使用数据绑定库DataBinding实现篮球计分功能
参考资源: Android开发教程(2019最新版,使用JetPack)
数据绑定库是一种支持库,借助该库,您可以使用声明性格式(而非程序化地)将布局中的界面组件绑定到应用中的数据源。
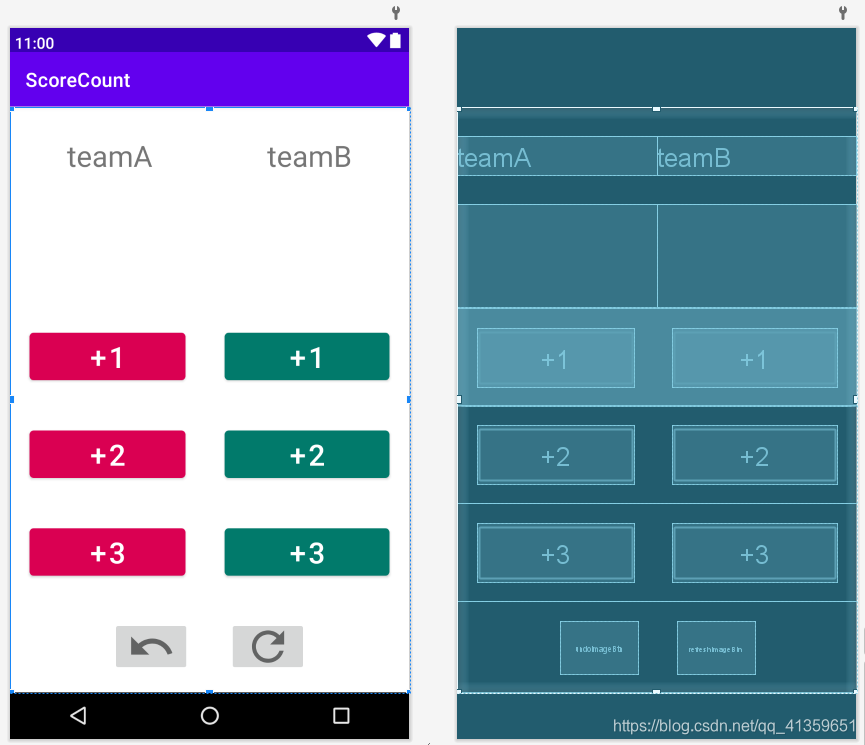
实现目标如下图所示
首先, 修改app级的.gradle配置文件, 添加如下信息:
android {
    // ...
    defaultConfig {
        // 新增如下内容
        dataBinding {// 开启dabaBinding
            enabled true
        }
        android.defaultConfig.vectorDrawables.useSupportLibrary = true //使用位图需要添加这个
    }
    // ...
}
dependencies {
    // ...
    // 新增
    implementation 'androidx.lifecycle:lifecycle-extensions:2.2.0'
    // ...
}
第二步, 修改布局文件
当修改完成 .gradle 配置文件之后, 接下来修改布局文件
将鼠标放在布局文件的第一行, 会有提示让你转换为 data binding layout, 如下图所示.
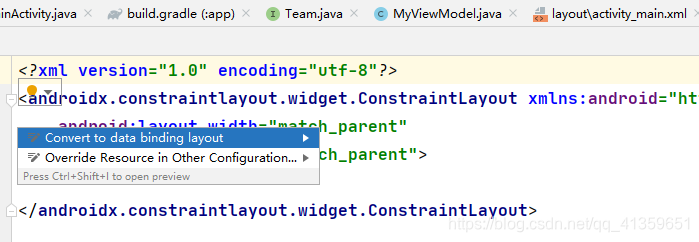
点击转换之后, 布局文件会变成如下的形式.
<?xml version="1.0" encoding="utf-8"?>
<layout xmlns:android="http://schemas.android.com/apk/res/android">
    <data>
    </data>
    <androidx.constraintlayout.widget.ConstraintLayout
        android:layout_width="match_parent"
        android:layout_height="match_parent">
    </androidx.constraintlayout.widget.ConstraintLayout>
</layout>
第三步, 布局
<?xml version="1.0" encoding="utf-8"?>
<layout xmlns:android="http://schemas.android.com/apk/res/android"
    xmlns:app="http://schemas.android.com/apk/res-auto"
    xmlns:tools="http://schemas.android.com/tools">
    <data>
    </data>
    <LinearLayout
        tools:context=".MainActivity">
        <LinearLayout>
            <TextView
                android:id="@+id/textView"/>
            <TextView
                android:id="@+id/textView3"/>
        </LinearLayout>
        <LinearLayout>
            <TextView
                android:id="@+id/teamAScoreTextView"/>
            <TextView
                android:id="@+id/teamBScoreTextView"/>
        </LinearLayout>
        <LinearLayout>
            <Button
                android:id="@+id/teamAAddOneBtn"/>
            <Button
                android:id="@+id/teamBAddOneBtn"/>
        </LinearLayout>

        <LinearLayout>
            <Button
                android:id="@+id/teamAAddTwoBtn"/>
            <Button
                android:id="@+id/teamBAddTwoBtn"/>
        </LinearLayout>
        <LinearLayout>
            <Button
                android:id="@+id/teamAAddThreeBtn"/>
            <Button
                app:backgroundTint="@color/teamBColor" />
        </LinearLayout>
        <LinearLayout>
            <ImageButton
                android:id="@+id/undoImageBtn"/>
            <ImageButton
                android:id="@+id/refreshImageBtn"/>
        </LinearLayout>
    </LinearLayout>
</layout>
只记录了关键部分, 实现效果如下图所示.
第四步, 编写ModelView
public interface Team {
    int TEAM_A = 1;
    int TEAM_B = 2;
}
public class MyViewModel extends ViewModel {
private MutableLiveData<Integer> teamAScore;
private MutableLiveData<Integer> teamBScore;
private Deque<ScoreAAndB> oldScore;
class ScoreAAndB {
int scoreA;
int scoreB;
public ScoreAAndB() {
}
public ScoreAAndB(int scoreA, int scoreB) {
this.scoreA = scoreA;
this.scoreB = scoreB;
}
}
public MyViewModel() {
teamAScore = new MutableLiveData<>();
teamBScore = new MutableLiveData<>();
teamAScore.setValue(0);
teamBScore.setValue(0);
oldScore = new LinkedList<>();
}
public void addTeamScore(int team, int score) {
Integer value;
ScoreAAndB scoreAAndB = new ScoreAAndB();
scoreAAndB.scoreA = teamAScore.getValue().intValue();
scoreAAndB.scoreB = teamBScore.getValue().intValue();
if (oldScore.size() > 10) {
oldScore.pollFirst();
}
oldScore.addLast(scoreAAndB);
switch (team) {
case Team.TEAM_A:
value = teamAScore.getValue();
if (value == null)
value = 0;
teamAScore.setValue(value + score);
break;
case Team.TEAM_B:
value = teamBScore.getValue();
if (value == null)
value = 0;
teamBScore.setValue(value + score);
break;
default:
break;
}
}
public void clear() {
teamAScore.setValue(0);
teamBScore.setValue(0);
oldScore.clear();
}
public void undo() {
ScoreAAndB scoreAAndB = oldScore.pollLast();
if (scoreAAndB != null) {
teamAScore.setValue(scoreAAndB.scoreA);
teamBScore.setValue(scoreAAndB.scoreB);
}
}
}
第五步, 编写Activity和布局文件代码
public class MainActivity extends AppCompatActivity {
    ActivityMainBinding binding;
    MyViewModel myViewModel;
    @Override
    protected void onCreate(Bundle savedInstanceState) {
        super.onCreate(savedInstanceState);
        binding = DataBindingUtil.setContentView(this, R.layout.activity_main);
        myViewModel = new ViewModelProvider(this).get(MyViewModel.class);
        binding.setData(myViewModel);
        binding.setLifecycleOwner(this);
    }
}
<?xml version="1.0" encoding="utf-8"?>
<layout xmlns:android="http://schemas.android.com/apk/res/android"
    xmlns:app="http://schemas.android.com/apk/res-auto"
    xmlns:tools="http://schemas.android.com/tools">
    <data>
        <variable
            name="data"
            type="work.wxmx.scorecount.MyViewModel" />
        <variable
            name="team"
            type="work.wxmx.scorecount.Team" />
    </data>
    <LinearLayout
        tools:context=".MainActivity">
        <LinearLayout>
            <TextView
                android:id="@+id/textView"/>
            <TextView
                android:id="@+id/textView3"/>
        </LinearLayout>
        <LinearLayout>
            <TextView
                android:id="@+id/teamAScoreTextView"
                android:text="@{String.valueOf(data.teamAScore)}"/>
            <TextView
                android:id="@+id/teamBScoreTextView"
                android:text="@{String.valueOf(data.teamBScore)}" />
        </LinearLayout>
        <LinearLayout>
            <Button
                android:id="@+id/teamAAddOneBtn"
                android:onClick="@{()->data.addTeamScore(team.TEAM_A, 1)}"/>
            <Button
                android:id="@+id/teamBAddOneBtn"
                android:onClick="@{()->data.addTeamScore(team.TEAM_B, 1)}"/>
        </LinearLayout>

        <LinearLayout>
            <Button
                android:id="@+id/teamAAddTwoBtn"
                android:onClick="@{()->data.addTeamScore(team.TEAM_A, 2)}"/>
            <Button
                android:id="@+id/teamBAddTwoBtn"
                android:onClick="@{()->data.addTeamScore(team.TEAM_B, 2)}"/>
        </LinearLayout>
        <LinearLayout>
            <Button
                android:id="@+id/teamAAddThreeBtn"
                android:onClick="@{()->data.addTeamScore(team.TEAM_A, 3)}"/>
            <Button
                android:onClick="@{()->data.addTeamScore(team.TEAM_B, 3)}"
                app:backgroundTint="@color/teamBColor" />
        </LinearLayout>
        <LinearLayout>
            <ImageButton
                android:id="@+id/undoImageBtn"
                android:onClick="@{()->data.undo()}"/>
            <ImageButton
                android:id="@+id/refreshImageBtn"
                android:onClick="@{()->data.clear()}"/>
        </LinearLayout>
    </LinearLayout>
</layout>
完成以上部分之后, 就能够实现如上图所示的功能.
最后
还有一些如国际化以及横屏展示的细节, 可以参见文章开头的参考链接
peace!

本文内容由网友自发贡献,版权归原作者所有,本站不承担相应法律责任。如您发现有涉嫌抄袭侵权的内容,请联系:hwhale#tublm.com(使用前将#替换为@)