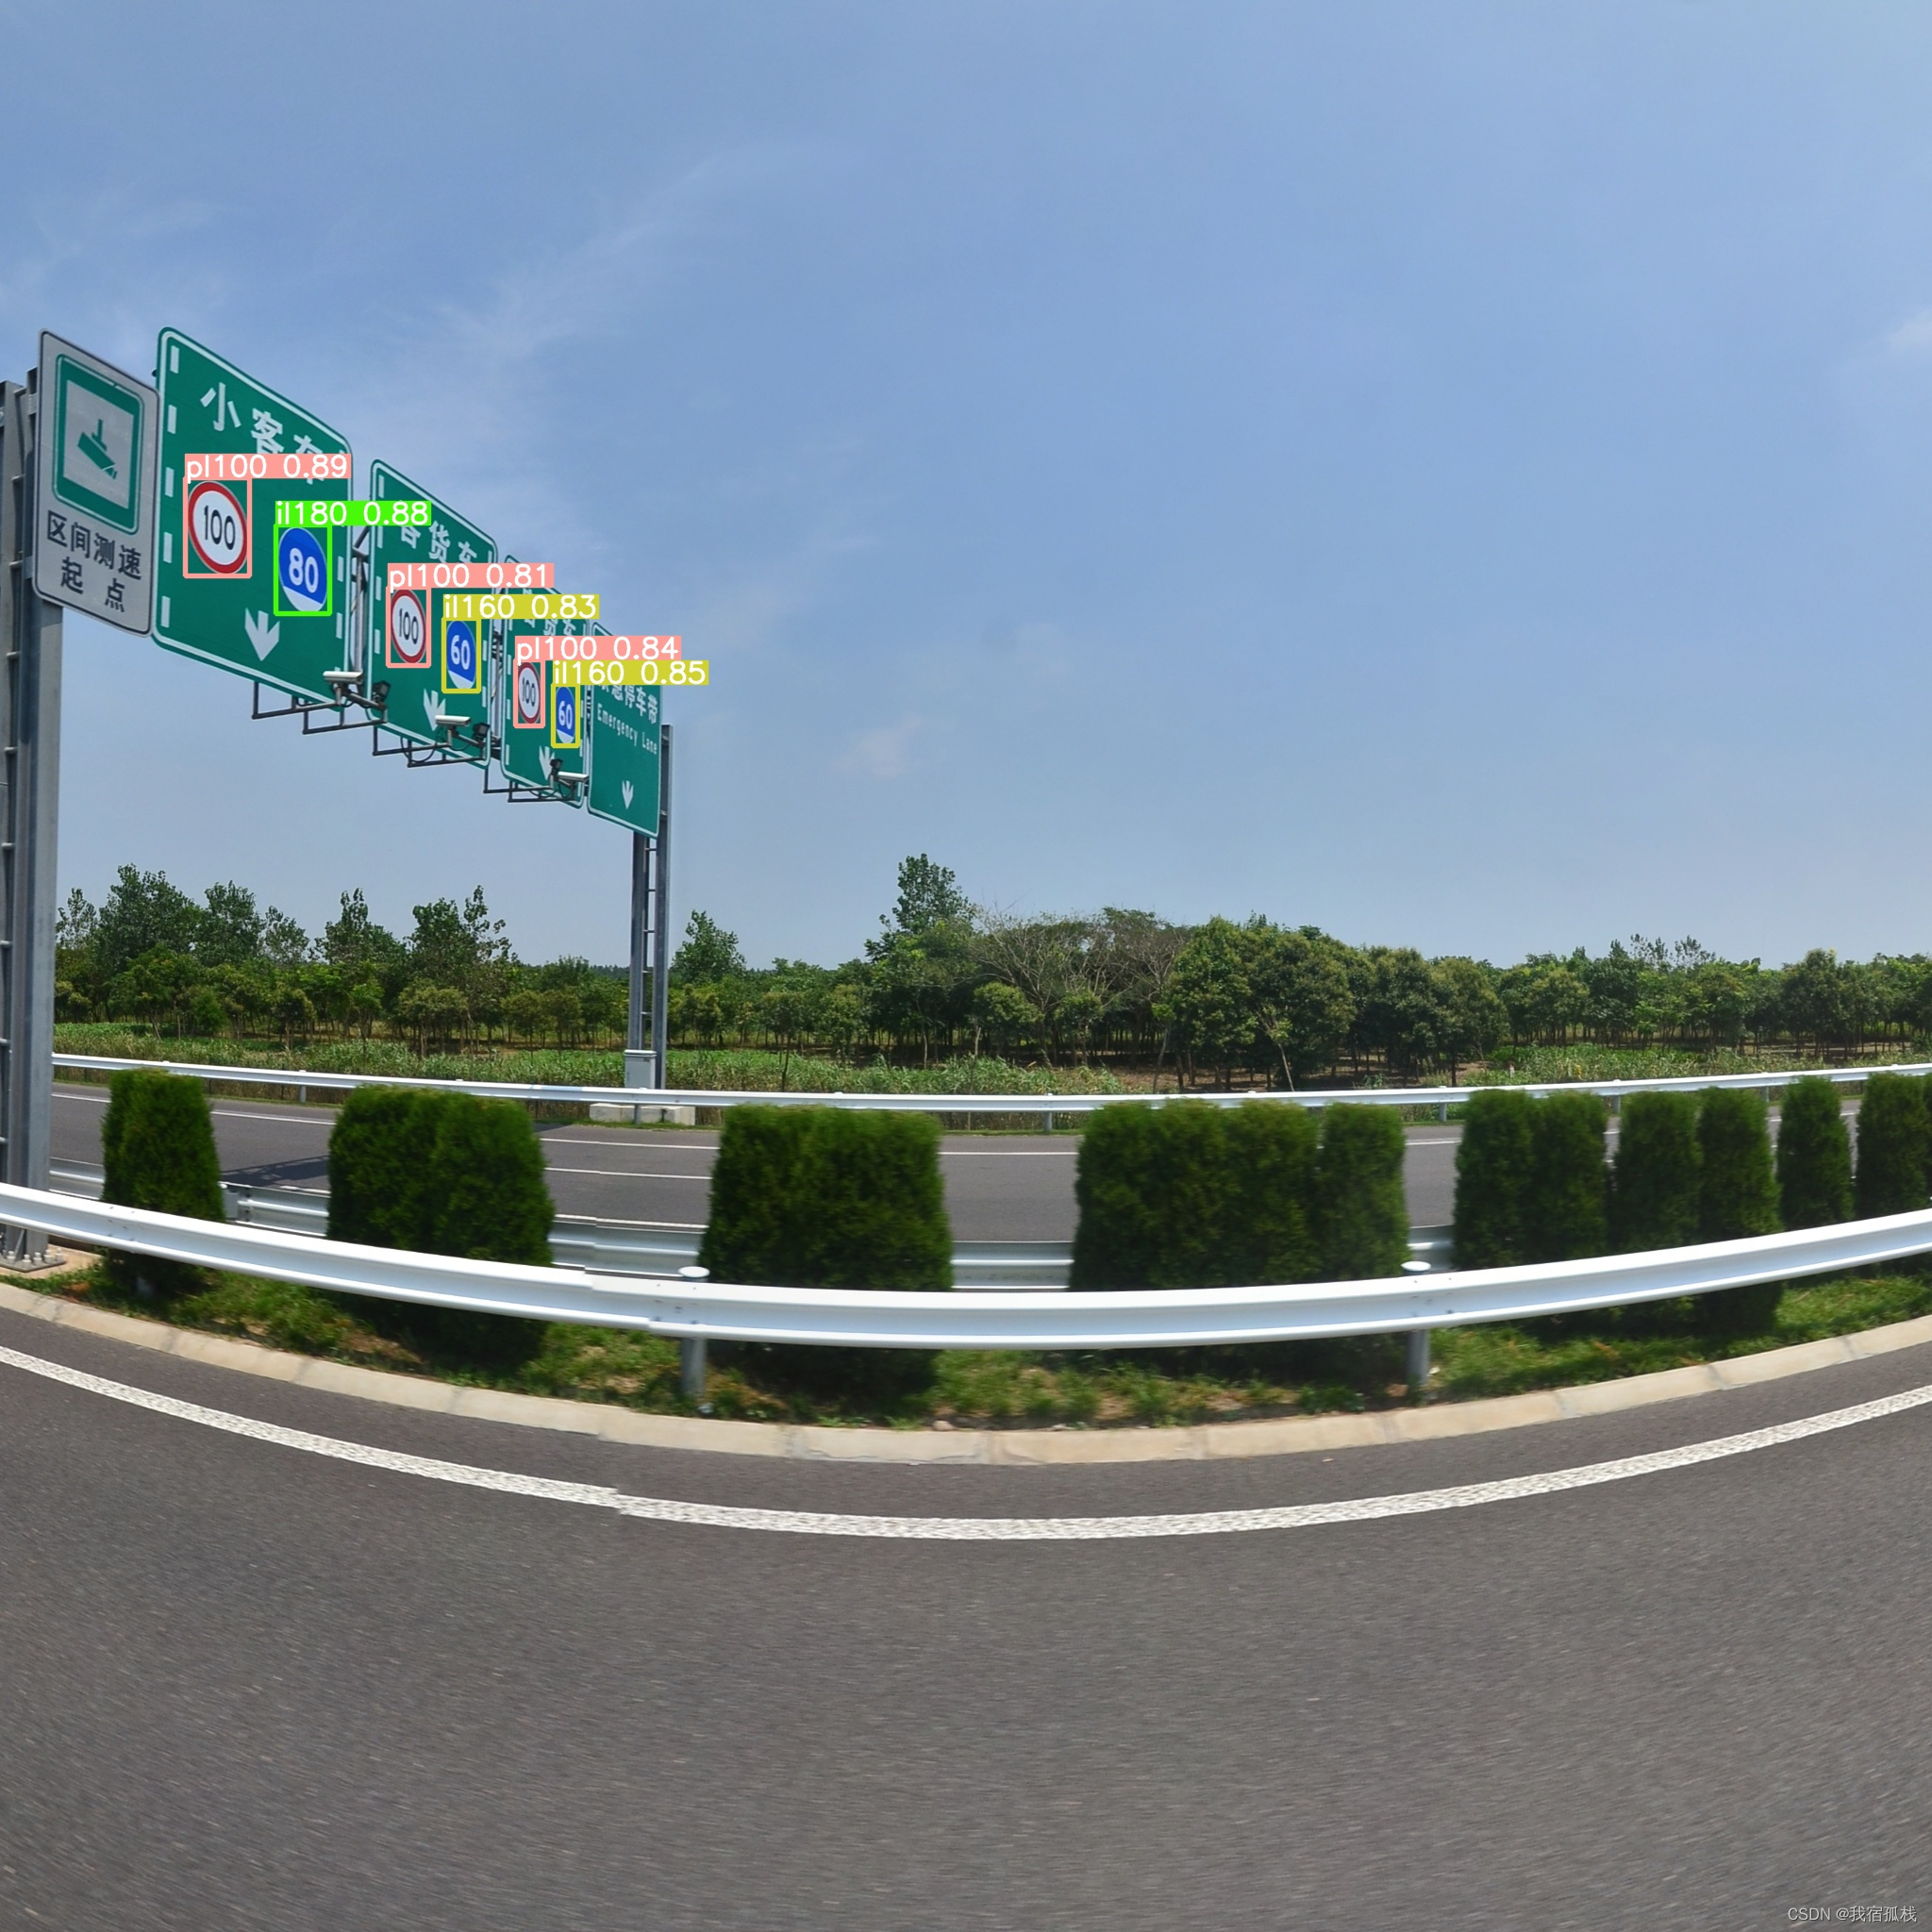
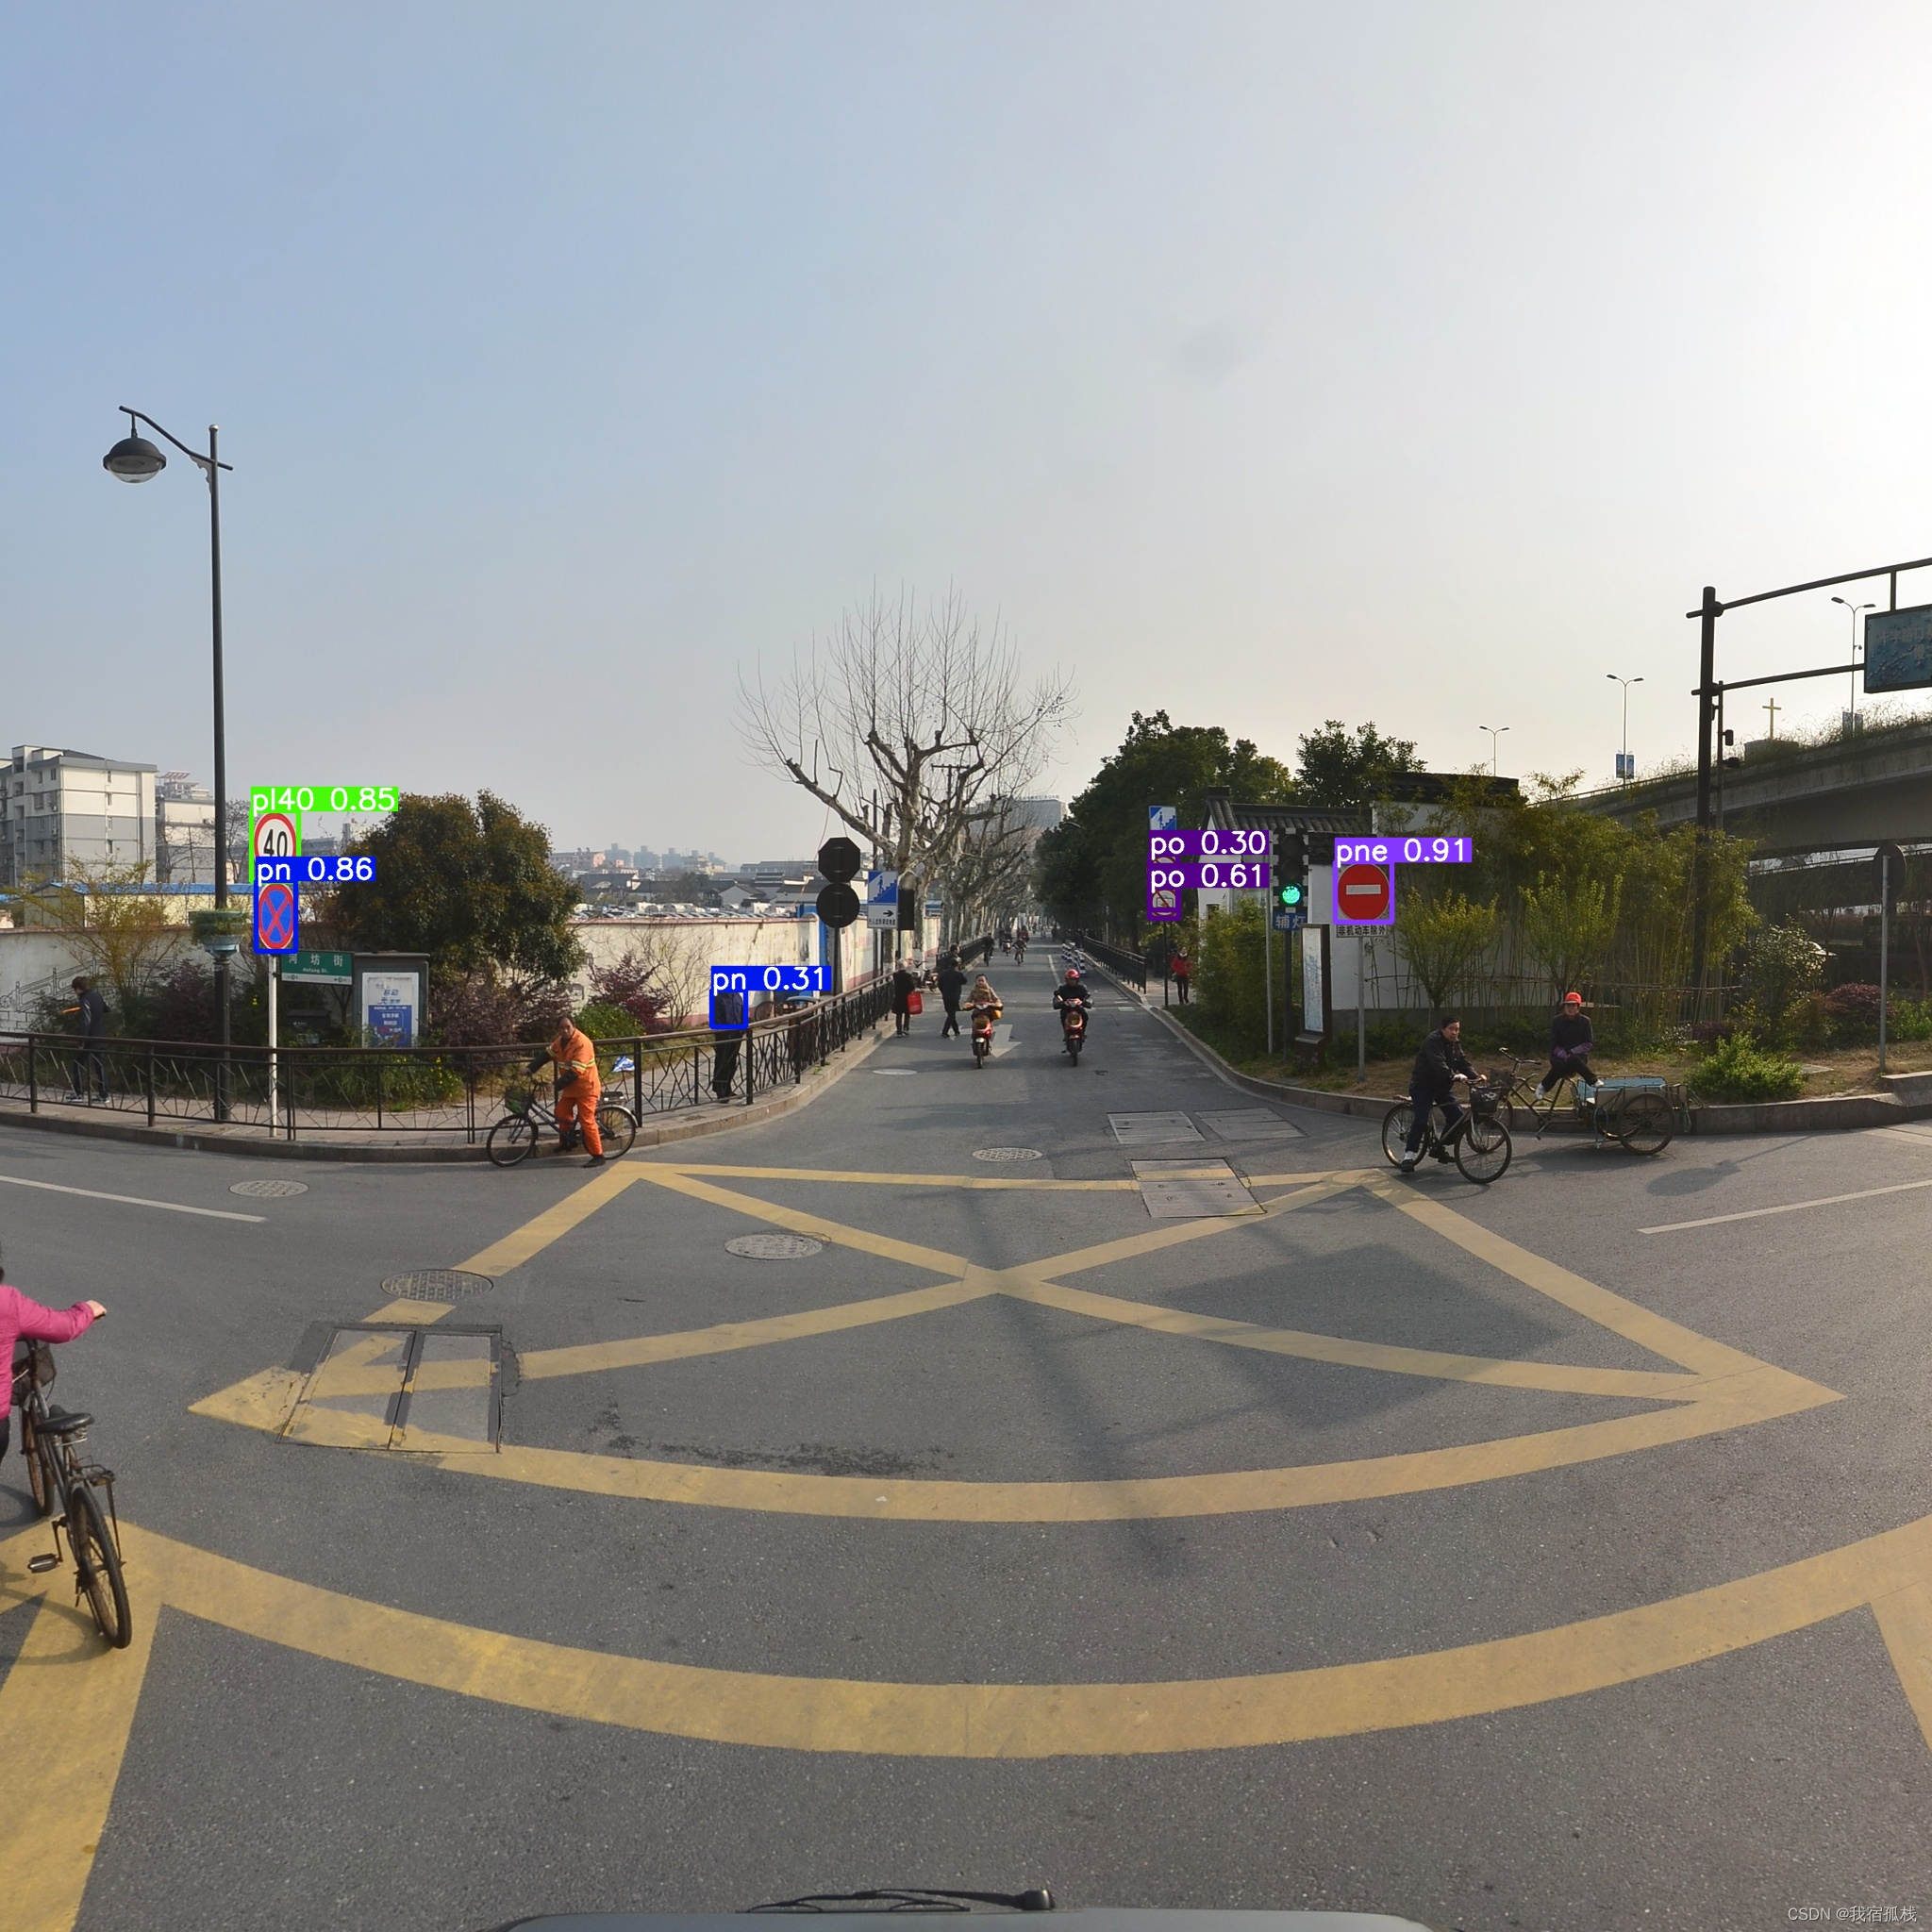
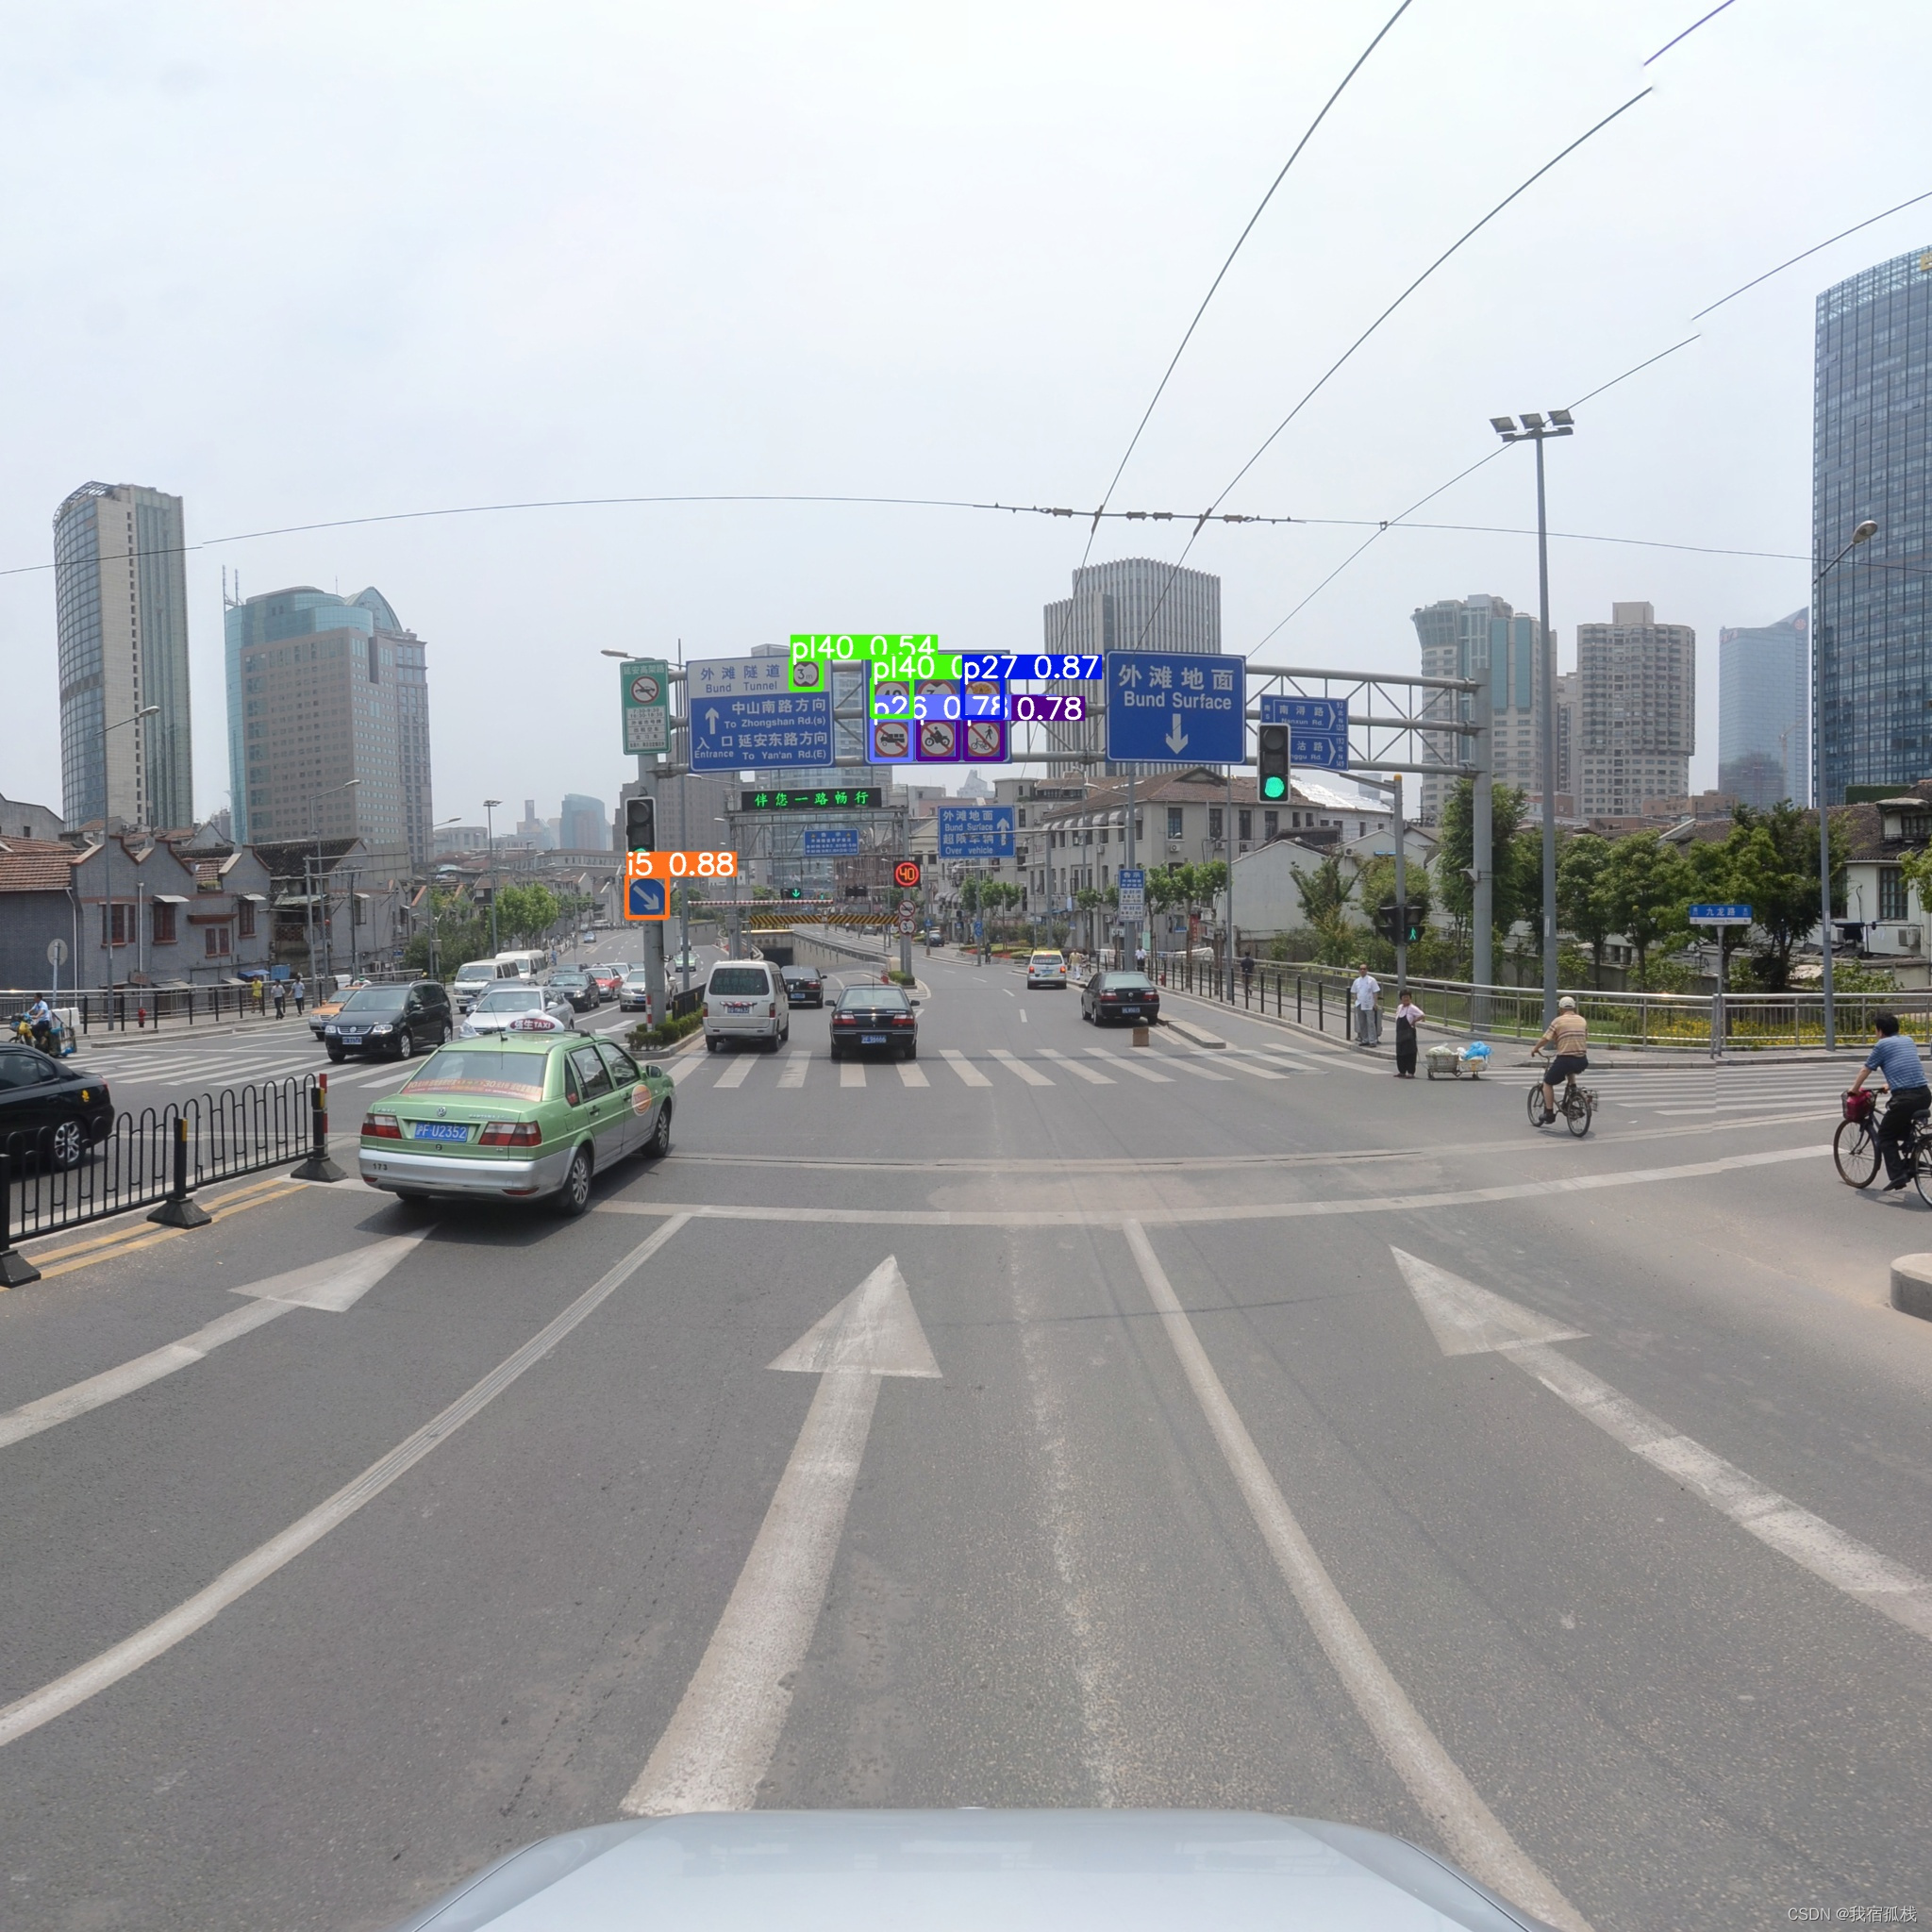
先贴下实验结果:
去年就做完了的一个工作,这会终于记录完毕啦。
另外如果是对口罩识别检测(可用于毕设、课程设计等等)感兴趣的同学也可参考博主的另一篇博文口罩识别检测;同类型的火灾识别检测(提供标注好的YOLO格式数据集或训练好的权重),有需求的可以私信博主。
一、数据集转换
1.1、数据集下载
下载地址:TT100K
1.2、数据集格式转换
1.2.1. 下载数据集通过以下Python脚本进行数据集格式转换。
import os
import json
from random import random
import cv2
import shutil
import json
import xml.dom.minidom
from tqdm import tqdm
import argparse
# from jinxSkills.jinx_opencv.datasets_transform.dataset_transform import DataSets_transform
class TT100K2COCO:
def __init__(self):
self.original_datasets = 'tt100k'
self.to_datasets = 'coco'
def class_statistics(self):
# os.makedirs('annotations', exist_ok=True)
# 存放数据的父路径
parent_path = 'D:/jinxData/TT100K/data'
# 读TT100K原始数据集标注文件
with open(os.path.join(parent_path, 'annotations.json')) as origin_json:
origin_dict = json.load(origin_json)
classes = origin_dict['types']
# 建立统计每个类别包含的图片的字典
sta = {}
for i in classes:
sta[i] = []
images_dic = origin_dict['imgs']
# 记录所有保留的图片
saved_images = []
# 遍历TT100K的imgs
for image_id in images_dic:
image_element = images_dic[image_id]
image_path = image_element['path']
# 添加图像的信息到dataset中
image_path = image_path.split('/')[-1]
obj_list = image_element['objects']
# 遍历每张图片的标注信息
for anno_dic in obj_list:
label_key = anno_dic['category']
# 防止一个图片多次加入一个标签类别
if image_path not in sta[label_key]:
sta[label_key].append(image_path)
# 只保留包含图片数超过100的类别(重新划分,阈值100可根据需求修改)
result = {k: v for k, v in sta.items() if len(v) >= 100}
for i in result:
print("the type of {} includes {} images".format(i, len(result[i])))
saved_images.extend(result[i])
saved_images = list(set(saved_images))
print("total types is {}".format(len(result)))
type_list = list(result.keys())
result = {"type": type_list, "details": result, "images": saved_images}
print(type_list)
# 保存结果
json_name = os.path.join(parent_path, 'statistics.json')
with open(json_name, 'w', encoding="utf-8") as f:
json.dump(result, f, ensure_ascii=False, indent=1)
def original_datasets2object_datasets(self):
# os.makedirs('dataset/annotations', exist_ok=True)
# 存放数据的父路径
parent_path = 'D:/jinxData/TT100K/data'
# 读TT100K原始数据集标注文件
with open(os.path.join(parent_path, 'annotations.json')) as origin_json:
origin_dict = json.load(origin_json)
with open(os.path.join(parent_path, 'statistics.json')) as select_json:
select_dict = json.load(select_json)
classes = select_dict['type']
train_dataset = {'info': {}, 'licenses': [], 'categories': [], 'images': [], 'annotations': []}
val_dataset = {'info': {}, 'licenses': [], 'categories': [], 'images': [], 'annotations': []}
test_dataset = {'info': {}, 'licenses': [], 'categories': [], 'images': [], 'annotations': []}
label = {}
info = {
"year": 2021, # 年份
"version": '1.0', # 版本
"description": "TT100k_to_coco", # 数据集描述
"contributor": "Tecent&Tsinghua", # 提供者
"url": 'https://cg.cs.tsinghua.edu.cn/traffic-sign/', # 下载地址
"date_created": 2021 - 1 - 15
}
licenses = {
"id": 1,
"name": "null",
"url": "null",
}
train_dataset['info'] = info
val_dataset['info'] = info
test_dataset['info'] = info
train_dataset['licenses'] = licenses
val_dataset['licenses'] = licenses
test_dataset['licenses'] = licenses
# 建立类别和id的关系
for i, cls in enumerate(classes):
train_dataset['categories'].append({'id': i, 'name': cls, 'supercategory': 'traffic_sign'})
val_dataset['categories'].append({'id': i, 'name': cls, 'supercategory': 'traffic_sign'})
test_dataset['categories'].append({'id': i, 'name': cls, 'supercategory': 'traffic_sign'})
label[cls] = i
images_dic = origin_dict['imgs']
obj_id = 1
# TT100K的annotation转换成coco的
for image_id in images_dic:
image_element = images_dic[image_id]
image_path = image_element['path']
# 用opencv读取图片,得到图像的宽和高
im = cv2.imread(os.path.join(parent_path, image_path))
H, W, _ = im.shape
# 切换dataset的引用对象,从而划分数据集
if 'train' in image_path:
dataset = train_dataset
elif 'test' in image_path:
dataset = val_dataset
else:
dataset = test_dataset
# 添加图像的信息到dataset中
image_path = image_path.split('/')[-1]
dataset['images'].append({'file_name': image_path,
'id': image_id,
'width': W,
'height': H})
obj_list = image_element['objects']
for anno_dic in obj_list:
x = anno_dic['bbox']['xmin']
y = anno_dic['bbox']['ymin']
width = anno_dic['bbox']['xmax'] - anno_dic['bbox']['xmin']
height = anno_dic['bbox']['ymax'] - anno_dic['bbox']['ymin']
label_key = anno_dic['category']
dataset['annotations'].append({
'area': width * height,
'bbox': [x, y, width, height],
'category_id': label[label_key],
'id': obj_id,
'image_id': image_id,
'iscrowd': 0,
# mask, 矩形是从左上角点按顺时针的四个顶点
'segmentation': [[x, y, x + width, y, x + width, y + height, x, y + height]]
})
# 每个标注的对象id唯一
obj_id += 1
# 保存结果
for phase in ['train', 'val', 'test']:
json_name = os.path.join(parent_path, 'annotations/{}.json'.format(phase))
with open(json_name, 'w', encoding="utf-8") as f:
if phase == 'train':
json.dump(train_dataset, f, ensure_ascii=False, indent=1)
if phase == 'val':
json.dump(val_dataset, f, ensure_ascii=False, indent=1)
if phase == 'test':
json.dump(test_dataset, f, ensure_ascii=False, indent=1)
def original_datasets2object_datasets_re(self):
'''
重新划分数据集
:return:
'''
# os.makedirs('annotations2', exist_ok=True)
# 存放数据的父路径
parent_path = 'D:/jinxData/TT100K/data'
# 读TT100K原始数据集标注文件
with open(os.path.join(parent_path, 'annotations.json')) as origin_json:
origin_dict = json.load(origin_json)
with open(os.path.join(parent_path, 'statistics.json')) as select_json:
select_dict = json.load(select_json)
classes = select_dict['type']
train_dataset = {'info': {}, 'licenses': [], 'categories': [], 'images': [], 'annotations': []}
val_dataset = {'info': {}, 'licenses': [], 'categories': [], 'images': [], 'annotations': []}
test_dataset = {'info': {}, 'licenses': [], 'categories': [], 'images': [], 'annotations': []}
label = {} # 记录每个标志类别的id
count = {} # 记录每个类别的图片数
owntype_sum = {}
info = {
"year": 2021, # 年份
"version": '1.0', # 版本
"description": "TT100k_to_coco", # 数据集描述
"contributor": "Tecent&Tsinghua", # 提供者
"url": 'https://cg.cs.tsinghua.edu.cn/traffic-sign/', # 下载地址
"date_created": 2021 - 1 - 15
}
licenses = {
"id": 1,
"name": "null",
"url": "null",
}
train_dataset['info'] = info
val_dataset['info'] = info
test_dataset['info'] = info
train_dataset['licenses'] = licenses
val_dataset['licenses'] = licenses
test_dataset['licenses'] = licenses
# 建立类别和id的关系
for i, cls in enumerate(classes):
train_dataset['categories'].append({'id': i, 'name': cls, 'supercategory': 'traffic_sign'})
val_dataset['categories'].append({'id': i, 'name': cls, 'supercategory': 'traffic_sign'})
test_dataset['categories'].append({'id': i, 'name': cls, 'supercategory': 'traffic_sign'})
label[cls] = i
count[cls] = 0
owntype_sum[cls] = 0
images_dic = origin_dict['imgs']
obj_id = 1
# 计算出每个类别共‘包含’的图片数
for image_id in images_dic:
image_element = images_dic[image_id]
image_path = image_element['path']
image_name = image_path.split('/')[-1]
# 在所选的类别图片中
if image_name not in select_dict['images']:
continue
# 处理TT100K中的标注信息
obj_list = image_element['objects']
# 记录图片中包含最多的实例所属的type
includes_type = {}
for anno_dic in obj_list:
if anno_dic["category"] not in select_dict["type"]:
continue
# print(anno_dic["category"])
if anno_dic["category"] in includes_type:
includes_type[anno_dic["category"]] += 1
else:
includes_type[anno_dic["category"]] = 1
# print(includes_type)
own_type = max(includes_type, key=includes_type.get)
owntype_sum[own_type] += 1
# TT100K的annotation转换成coco的
for image_id in images_dic:
image_element = images_dic[image_id]
image_path = image_element['path']
image_name = image_path.split('/')[-1]
# 在所选的类别图片中
if image_name not in select_dict['images']:
continue
print("dealing with {} image".format(image_path))
# shutil.copy(os.path.join(parent_path,image_path),os.path.join(parent_path,"dataset/JPEGImages"))
# 处理TT100K中的标注信息
obj_list = image_element['objects']
# 记录图片中包含最多的实例所属的type
includes_type = {}
for anno_dic in obj_list:
if anno_dic["category"] not in select_dict["type"]:
continue
# print(anno_dic["category"])
if anno_dic["category"] in includes_type:
includes_type[anno_dic["category"]] += 1
else:
includes_type[anno_dic["category"]] = 1
# print(includes_type)
own_type = max(includes_type, key=includes_type.get)
count[own_type] += 1
num_rate = count[own_type] / owntype_sum[own_type]
# 切换dataset的引用对象,从而划分数据集根据每个类别类别的总数量按7:2:1分为了train_set,val_set,test_set。
# 其中每个图片所属类别根据该图片包含的类别的数量决定(归属为含有类别最多的类别)
if num_rate < 0.7:
dataset = train_dataset
elif num_rate < 0.9:
dataset = val_dataset
else:
print("dataset=test_dataset")
dataset = test_dataset
for anno_dic in obj_list:
if anno_dic["category"] not in select_dict["type"]:
continue
x = anno_dic['bbox']['xmin']
y = anno_dic['bbox']['ymin']
width = anno_dic['bbox']['xmax'] - anno_dic['bbox']['xmin']
height = anno_dic['bbox']['ymax'] - anno_dic['bbox']['ymin']
label_key = anno_dic['category']
dataset['annotations'].append({
'area': width * height,
'bbox': [x, y, width, height],
'category_id': label[label_key],
'id': obj_id,
'image_id': image_id,
'iscrowd': 0,
# mask, 矩形是从左上角点按顺时针的四个顶点
'segmentation': [[x, y, x + width, y, x + width, y + height, x, y + height]]
})
# 每个标注的对象id唯一
obj_id += 1
# 用opencv读取图片,得到图像的宽和高
im = cv2.imread(os.path.join(parent_path, image_path))
# print(image_path)
H, W, _ = im.shape
# 添加图像的信息到dataset中
dataset['images'].append({'file_name': image_name,
'id': image_id,
'width': W,
'height': H})
# 保存结果
for phase in ['train', 'val', 'test']:
json_name = os.path.join(parent_path, 'dataset/annotations/{}.json'.format(phase))
with open(json_name, 'w', encoding="utf-8") as f:
if phase == 'train':
json.dump(train_dataset, f, ensure_ascii=False, indent=1)
if phase == 'val':
json.dump(val_dataset, f, ensure_ascii=False, indent=1)
if phase == 'test':
json.dump(test_dataset, f, ensure_ascii=False, indent=1)
def json2xml(self):
img_path = 'F:/tt100k_dataset/data/train/' # train图片路径
annos = json.loads(open("F:/tt100k_dataset/data/annotations.json").read())
xml_path = 'F:/tt100k_dataset/data/xml_train/' # xml保存路径
for line in open(img_path + "ids.txt"):
img_name = line.replace('\n', '')
img_file = img_name + '.jpg'
img = cv2.imread(img_path + img_file)
sp = img.shape
img_height = str(sp[0]) # height(rows) of image
img_width = str(sp[1])
doc = xml.dom.minidom.Document()
# creat a root node which name is annotation
annotation = doc.createElement('annotation')
# add the root node to the dom document object
doc.appendChild(annotation)
# add the folder subnode
folder = doc.createElement('folder')
folder_text = doc.createTextNode('JPEGImages')
folder.appendChild(folder_text)
annotation.appendChild(folder)
# add the filename subnode
filename = doc.createElement('filename')
filename_text = doc.createTextNode(img_file)
filename.appendChild(filename_text)
annotation.appendChild(filename)
# add the path subnode
path = doc.createElement('path')
path_text = doc.createTextNode(
img_path + img_file)
path.appendChild(path_text)
annotation.appendChild(path)
# add the source subnode
source = doc.createElement('source')
database = doc.createElement('database')
database_text = doc.createTextNode('Unknown')
source.appendChild(database)
database.appendChild(database_text)
annotation.appendChild(source)
# add the size subnode
size = doc.createElement('size')
width = doc.createElement('width')
width_text = doc.createTextNode(img_width)
height = doc.createElement('height')
height_text = doc.createTextNode(img_height)
depth = doc.createElement('depth')
depth_text = doc.createTextNode('3')
size.appendChild(width)
width.appendChild(width_text)
size.appendChild(height)
height.appendChild(height_text)
size.appendChild(depth)
depth.appendChild(depth_text)
annotation.appendChild(size)
segmented = doc.createElement('segmented')
segmented_text = doc.createTextNode('0')
segmented.appendChild(segmented_text)
annotation.appendChild(segmented)
img_objects = annos["imgs"][img_name]['objects']
for i in range(0, len(img_objects)):
obj_category = annos["imgs"][img_name]['objects'][i]['category']
obj_bbox = annos["imgs"][img_name]['objects'][i]['bbox']
bbox_ymin = int(annos["imgs"][img_name]['objects'][i]['bbox']['ymin'])
bbox_xmin = int(annos["imgs"][img_name]['objects'][i]['bbox']['xmin'])
bbox_ymax = int(annos["imgs"][img_name]['objects'][i]['bbox']['ymax'])
bbox_xmax = int(annos["imgs"][img_name]['objects'][i]['bbox']['xmax'])
print(obj_category, bbox_ymin, bbox_xmin, bbox_ymax, bbox_xmax)
object = doc.createElement('object')
name = doc.createElement('name')
name_text = doc.createTextNode(obj_category)
difficult = doc.createElement('difficult')
difficult_text = doc.createTextNode('0')
pose = doc.createElement('pose')
pose_text = doc.createTextNode('Unspecified')
truncated = doc.createElement('truncated')
truncated_text = doc.createTextNode('0')
bndbox = doc.createElement('bndbox')
xmin = doc.createElement('xmin')
xmin_text = doc.createTextNode(str(bbox_xmin))
ymin = doc.createElement('ymin')
ymin_text = doc.createTextNode(str(bbox_ymin))
xmax = doc.createElement('xmax')
xmax_text = doc.createTextNode(str(bbox_xmax))
ymax = doc.createElement('ymax')
ymax_text = doc.createTextNode(str(bbox_ymax))
object.appendChild(name)
name.appendChild(name_text)
object.appendChild(pose)
pose.appendChild(pose_text)
object.appendChild(truncated)
truncated.appendChild(truncated_text)
object.appendChild(difficult)
difficult.appendChild(difficult_text)
object.appendChild(bndbox)
bndbox.appendChild(xmin)
xmin.appendChild(xmin_text)
bndbox.appendChild(ymin)
ymin.appendChild(ymin_text)
bndbox.appendChild(xmax)
xmax.appendChild(xmax_text)
bndbox.appendChild(ymax)
ymax.appendChild(ymax_text)
annotation.appendChild(object)
fp = open(xml_path + '%s.xml' % img_name, 'w+')
doc.writexml(fp, indent='\t', addindent='\t', newl='\n', encoding='utf-8')
# print(annos["imgs"][img_name]['objects'])
fp.close()
def coco_json2yolo_txt(self, class_json):
# COCO 格式的数据集转化为 YOLO 格式的数据集
# --json_path 输入的json文件路径
# --save_path 保存的文件夹名字,默认为当前目录下的labels。
'''
parser = argparse.ArgumentParser()
# 这里根据自己的json文件位置,换成自己的就行
parser.add_argument('--json_path',
default='D:/jinxData/TT100K/data/dataset/annotations/train.json',
type=str, help="input: coco format(json)")
# 这里设置.txt文件保存位置
parser.add_argument('--save_path', default='D:/jinxData/TT100K/data/dataset/annotations', type=str,
help="specify where to save the output dir of labels")
arg = parser.parse_args()
'''
def convert(size, box):
dw = 1. / (size[0])
dh = 1. / (size[1])
x = box[0] + box[2] / 2.0
y = box[1] + box[3] / 2.0
w = box[2]
h = box[3]
# round函数确定(xmin, ymin, xmax, ymax)的小数位数
x = round(x * dw, 6)
w = round(w * dw, 6)
y = round(y * dh, 6)
h = round(h * dh, 6)
return (x, y, w, h)
# class_json = 'train'
json_file = os.path.join(
'D:/jinxData/TT100K/data/dataset/annotations/%s.json' % class_json) # COCO Object Instance 类型的标注
# ana_txt_save_path = 'D:/jinxData/TT100K/data/dataset/annotations/train' # 保存的路径
ana_txt_save_path = os.path.join('D:/jinxData/TT100K/data/dataset/annotations', class_json) # 保存的路径
data = json.load(open(json_file, 'r'))
if not os.path.exists(ana_txt_save_path):
os.makedirs(ana_txt_save_path)
id_map = {} # coco数据集的id不连续!重新映射一下再输出!
with open(os.path.join(ana_txt_save_path, 'classes.txt'), 'w') as f:
# 写入classes.txt
for i, category in enumerate(data['categories']):
f.write(f"{category['name']}\n")
id_map[category['id']] = i
# print(id_map)
# 这里需要根据自己的需要,更改写入图像相对路径的文件位置。
list_file = open(os.path.join(ana_txt_save_path, '%s.txt' % class_json.format()), 'w')
for img in tqdm(data['images']):
filename = img["file_name"]
img_width = img["width"]
img_height = img["height"]
img_id = img["id"]
head, tail = os.path.splitext(filename)
ana_txt_name = head + ".txt" # 对应的txt名字,与jpg一致
f_txt = open(os.path.join(ana_txt_save_path, ana_txt_name), 'w')
for ann in data['annotations']:
if ann['image_id'] == img_id:
box = convert((img_width, img_height), ann["bbox"])
f_txt.write("%s %s %s %s %s\n" % (id_map[ann["category_id"]], box[0], box[1], box[2], box[3]))
f_txt.close()
# 将图片的相对路径写入train2017或val2017的路径
list_file.write('/%s/%s.jpg\n' % (class_json.format(), head))
list_file.close()
def divide_TrainValTest(self, source, target):
'''
创建文件路径
:param source: 源文件位置
:param target: 目标文件位置
'''
for i in ['train', 'val', 'test']:
path = target + '/' + i
if not os.path.exists(path):
os.makedirs(path)
# 遍历目录下的文件名,复制对应的图片到指定目录
for root, dirs, files in os.walk(source):
for file in files:
file_name = os.path.splitext(file)[0]
image_path = os.path.join(file_name + '.jpg')
# print(source)
if 'train' in source:
shutil.copyfile('D:/jinxData/TT100K/data/image_reparation/'
+ image_path, target + '/train/' + image_path)
elif 'val' in source:
shutil.copyfile('D:/jinxData/TT100K/data/image_reparation/'
+ image_path, target + '/val/' + image_path)
elif 'test' in source:
shutil.copyfile('D:/jinxData/TT100K/data/image_reparation/'
+ image_path, target + '/test/' + image_path)
def xml2txt(self):
# coding:utf-8
parser = argparse.ArgumentParser()
# xml文件的地址,根据自己的数据进行修改 xml一般存放在Annotations下
parser.add_argument('--xml_path', default='xml', type=str, help='input xml label path')
# 数据集的划分,地址选择自己数据下的ImageSets/Main
parser.add_argument('--txt_path', default='dataSet', type=str, help='output txt label path')
opt = parser.parse_args()
trainval_percent = 1.0
train_percent = 0.9
xmlfilepath = opt.xml_path
txtsavepath = opt.txt_path
total_xml = os.listdir(xmlfilepath)
if not os.path.exists(txtsavepath):
os.makedirs(txtsavepath)
num = len(total_xml)
list_index = range(num)
tv = int(num * trainval_percent)
tr = int(tv * train_percent)
trainval = random.sample(list_index, tv)
train = random.sample(trainval, tr)
file_trainval = open(txtsavepath + '/trainval.txt', 'w')
file_test = open(txtsavepath + '/test.txt', 'w')
file_train = open(txtsavepath + '/train.txt', 'w')
file_val = open(txtsavepath + '/val.txt', 'w')
for i in list_index:
name = total_xml[i][:-4] + '\n'
if i in trainval:
file_trainval.write(name)
if i in train:
file_train.write(name)
else:
file_val.write(name)
else:
file_test.write(name)
file_trainval.close()
file_train.close()
file_val.close()
file_test.close()
if __name__ == '__main__':
tt100k = TT100K2COCO()
# tt100k.class_statistics()
# tt100k.original_datasets2object_datasets_re()
# tt100k.coco_json2yolo_txt('val')
tt100k.divide_TrainValTest('D:/jinxData/TT100K/data/dataset/annotations/test', 'D:/jinxData/TT100K/data/dataset')
函数tt100k.class_statistics()方法中可以对TT100K中的数据集进行预处理,代码中是只保留包含图片数超过100的类别;
函数tt100k.original_datasets2object_dataset_rs()可以对TT100K数据集的训练集、验证集和测试集进行比例划分;
函数tt100k.coco_json2yolo_txt()将分别将CoCo格式的标签json文件(3个json文件)转换为YOLO格式的txt(注意此处需要分别调用三次,train、val和test,对应生成其3个.txt文件);
函数tt100k.divide_TrainValTest()根据重新划分的结果对原始数据集的图像进行重新划分存储为与标签一一对应的格式,这一步结束即可将重新规划后的数据集以及标签文件整理为数据集通过YOLO5进行训练预测。
如图:

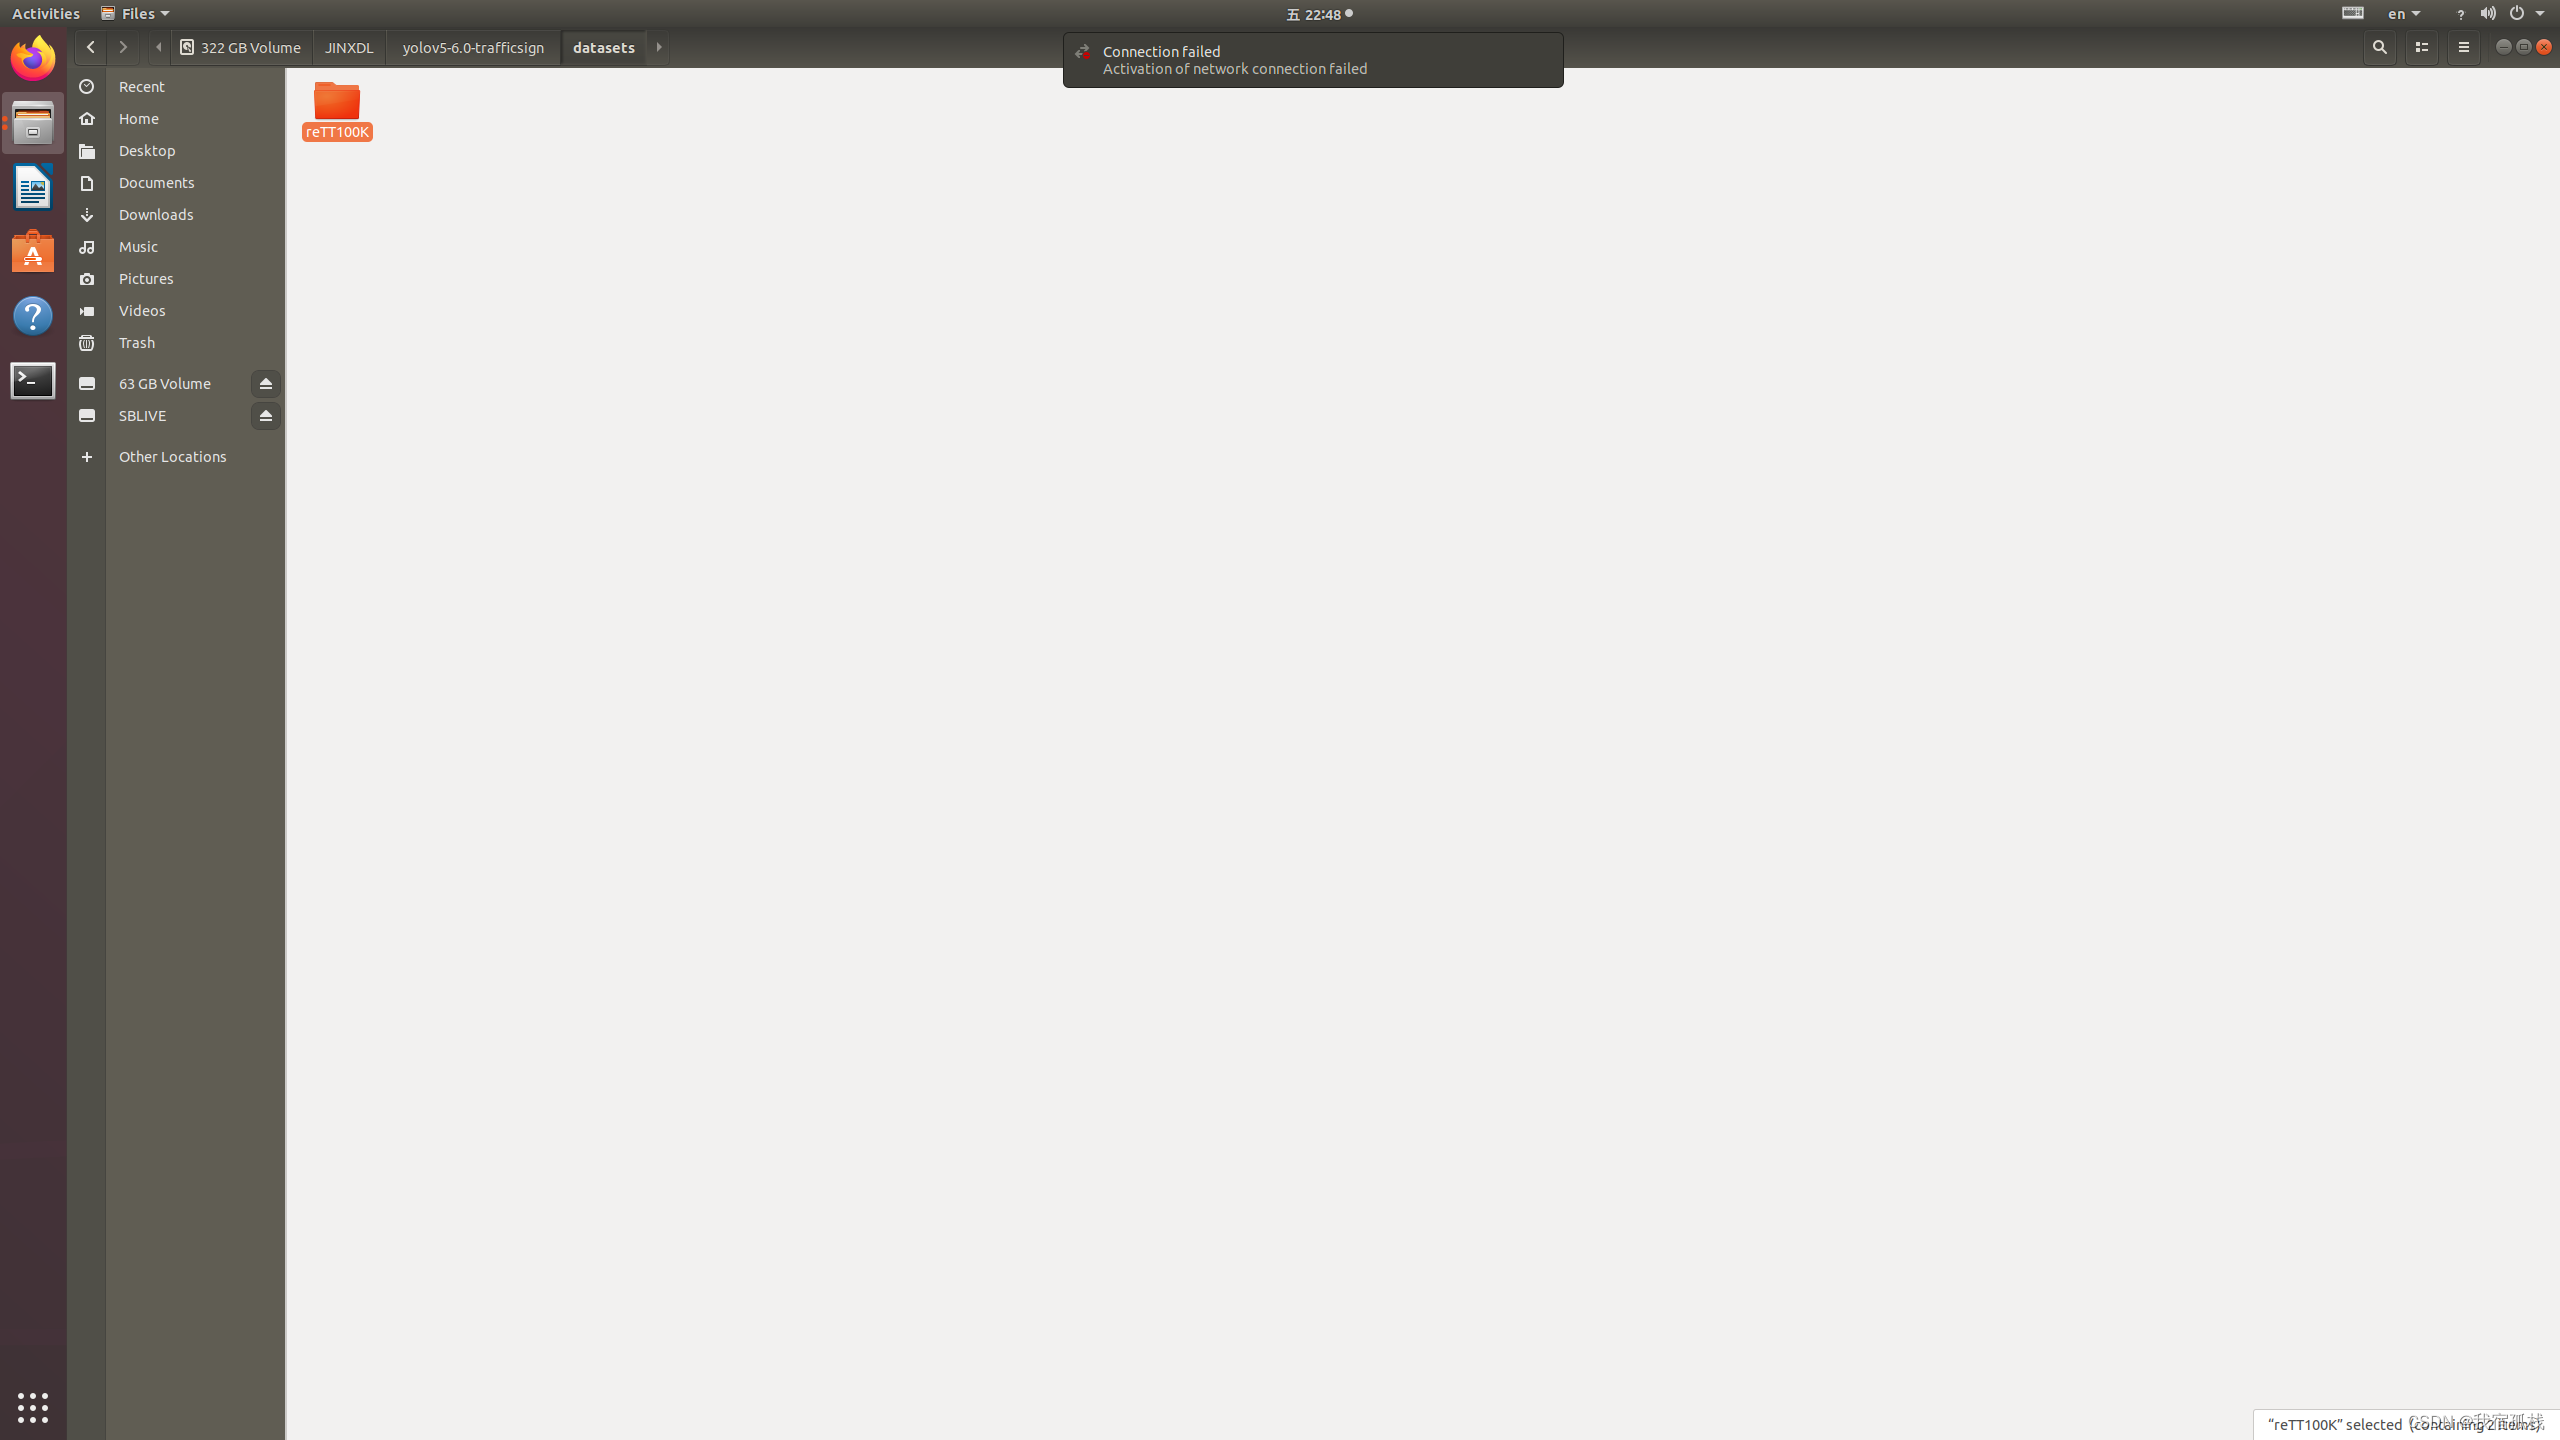
转换后为如图三个文件夹: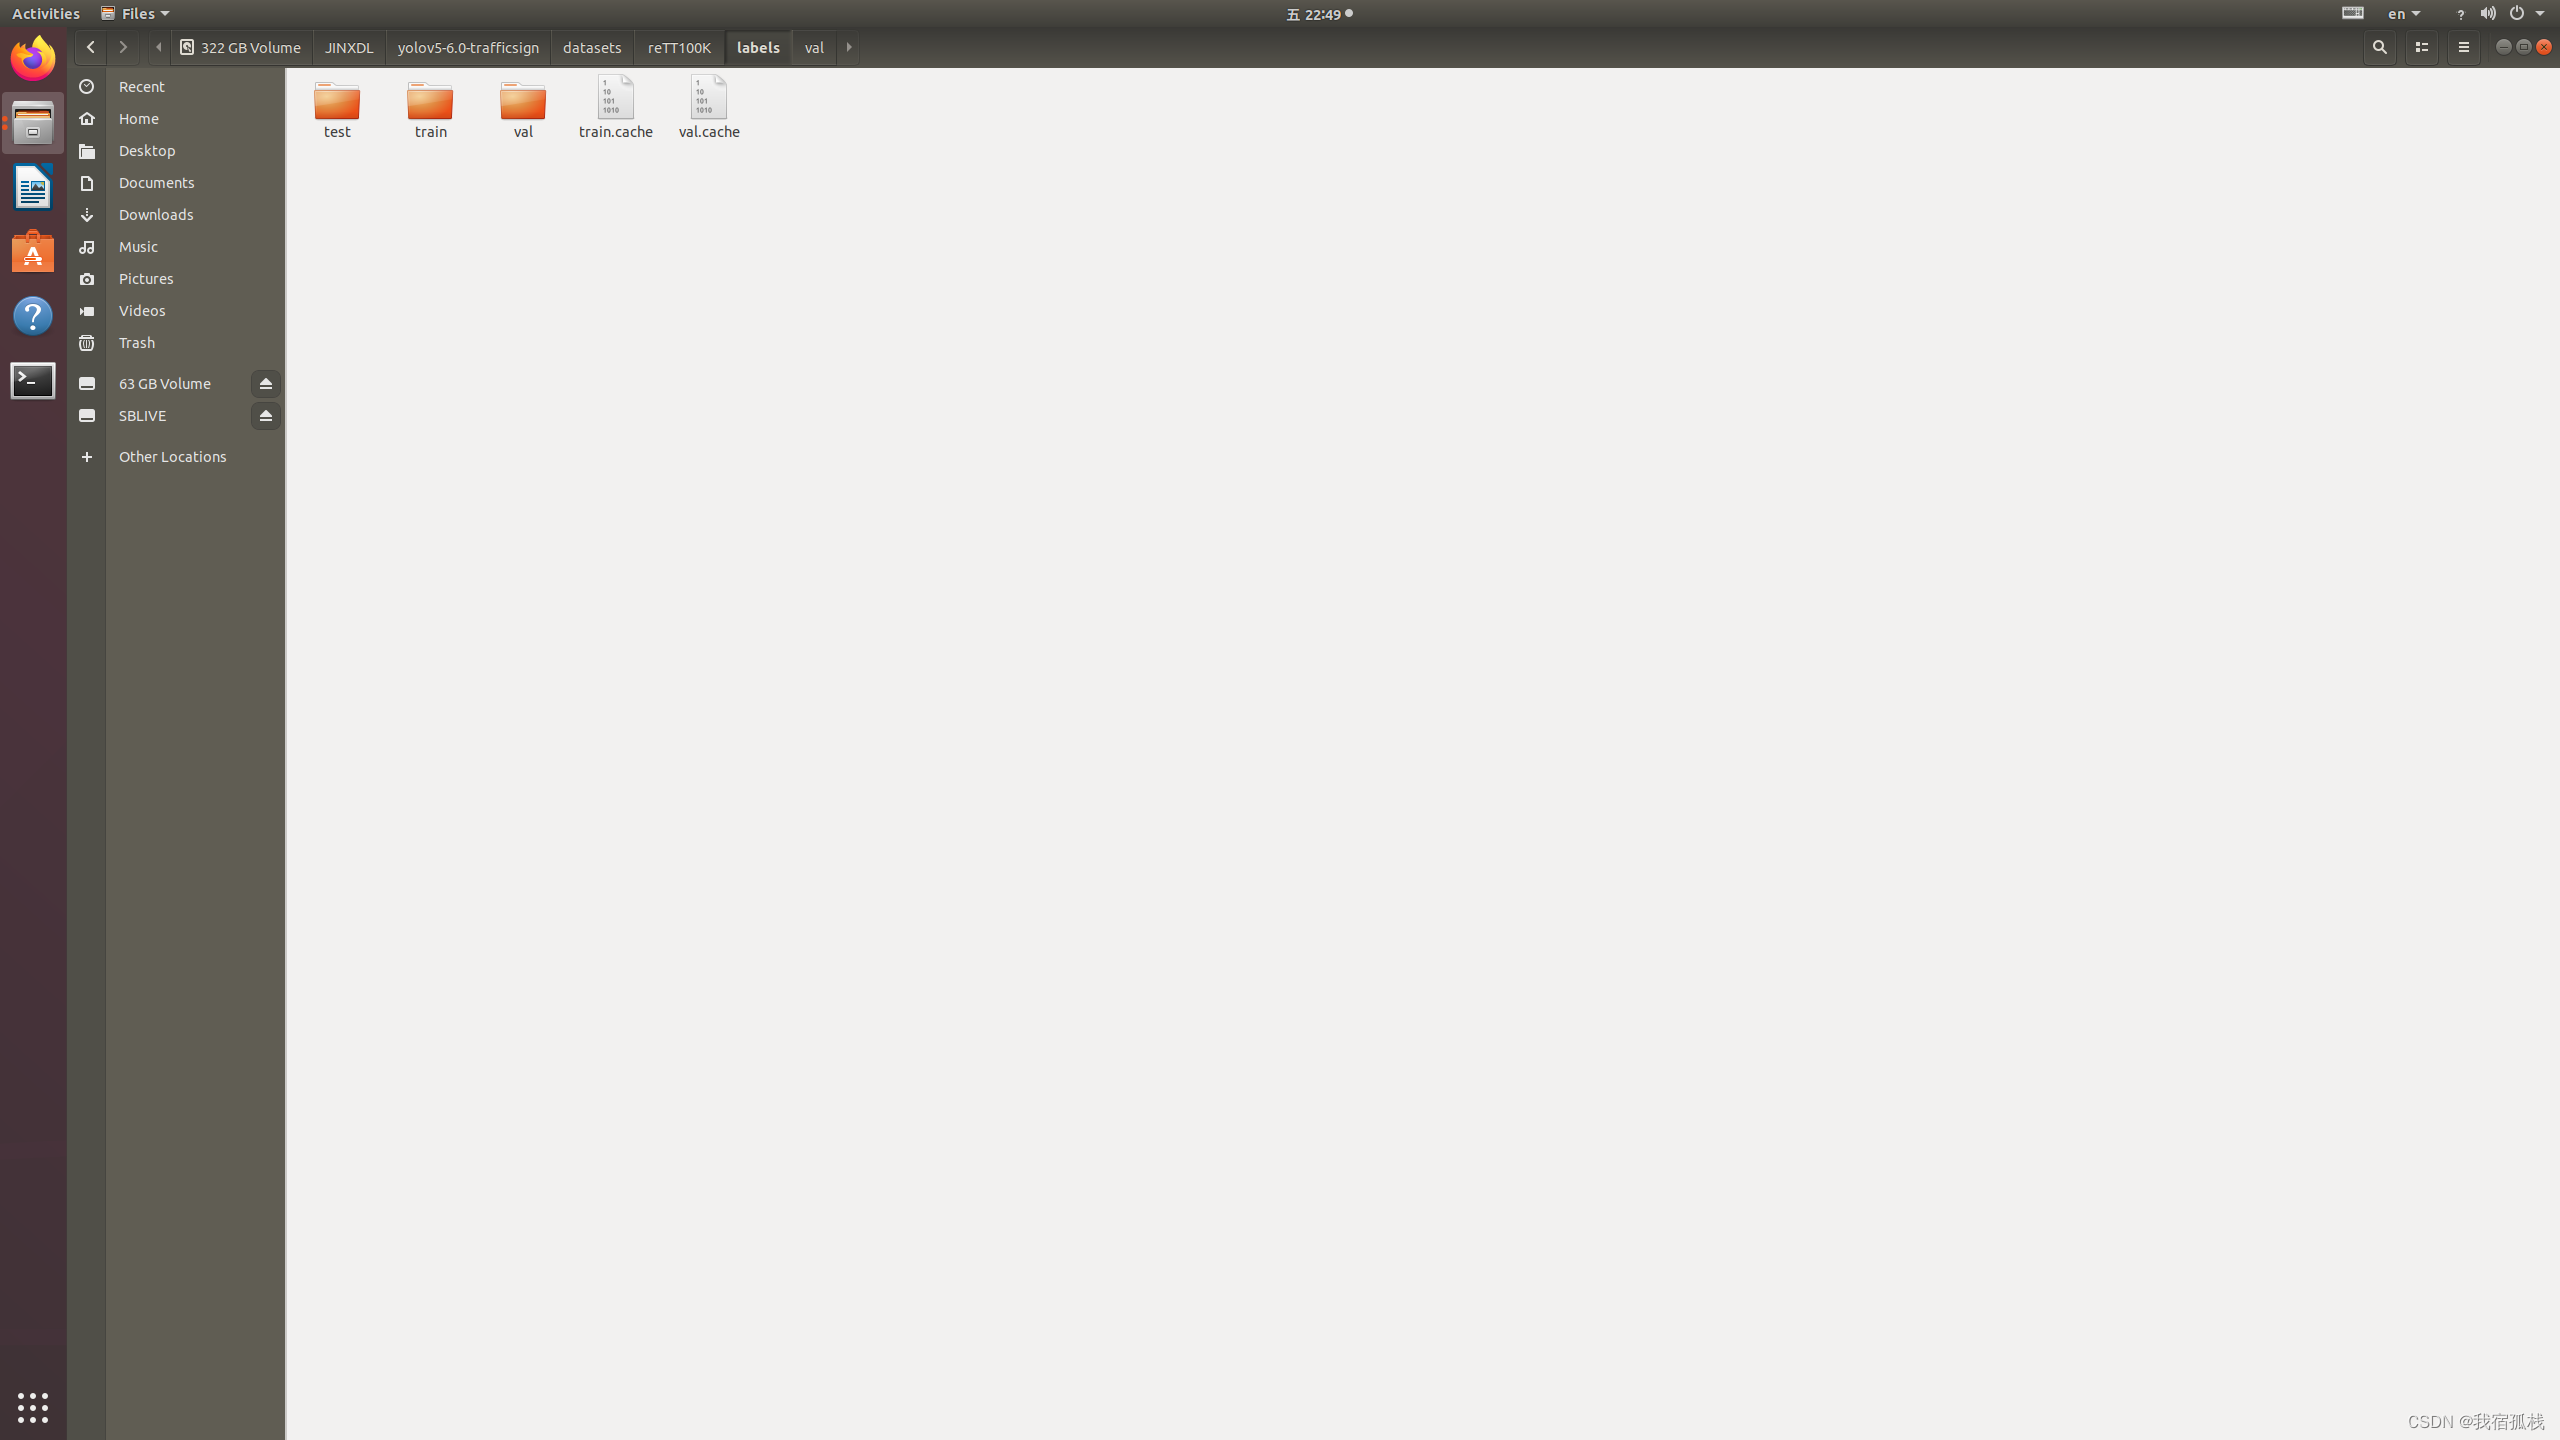

1.2.2. 数据集层级划分
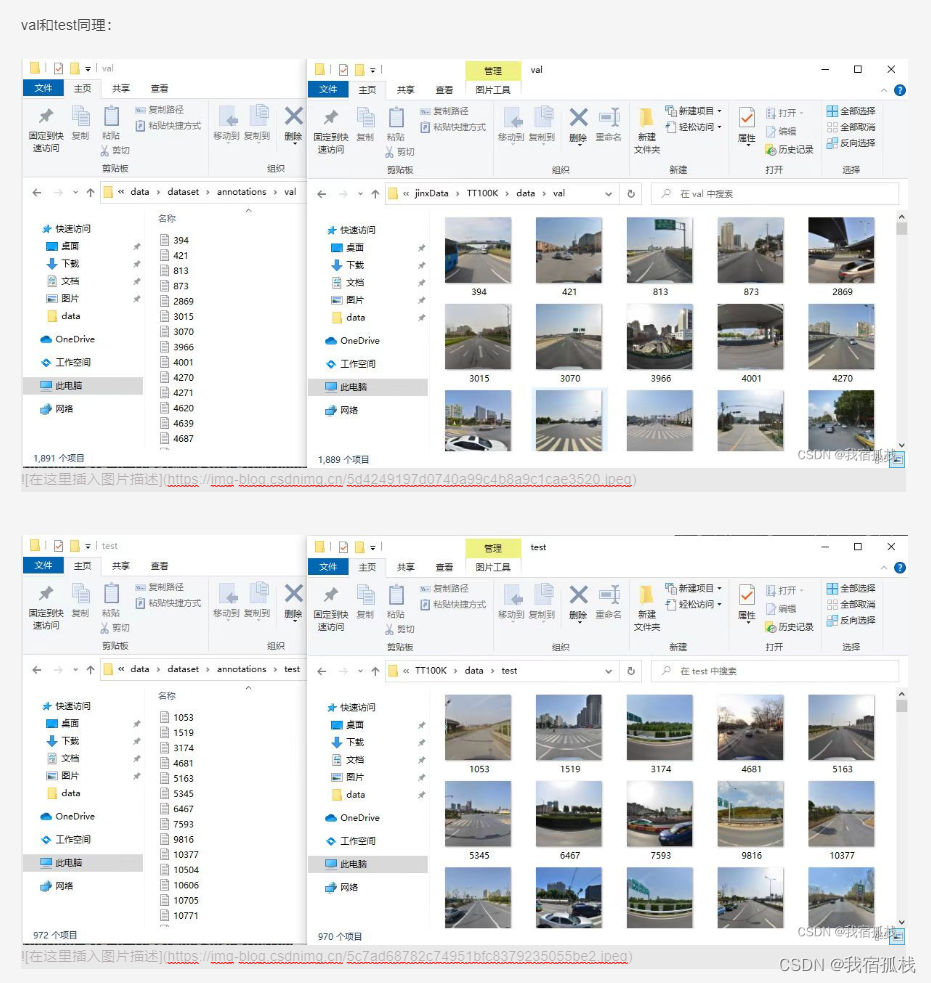
- 通过2.1后对生成的数据进行归纳整理,首先根目录在YOLO层级下的dataset目录:

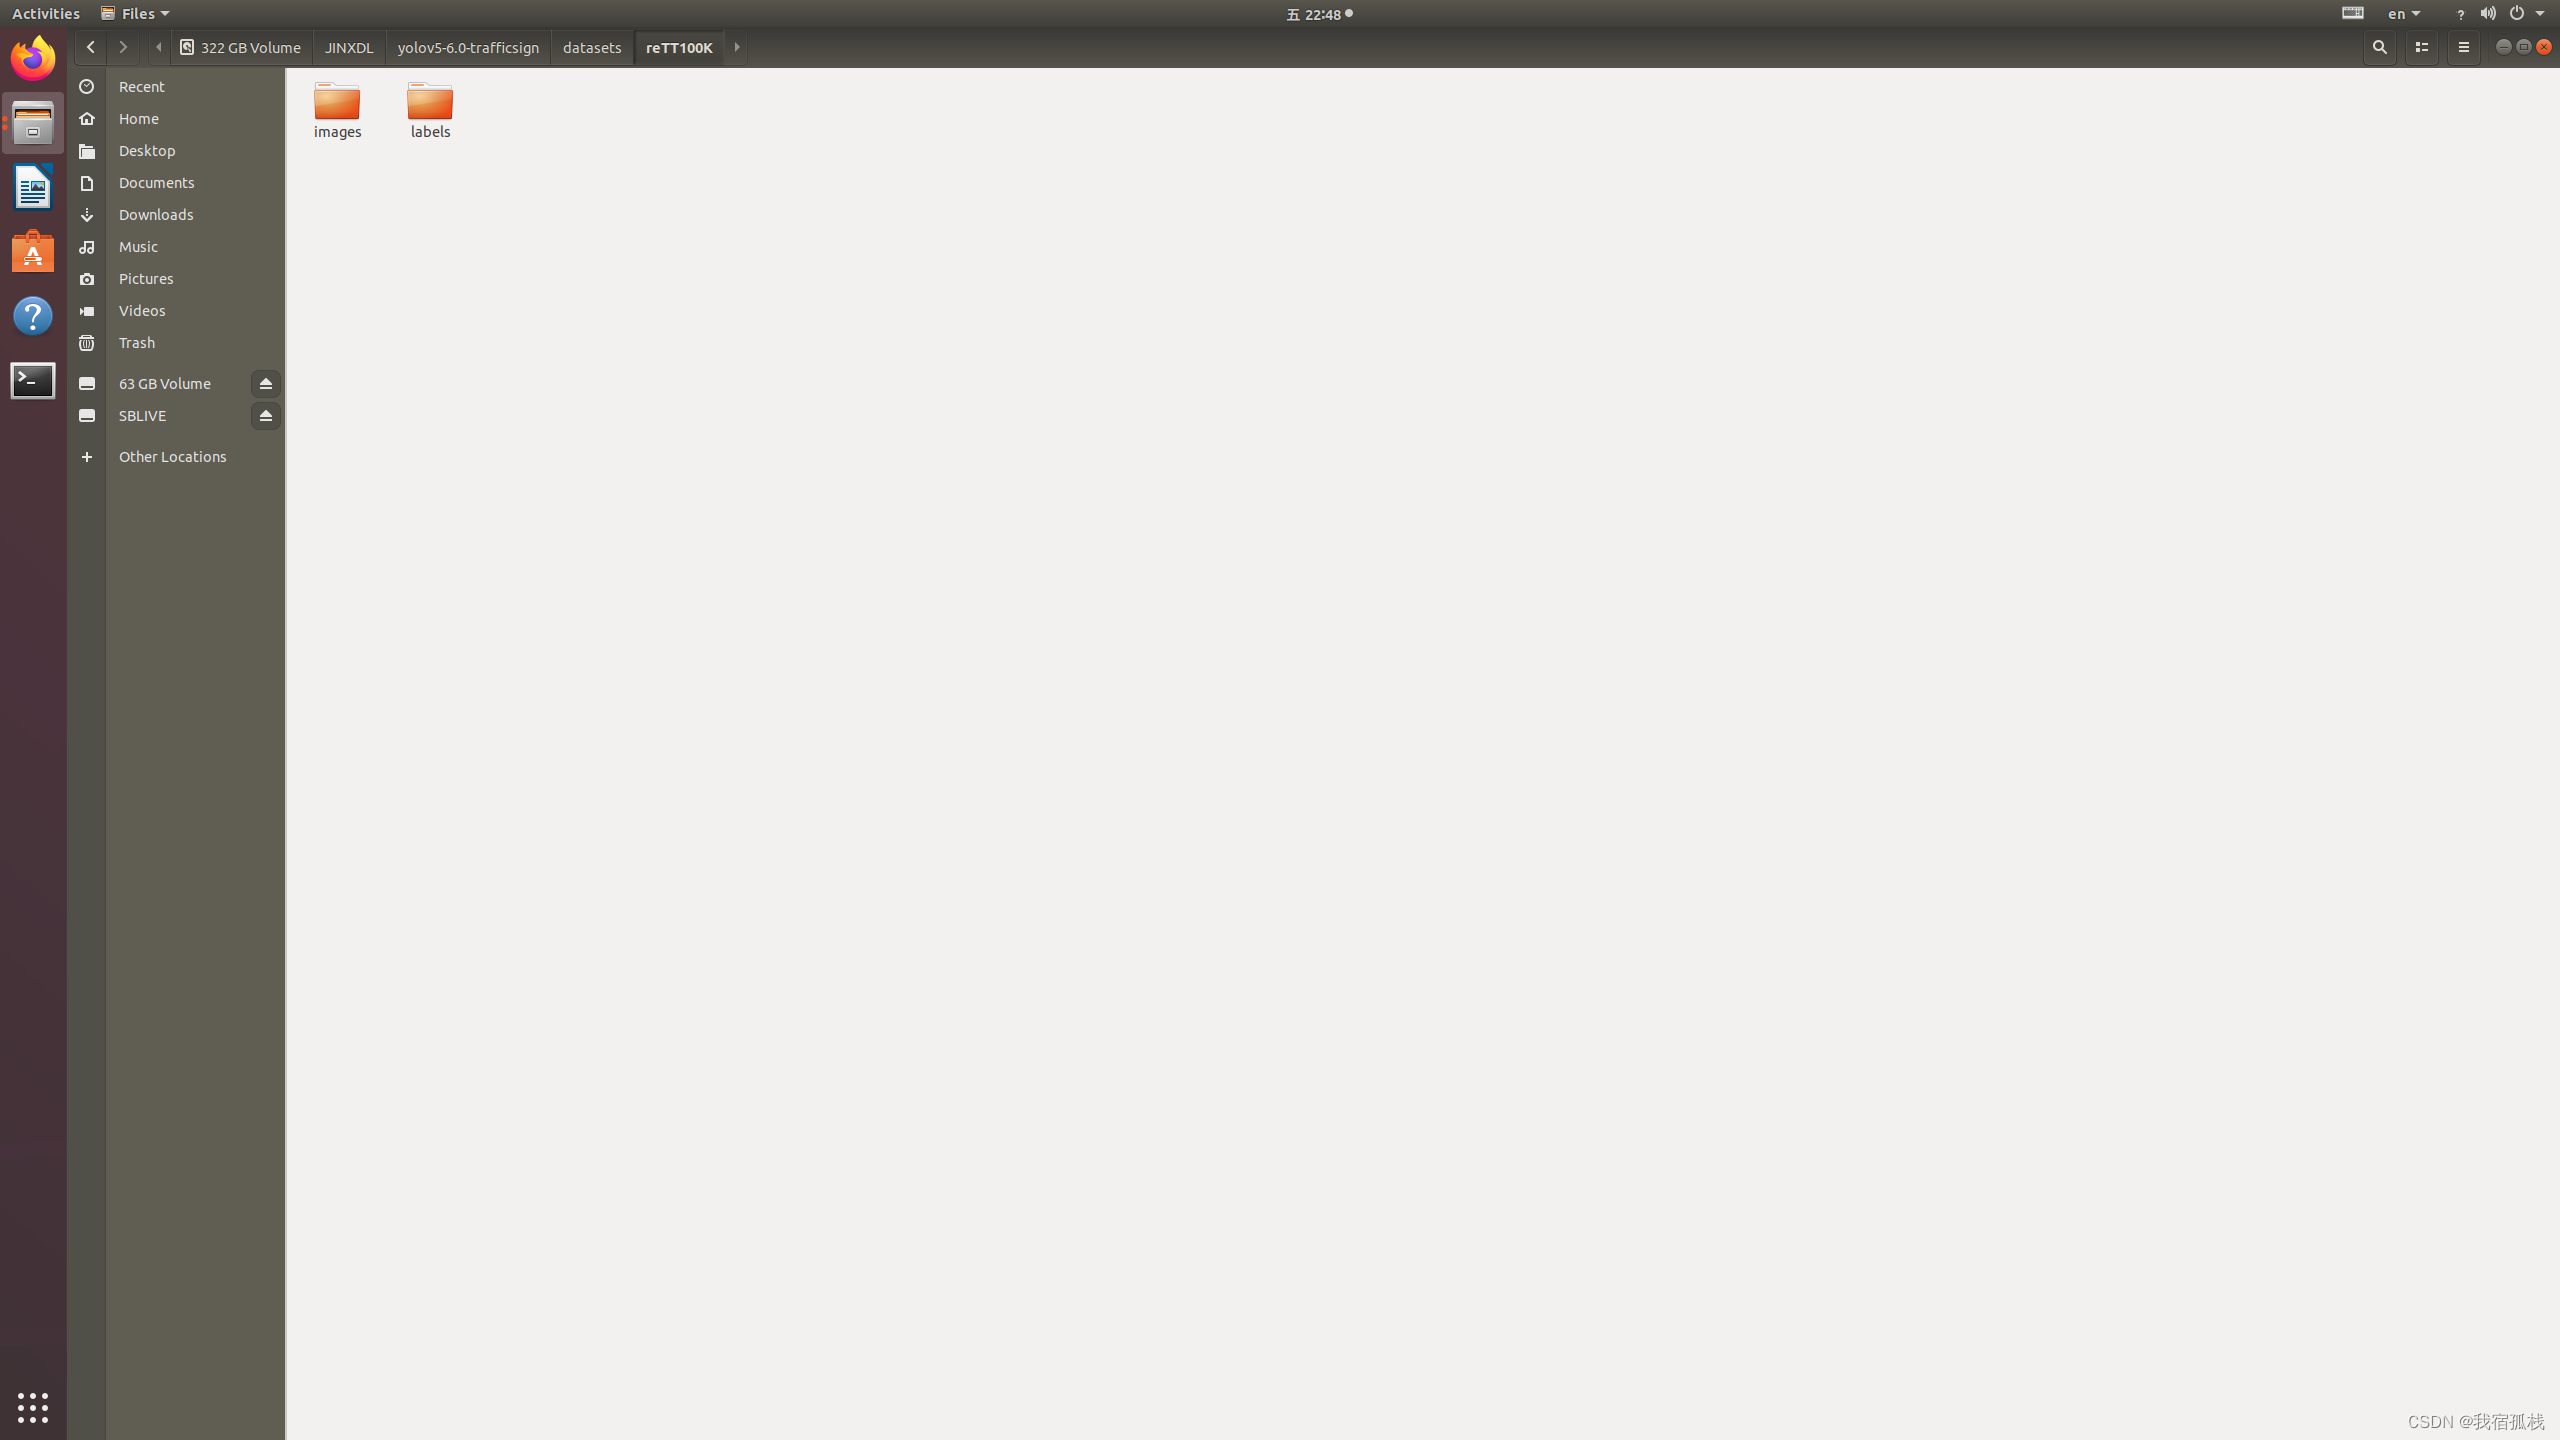
- 图里为博主重新整理过后的TK100K数据集:
- 两个目录,一个是原图片集——images,一个是标签文件——labels:
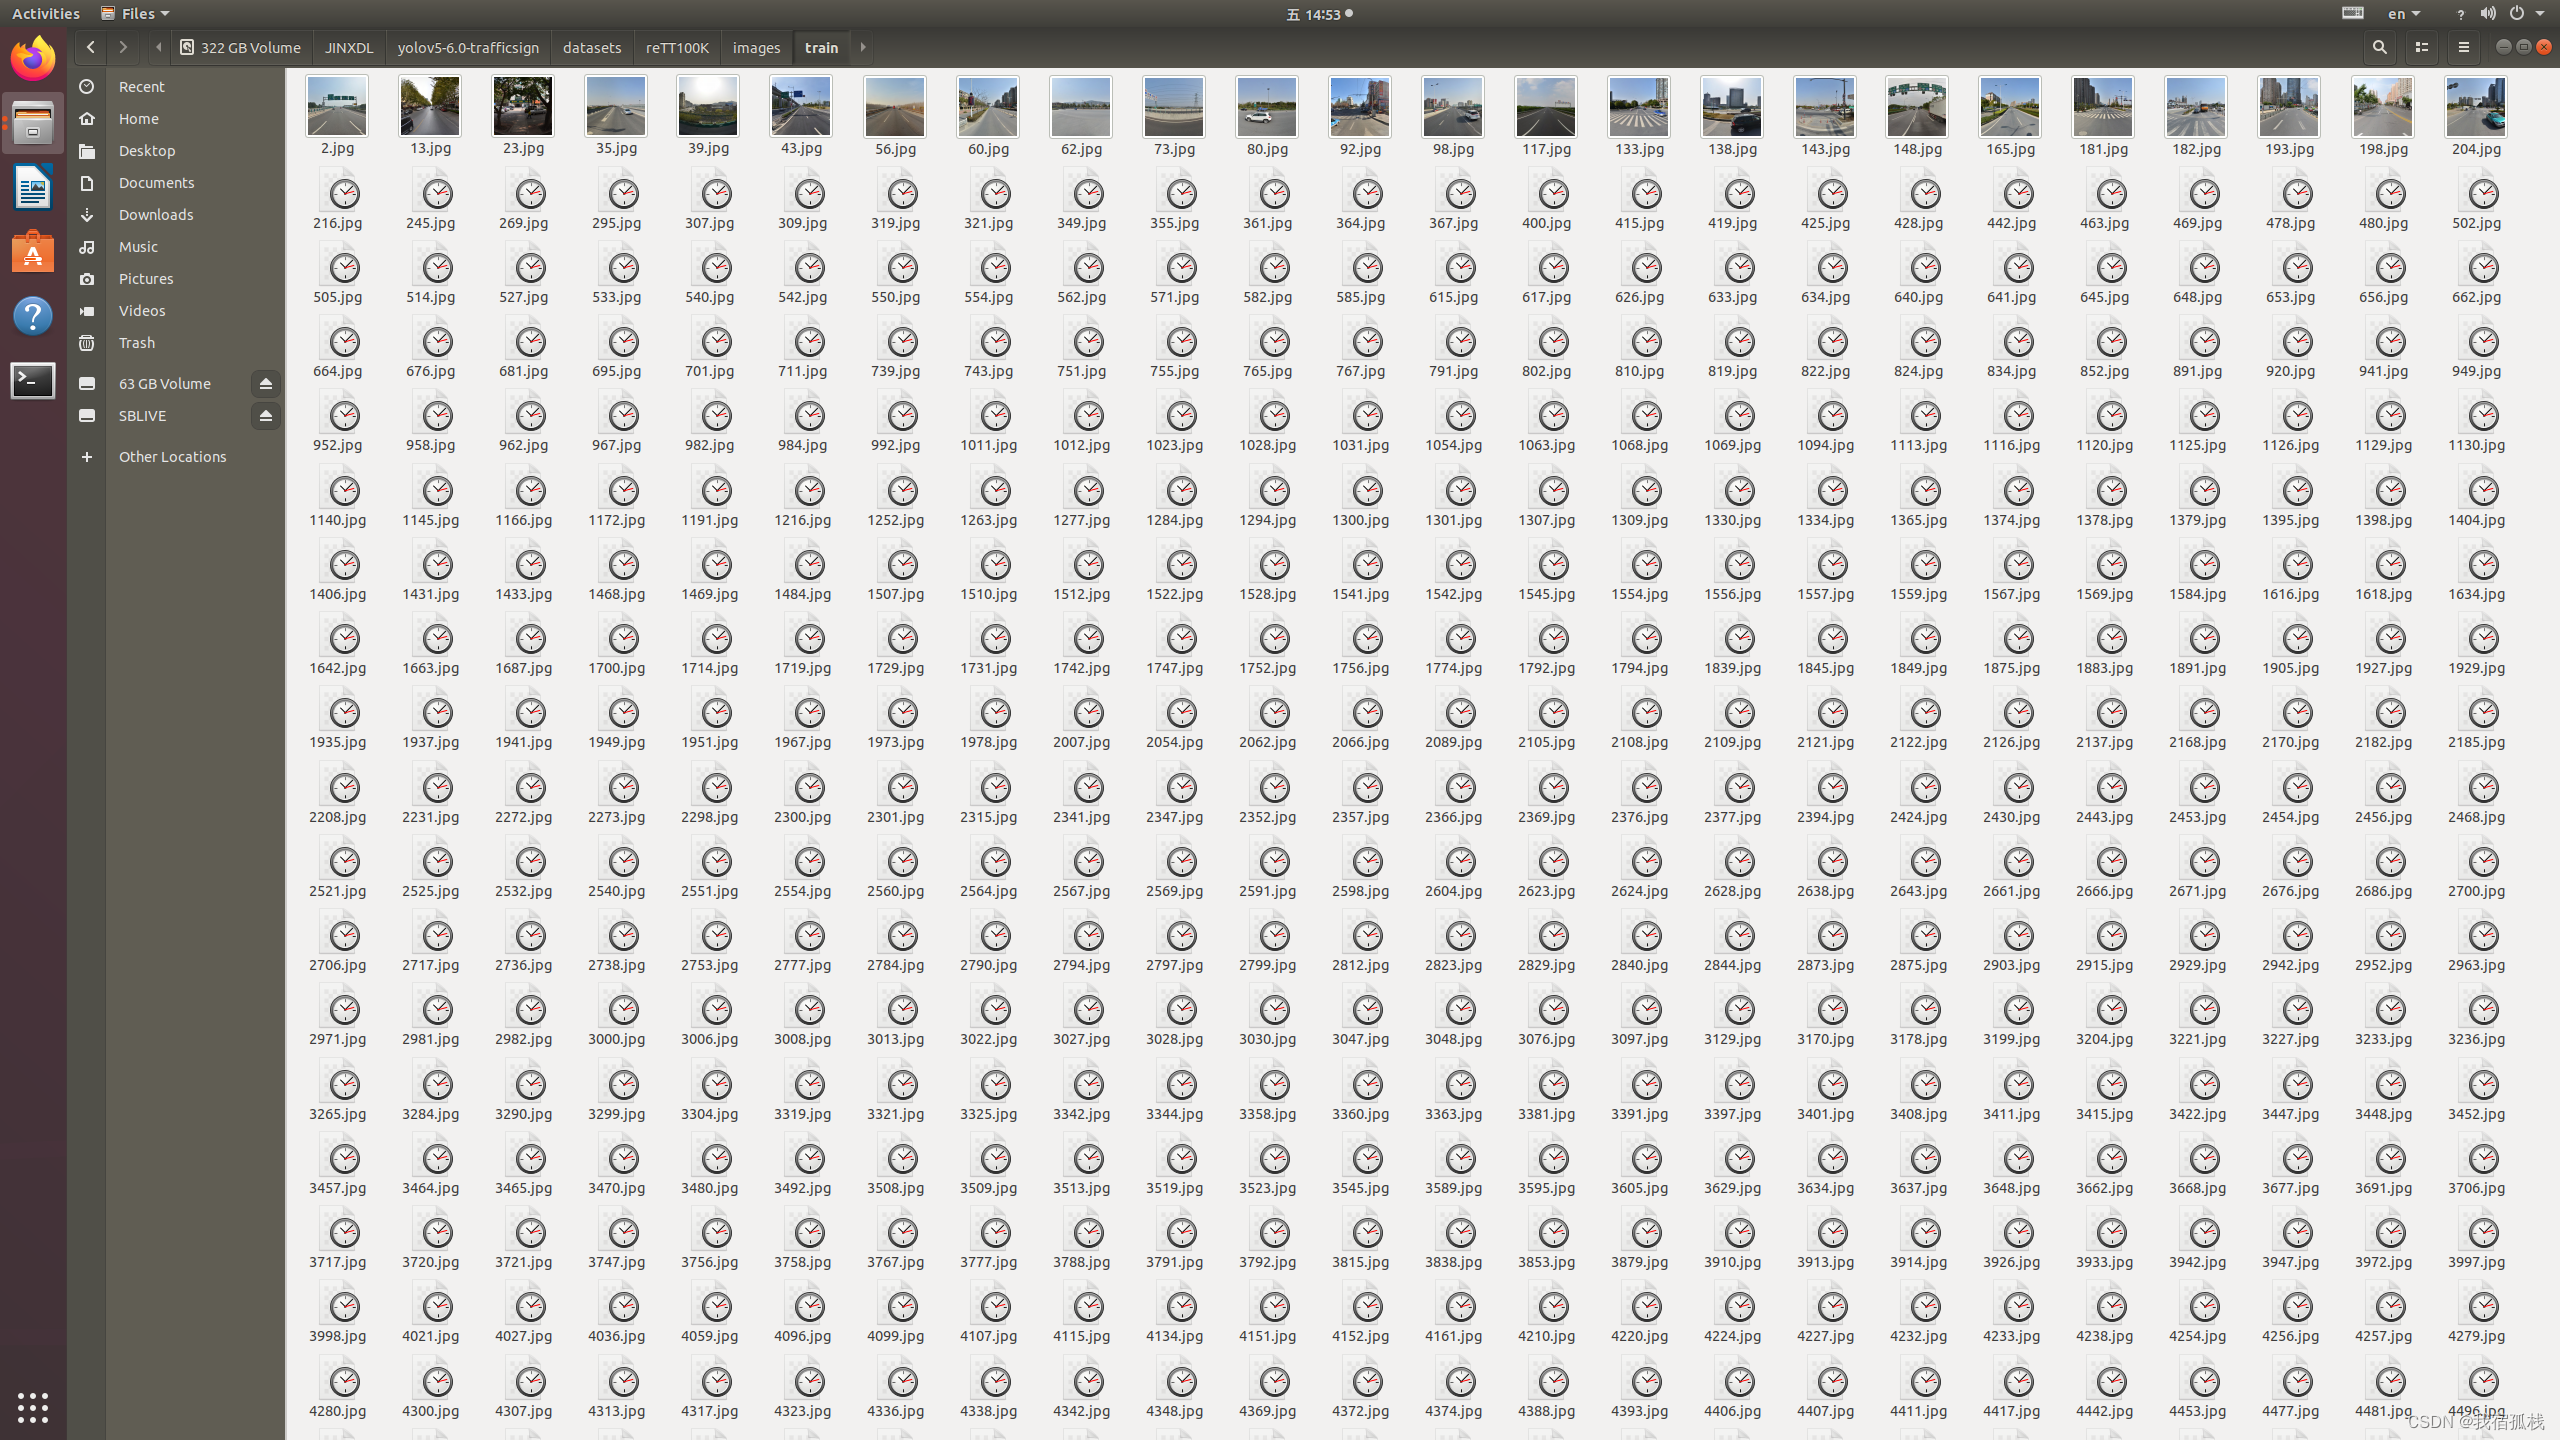
- image目录下依然是三个文件夹:

里边是对应的原始图片:
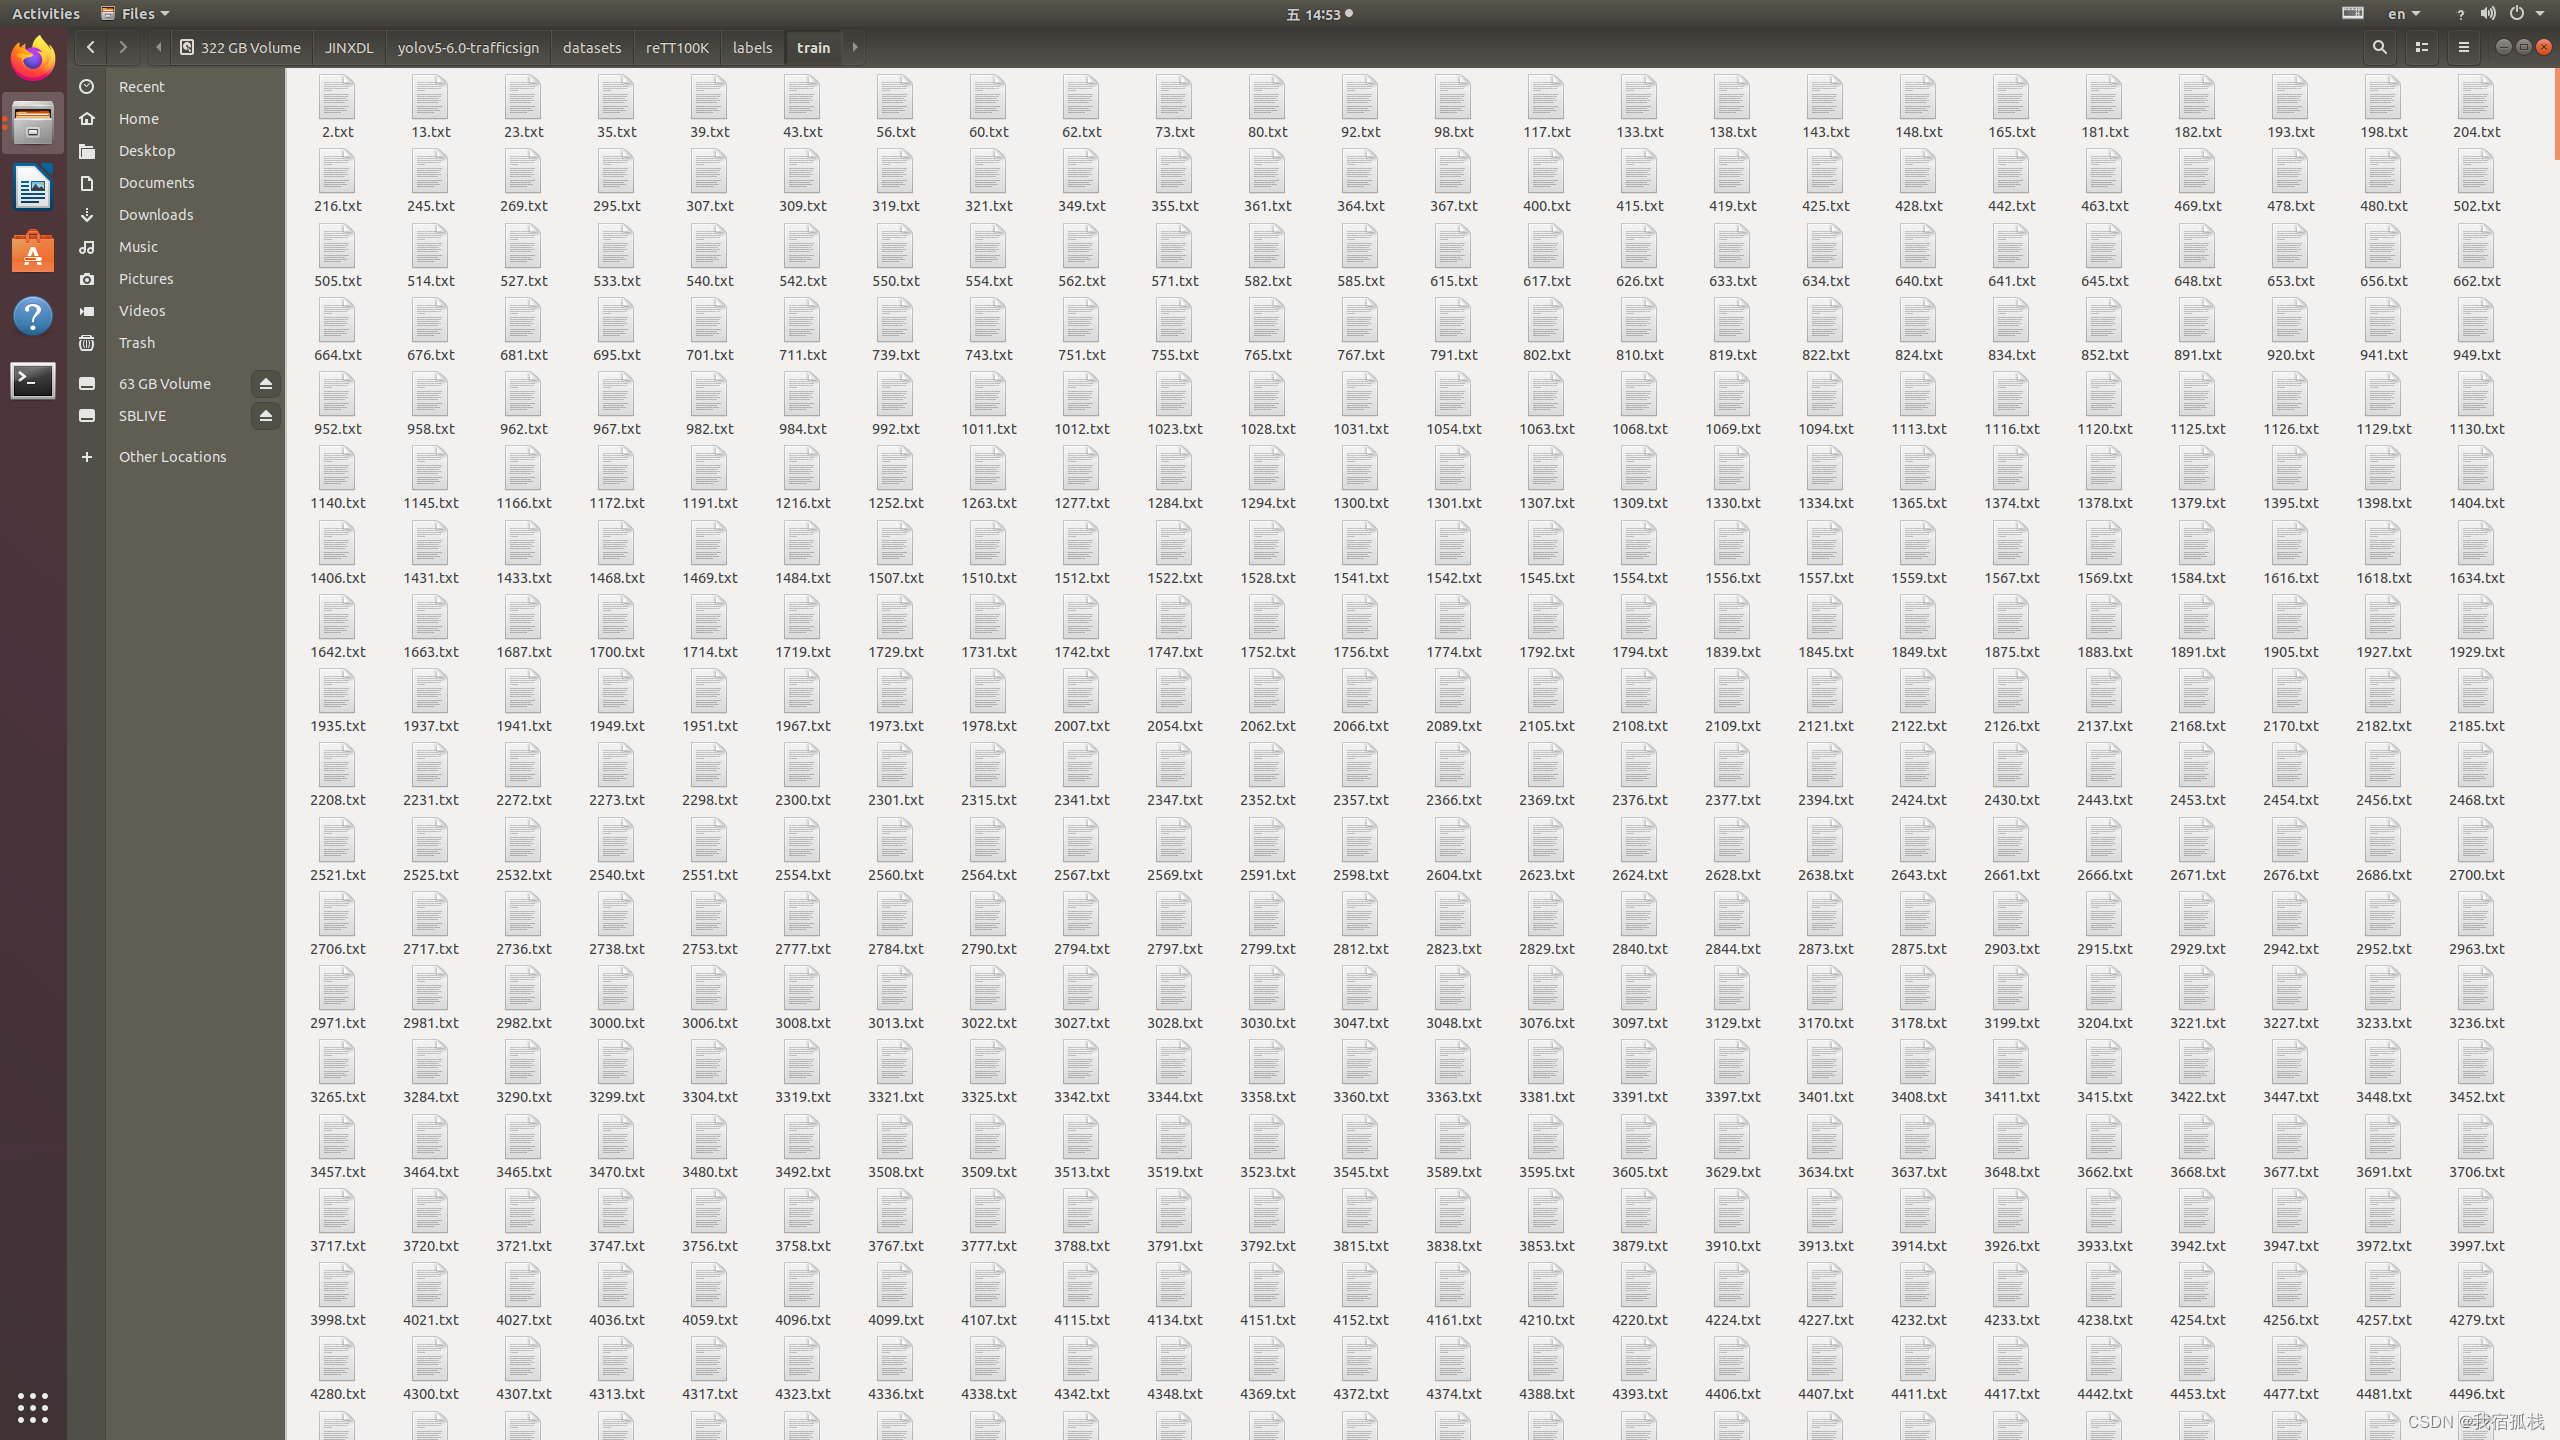
- labels目录下也对应三个文件夹(图里另外两个文件可忽略,):

里边对应为每个图片的标签信息:
至此,数据集准备完毕。
二、训练预测
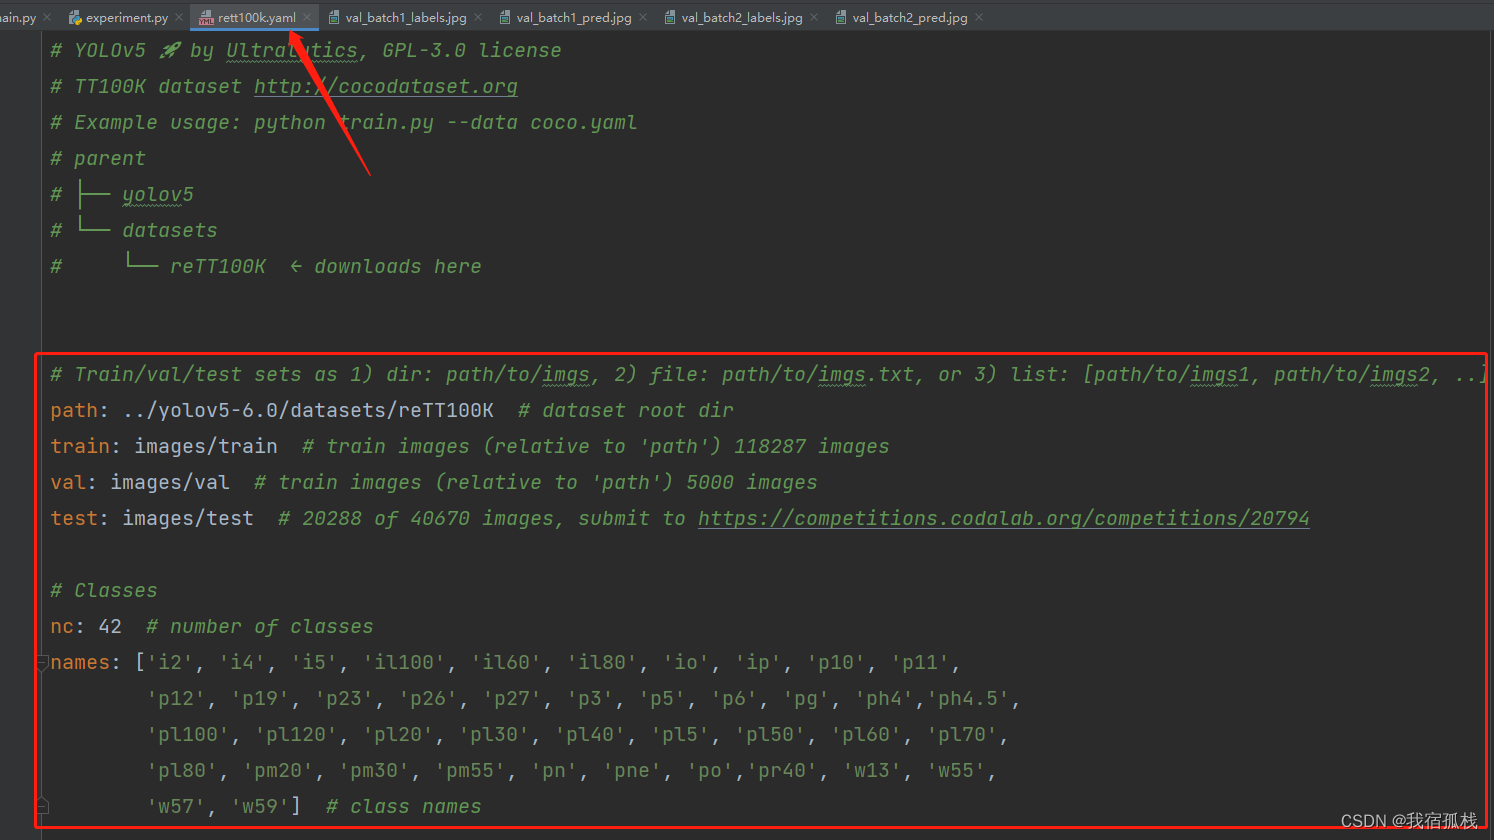
2.1、.yaml文件创建
需要新建一个.yaml文件用于程序读取数据,如图:
2.2 训练预测
此处根据YOLO5的官方文档进行训练预测即可。
训练完成后的预测结果展示:
三、写在最末
- 对于刚接触这个的小白同学,如果有什么环境配置等问题也可以私信博主;
- 如果不想自己运行,想要已经跑好的数据集或者权重文件直接提供给YOLO的同学,私信博主(非无偿)。另外,TT100K本身包含的标志牌类别一共有200+,但其各类别数量分配不均衡,博主贴的训练结果是选取的个类别实例数大于100的,一共有42类,如果有同学需要自定义比例的数据集也可私信博主。
