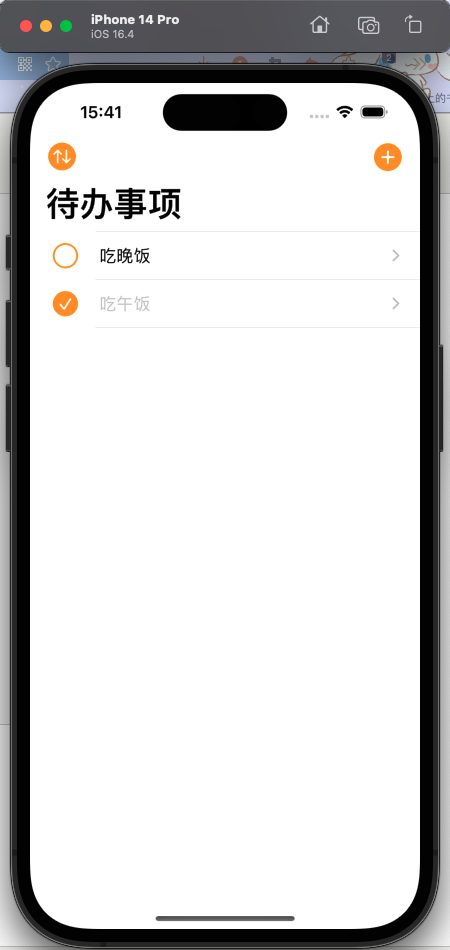
1.在待办事项App中,寻找沙盒路径.
TodosTableVC-Delegate:
import UIKit

//UITableViewDelegate
extension TodosTableVC{
    //当用户点击cell的时候调用
    override func tableView(_ tableView: UITableView, didSelectRowAt indexPath: IndexPath) {
        tableView.deselectRow(at: indexPath, animated: true) //取消选择cell以让底色迅速消失

//        找到storyboard上的vc
//        let vc = storyboard?.instantiateViewController(withIdentifier: kTodoTableVCID) as! TodoTableVC
//        用代码进行push跳转
//        navigationController?.pushViewController(vc, animated: true)
    }

    //自定义左滑删除按钮的文本
//    override func tableView(_ tableView: UITableView, titleForDeleteConfirmationButtonForRowAt indexPath: IndexPath) -> String? {
//        return "点击以删除"
//    }

    //编辑状态下cell左边的按钮-设置为none;因仍旧需要左滑删除功能,故在非编辑状态下仍需返回.delete
    override func tableView(_ tableView: UITableView, editingStyleForRowAt indexPath: IndexPath) -> UITableViewCell.EditingStyle {
        isEditing ? .none : .delete
    }
    //取消编辑状态下cell的缩进
    override func tableView(_ tableView: UITableView, shouldIndentWhileEditingRowAt indexPath: IndexPath) -> Bool { false }
}


//TodoTableVCDelegate
//反向传值
extension TodosTableVC: TodoTableVCDelegate{
    //增删改查-增
    func didAdd(name: String) {
        //添加数据
        todos.append(Todo(name: name, checked: false))
        UserDefaults.standard.set(todos,forKey: "todos")
        //根据最新数据更新视图
        tableView.insertRows(at: [IndexPath(row: todos.count - 1, section: 0)], with: .automatic)
    }

    //增删改查-改
    func didEdit(name: String) {
        //改数据
        todos[row].name = name

        //根据最新数据更新视图

        //1.通过indexPath找cell,继而找到里面的todoLabel,然后改text
//        let indexPath = IndexPath(row: row, section: 0)
//        let cell = tableView.cellForRow(at: indexPath) as! TodoCell
//        cell.todoLabel.text = todos[row].name

        //2.刷新整个tableView(不用过度担心耗资源问题)
        tableView.reloadData()

    }
}
TodosTableVC:
import UIKit
//present和dismiss
//push和pop(压栈/入栈和出栈)
class TodosTableVC: UITableViewController {
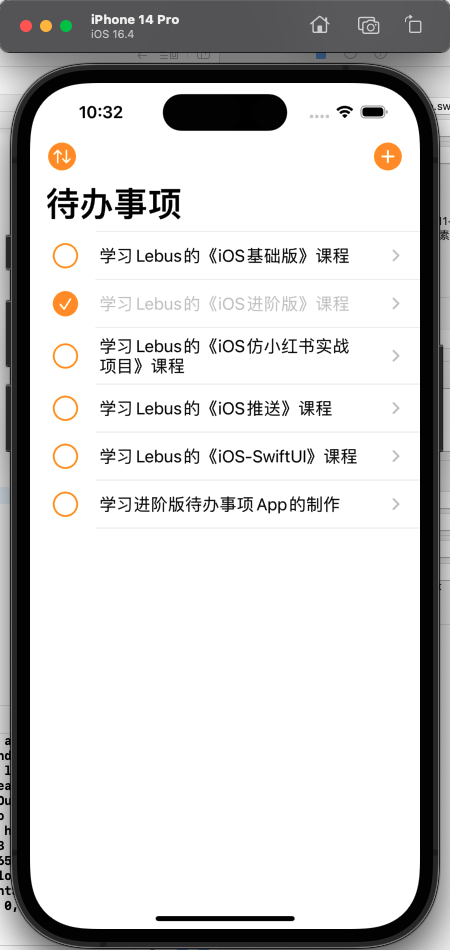
var todos = [
Todo(name: "学习Lebus的《iOS基础版》课程", checked: false),
Todo(name: "学习Lebus的《iOS进阶版》课程", checked: true),
Todo(name: "学习Lebus的《iOS仿小红书实战项目》课程", checked: false),
Todo(name: "学习Lebus的《iOS推送》课程", checked: false),
Todo(name: "学习Lebus的《iOS-SwiftUI》课程", checked: false)
]
var row = 0
override func viewDidLoad() {
super.viewDidLoad()
//print(todos)
//isEditing = true //可手动修改isEditing
//Uncomment the following line to display an Edit button in the navigation bar for this view controller.
//左边的排序按钮-用于对待办事项重新排序
editButtonItem.title = nil
editButtonItem.image = pointIcon("arrow.up.arrow.down.circle.fill")
navigationItem.leftBarButtonItem = editButtonItem
//右边的加号按钮-用于添加待办事项
navigationItem.rightBarButtonItem?.image = pointIcon("plus.circle.fill")
//沙盒sandbox
print(NSHomeDirectory())
}
//点下editButtonItem后调用
override func setEditing(_ editing: Bool, animated: Bool) {
super.setEditing(editing, animated: animated)
if isEditing{
editButtonItem.image = nil
editButtonItem.title = "完成"
}else{
editButtonItem.title = nil
editButtonItem.image = pointIcon("arrow.up.arrow.down.circle.fill")
}
}
// MARK: - Navigation
override func prepare(for segue: UIStoryboardSegue, sender: Any?) {
let vc = segue.destination as! TodoTableVC
vc.delegate = self
if segue.identifier == kEditTodoID{
let cell = sender as! TodoCell //sender就是用户点击的那个cell
//1.cell-->indexPath
row = tableView.indexPath(for: cell)!.row
//2.indexPath-->cell(下述)
//tableView.cellForRow(at: indexPath) as! TodoCell
vc.name = todos[row].name //正向传值
}
}
}
启动运行:
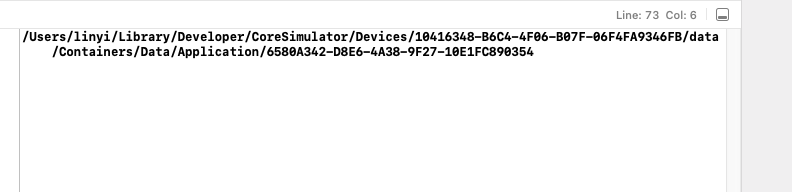
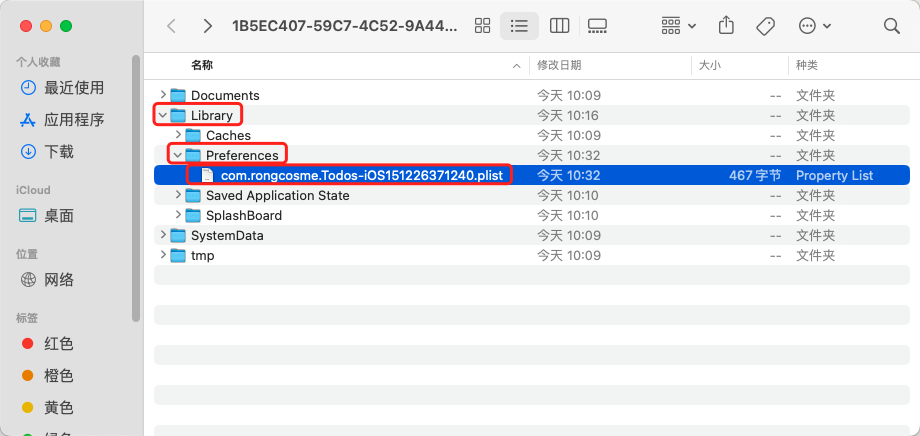
找到在模拟器上的沙盒路径:/Users/linyi/Library/Developer/CoreSimulator/Devices/10416348-B6C4-4F06-B07F-06F4FA9346FB/data/Containers/Data/Application/6580A342-D8E6-4A38-9F27-10E1FC890354
找到沙盒文件夹:
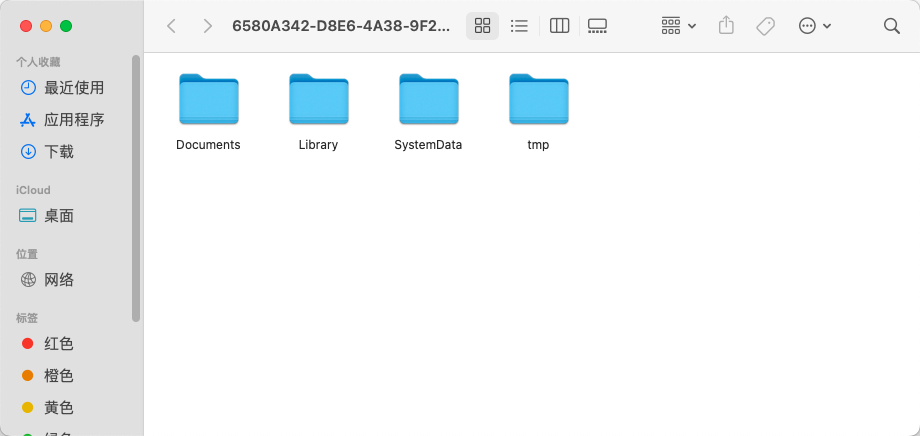
通过观察文件夹可知,能够放入沙盒的数据类型是有限制的,所以需要使用JSON编码和Codable协议将数据类型转换为Data类型.
2.JSON编码和Codable协议
Todo:
import Foundation

//class Todo{
//    var name = ""
//    var checked = false
//}

//结构体-值类型
struct Todo: Codable {  //遵循编码协议和解码协议
    var name: String
    var checked: Bool
//    init(name: String, checked: Bool){
//        self.name = name
//        self.checked = checked
//    }
}
Constants:
import UIKit

let kTodoTableVCID = "TodoTableVCID"

let kTodoCellID = "TodoCellID"
let kAddTodoID = "AddTodoID"
let kEditTodoID = "EditTodoID"

let kTodosKey = "TodosKey"

func pointIcon(_ iconName: String, _ pointSize: CGFloat = 22) -> UIImage?{
    let config = UIImage.SymbolConfiguration(pointSize: pointSize)
    return UIImage(systemName: iconName, withConfiguration: config)
}
TodosTableVC-Delegate:
import UIKit

//UITableViewDelegate
extension TodosTableVC{
    //当用户点击cell的时候调用
    override func tableView(_ tableView: UITableView, didSelectRowAt indexPath: IndexPath) {
        tableView.deselectRow(at: indexPath, animated: true) //取消选择cell以让底色迅速消失

//        找到storyboard上的vc
//        let vc = storyboard?.instantiateViewController(withIdentifier: kTodoTableVCID) as! TodoTableVC
//        用代码进行push跳转
//        navigationController?.pushViewController(vc, animated: true)
    }

    //自定义左滑删除按钮的文本
//    override func tableView(_ tableView: UITableView, titleForDeleteConfirmationButtonForRowAt indexPath: IndexPath) -> String? {
//        return "点击以删除"
//    }

    //编辑状态下cell左边的按钮-设置为none;因仍旧需要左滑删除功能,故在非编辑状态下仍需返回.delete
    override func tableView(_ tableView: UITableView, editingStyleForRowAt indexPath: IndexPath) -> UITableViewCell.EditingStyle {
        isEditing ? .none : .delete
    }
    //取消编辑状态下cell的缩进
    override func tableView(_ tableView: UITableView, shouldIndentWhileEditingRowAt indexPath: IndexPath) -> Bool { false }
}


//TodoTableVCDelegate
//反向传值
extension TodosTableVC: TodoTableVCDelegate{
    //增删改查-增
    func didAdd(name: String) {
        //添加数据
        todos.append(Todo(name: name, checked: false))
        //编码
        do {
            let data = try JSONEncoder().encode(todos)  //todos类型转换为data
            UserDefaults.standard.set(data,forKey: kTodosKey)   //data存入沙盒
        }catch {
            print("编码错误:", error)
        }

        //根据最新数据更新视图
        tableView.insertRows(at: [IndexPath(row: todos.count - 1, section: 0)], with: .automatic)
    }

    //增删改查-改
    func didEdit(name: String) {
        //改数据
        todos[row].name = name

        //根据最新数据更新视图

        //1.通过indexPath找cell,继而找到里面的todoLabel,然后改text
//        let indexPath = IndexPath(row: row, section: 0)
//        let cell = tableView.cellForRow(at: indexPath) as! TodoCell
//        cell.todoLabel.text = todos[row].name

        //2.刷新整个tableView(不用过度担心耗资源问题)
        tableView.reloadData()

    }
}
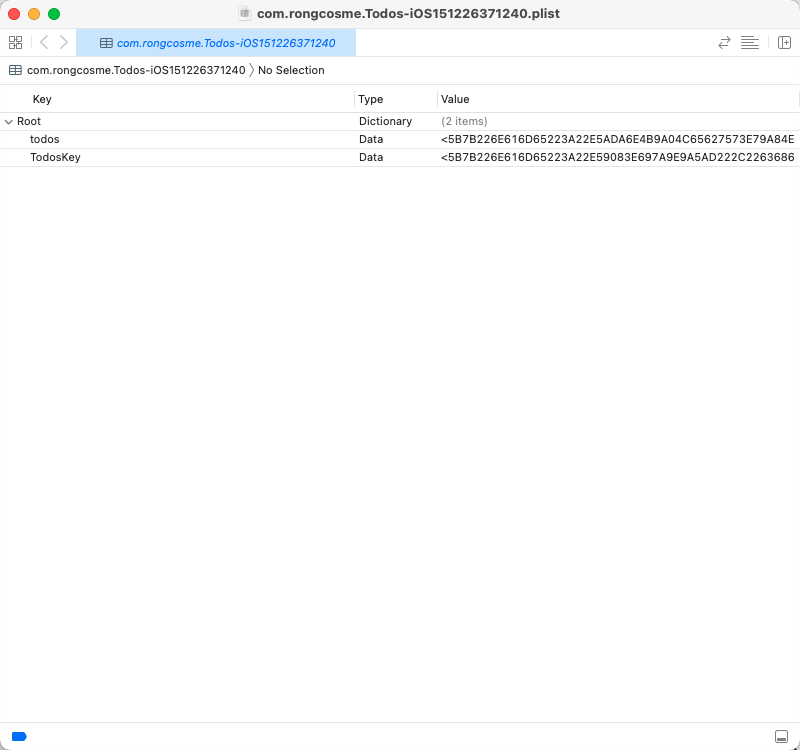
启动测试:
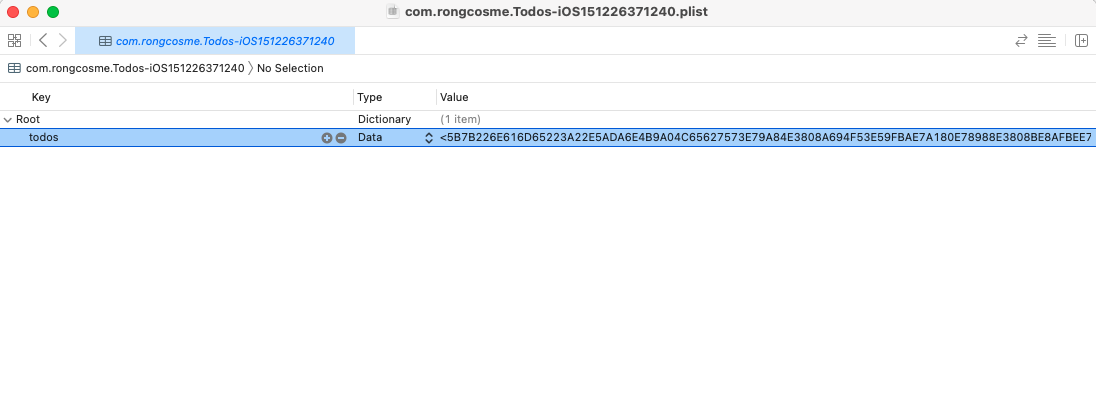
发现数据已被存储到了本机.
3.在增删改的时候都使用本地存储.
TodosTableVC-DataSource:
import UIKit

//UITableViewDataSource
extension TodosTableVC{

    //配置section的数量(不实现的话就相当于返回1)
    override func numberOfSections(in tableView: UITableView) -> Int { 1 }
    //配置row的数量
    override func tableView(_ tableView: UITableView, numberOfRowsInSection section: Int) -> Int { todos.count }
    //配置每个row里面显示什么内容
    override func tableView(_ tableView: UITableView, cellForRowAt indexPath: IndexPath) -> UITableViewCell {

        let cell = tableView.dequeueReusableCell(withIdentifier: kTodoCellID, for: indexPath) as! TodoCell

        //增删改查-查
        let checkBoxBtn = cell.checkBoxBtn!
        let todoLabel = cell.todoLabel!
        let initSelected = todos[indexPath.row].checked
//        系统自带布局(虽然storyboard里面没有相应的UI控件,但仍旧可以这样使用)
//        var contentConfiguration = cell.defaultContentConfiguration()
//        contentConfiguration.text = "昵称"
//        contentConfiguration.secondaryText = "个性签名"
//        contentConfiguration.image = UIImage(systemName: "star")
//        cell.contentConfiguration = contentConfiguration

        //配置初始数据
        checkBoxBtn.isSelected = initSelected
        todoLabel.text = todos[indexPath.row].name
        todoLabel.textColor = initSelected ? .tertiaryLabel : .label //三元运算符.等同于下面
//        if todos[indexPath.row].checked{
//            cell.todoLabel.textColor = .tertiaryLabel
//        }else{
//            cell.todoLabel.textColor = .label
//        }


        //增删改查-改
        //设置每个checkBoxBtn的tag值为当前的row,用于传值
        checkBoxBtn.tag = indexPath.row
        //添加点击事件,用户点击checkBoxBtn后会触发self下面的toggleCheck函数,并且系统会自动把本身(toggleCheck)作为参数传过去
        checkBoxBtn.addTarget(self, action: #selector(toggleCheck), for: .touchUpInside)

        return cell
    }


    //增删改查-删
    override func tableView(_ tableView: UITableView, commit editingStyle: UITableViewCell.EditingStyle, forRowAt indexPath: IndexPath) {
        //左滑删除
        if editingStyle == .delete {
            //删数据
            todos.remove(at: indexPath.row)
            saveData()  //本地化存储
            //根据最新数据更新视图
            tableView.reloadData()
        } else if editingStyle == .insert {
            // Create a new instance of the appropriate class, insert it into the array, and add a new row to the table view
        }
    }


    //增删改查-改(移动/重新排序)
    override func tableView(_ tableView: UITableView, moveRowAt fromIndexPath: IndexPath, to: IndexPath) {
//        Swift里数组元素的移动(重新排序)
//        var arr = [1,2,3,4]
//        arr.remove(at: 0) //arr --> [2,3,4]
//        arr.insert(1, at: 3) //arr --> [2,3,4,1]
//        print(arr)

        //改数据
        let todoToRemove = todos[fromIndexPath.row] //一定要在删除数组某个元素前取出,不然后面取会取不到
        todos.remove(at: fromIndexPath.row)
        todos.insert(todoToRemove, at: to.row)
        //print(todos)
        saveData()   //本地化存储

        //系统自动更新视图(纯粹更新,不会调用DataSource)
        //但我们仍需刷新DataSource函数,因为要刷新indexPath,从而让用户点击CheckBox时数据能够准确
        tableView.reloadData()
    }
}

extension TodosTableVC{
    func saveData(){
        //编码
        do {
            let data = try JSONEncoder().encode(todos)  //todos类型转换为data
            UserDefaults.standard.set(data,forKey: kTodosKey)   //data存入沙盒
        }catch {
            print("编码错误:", error)
        }
    }
}

//监听函数
extension TodosTableVC{
    //用户点击checkBoxBtn触发
    @objc func toggleCheck(checkBoxBtn: UIButton){
        let row = checkBoxBtn.tag
        //修改数据
        todos[row].checked.toggle()
        //print("点击了第\(row + 1)行,todos变成了:",todos)
        saveData()    //本地化存储
        //根据最新数据更新视图
        let checked = todos[row].checked
        checkBoxBtn.isSelected = checked
        let cell = tableView.cellForRow(at: IndexPath(row: row, section: 0)) as! TodoCell
        cell.todoLabel.textColor = checked ? .tertiaryLabel : .label
    }
}
TodosTableVC-Delegate:
import UIKit

//UITableViewDelegate
extension TodosTableVC{
    //当用户点击cell的时候调用
    override func tableView(_ tableView: UITableView, didSelectRowAt indexPath: IndexPath) {
        tableView.deselectRow(at: indexPath, animated: true) //取消选择cell以让底色迅速消失

//        找到storyboard上的vc
//        let vc = storyboard?.instantiateViewController(withIdentifier: kTodoTableVCID) as! TodoTableVC
//        用代码进行push跳转
//        navigationController?.pushViewController(vc, animated: true)
    }

    //自定义左滑删除按钮的文本
//    override func tableView(_ tableView: UITableView, titleForDeleteConfirmationButtonForRowAt indexPath: IndexPath) -> String? {
//        return "点击以删除"
//    }

    //编辑状态下cell左边的按钮-设置为none;因仍旧需要左滑删除功能,故在非编辑状态下仍需返回.delete
    override func tableView(_ tableView: UITableView, editingStyleForRowAt indexPath: IndexPath) -> UITableViewCell.EditingStyle {
        isEditing ? .none : .delete
    }
    //取消编辑状态下cell的缩进
    override func tableView(_ tableView: UITableView, shouldIndentWhileEditingRowAt indexPath: IndexPath) -> Bool { false }
}


//TodoTableVCDelegate
//反向传值
extension TodosTableVC: TodoTableVCDelegate{
    //增删改查-增
    func didAdd(name: String) {
        //添加数据
        todos.append(Todo(name: name, checked: false))
        saveData()   //本地化存储

        //根据最新数据更新视图
        tableView.insertRows(at: [IndexPath(row: todos.count - 1, section: 0)], with: .automatic)
    }

    //增删改查-改
    func didEdit(name: String) {
        //改数据
        todos[row].name = name
        saveData()   //本地化存储

        //根据最新数据更新视图

        //1.通过indexPath找cell,继而找到里面的todoLabel,然后改text
//        let indexPath = IndexPath(row: row, section: 0)
//        let cell = tableView.cellForRow(at: indexPath) as! TodoCell
//        cell.todoLabel.text = todos[row].name

        //2.刷新整个tableView(不用过度担心耗资源问题)
        tableView.reloadData()

    }
}
4.在查询数据的时候使用解码从本地数据中查询待办事项.
TodosTableVC:
import UIKit

//present和dismiss
//push和pop(压栈/入栈和出栈)

class TodosTableVC: UITableViewController {

    var todos: [Todo] = [
//        Todo(name: "学习Lebus的《iOS基础版》课程", checked: false),
//        Todo(name: "学习Lebus的《iOS进阶版》课程", checked: true),
//        Todo(name: "学习Lebus的《iOS仿小红书实战项目》课程", checked: false),
//        Todo(name: "学习Lebus的《iOS推送》课程", checked: false),
//        Todo(name: "学习Lebus的《iOS-SwiftUI》课程", checked: false)
    ]


    var row = 0

    override func viewDidLoad() {
        super.viewDidLoad()
        //print(todos)
        //isEditing = true //可手动修改isEditing

        //Uncomment the following line to display an Edit button in the navigation bar for this view controller.
        //左边的排序按钮-用于对待办事项重新排序
        editButtonItem.title = nil
        editButtonItem.image = pointIcon("arrow.up.arrow.down.circle.fill")
        navigationItem.leftBarButtonItem = editButtonItem

        //右边的加号按钮-用于添加待办事项
        navigationItem.rightBarButtonItem?.image = pointIcon("plus.circle.fill")

        //沙盒sandbox
        print(NSHomeDirectory())

        //根据key在沙盒中取data数据
        if let data = UserDefaults.standard.data(forKey: kTodosKey){
            //解码
            if let todos = try? JSONDecoder().decode([Todo].self, from: data){
                //想把数据从data类型解码成数组里边元素是Todo的类型
                self.todos = todos
            }else{
                print("解码失败")
            }
        }

    }

    //点下editButtonItem后调用
    override func setEditing(_ editing: Bool, animated: Bool) {
        super.setEditing(editing, animated: animated)

        if isEditing{
            editButtonItem.image = nil
            editButtonItem.title = "完成"
        }else{
            editButtonItem.title = nil
            editButtonItem.image = pointIcon("arrow.up.arrow.down.circle.fill")
        }
    }


    // MARK: - Navigation
    override func prepare(for segue: UIStoryboardSegue, sender: Any?) {
        let vc = segue.destination as! TodoTableVC
        vc.delegate = self

        if segue.identifier == kEditTodoID{
            let cell = sender as! TodoCell //sender就是用户点击的那个cell

            //1.cell-->indexPath
            row = tableView.indexPath(for: cell)!.row
            //2.indexPath-->cell(下述)
            //tableView.cellForRow(at: indexPath) as! TodoCell

            vc.name = todos[row].name //正向传值
        }
    }


}
启动测试:
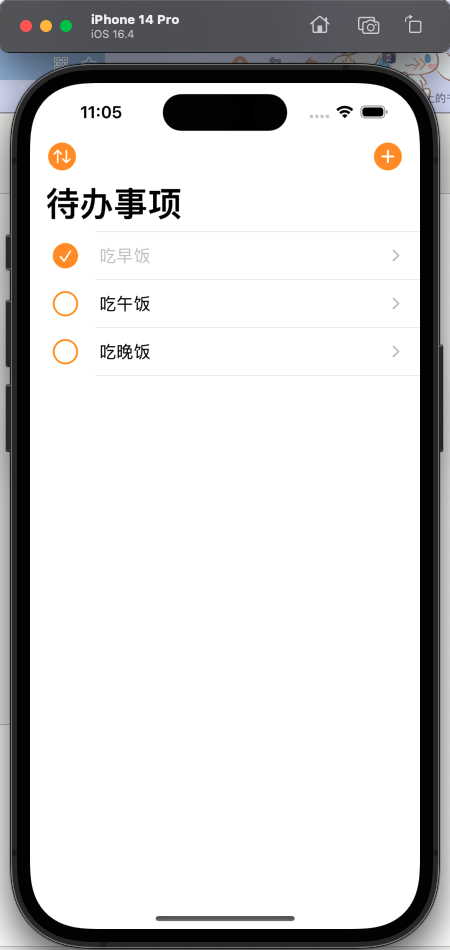
关闭应用,再次打开:
5.每次都直接覆盖存储,数据多了可能会影响系统性能.所以使用Core Data来提高效率.
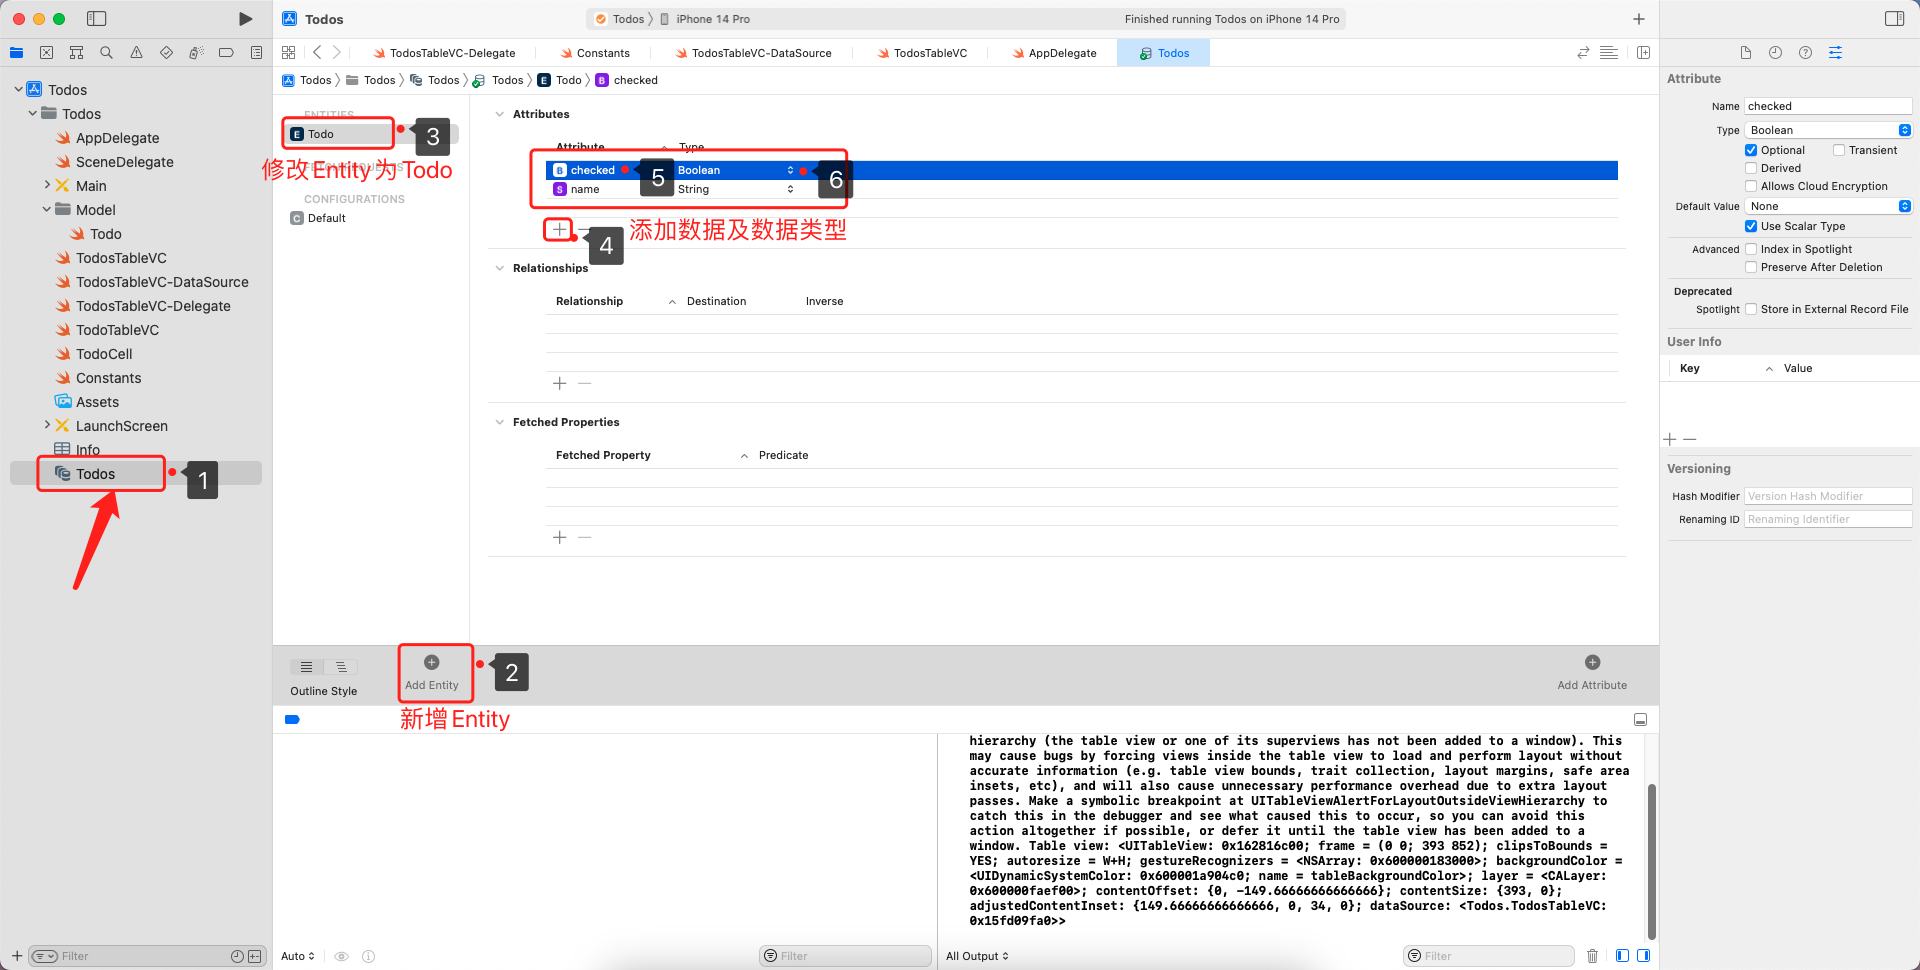
以前在新建项目的时候勾选了Core Data,所以系统为我们自动生成了DataModel.
配置Core Data:
这时Todo这个类就暂时不需要了.将它注释掉.
Todo:
import Foundation

//class Todo{
//    var name = ""
//    var checked = false
//}

//结构体-值类型
//struct Todo: Codable {
//    var name: String
//    var checked: Bool
////    init(name: String, checked: Bool){
////        self.name = name
////        self.checked = checked
////    }
//}
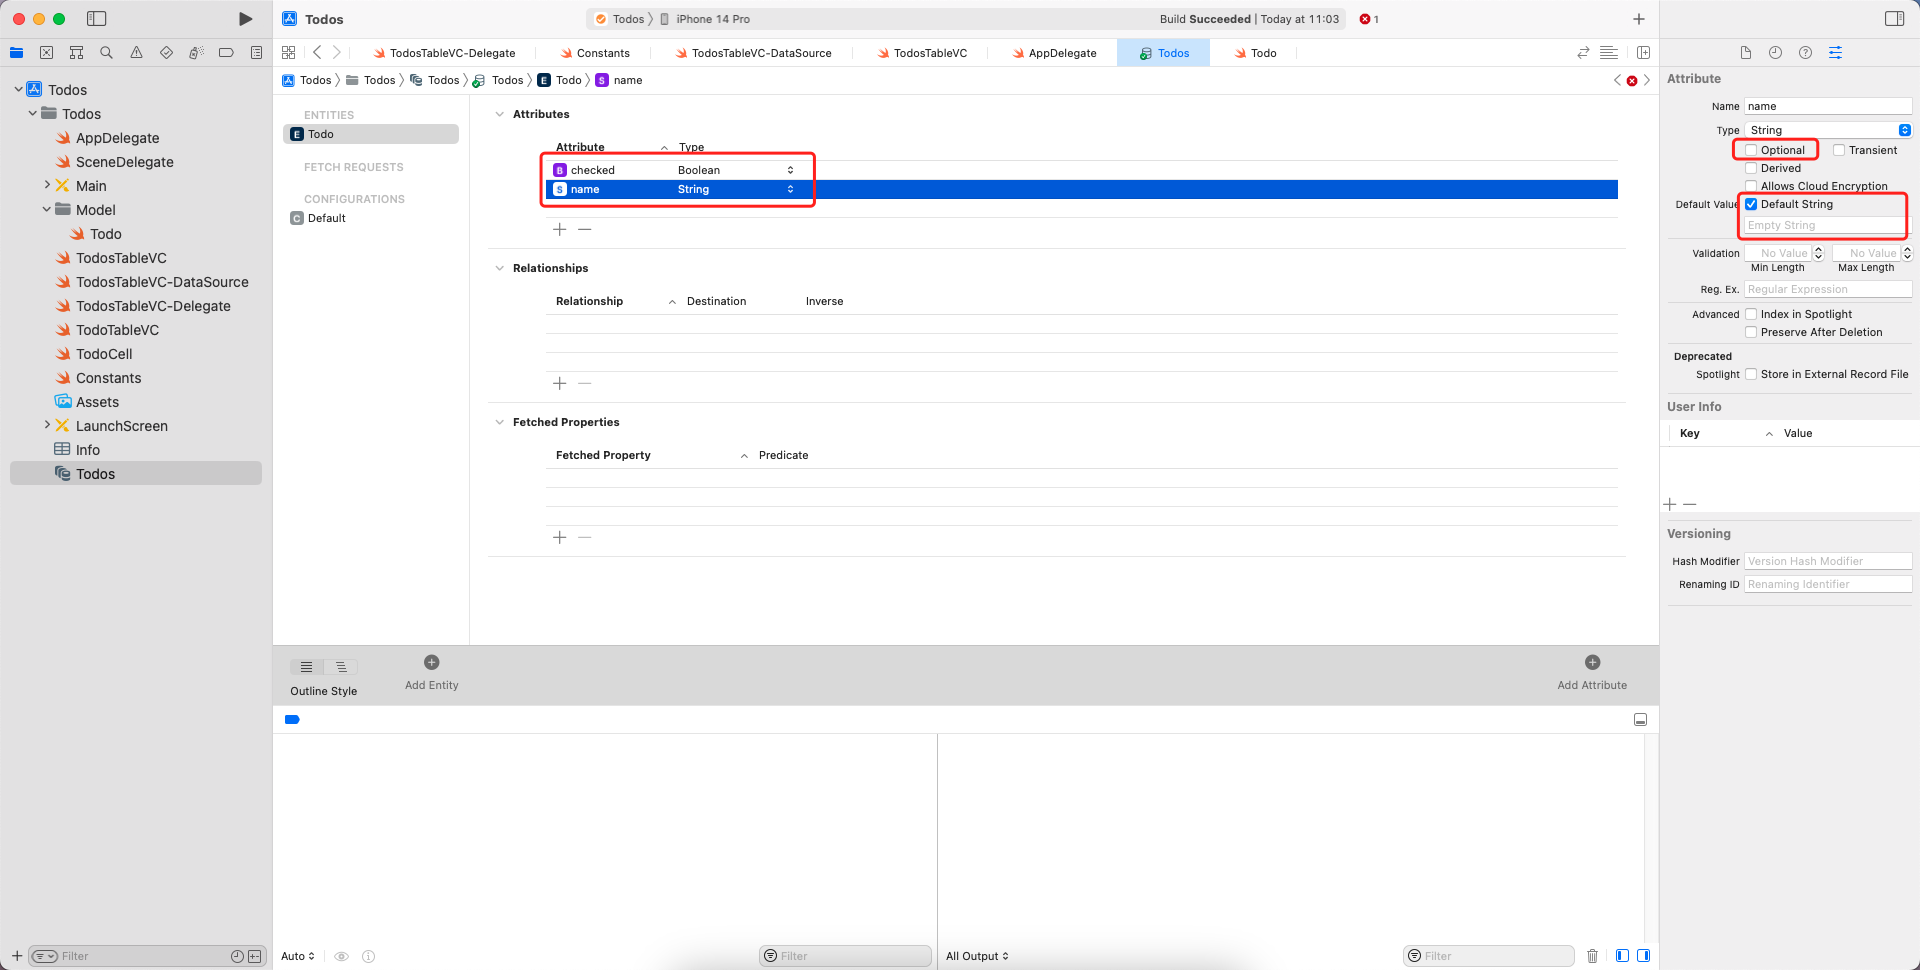
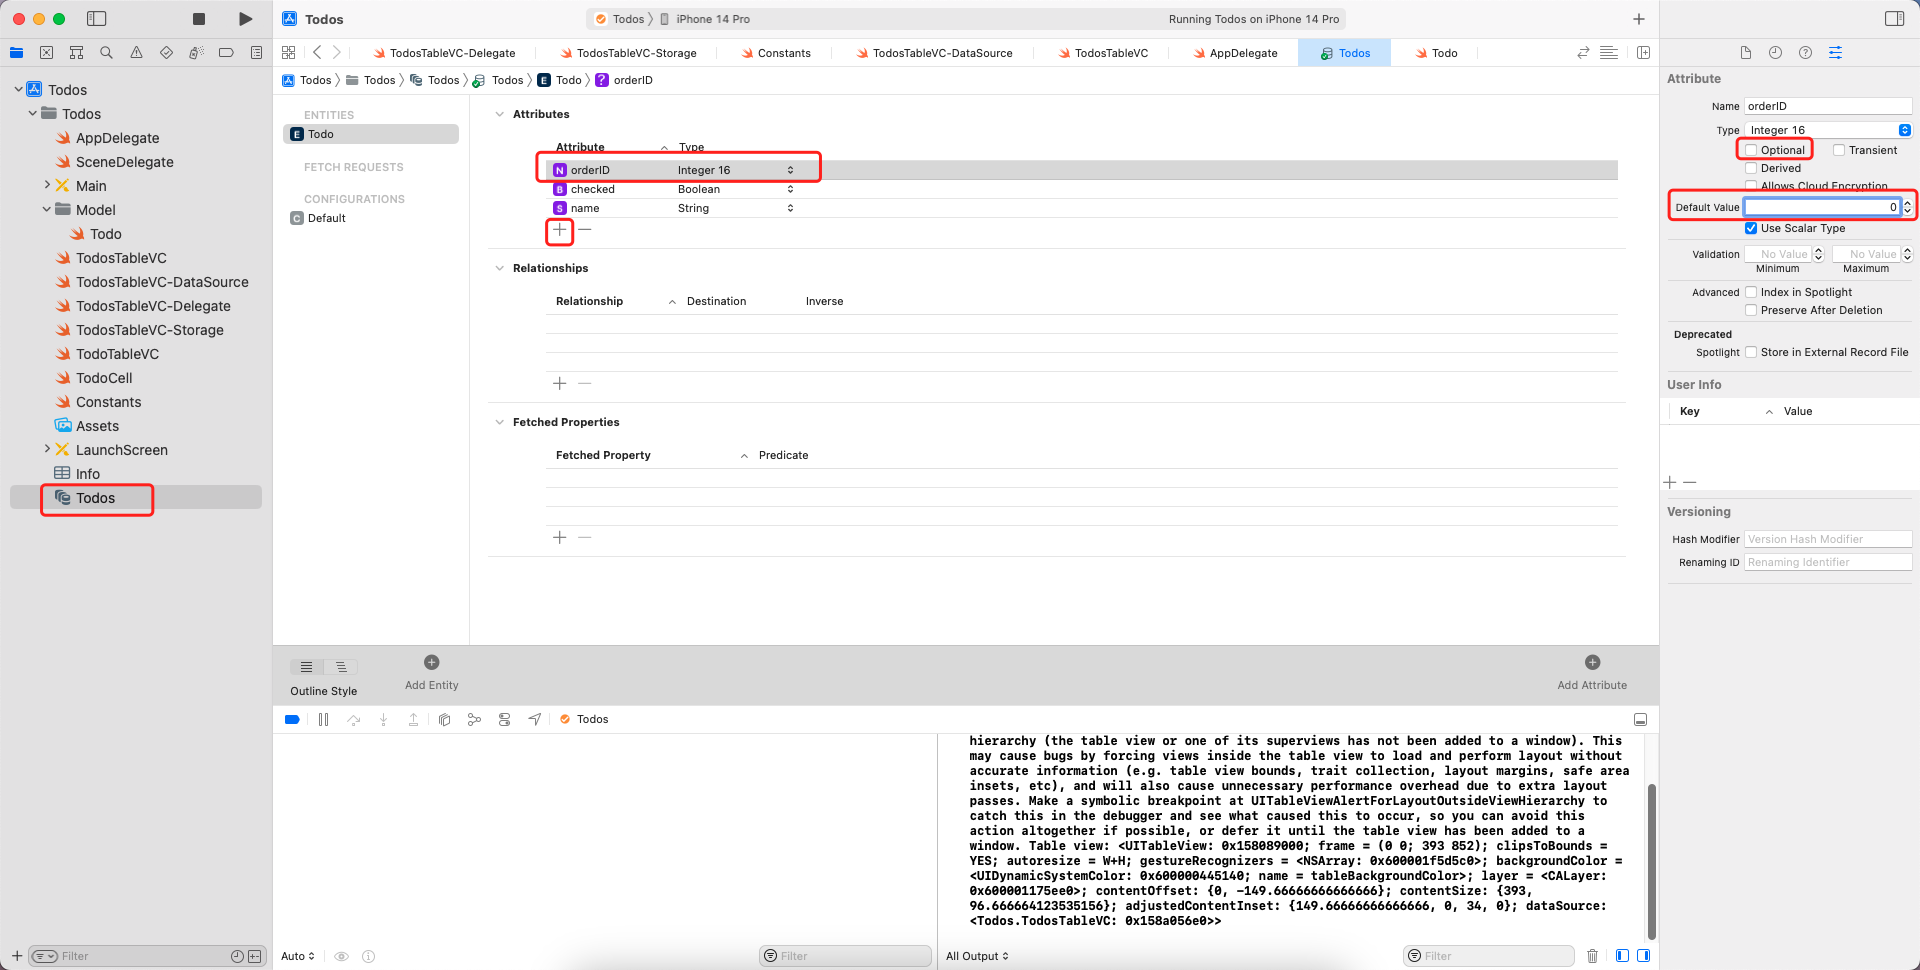
6.Todos的数据库添加操作.
将数据库中的name和checked都取消可选类型,设置默认值.
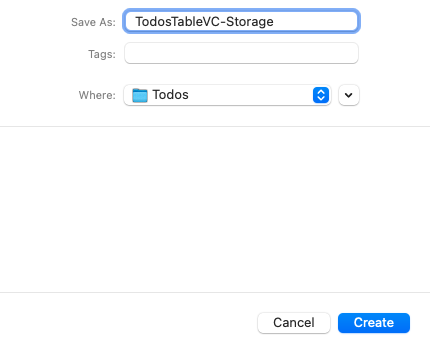
新建一个用于存放存储代码的swift文件.
修改新增部分代码.
TodosTableVC-Delegate:
import UIKit

//UITableViewDelegate
extension TodosTableVC{
    //当用户点击cell的时候调用
    override func tableView(_ tableView: UITableView, didSelectRowAt indexPath: IndexPath) {
        tableView.deselectRow(at: indexPath, animated: true) //取消选择cell以让底色迅速消失

//        找到storyboard上的vc
//        let vc = storyboard?.instantiateViewController(withIdentifier: kTodoTableVCID) as! TodoTableVC
//        用代码进行push跳转
//        navigationController?.pushViewController(vc, animated: true)
    }

    //自定义左滑删除按钮的文本
//    override func tableView(_ tableView: UITableView, titleForDeleteConfirmationButtonForRowAt indexPath: IndexPath) -> String? {
//        return "点击以删除"
//    }

    //编辑状态下cell左边的按钮-设置为none;因仍旧需要左滑删除功能,故在非编辑状态下仍需返回.delete
    override func tableView(_ tableView: UITableView, editingStyleForRowAt indexPath: IndexPath) -> UITableViewCell.EditingStyle {
        isEditing ? .none : .delete
    }
    //取消编辑状态下cell的缩进
    override func tableView(_ tableView: UITableView, shouldIndentWhileEditingRowAt indexPath: IndexPath) -> Bool { false }
}


//TodoTableVCDelegate
//反向传值
extension TodosTableVC: TodoTableVCDelegate{
    //增删改查-增
    func didAdd(name: String) {
        //添加数据
//        todos.append(Todo(name: name, checked: false))
//        saveData()   //本地化存储
        //修改内存中的数据,再将修改后的数据存到本地.
        let appDelegate = UIApplication.shared.delegate as! AppDelegate
        let context = appDelegate.persistentContainer.viewContext
        let todo = Todo(context: context)
        todo.name = name
        todos.append(todo)
        appDelegate.saveContext()

        //根据最新数据更新视图
        tableView.insertRows(at: [IndexPath(row: todos.count - 1, section: 0)], with: .automatic)
    }

    //增删改查-改
    func didEdit(name: String) {
        //改数据
        todos[row].name = name
        //saveData()   //本地化存储

        //根据最新数据更新视图

        //1.通过indexPath找cell,继而找到里面的todoLabel,然后改text
//        let indexPath = IndexPath(row: row, section: 0)
//        let cell = tableView.cellForRow(at: indexPath) as! TodoCell
//        cell.todoLabel.text = todos[row].name

        //2.刷新整个tableView(不用过度担心耗资源问题)
        tableView.reloadData()

    }
}
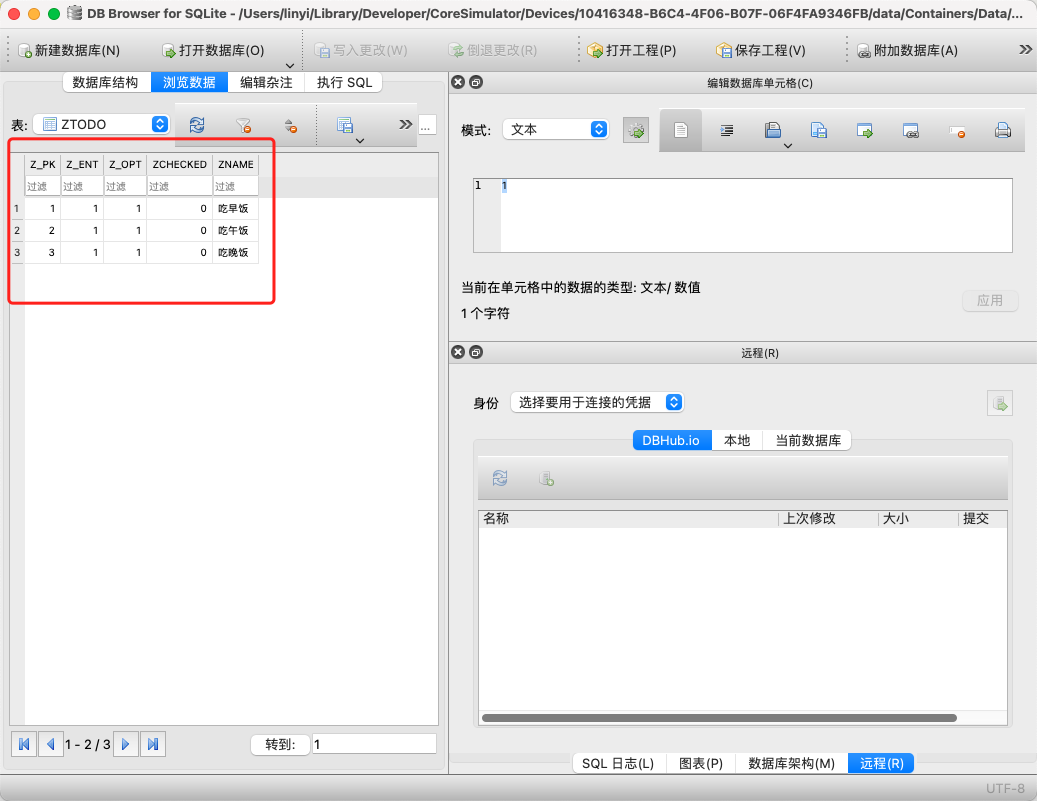
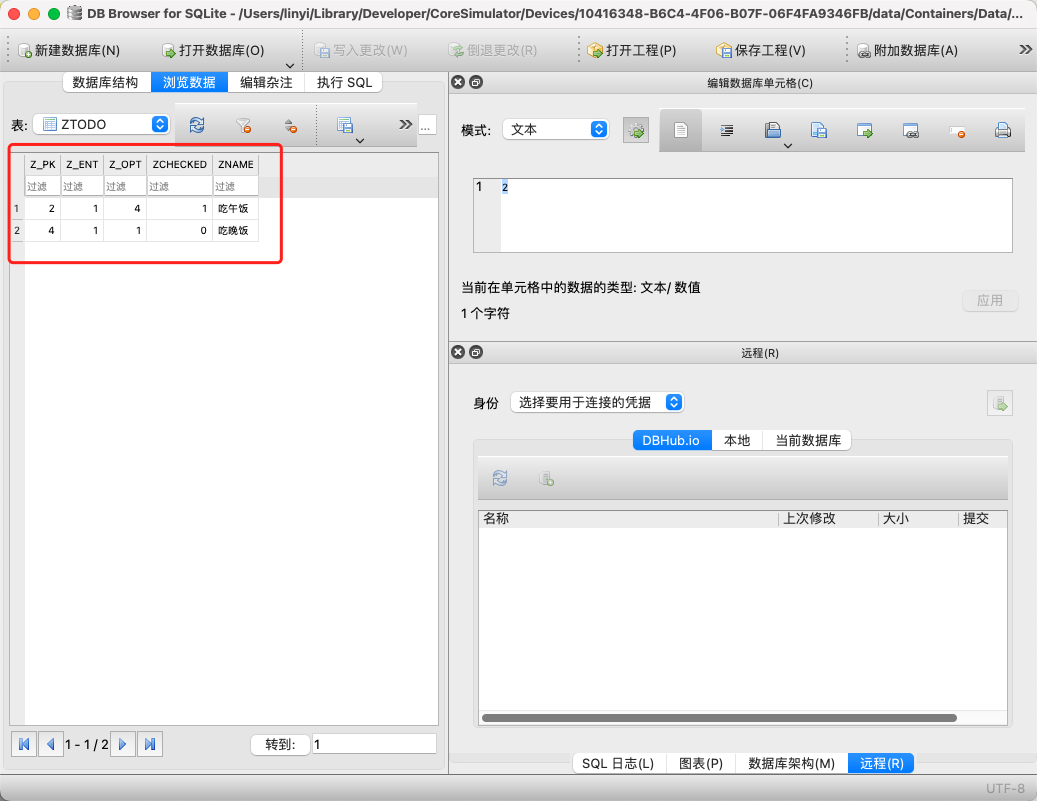
通过地址/Users/linyi/Library/Developer/CoreSimulator/Devices/10416348-B6C4-4F06-B07F-06F4FA9346FB/data/Containers/Data/Application/0B19CC42-A036-492E-9F77-AF56F9EF4071/Library/ApplicationSupport的Todos.sqlite查看数据库:
7.删除待办事项后更新本地数据库.
TodosTableVC-DataSource:
import UIKit

//UITableViewDataSource
extension TodosTableVC{

    //配置section的数量(不实现的话就相当于返回1)
    override func numberOfSections(in tableView: UITableView) -> Int { 1 }
    //配置row的数量
    override func tableView(_ tableView: UITableView, numberOfRowsInSection section: Int) -> Int { todos.count }
    //配置每个row里面显示什么内容
    override func tableView(_ tableView: UITableView, cellForRowAt indexPath: IndexPath) -> UITableViewCell {

        let cell = tableView.dequeueReusableCell(withIdentifier: kTodoCellID, for: indexPath) as! TodoCell

        //增删改查-查
        let checkBoxBtn = cell.checkBoxBtn!
        let todoLabel = cell.todoLabel!
        let initSelected = todos[indexPath.row].checked
//        系统自带布局(虽然storyboard里面没有相应的UI控件,但仍旧可以这样使用)
//        var contentConfiguration = cell.defaultContentConfiguration()
//        contentConfiguration.text = "昵称"
//        contentConfiguration.secondaryText = "个性签名"
//        contentConfiguration.image = UIImage(systemName: "star")
//        cell.contentConfiguration = contentConfiguration

        //配置初始数据
        checkBoxBtn.isSelected = initSelected
        todoLabel.text = todos[indexPath.row].name
        todoLabel.textColor = initSelected ? .tertiaryLabel : .label //三元运算符.等同于下面
//        if todos[indexPath.row].checked{
//            cell.todoLabel.textColor = .tertiaryLabel
//        }else{
//            cell.todoLabel.textColor = .label
//        }


        //增删改查-改
        //设置每个checkBoxBtn的tag值为当前的row,用于传值
        checkBoxBtn.tag = indexPath.row
        //添加点击事件,用户点击checkBoxBtn后会触发self下面的toggleCheck函数,并且系统会自动把本身(toggleCheck)作为参数传过去
        checkBoxBtn.addTarget(self, action: #selector(toggleCheck), for: .touchUpInside)

        return cell
    }


    //增删改查-删
    override func tableView(_ tableView: UITableView, commit editingStyle: UITableViewCell.EditingStyle, forRowAt indexPath: IndexPath) {
        //左滑删除
        if editingStyle == .delete {
            //删除本地中的数据
            context.delete(todos[indexPath.row])
            //删内存中的数据
            todos.remove(at: indexPath.row)
            appDelegate.saveContext()
            //saveData()  //本地化存储
            //根据最新数据更新视图
            tableView.reloadData()
        } else if editingStyle == .insert {
            // Create a new instance of the appropriate class, insert it into the array, and add a new row to the table view
        }
    }


    //增删改查-改(移动/重新排序)
    override func tableView(_ tableView: UITableView, moveRowAt fromIndexPath: IndexPath, to: IndexPath) {
//        Swift里数组元素的移动(重新排序)
//        var arr = [1,2,3,4]
//        arr.remove(at: 0) //arr --> [2,3,4]
//        arr.insert(1, at: 3) //arr --> [2,3,4,1]
//        print(arr)

        //改数据
        let todoToRemove = todos[fromIndexPath.row] //一定要在删除数组某个元素前取出,不然后面取会取不到
        todos.remove(at: fromIndexPath.row)
        todos.insert(todoToRemove, at: to.row)
        //print(todos)
        //saveData()   //本地化存储

        //系统自动更新视图(纯粹更新,不会调用DataSource)
        //但我们仍需刷新DataSource函数,因为要刷新indexPath,从而让用户点击CheckBox时数据能够准确
        tableView.reloadData()
    }
}


//监听函数
extension TodosTableVC{
    //用户点击checkBoxBtn触发
    @objc func toggleCheck(checkBoxBtn: UIButton){
        let row = checkBoxBtn.tag
        //修改数据
        todos[row].checked.toggle()
        //print("点击了第\(row + 1)行,todos变成了:",todos)
        //saveData()    //本地化存储
        //根据最新数据更新视图
        let checked = todos[row].checked
        checkBoxBtn.isSelected = checked
        let cell = tableView.cellForRow(at: IndexPath(row: row, section: 0)) as! TodoCell
        cell.todoLabel.textColor = checked ? .tertiaryLabel : .label
    }
}
8.编辑待办事项后更新本地数据库.
TodosTableVC-Delegate:
import UIKit

//UITableViewDelegate
extension TodosTableVC{
    //当用户点击cell的时候调用
    override func tableView(_ tableView: UITableView, didSelectRowAt indexPath: IndexPath) {
        tableView.deselectRow(at: indexPath, animated: true) //取消选择cell以让底色迅速消失

//        找到storyboard上的vc
//        let vc = storyboard?.instantiateViewController(withIdentifier: kTodoTableVCID) as! TodoTableVC
//        用代码进行push跳转
//        navigationController?.pushViewController(vc, animated: true)
    }

    //自定义左滑删除按钮的文本
//    override func tableView(_ tableView: UITableView, titleForDeleteConfirmationButtonForRowAt indexPath: IndexPath) -> String? {
//        return "点击以删除"
//    }

    //编辑状态下cell左边的按钮-设置为none;因仍旧需要左滑删除功能,故在非编辑状态下仍需返回.delete
    override func tableView(_ tableView: UITableView, editingStyleForRowAt indexPath: IndexPath) -> UITableViewCell.EditingStyle {
        isEditing ? .none : .delete
    }
    //取消编辑状态下cell的缩进
    override func tableView(_ tableView: UITableView, shouldIndentWhileEditingRowAt indexPath: IndexPath) -> Bool { false }
}


//TodoTableVCDelegate
//反向传值
extension TodosTableVC: TodoTableVCDelegate{
    //增删改查-增
    func didAdd(name: String) {
        //添加数据
//        todos.append(Todo(name: name, checked: false))
//        saveData()   //本地化存储
        //修改内存中的数据,再将修改后的数据存到本地.

        let todo = Todo(context: context)
        todo.name = name
        todos.append(todo)
        appDelegate.saveContext()

        //根据最新数据更新视图
        tableView.insertRows(at: [IndexPath(row: todos.count - 1, section: 0)], with: .automatic)
    }

    //增删改查-改
    func didEdit(name: String) {
        //改数据
        todos[row].name = name
        appDelegate.saveContext()
        //saveData()   //本地化存储

        //根据最新数据更新视图

        //1.通过indexPath找cell,继而找到里面的todoLabel,然后改text
//        let indexPath = IndexPath(row: row, section: 0)
//        let cell = tableView.cellForRow(at: indexPath) as! TodoCell
//        cell.todoLabel.text = todos[row].name

        //2.刷新整个tableView(不用过度担心耗资源问题)
        tableView.reloadData()

    }
}
TodosTableVC-DataSource:
import UIKit

//UITableViewDataSource
extension TodosTableVC{

    //配置section的数量(不实现的话就相当于返回1)
    override func numberOfSections(in tableView: UITableView) -> Int { 1 }
    //配置row的数量
    override func tableView(_ tableView: UITableView, numberOfRowsInSection section: Int) -> Int { todos.count }
    //配置每个row里面显示什么内容
    override func tableView(_ tableView: UITableView, cellForRowAt indexPath: IndexPath) -> UITableViewCell {

        let cell = tableView.dequeueReusableCell(withIdentifier: kTodoCellID, for: indexPath) as! TodoCell

        //增删改查-查
        let checkBoxBtn = cell.checkBoxBtn!
        let todoLabel = cell.todoLabel!
        let initSelected = todos[indexPath.row].checked
//        系统自带布局(虽然storyboard里面没有相应的UI控件,但仍旧可以这样使用)
//        var contentConfiguration = cell.defaultContentConfiguration()
//        contentConfiguration.text = "昵称"
//        contentConfiguration.secondaryText = "个性签名"
//        contentConfiguration.image = UIImage(systemName: "star")
//        cell.contentConfiguration = contentConfiguration

        //配置初始数据
        checkBoxBtn.isSelected = initSelected
        todoLabel.text = todos[indexPath.row].name
        todoLabel.textColor = initSelected ? .tertiaryLabel : .label //三元运算符.等同于下面
//        if todos[indexPath.row].checked{
//            cell.todoLabel.textColor = .tertiaryLabel
//        }else{
//            cell.todoLabel.textColor = .label
//        }


        //增删改查-改
        //设置每个checkBoxBtn的tag值为当前的row,用于传值
        checkBoxBtn.tag = indexPath.row
        //添加点击事件,用户点击checkBoxBtn后会触发self下面的toggleCheck函数,并且系统会自动把本身(toggleCheck)作为参数传过去
        checkBoxBtn.addTarget(self, action: #selector(toggleCheck), for: .touchUpInside)

        return cell
    }


    //增删改查-删
    override func tableView(_ tableView: UITableView, commit editingStyle: UITableViewCell.EditingStyle, forRowAt indexPath: IndexPath) {
        //左滑删除
        if editingStyle == .delete {
            //删除本地中的数据
            context.delete(todos[indexPath.row])
            //删内存中的数据
            todos.remove(at: indexPath.row)
            appDelegate.saveContext()
            //saveData()  //本地化存储
            //根据最新数据更新视图
            tableView.reloadData()
        } else if editingStyle == .insert {
            // Create a new instance of the appropriate class, insert it into the array, and add a new row to the table view
        }
    }


    //增删改查-改(移动/重新排序)
    override func tableView(_ tableView: UITableView, moveRowAt fromIndexPath: IndexPath, to: IndexPath) {
//        Swift里数组元素的移动(重新排序)
//        var arr = [1,2,3,4]
//        arr.remove(at: 0) //arr --> [2,3,4]
//        arr.insert(1, at: 3) //arr --> [2,3,4,1]
//        print(arr)

        //改数据
        let todoToRemove = todos[fromIndexPath.row] //一定要在删除数组某个元素前取出,不然后面取会取不到
        todos.remove(at: fromIndexPath.row)
        todos.insert(todoToRemove, at: to.row)
        //print(todos)
        //saveData()   //本地化存储

        //系统自动更新视图(纯粹更新,不会调用DataSource)
        //但我们仍需刷新DataSource函数,因为要刷新indexPath,从而让用户点击CheckBox时数据能够准确
        tableView.reloadData()
    }
}


//监听函数
extension TodosTableVC{
    //用户点击checkBoxBtn触发
    @objc func toggleCheck(checkBoxBtn: UIButton){
        let row = checkBoxBtn.tag
        //修改数据
        todos[row].checked.toggle()
        //print("点击了第\(row + 1)行,todos变成了:",todos)
        //saveData()    //本地化存储
        appDelegate.saveContext()
        //根据最新数据更新视图
        let checked = todos[row].checked
        checkBoxBtn.isSelected = checked
        let cell = tableView.cellForRow(at: IndexPath(row: row, section: 0)) as! TodoCell
        cell.todoLabel.textColor = checked ? .tertiaryLabel : .label
    }
}
9.从本地取出数据.
TodosTableVC:
import UIKit

//present和dismiss
//push和pop(压栈/入栈和出栈)

class TodosTableVC: UITableViewController {

    var todos: [Todo] = [
//        Todo(name: "学习Lebus的《iOS基础版》课程", checked: false),
//        Todo(name: "学习Lebus的《iOS进阶版》课程", checked: true),
//        Todo(name: "学习Lebus的《iOS仿小红书实战项目》课程", checked: false),
//        Todo(name: "学习Lebus的《iOS推送》课程", checked: false),
//        Todo(name: "学习Lebus的《iOS-SwiftUI》课程", checked: false)
    ]


    var row = 0

    override func viewDidLoad() {
        super.viewDidLoad()
        //print(todos)
        //isEditing = true //可手动修改isEditing

        //Uncomment the following line to display an Edit button in the navigation bar for this view controller.
        //左边的排序按钮-用于对待办事项重新排序
        editButtonItem.title = nil
        editButtonItem.image = pointIcon("arrow.up.arrow.down.circle.fill")
        navigationItem.leftBarButtonItem = editButtonItem

        //右边的加号按钮-用于添加待办事项
        navigationItem.rightBarButtonItem?.image = pointIcon("plus.circle.fill")

        //沙盒sandbox
        print(NSHomeDirectory())

//        //根据key在沙盒中取data数据
//        if let data = UserDefaults.standard.data(forKey: kTodosKey){
//            //解码
//            if let todos = try? JSONDecoder().decode([Todo].self, from: data){
//                //想把数据从data类型解码成数组里边元素是Todo的类型
//                self.todos = todos
//            }else{
//                print("解码失败")
//            }
//        }
        if let todos = try? context.fetch(Todo.fetchRequest()){
            self.todos = todos
        }else{
            print("从SQLite里面取数值失败了")
        }
    }

    //点下editButtonItem后调用
    override func setEditing(_ editing: Bool, animated: Bool) {
        super.setEditing(editing, animated: animated)

        if isEditing{
            editButtonItem.image = nil
            editButtonItem.title = "完成"
        }else{
            editButtonItem.title = nil
            editButtonItem.image = pointIcon("arrow.up.arrow.down.circle.fill")
        }
    }


    // MARK: - Navigation
    override func prepare(for segue: UIStoryboardSegue, sender: Any?) {
        let vc = segue.destination as! TodoTableVC
        vc.delegate = self

        if segue.identifier == kEditTodoID{
            let cell = sender as! TodoCell //sender就是用户点击的那个cell

            //1.cell-->indexPath
            row = tableView.indexPath(for: cell)!.row
            //2.indexPath-->cell(下述)
            //tableView.cellForRow(at: indexPath) as! TodoCell

            vc.name = todos[row].name //正向传值
        }
    }


}
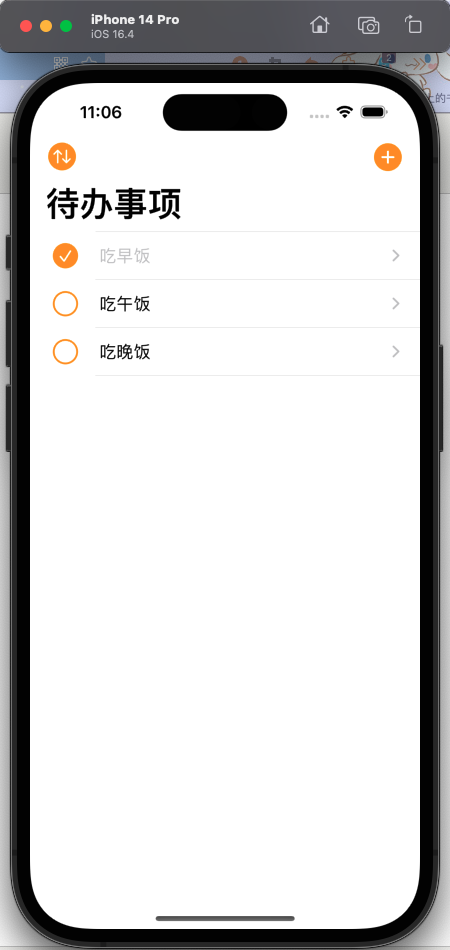
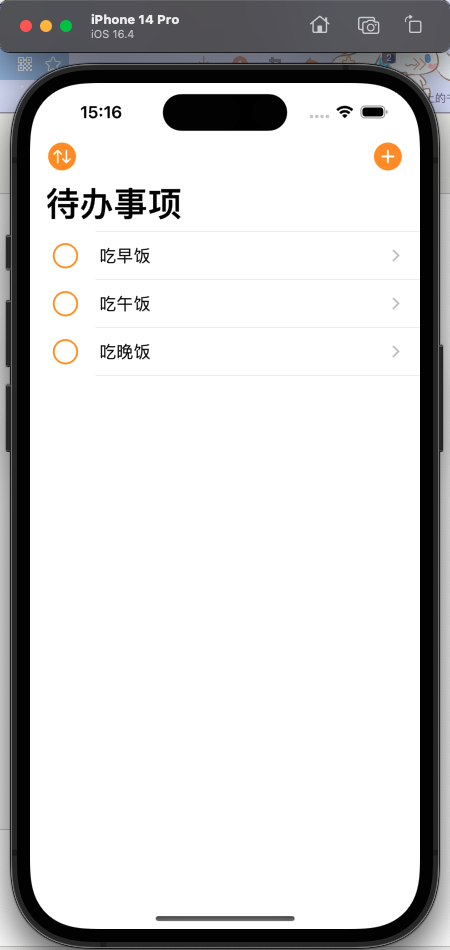
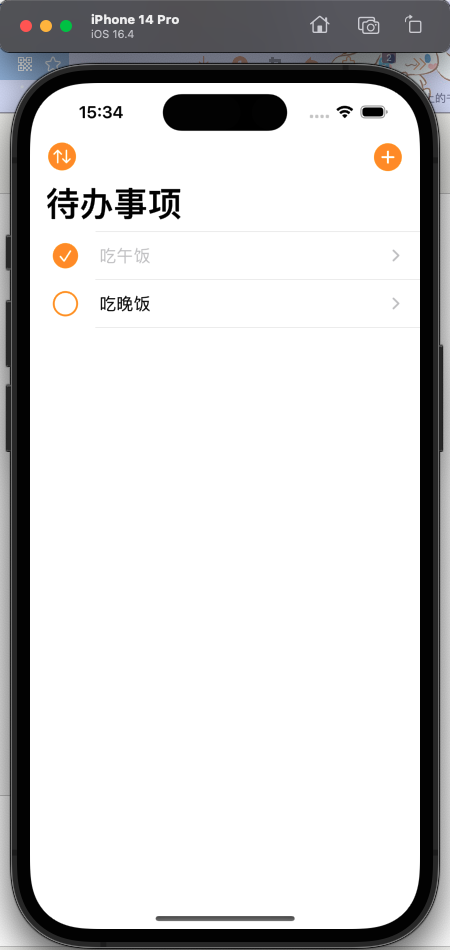
启动测试:
10.移动待办事项:主键+Int16+添加属性时的自动迁移.
在Entity中追加一个属性-排序ID.
TodosTableVC-DataSource:
import UIKit

//UITableViewDataSource
extension TodosTableVC{

    //配置section的数量(不实现的话就相当于返回1)
    override func numberOfSections(in tableView: UITableView) -> Int { 1 }
    //配置row的数量
    override func tableView(_ tableView: UITableView, numberOfRowsInSection section: Int) -> Int { todos.count }
    //配置每个row里面显示什么内容
    override func tableView(_ tableView: UITableView, cellForRowAt indexPath: IndexPath) -> UITableViewCell {

        let cell = tableView.dequeueReusableCell(withIdentifier: kTodoCellID, for: indexPath) as! TodoCell

        todos[indexPath.row].orderID = Int16(indexPath.row)
     appDelegate.saveContext()

        //增删改查-查
        let checkBoxBtn = cell.checkBoxBtn!
        let todoLabel = cell.todoLabel!
        let initSelected = todos[indexPath.row].checked
//        系统自带布局(虽然storyboard里面没有相应的UI控件,但仍旧可以这样使用)
//        var contentConfiguration = cell.defaultContentConfiguration()
//        contentConfiguration.text = "昵称"
//        contentConfiguration.secondaryText = "个性签名"
//        contentConfiguration.image = UIImage(systemName: "star")
//        cell.contentConfiguration = contentConfiguration

        //配置初始数据
        checkBoxBtn.isSelected = initSelected
        todoLabel.text = todos[indexPath.row].name
        todoLabel.textColor = initSelected ? .tertiaryLabel : .label //三元运算符.等同于下面
//        if todos[indexPath.row].checked{
//            cell.todoLabel.textColor = .tertiaryLabel
//        }else{
//            cell.todoLabel.textColor = .label
//        }


        //增删改查-改
        //设置每个checkBoxBtn的tag值为当前的row,用于传值
        checkBoxBtn.tag = indexPath.row
        //添加点击事件,用户点击checkBoxBtn后会触发self下面的toggleCheck函数,并且系统会自动把本身(toggleCheck)作为参数传过去
        checkBoxBtn.addTarget(self, action: #selector(toggleCheck), for: .touchUpInside)

        return cell
    }


    //增删改查-删
    override func tableView(_ tableView: UITableView, commit editingStyle: UITableViewCell.EditingStyle, forRowAt indexPath: IndexPath) {
        //左滑删除
        if editingStyle == .delete {
            //删除本地中的数据
            context.delete(todos[indexPath.row])
            //删内存中的数据
            todos.remove(at: indexPath.row)
            appDelegate.saveContext()
            //saveData()  //本地化存储
            //根据最新数据更新视图
            tableView.reloadData()
        } else if editingStyle == .insert {
            // Create a new instance of the appropriate class, insert it into the array, and add a new row to the table view
        }
    }


    //增删改查-改(移动/重新排序)
    override func tableView(_ tableView: UITableView, moveRowAt fromIndexPath: IndexPath, to: IndexPath) {
//        Swift里数组元素的移动(重新排序)
//        var arr = [1,2,3,4]
//        arr.remove(at: 0) //arr --> [2,3,4]
//        arr.insert(1, at: 3) //arr --> [2,3,4,1]
//        print(arr)

        //改数据
        let todoToRemove = todos[fromIndexPath.row] //一定要在删除数组某个元素前取出,不然后面取会取不到
        todos.remove(at: fromIndexPath.row)
        todos.insert(todoToRemove, at: to.row)
        //print(todos)
        //saveData()   //本地化存储

        //系统自动更新视图(纯粹更新,不会调用DataSource)
        //但我们仍需刷新DataSource函数,因为要刷新indexPath,从而让用户点击CheckBox时数据能够准确
        tableView.reloadData()
    }
}


//监听函数
extension TodosTableVC{
    //用户点击checkBoxBtn触发
    @objc func toggleCheck(checkBoxBtn: UIButton){
        let row = checkBoxBtn.tag
        //修改数据
        todos[row].checked.toggle()
        //print("点击了第\(row + 1)行,todos变成了:",todos)
        //saveData()    //本地化存储
        appDelegate.saveContext()
        //根据最新数据更新视图
        let checked = todos[row].checked
        checkBoxBtn.isSelected = checked
        let cell = tableView.cellForRow(at: IndexPath(row: row, section: 0)) as! TodoCell
        cell.todoLabel.textColor = checked ? .tertiaryLabel : .label
    }
}
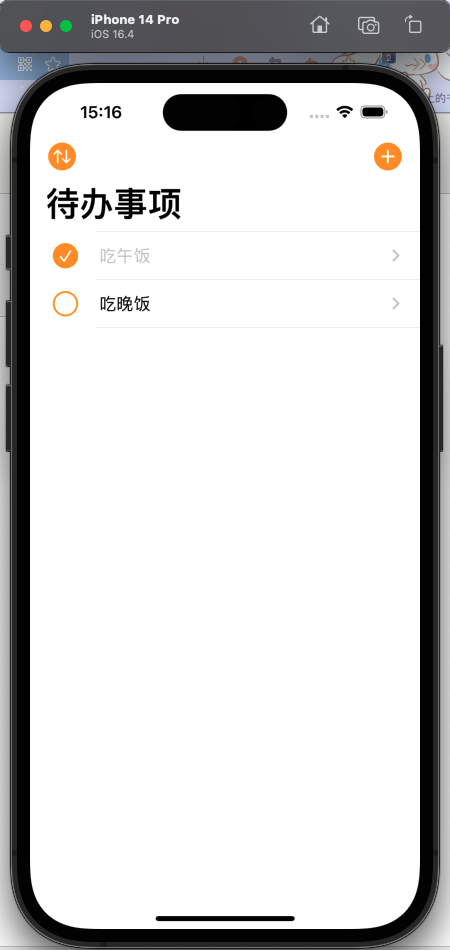
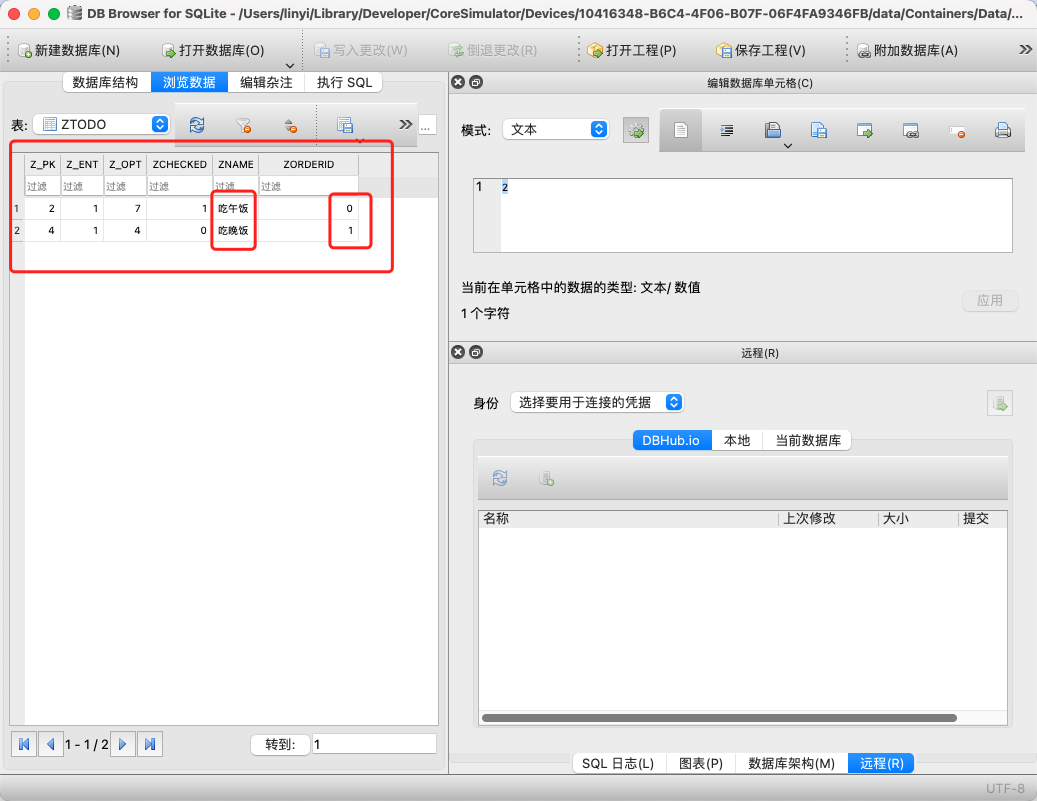
测试:

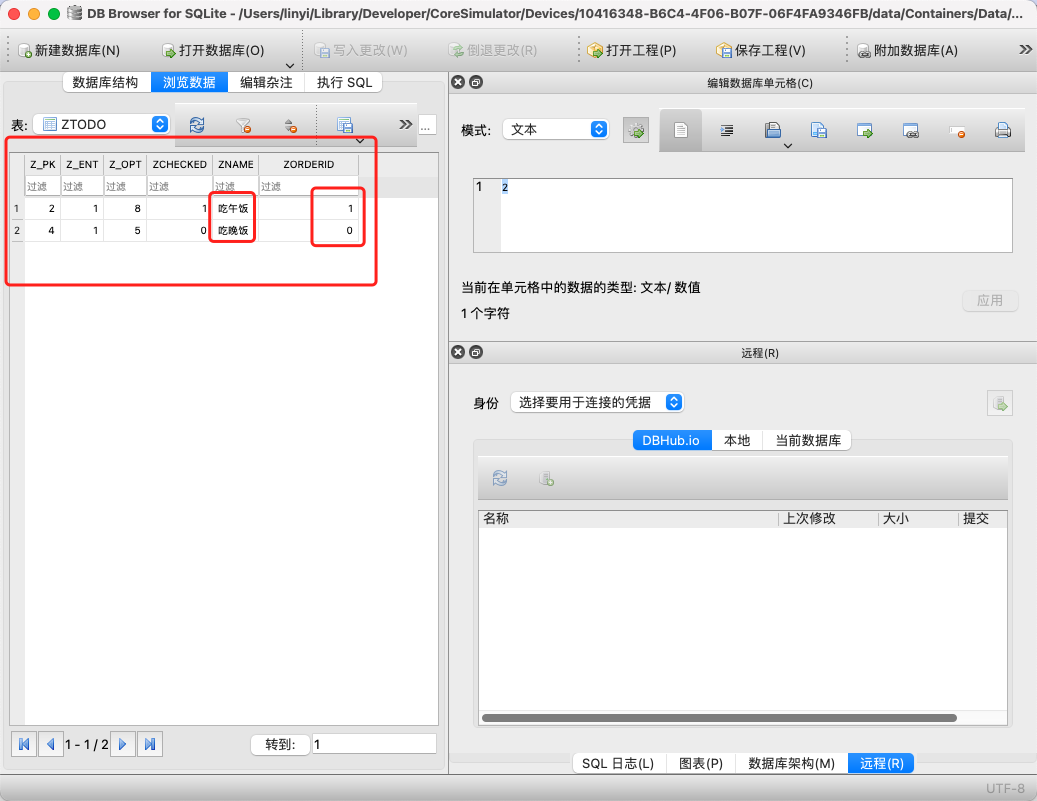
11.首次进入App首页时按照orderID从小到大的顺序进行排序.
TodosTableVC:
import UIKit

//present和dismiss
//push和pop(压栈/入栈和出栈)

class TodosTableVC: UITableViewController {

    var todos: [Todo] = [
//        Todo(name: "学习Lebus的《iOS基础版》课程", checked: false),
//        Todo(name: "学习Lebus的《iOS进阶版》课程", checked: true),
//        Todo(name: "学习Lebus的《iOS仿小红书实战项目》课程", checked: false),
//        Todo(name: "学习Lebus的《iOS推送》课程", checked: false),
//        Todo(name: "学习Lebus的《iOS-SwiftUI》课程", checked: false)
    ]


    var row = 0

    override func viewDidLoad() {
        super.viewDidLoad()
        //print(todos)
        //isEditing = true //可手动修改isEditing

        //Uncomment the following line to display an Edit button in the navigation bar for this view controller.
        //左边的排序按钮-用于对待办事项重新排序
        editButtonItem.title = nil
        editButtonItem.image = pointIcon("arrow.up.arrow.down.circle.fill")
        navigationItem.leftBarButtonItem = editButtonItem

        //右边的加号按钮-用于添加待办事项
        navigationItem.rightBarButtonItem?.image = pointIcon("plus.circle.fill")

        //沙盒sandbox
        print(NSHomeDirectory())

//        //根据key在沙盒中取data数据
//        if let data = UserDefaults.standard.data(forKey: kTodosKey){
//            //解码
//            if let todos = try? JSONDecoder().decode([Todo].self, from: data){
//                //想把数据从data类型解码成数组里边元素是Todo的类型
//                self.todos = todos
//            }else{
//                print("解码失败")
//            }
//        }
        //指定排序规则
        let request = Todo.fetchRequest()
        //根据orderID的顺序进行升序排列.
        request.sortDescriptors = [NSSortDescriptor(key: "orderID", ascending: true)]

        if let todos = try? context.fetch(request){
            self.todos = todos
        }else{
            print("从SQLite里面取数值失败了")
        }
    }

    //点下editButtonItem后调用
    override func setEditing(_ editing: Bool, animated: Bool) {
        super.setEditing(editing, animated: animated)

        if isEditing{
            editButtonItem.image = nil
            editButtonItem.title = "完成"
        }else{
            editButtonItem.title = nil
            editButtonItem.image = pointIcon("arrow.up.arrow.down.circle.fill")
        }
    }


    // MARK: - Navigation
    override func prepare(for segue: UIStoryboardSegue, sender: Any?) {
        let vc = segue.destination as! TodoTableVC
        vc.delegate = self

        if segue.identifier == kEditTodoID{
            let cell = sender as! TodoCell //sender就是用户点击的那个cell

            //1.cell-->indexPath
            row = tableView.indexPath(for: cell)!.row
            //2.indexPath-->cell(下述)
            //tableView.cellForRow(at: indexPath) as! TodoCell

            vc.name = todos[row].name //正向传值
        }
    }


}
启动测试: