目录
- 1. 下载harbor离线安装包
- 2. 解压harbor安装包
- 3. 编辑harbor配置文件
- 4. 编辑docker配置文件
- 5. 安装docker-compose
- 6. 运行安装脚本
- 7. 访问harbor网页端
- 8. 登录harbor
- 9. 推送docker镜像到harbor
1. 下载harbor离线安装包
v1.10.9
v2.3.4
v2.3.5
v2.4.1
wget https://github.com/goharbor/harbor/releases/download/v1.10.9/harbor-offline-installer-v1.10.9.tgz
2. 解压harbor安装包
tar xvf harbor-offline-installer-v1.10.9.tgz -C /usr/local/

3. 编辑harbor配置文件
vim /usr/local/harbor/harbor.yml

4. 编辑docker配置文件
vim /etc/docker/daemon.json
然后执行下面命令重启docker服务
sudo systemctl daemon-reload
sudo systemctl restart docker
{
             "registry-mirrors": [
                              "http://f1361db2.m.daocloud.io","https://6drkwgha.mirror.aliyuncs.com"
                                   ],
             "insecure-registries":["192.168.227.57:5000","192.168.227.57:80"]
                                         }
5. 安装docker-compose
// 下载docker-compose(下载到/usr/local/bin/文件夹下即可使用)
curl -L https://get.daocloud.io/docker/compose/releases/download/1.29.2/docker-compose-`uname -s`-`uname -m` > /usr/local/bin/docker-compose
// 修改docker-compose文件的权限
chmod 777 /usr/local/bin/docker-compose
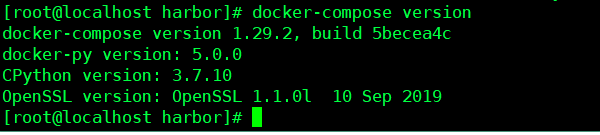
//执行docker-compose version命令,显示如下版本说明docker-compose安装成功
6. 运行安装脚本
/usr/local/harbor/install.sh  --with-clair --with-chartmuseum
注意:2.+版本需要去除--with-clair这个参数
[root@localhost harbor]# /usr/local/harbor/install.sh  --with-clair --with-chartmuseum

[Step 0]: checking if docker is installed ...

Note: docker version: 20.10.12

[Step 1]: checking docker-compose is installed ...

Note: docker-compose version: 1.29.2

[Step 2]: loading Harbor images ...
Loaded image: goharbor/harbor-core:v1.10.9
Loaded image: goharbor/harbor-jobservice:v1.10.9
Loaded image: goharbor/notary-signer-photon:v1.10.9
Loaded image: goharbor/nginx-photon:v1.10.9
Loaded image: goharbor/chartmuseum-photon:v1.10.9
Loaded image: goharbor/registry-photon:v1.10.9
Loaded image: goharbor/clair-photon:v1.10.9
Loaded image: goharbor/clair-adapter-photon:v1.10.9
Loaded image: goharbor/prepare:v1.10.9
Loaded image: goharbor/harbor-portal:v1.10.9
Loaded image: goharbor/harbor-db:v1.10.9
Loaded image: goharbor/notary-server-photon:v1.10.9
Loaded image: goharbor/harbor-log:v1.10.9
Loaded image: goharbor/harbor-registryctl:v1.10.9
Loaded image: goharbor/redis-photon:v1.10.9


[Step 3]: preparing environment ...

[Step 4]: preparing harbor configs ...
prepare base dir is set to /usr/local/harbor
/usr/src/app/utils/configs.py:100: YAMLLoadWarning: calling yaml.load() without Loader=... is deprecated, as the default Loader is unsafe. Please read https://msg.pyyaml.org/load for full details.
  configs = yaml.load(f)
WARNING:root:WARNING: HTTP protocol is insecure. Harbor will deprecate http protocol in the future. Please make sure to upgrade to https
/usr/src/app/utils/configs.py:90: YAMLLoadWarning: calling yaml.load() without Loader=... is deprecated, as the default Loader is unsafe. Please read https://msg.pyyaml.org/load for full details.
  versions = yaml.load(f)
Clearing the configuration file: /config/log/logrotate.conf
Clearing the configuration file: /config/log/rsyslog_docker.conf
Clearing the configuration file: /config/nginx/nginx.conf
Clearing the configuration file: /config/core/env
Clearing the configuration file: /config/core/app.conf
Clearing the configuration file: /config/registry/config.yml
Clearing the configuration file: /config/registryctl/env
Clearing the configuration file: /config/registryctl/config.yml
Clearing the configuration file: /config/db/env
Clearing the configuration file: /config/jobservice/env
Clearing the configuration file: /config/jobservice/config.yml
Clearing the configuration file: /config/clair/postgresql-init.d/README.md
Clearing the configuration file: /config/clair/postgres_env
Clearing the configuration file: /config/clair/config.yaml
Clearing the configuration file: /config/clair/clair_env
Clearing the configuration file: /config/clair-adapter/env
Clearing the configuration file: /config/chartserver/env
Generated configuration file: /config/log/logrotate.conf
Generated configuration file: /config/log/rsyslog_docker.conf
Generated configuration file: /config/nginx/nginx.conf
Generated configuration file: /config/core/env
Generated configuration file: /config/core/app.conf
Generated configuration file: /config/registry/config.yml
Generated configuration file: /config/registryctl/env
Generated configuration file: /config/db/env
Generated configuration file: /config/jobservice/env
Generated configuration file: /config/jobservice/config.yml
loaded secret from file: /secret/keys/secretkey
Copying offline data file for clair DB
Generated configuration file: /config/clair/postgres_env
Generated configuration file: /config/clair/config.yaml
Generated configuration file: /config/clair/clair_env
Generated configuration file: /config/clair-adapter/env
Generated configuration file: /config/chartserver/env
Generated configuration file: /compose_location/docker-compose.yml
Clean up the input dir


[Step 5]: starting Harbor ...
Creating harbor-log ... done
Creating harbor-db     ... done
Creating redis         ... done
Creating registry      ... done
Creating harbor-portal ... done
Creating chartmuseum   ... done
Creating registryctl   ... done
Creating clair         ... done
Creating harbor-core   ... done
Creating clair-adapter ... done
Creating harbor-jobservice ... done
Creating nginx             ... done
✔ ----Harbor has been installed and started successfully.----
7. 访问harbor网页端
访问地址:http://192.168.227.57/harbor
默认管理员admin ;密码 Harbor12345

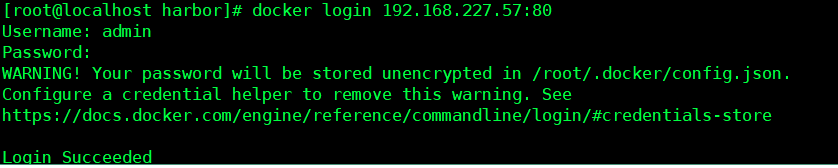
8. 登录harbor
docker login 192.168.227.57:80
默认管理员admin ;密码 Harbor12345
9. 推送docker镜像到harbor
[root@localhost ~]# docker tag e77d7ce2134c 192.168.227.57:80/jamysong/mariadb:10.3
[root@localhost ~]# docker push 192.168.227.57:80/jamysong/mariadb:10.3
The push refers to repository [192.168.227.57:80/jamysong/mariadb]
f5d31ca48d87: Pushed
2b4d61b5a22b: Pushed
d92e0331c7a2: Pushed
6627237e4074: Pushed
672465781193: Pushed
6c649bbdd7d6: Pushed
286a90349ea9: Pushed
eb3b55e3972c: Pushed
8f2689356f7c: Pushed
657a7983a5d3: Pushed
9f54eef41275: Pushed
10.3: digest: sha256:cd33a9afb2e44071e6bb3aee07a3552ce99b350f4bdcff7673bc568dd32160e9 size: 2619
看看从本地推送到harbor的镜像

本文内容由网友自发贡献,版权归原作者所有,本站不承担相应法律责任。如您发现有涉嫌抄袭侵权的内容,请联系:hwhale#tublm.com(使用前将#替换为@)