环境搭建可查看Python人脸识别微笑检测
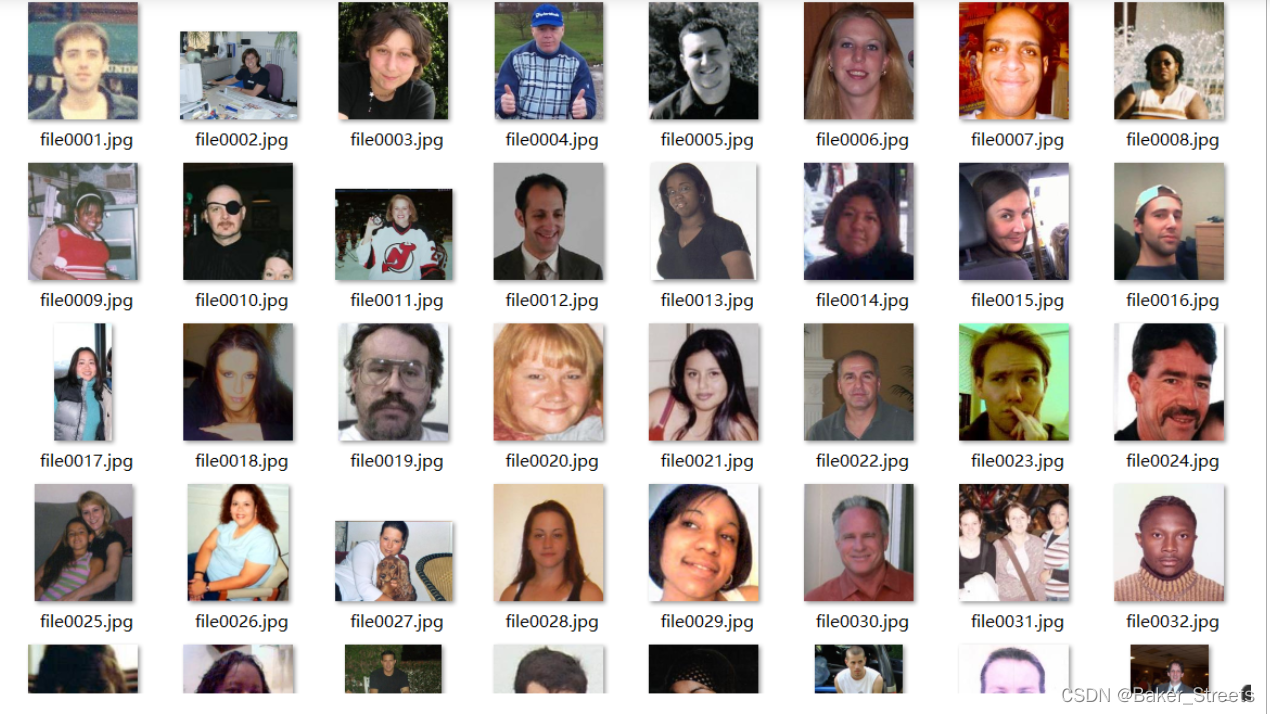
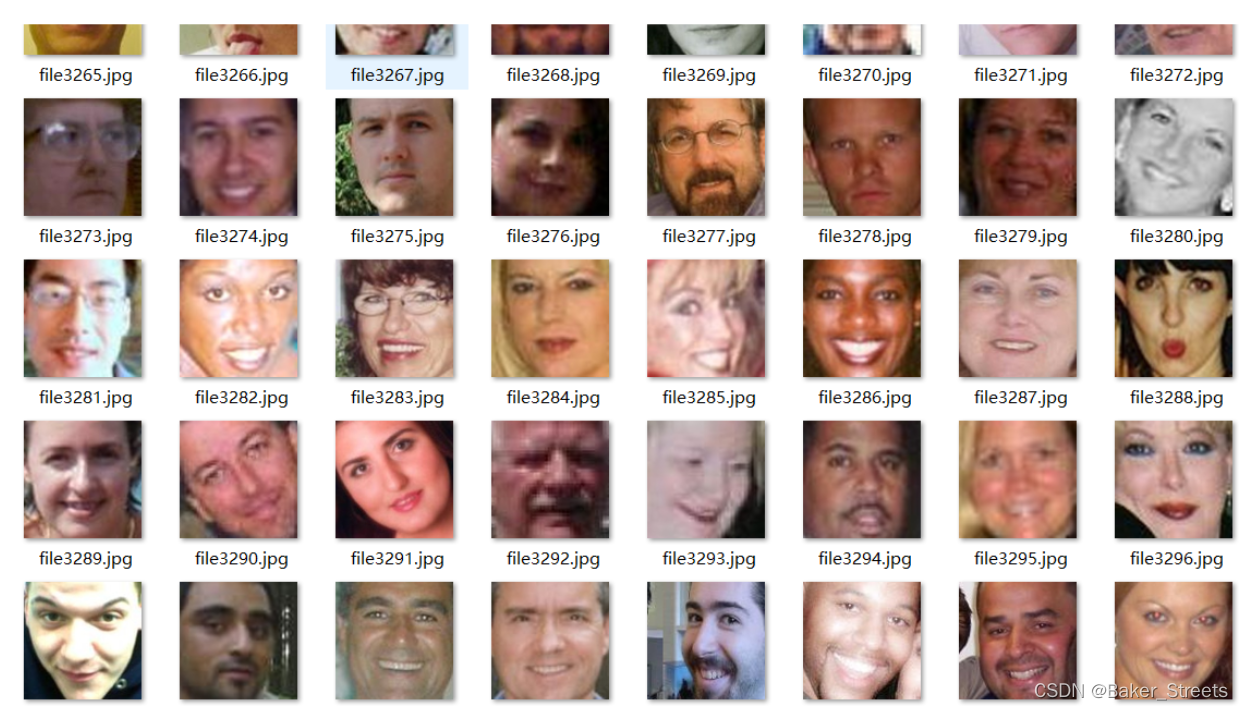
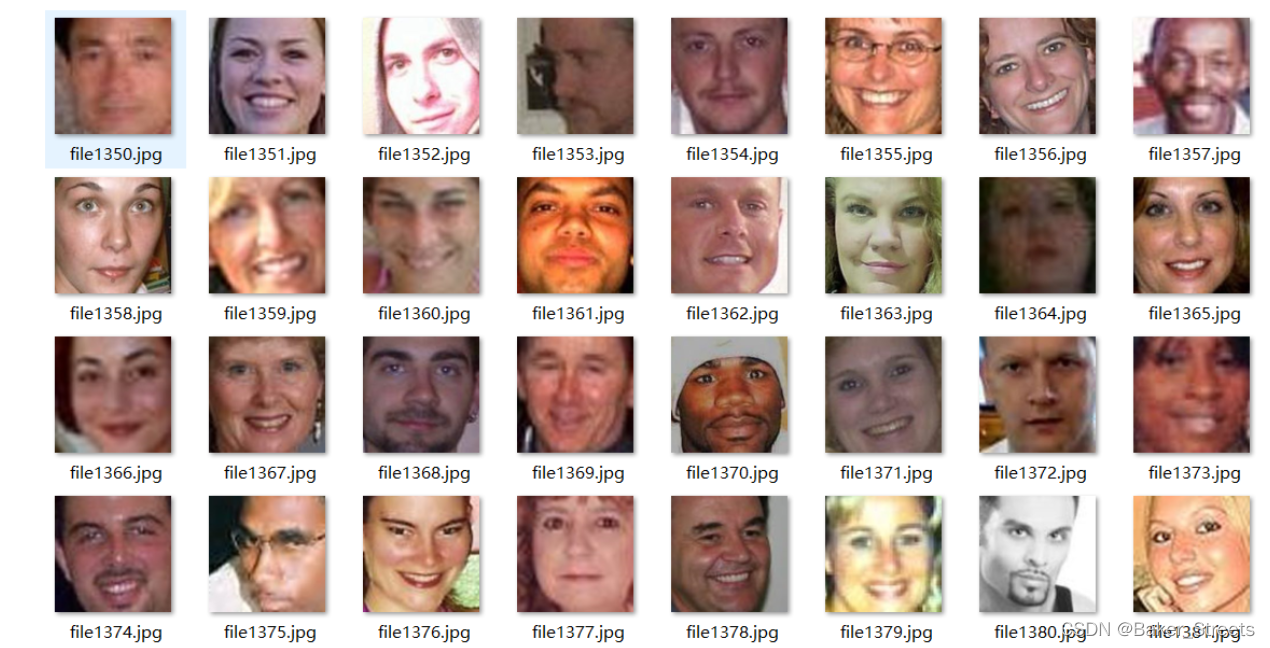
数据集可在https://inc.ucsd.edu/mplab/wordpress/index.html%3Fp=398.html获取
数据如下:
一、图片预处理
import dlib         # 人脸识别的库dlib
import numpy as np  # 数据处理的库numpy
import cv2          # 图像处理的库OpenCv
import os

# dlib预测器
detector = dlib.get_frontal_face_detector()
predictor = dlib.shape_predictor('shape_predictor_68_face_landmarks.dat')

# 读取图像的路径
path_read = ".\ImageFiles\\files"
num=0
for file_name in os.listdir(path_read):
	#aa是图片的全路径
    aa=(path_read +"/"+file_name)
    #读入的图片的路径中含非英文
    img=cv2.imdecode(np.fromfile(aa, dtype=np.uint8), cv2.IMREAD_UNCHANGED)
    #获取图片的宽高
    img_shape=img.shape
    img_height=img_shape[0]
    img_width=img_shape[1]

    # 用来存储生成的单张人脸的路径
    path_save=".\ImageFiles\\files1"
    # dlib检测
    dets = detector(img,1)
    print("人脸数:", len(dets))
    for k, d in enumerate(dets):
        if len(dets)>1:
            continue
        num=num+1
        # 计算矩形大小
        # (x,y), (宽度width, 高度height)
        pos_start = tuple([d.left(), d.top()])
        pos_end = tuple([d.right(), d.bottom()])

        # 计算矩形框大小
        height = d.bottom()-d.top()
        width = d.right()-d.left()

        # 根据人脸大小生成空的图像
        img_blank = np.zeros((height, width, 3), np.uint8)
        for i in range(height):
            if d.top()+i>=img_height:# 防止越界
                continue
            for j in range(width):
                if d.left()+j>=img_width:# 防止越界
                    continue
                img_blank[i][j] = img[d.top()+i][d.left()+j]
        img_blank = cv2.resize(img_blank, (200, 200), interpolation=cv2.INTER_CUBIC)

        cv2.imencode('.jpg', img_blank)[1].tofile(path_save+"\\"+"file"+str(num)+".jpg") # 正确方法
运行结果:
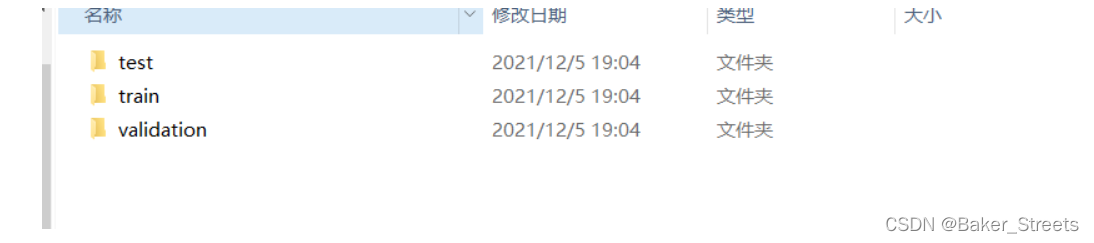
二、数据集划分
import os, shutil
# 原始数据集路径
original_dataset_dir = '.\ImageFiles\\files1'

# 新的数据集
base_dir = '.\ImageFiles\\files2'
os.mkdir(base_dir)

# 训练图像、验证图像、测试图像的目录
train_dir = os.path.join(base_dir, 'train')
os.mkdir(train_dir)
validation_dir = os.path.join(base_dir, 'validation')
os.mkdir(validation_dir)
test_dir = os.path.join(base_dir, 'test')
os.mkdir(test_dir)

train_cats_dir = os.path.join(train_dir, 'smile')
os.mkdir(train_cats_dir)

train_dogs_dir = os.path.join(train_dir, 'unsmile')
os.mkdir(train_dogs_dir)

validation_cats_dir = os.path.join(validation_dir, 'smile')
os.mkdir(validation_cats_dir)

validation_dogs_dir = os.path.join(validation_dir, 'unsmile')
os.mkdir(validation_dogs_dir)

test_cats_dir = os.path.join(test_dir, 'smile')
os.mkdir(test_cats_dir)

test_dogs_dir = os.path.join(test_dir, 'unsmile')
os.mkdir(test_dogs_dir)

# 复制1000张笑脸图片到train_c_dir
fnames = ['file{}.jpg'.format(i) for i in range(1,900)]
for fname in fnames:
    src = os.path.join(original_dataset_dir, fname)
    dst = os.path.join(train_cats_dir, fname)
    shutil.copyfile(src, dst)

fnames = ['file{}.jpg'.format(i) for i in range(900, 1350)]
for fname in fnames:
    src = os.path.join(original_dataset_dir, fname)
    dst = os.path.join(validation_cats_dir, fname)
    shutil.copyfile(src, dst)

# Copy next 500 cat images to test_cats_dir
fnames = ['file{}.jpg'.format(i) for i in range(1350, 1800)]
for fname in fnames:
    src = os.path.join(original_dataset_dir, fname)
    dst = os.path.join(test_cats_dir, fname)
    shutil.copyfile(src, dst)

fnames = ['file{}.jpg'.format(i) for i in range(2127,3000)]
for fname in fnames:
    src = os.path.join(original_dataset_dir, fname)
    dst = os.path.join(train_dogs_dir, fname)
    shutil.copyfile(src, dst)

# Copy next 500 dog images to validation_dogs_dir
fnames = ['file{}.jpg'.format(i) for i in range(3000,3304)]
for fname in fnames:
    src = os.path.join(original_dataset_dir, fname)
    dst = os.path.join(validation_dogs_dir, fname)
    shutil.copyfile(src, dst)

# # Copy next 500 dog images to test_dogs_dir
# fnames = ['file{}.jpg'.format(i) for i in range(3000,3878)]
# for fname in fnames:
#     src = os.path.join(original_dataset_dir, fname)
#     dst = os.path.join(test_dogs_dir, fname)
#     shutil.copyfile(src, dst)
运行结果:
三、识别笑脸
#创建模型
from keras import layers
from keras import models
model = models.Sequential()
model.add(layers.Conv2D(32, (3, 3), activation='relu',input_shape=(150, 150, 3)))
model.add(layers.MaxPooling2D((2, 2)))
model.add(layers.Conv2D(64, (3, 3), activation='relu'))
model.add(layers.MaxPooling2D((2, 2)))
model.add(layers.Conv2D(128, (3, 3), activation='relu'))
model.add(layers.MaxPooling2D((2, 2)))
model.add(layers.Conv2D(128, (3, 3), activation='relu'))
model.add(layers.MaxPooling2D((2, 2)))
model.add(layers.Flatten())
model.add(layers.Dense(512, activation='relu'))
model.add(layers.Dense(1, activation='sigmoid'))
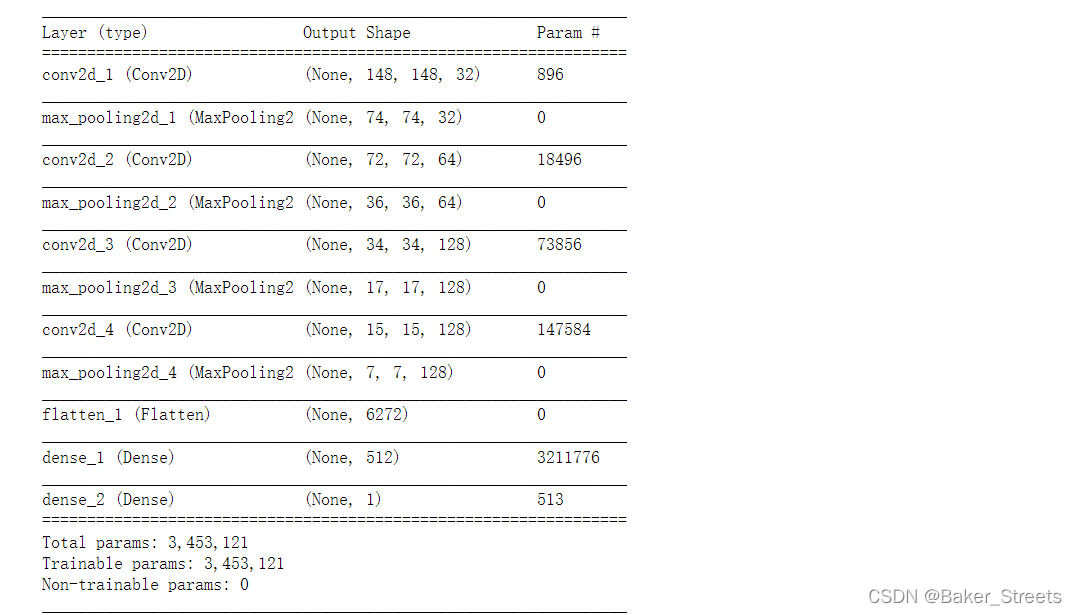
model.summary()#查看
#归一化
from keras import optimizers
model.compile(loss='binary_crossentropy',
              optimizer=optimizers.RMSprop(lr=1e-4),
              metrics=['acc'])
from keras.preprocessing.image import ImageDataGenerator
train_datagen = ImageDataGenerator(rescale=1./255)
validation_datagen=ImageDataGenerator(rescale=1./255)
test_datagen = ImageDataGenerator(rescale=1./255)
train_generator = train_datagen.flow_from_directory(
        # 目标文件目录
        train_dir,
        #所有图片的size必须是150x150
        target_size=(150, 150),
        batch_size=20,
        # Since we use binary_crossentropy loss, we need binary labels
        class_mode='binary')
validation_generator = test_datagen.flow_from_directory(
        validation_dir,
        target_size=(150, 150),
        batch_size=20,
        class_mode='binary')
test_generator = test_datagen.flow_from_directory(test_dir,
                                                   target_size=(150, 150),
                                                   batch_size=20,
                                                   class_mode='binary')
for data_batch, labels_batch in train_generator:
    print('data batch shape:', data_batch.shape)
    print('labels batch shape:', labels_batch)
    break
#'smile': 0, 'unsmile': 1

#数据增强
datagen = ImageDataGenerator(
rotation_range=40,
width_shift_range=0.2,
height_shift_range=0.2,
shear_range=0.2,
zoom_range=0.2,
horizontal_flip=True,
fill_mode='nearest')
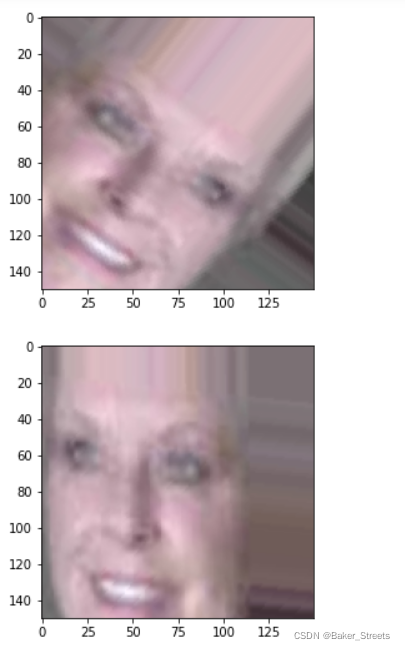
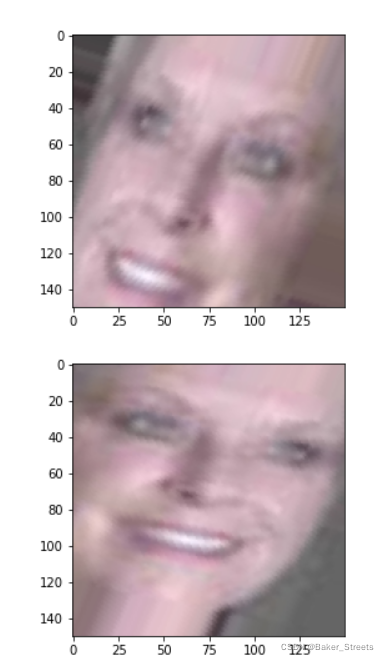
#数据增强后图片变化
import matplotlib.pyplot as plt
# This is module with image preprocessing utilities
from keras.preprocessing import image
train_smile_dir = './ImageFiles//files2//train//smile/'
fnames = [os.path.join(train_smile_dir, fname) for fname in os.listdir(train_smile_dir)]
img_path = fnames[3]
img = image.load_img(img_path, target_size=(150, 150))
x = image.img_to_array(img)
x = x.reshape((1,) + x.shape)
i = 0
for batch in datagen.flow(x, batch_size=1):
plt.figure(i)
imgplot = plt.imshow(image.array_to_img(batch[0]))
i += 1
if i % 4 == 0:
break
plt.show()
#创建网络
model = models.Sequential()
model.add(layers.Conv2D(32, (3, 3), activation='relu',input_shape=(150, 150, 3)))
model.add(layers.MaxPooling2D((2, 2)))
model.add(layers.Conv2D(64, (3, 3), activation='relu'))
model.add(layers.MaxPooling2D((2, 2)))
model.add(layers.Conv2D(128, (3, 3), activation='relu'))
model.add(layers.MaxPooling2D((2, 2)))
model.add(layers.Conv2D(128, (3, 3), activation='relu'))
model.add(layers.MaxPooling2D((2, 2)))
model.add(layers.Flatten())
model.add(layers.Dropout(0.5))
model.add(layers.Dense(512, activation='relu'))
model.add(layers.Dense(1, activation='sigmoid'))
model.compile(loss='binary_crossentropy',
optimizer=optimizers.RMSprop(lr=1e-4),
metrics=['acc'])
#归一化处理
train_datagen = ImageDataGenerator(
rescale=1./255,
rotation_range=40,
width_shift_range=0.2,
height_shift_range=0.2,
shear_range=0.2,
zoom_range=0.2,
horizontal_flip=True,)
test_datagen = ImageDataGenerator(rescale=1./255)
train_generator = train_datagen.flow_from_directory(
# This is the target directory
train_dir,
# All images will be resized to 150x150
target_size=(150, 150),
batch_size=32,
# Since we use binary_crossentropy loss, we need binary labels
class_mode='binary')
validation_generator = test_datagen.flow_from_directory(
validation_dir,
target_size=(150, 150),
batch_size=32,
class_mode='binary')
history = model.fit_generator(
train_generator,
steps_per_epoch=100,
epochs=60,
validation_data=validation_generator,
validation_steps=50)
model.save('smileAndUnsmile1.h5')
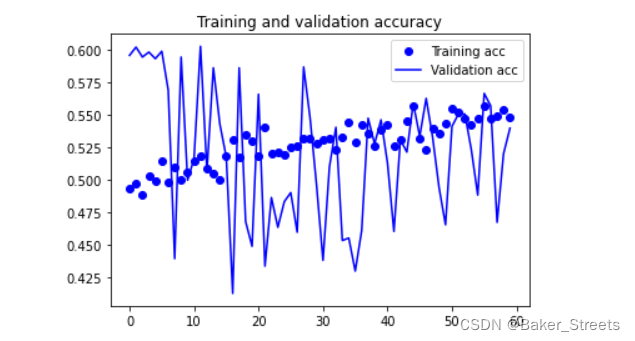
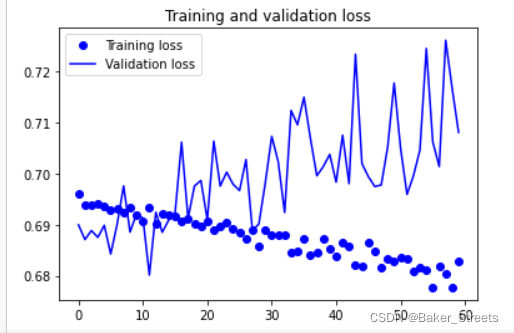
#数据增强过后的训练集与验证集的精确度与损失度的图形
acc = history.history['acc']
val_acc = history.history['val_acc']
loss = history.history['loss']
val_loss = history.history['val_loss']
epochs = range(len(acc))
plt.plot(epochs, acc, 'bo', label='Training acc')
plt.plot(epochs, val_acc, 'b', label='Validation acc')
plt.title('Training and validation accuracy')
plt.legend()
plt.figure()
plt.plot(epochs, loss, 'bo', label='Training loss')
plt.plot(epochs, val_loss, 'b', label='Validation loss')
plt.title('Training and validation loss')
plt.legend()
plt.show()
# 单张图片进行判断 是笑脸还是非笑脸
import cv2
from keras.preprocessing import image
from keras.models import load_model
import numpy as np
#加载模型
model = load_model('smileAndUnsmile1.h5')
#本地图片路径
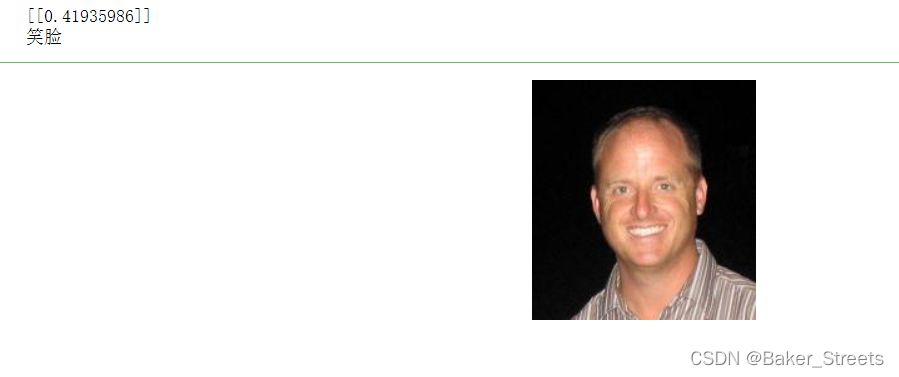
img_path='test.jpg'
img = image.load_img(img_path, target_size=(150, 150))
img_tensor = image.img_to_array(img)/255.0
img_tensor = np.expand_dims(img_tensor, axis=0)
prediction =model.predict(img_tensor)
print(prediction)
if prediction[0][0]>0.5:
result='非笑脸'
else:
result='笑脸'
print(result)
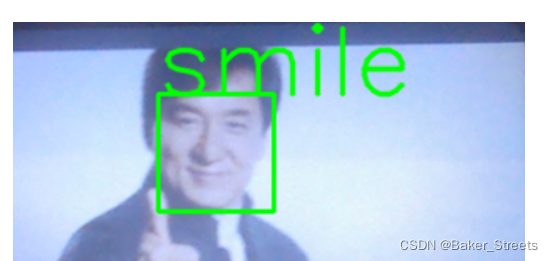
#检测视频或者摄像头中的人脸
import cv2
from keras.preprocessing import image
from keras.models import load_model
import numpy as np
import dlib
from PIL import Image
model = load_model('smileAndUnsmile1.h5')
detector = dlib.get_frontal_face_detector()
video=cv2.VideoCapture(0)
font = cv2.FONT_HERSHEY_SIMPLEX
def rec(img):
    gray=cv2.cvtColor(img,cv2.COLOR_BGR2GRAY)
    dets=detector(gray,1)
    if dets is not None:
        for face in dets:
            left=face.left()
            top=face.top()
            right=face.right()
            bottom=face.bottom()
            cv2.rectangle(img,(left,top),(right,bottom),(0,255,0),2)
            img1=cv2.resize(img[top:bottom,left:right],dsize=(150,150))
            img1=cv2.cvtColor(img1,cv2.COLOR_BGR2RGB)
            img1 = np.array(img1)/255.
            img_tensor = img1.reshape(-1,150,150,3)
            prediction =model.predict(img_tensor)
            if prediction[0][0]>0.5:
                result='unsmile'
            else:
                result='smile'
            cv2.putText(img, result, (left,top), font, 2, (0, 255, 0), 2, cv2.LINE_AA)
        cv2.imshow('Video', img)
while video.isOpened():
    res, img_rd = video.read()
    if not res:
        break
    rec(img_rd)
    if cv2.waitKey(1) & 0xFF == ord('q'):
        break
video.release()
cv2.destroyAllWindows()
运行结果:
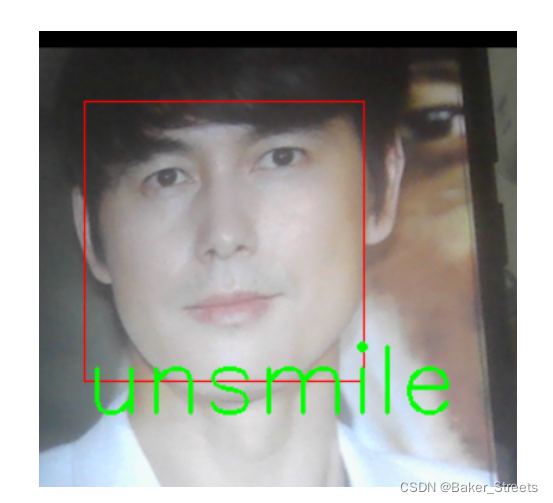
四、Dlib提取人脸特征识别笑脸和非笑脸
import cv2                     #  图像处理的库 OpenCv
import dlib                    # 人脸识别的库 dlib
import numpy as np             # 数据处理的库 numpy
class face_emotion():
    def __init__(self):
        self.detector = dlib.get_frontal_face_detector()
        self.predictor = dlib.shape_predictor("shape_predictor_68_face_landmarks.dat")
        self.cap = cv2.VideoCapture(0)
        self.cap.set(3, 480)
        self.cnt = 0
    def learning_face(self):
        line_brow_x = []
        line_brow_y = []
        while(self.cap.isOpened()):

            flag, im_rd = self.cap.read()
            k = cv2.waitKey(1)
            # 取灰度
            img_gray = cv2.cvtColor(im_rd, cv2.COLOR_RGB2GRAY)
            faces = self.detector(img_gray, 0)

            font = cv2.FONT_HERSHEY_SIMPLEX

            # 如果检测到人脸
            if(len(faces) != 0):

                # 对每个人脸都标出68个特征点
                for i in range(len(faces)):
                    for k, d in enumerate(faces):
                        cv2.rectangle(im_rd, (d.left(), d.top()), (d.right(), d.bottom()), (0,0,255))
                        self.face_width = d.right() - d.left()
                        shape = self.predictor(im_rd, d)
                        mouth_width = (shape.part(54).x - shape.part(48).x) / self.face_width
                        mouth_height = (shape.part(66).y - shape.part(62).y) / self.face_width
                        brow_sum = 0
                        frown_sum = 0
                        for j in range(17, 21):
                            brow_sum += (shape.part(j).y - d.top()) + (shape.part(j + 5).y - d.top())
                            frown_sum += shape.part(j + 5).x - shape.part(j).x
                            line_brow_x.append(shape.part(j).x)
                            line_brow_y.append(shape.part(j).y)

                        tempx = np.array(line_brow_x)
                        tempy = np.array(line_brow_y)
                        z1 = np.polyfit(tempx, tempy, 1)
                        self.brow_k = -round(z1[0], 3)

                        brow_height = (brow_sum / 10) / self.face_width # 眉毛高度占比
                        brow_width = (frown_sum / 5) / self.face_width  # 眉毛距离占比

                        eye_sum = (shape.part(41).y - shape.part(37).y + shape.part(40).y - shape.part(38).y +
                                   shape.part(47).y - shape.part(43).y + shape.part(46).y - shape.part(44).y)
                        eye_hight = (eye_sum / 4) / self.face_width
                        if round(mouth_height >= 0.03) and eye_hight<0.56:
                            cv2.putText(im_rd, "smile", (d.left(), d.bottom() + 20), cv2.FONT_HERSHEY_SIMPLEX, 2,
                                            (0,255,0), 2, 4)

                        if round(mouth_height<0.03) and self.brow_k>-0.3:
                            cv2.putText(im_rd, "unsmile", (d.left(), d.bottom() + 20), cv2.FONT_HERSHEY_SIMPLEX, 2,
                                        (0,255,0), 2, 4)
                cv2.putText(im_rd, "Face-" + str(len(faces)), (20,50), font, 0.6, (0,0,255), 1, cv2.LINE_AA)
            else:
                cv2.putText(im_rd, "No Face", (20,50), font, 0.6, (0,0,255), 1, cv2.LINE_AA)
            im_rd = cv2.putText(im_rd, "S: screenshot", (20,450), font, 0.6, (255,0,255), 1, cv2.LINE_AA)
            im_rd = cv2.putText(im_rd, "Q: quit", (20,470), font, 0.6, (255,0,255), 1, cv2.LINE_AA)
            if (cv2.waitKey(1) & 0xFF) == ord('s'):
                self.cnt += 1
                cv2.imwrite("screenshoot" + str(self.cnt) + ".jpg", im_rd)
            # 按下 q 键退出
            if (cv2.waitKey(1)) == ord('q'):
                break
            # 窗口显示
            cv2.imshow("Face Recognition", im_rd)
        self.cap.release()
        cv2.destroyAllWindows()
if __name__ == "__main__":
    my_face = face_emotion()
    my_face.learning_face()
运行结果:
参考
Python人脸识别微笑检测
Python-人脸识别并判断表情 笑脸或非笑脸 使用笑脸数据集genki4k