“ 预测性维修(Predictive Maintenance,简称PdM)是以状态为依据(Condition Based)的维修,在机器运行时,对它的主要(或需要)部位进行定期(或连续)的状态监测和故障诊断,判定装备所处的状态,预测装备状态未来的发展趋势,依据装备的状态发展趋势和可能的故障模式,预先制定预测性维修计划。”
01
—
振动传感器的基础知识
传感器的主要应用领域:
土木桥梁;机械机床; 汽车NVH;航天航空;海洋船舶;风能电力;国防军工;石油化工;振动台控制;材料特性;教育教学。
传感器的产品类型:
有集中式;便携式;组合式;坚固式;分布式

描述振幅的三种基本参量:位移x,速度v,加速度a
位移微分积分速度微分积分加速度位移x:
速度v: 加速度: 可以看出,位移、速度和加速度幅值大小的关系是:
微积分前后波形的变化:
1)、相位差90°
2)、幅值变化与频率有关系:位移相同时,速度与频率成正比,加速度与频率的平方成正比。
在实际工程中低阶振动更重要,由于力和加速度成正比,假设在相同力的作用下,不同频率的振动有相同的加速度A=100,则推算到振动速度V和位移X的公式如下:
| 频率f |
1 |
10 |
100 |
1000 |
| 圆频率 |
6.28 |
62.8 |
628 |
6280 |
| 加速度 |
100 |
100 |
100 |
100 |
| 加速度 |
16 |
1.6 |
0.16 |
0.016 |
| 位移 |
2.5 |
0.025 |
0.00025 |
0.0000025 |
可见,在相同振动加速度下,随着频率增加,振动位移按平方关系下降。工程中,高频的震动位移都是非常微弱的,对结构几乎不形成损伤,因此无需关心
02
—
常见振动传感器类型
-
加速度传感器:输出振动加速度信号;
-
速度传感器:输出振动速度信号;
-
位移传感器:输出振动位移信号,如电涡流传感器;
-
力传感器:输出力信号(力垂中的压力、拉力);
-
应变传感器:应变片,需要通过惠斯通桥路,输出应变信号;
-
声音传感器:传声器,输出声波在空气中的振动压力信号;
-
转速传感器:多种形式(光电、涡流、编码器等),用于输出机械转速信息;

传感器的选择方法
03
—
基于加速度传感器数据构建模型
1、老样子,我们导入机器学习三大件
import numpy as np
import pandas as pd
import random
import matplotlib.pyplot as plt
import matplotlib
import seaborn as sns
# from sklearn.preprocessing import StandardScaler
# scaler = StandardScaler()
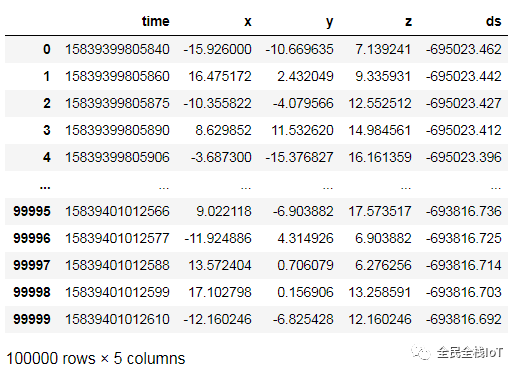
2、读入机器健康时的振动数据
header_list = ['time','x','y','z']
mHealthy = pd.read_csv('data/m1_vib1.csv',header = None, names = header_list )
mHealthy['ds'] = mHealthy['time'].apply(lambda x: float((x- 15840094829302)/1000))
3、读入机器出现问题时的数据
mBroken = pd.read_csv('data/m2_vib3.csv',header = None, names = header_list )
mBroken['ds'] = mBroken['time'].apply(lambda x: float((x- 15840094829302)/1000))

4、从上面看来数据的特征似乎有点少,现在我们需要做的就是进行数据增强,我们对数据进行求均值,有效值,偏度,峰度等相关的数据变换。
Main = pd.DataFrame(columns=['SDx','SDy','SDz','RMSx','RMSy','RMSz','Mx','My','Mz','CRx','CRy','CRz','Kx','Ky','Kz','SKx','SKy','SKz','CFx','CFy','CFz','IFx','IFy','IFz','SFx','SFy','SFz','label'])
MainT = pd.DataFrame(columns=['SDx','SDy','SDz','RMSx','RMSy','RMSz','Mx','My','Mz','CRx','CRy','CRz','Kx','Ky','Kz','SKx','SKy','SKz','CFx','CFy','CFz','IFx','IFy','IFz','SFx','SFy','SFz','label'])
num = random.randint(0,99899)
df = mBroken[num:num+100]
num = random.randint(0,99899)
df = mBroken[num:num+100
def RMScalc(df,c):
    return np.sqrt(df[c].pow(2).sum()/1000)
def Clearance(df,c):
    root = (df[c].abs().pow(0.5).sum()/1000)**2
    return root
RMScalc(df,'x')
for i in range(0,100):
    num = random.randint(0,99899)
    df = mBroken[num:num+100]
    SDx = df.std()['x']
    SDy = df.std()['y']
    SDz = df.std()['z']
    RMSx = RMScalc(df,'x')
    RMSy = RMScalc(df,'y')
    RMSz = RMScalc(df,'z')
    Mx = df['x'].mean()
    My = df['y'].mean()
    Mz = df['z'].mean()
    CRx = float(df['x'].max()/RMSx)
    CRy = float(df['y'].max()/RMSy)
    CRz = float(df['z'].max()/RMSz)
    Kx = df['x'].kurt()
    Ky = df['y'].kurt()
    Kz = df['z'].kurt()
    SKx = df['x'].skew()
    SKy = df['y'].skew()
    SKz = df['z'].skew()
    CFx = float(df['x'].max()/Clearance(df,'x'))
    CFy = float(df['y'].max()/Clearance(df,'y'))
    CFz = float(df['z'].max()/Clearance(df,'z'))
    IFx = float(df['x'].max()/Mx)
    IFy = float(df['y'].max()/My)
    IFz = float(df['z'].max()/Mz)
    SFx = float(RMSx/Mx)
    SFy = float(RMSy/My)
    SFz = float(RMSz/Mz)
    label = 0
    list = [SDx,SDy,SDz,RMSx,RMSy,RMSz,Mx,My,Mz,CRx,CRy,CRz,Kx,Ky,Kz,SKx,SKy,SKz,CFx,CFy,CFz,IFx,IFy,IFz,SFx,SFy,SFz,label]
    MainT.loc[i] = list


for i in range(101,200):
    num = random.randint(0,99899)
    df = mHealthy[num:num+100]
    SDx = df.std()['x']
    SDy = df.std()['y']
    SDz = df.std()['z']
    RMSx = RMScalc(df,'x')
    RMSy = RMScalc(df,'y')
    RMSz = RMScalc(df,'z')
    Mx = df['x'].mean()
    My = df['y'].mean()
    Mz = df['z'].mean()
    CRx = float(df['x'].max()/RMSx)
    CRy = float(df['y'].max()/RMSy)
    CRz = float(df['z'].max()/RMSz)
    Kx = df['x'].kurt()
    Ky = df['y'].kurt()
    Kz = df['z'].kurt()
    SKx = df['x'].skew()
    SKy = df['y'].skew()
    SKz = df['z'].skew()
    CFx = float(df['x'].max()/Clearance(df,'x'))
    CFy = float(df['y'].max()/Clearance(df,'y'))
    CFz = float(df['z'].max()/Clearance(df,'z'))
    IFx = float(df['x'].max()/Mx)
    IFy = float(df['y'].max()/My)
    IFz = float(df['z'].max()/Mz)
    SFx = float(RMSx/Mx)
    SFy = float(RMSy/My)
    SFz = float(RMSz/Mz)
    label = 1
    list = [SDx,SDy,SDz,RMSx,RMSy,RMSz,Mx,My,Mz,CRx,CRy,CRz,Kx,Ky,Kz,SKx,SKy,SKz,CFx,CFy,CFz,IFx,IFy,IFz,SFx,SFy,SFz,label]
    MainT.loc[i] = list
我们来看看每个特征的相关系数,用sns中的一个热力图插件来看看
fig, ax = plt.subplots(figsize=(20,20))
ax = sns.heatmap(Mainx.corr(),annot=True,cmap='viridis')

下面我们分别尝试用ANN、SVM、RandomForest来分别进行模型构建
1、ANN Classfier
X = Mainx.drop('label',axis=1).values
y = Mainx['label'].values
XT = MainT.drop('label',axis=1)
import seaborn as sns
from sklearn.preprocessing import MinMaxScaler
from sklearn.model_selection import train_test_split
import tensorflow as tf
from tensorflow.keras.models import Sequential
from tensorflow.keras.layers import Dense, Activation,Dropout
from tensorflow.keras.constraints import max_norm
scaler = MinMaxScaler()
Scaled = scaler.fit_transform(MainT['SDx'].values.astype(float).reshape(-1, 1))
df_normalized = pd.DataFrame(Scaled,columns = ['SDx'])
df_normalized['label'] = MainT['label']
X = Mainx.drop('label',axis=1).values
y = Mainx['label'].values
X_train, X_test, y_train, y_test = train_test_split(X, y, test_size=0.20, random_state=101)
scaler = MinMaxScaler()
X_train = scaler.fit_transform(X_train)
X_test = scaler.transform(X_test)
model = Sequential()


# https://stats.stackexchange.com/questions/181/how-to-choose-the-number-of-hidden-layers-and-nodes-in-a-feedforward-neural-netw


# input layer
model.add(Dense(4,input_dim = 4,  activation='tanh'))
model.add(Dropout(0.2))


# hidden layer
model.add(Dense(8, activation='relu'))
model.add(Dropout(0.2))


# hidden layer
model.add(Dense(8, activation='relu'))
model.add(Dropout(0.2))


# output layer
model.add(Dense(units=1,activation='tanh'))


# Compile model
model.compile(loss='binary_crossentropy', optimizer='adam',metrics = ['accuracy'])
模型训练
model.fit(X_train, y_train, validation_data=(X_test, y_test), epochs=400, verbose=2,batch_size = 50)
模型评估
model.evaluate(X_train, y_train, verbose=0)
from sklearn.metrics import classification_report,confusion_matrix
predictions = model.predict_classes(X_test)
print(classification_report(y_test,predictions))

可以看出准确率太低了,只有50%,还不如抛硬币。
下面来尝试SVM
from sklearn import svm
from sklearn.pipeline import Pipeline
clf = svm.SVC()
clf.fit(X_train,y_train)
preds = clf.predict(X_test)
from sklearn.metrics import accuracy_score
print(accuracy_score(y_test,preds))
准确率还是只有55%,我们还是继续跑硬币吧。
最后我们再来尝试下随机森林,理论上,多管齐下,得到的结果应该会稍微好点,话不多说,我们来看看
from sklearn.feature_selection import SelectFromModel
from sklearn.ensemble import RandomForestClassifier
from sklearn.svm import LinearSVC
clf2 = Pipeline([
  ('feature_selection', SelectFromModel(LinearSVC())),
  ('classification', RandomForestClassifier())
])
clf2.fit(X_train, y_train)
print(accuracy_score(y_test,clf2.predict(X_test)))
得到的结果是0.825,相比前两种方法提高了不少,但是要能够实际应用还远远不够,还需要继续提高准确率。
那问题出在哪里呢,是不是数据的特征提取出现了什么问题,我们用遗传算法来重新进行特征选择
mBroken['dt'] = mBroken['time'].apply(lambda x: float((x- 15840094829302)/10000))
mHealthy['dt'] = mHealthy['time'].apply(lambda x: float((x-15839399805840)/10000))
Main = pd.DataFrame(columns=['SDx','SDy','SDz','RMSx','RMSy','RMSz','Mx','My','Mz','CRx','CRy','CRz','Kx','Ky','Kz','SKx','SKy','SKz','CFx','CFy','CFz','IFx','IFy','IFz','SFx','SFy','SFz','label'])
Main2 = pd.DataFrame(columns=['SDx','SDy','SDz','RMSx','RMSy','RMSz','Mx','My','Mz','CRx','CRy','CRz','Kx','Ky','Kz','SKx','SKy','SKz','CFx','CFy','CFz','IFx','IFy','IFz','SFx','SFy','SFz','label'])
#SAMPEL BROKEN coba 100
for i in range(0,100):
    num = random.randint(0,99899)
    df = mBroken[num:num+100]
    SDx = df.std()['x']
    SDy = df.std()['y']
    SDz = df.std()['z']
    RMSx = RMScalc(df,'x')
    RMSy = RMScalc(df,'y')
    RMSz = RMScalc(df,'z')
    Mx = df['x'].mean()
    My = df['y'].mean()
    Mz = df['z'].mean()
    CRx = float(df['x'].max()/RMSx)
    CRy = float(df['y'].max()/RMSy)
    CRz = float(df['z'].max()/RMSz)
    Kx = df['x'].kurt()
    Ky = df['y'].kurt()
    Kz = df['z'].kurt()
    SKx = df['x'].skew()
    SKy = df['y'].skew()
    SKz = df['z'].skew()
    CFx = float(df['x'].max()/Clearance(df,'x'))
    CFy = float(df['y'].max()/Clearance(df,'y'))
    CFz = float(df['z'].max()/Clearance(df,'z'))
    IFx = float(df['x'].max()/Mx)
    IFy = float(df['y'].max()/My)
    IFz = float(df['z'].max()/Mz)
    SFx = float(RMSx/Mx)
    SFy = float(RMSy/My)
    SFz = float(RMSz/Mz)
    label = 0
    list = [SDx,SDy,SDz,RMSx,RMSy,RMSz,Mx,My,Mz,CRx,CRy,CRz,Kx,Ky,Kz,SKx,SKy,SKz,CFx,CFy,CFz,IFx,IFy,IFz,SFx,SFy,SFz,label]
    Main.loc[i] = list
# SAMPEL HEALTHY COBA 100
for i in range(0,100):
    num = random.randint(0,99899)
    df = mHealthy[num:num+100]
    SDx = df.std()['x']
    SDy = df.std()['y']
    SDz = df.std()['z']
    RMSx = RMScalc(df,'x')
    RMSy = RMScalc(df,'y')
    RMSz = RMScalc(df,'z')
    Mx = df['x'].mean()
    My = df['y'].mean()
    Mz = df['z'].mean()
    CRx = float(df['x'].max()/RMSx)
    CRy = float(df['y'].max()/RMSy)
    CRz = float(df['z'].max()/RMSz)
    Kx = df['x'].kurt()
    Ky = df['y'].kurt()
    Kz = df['z'].kurt()
    SKx = df['x'].skew()
    SKy = df['y'].skew()
    SKz = df['z'].skew()
    CFx = float(df['x'].max()/Clearance(df,'x'))
    CFy = float(df['y'].max()/Clearance(df,'y'))
    CFz = float(df['z'].max()/Clearance(df,'z'))
    IFx = float(df['x'].max()/Mx)
    IFy = float(df['y'].max()/My)
    IFz = float(df['z'].max()/Mz)
    SFx = float(RMSx/Mx)
    SFy = float(RMSy/My)
    SFz = float(RMSz/Mz)
    label = 1
    list = [SDx,SDy,SDz,RMSx,RMSy,RMSz,Mx,My,Mz,CRx,CRy,CRz,Kx,Ky,Kz,SKx,SKy,SKz,CFx,CFy,CFz,IFx,IFy,IFz,SFx,SFy,SFz,label]
    Main2.loc[i] = list
Main = Main.append(Main2)
模型训练
def modelGA(train_data,train_labels,test_data,test_labels):
    inputSize = train_data[1].size
    modelG = Sequential()
    # input layer
    modelG.add(Dense(inputSize,input_dim = inputSize,  activation='tanh'))
    #model.add(Dropout(0.2))


    # hidden layer
    modelG.add(Dense(13, activation='relu'))
    modelG.add(Dropout(0.2))


    # hidden layer
    modelG.add(Dense(13, activation='relu'))
    modelG.add(Dropout(0.2))


    # output layer
    modelG.add(Dense(units=1,activation='tanh'))


    # Compile model
    modelG.compile(loss='binary_crossentropy', optimizer='adam',metrics = ['accuracy'])
    modelG.fit(train_data, train_labels, validation_data=(test_data, test_labels), epochs=150, verbose=2,batch_size = 50)
    acc = modelG.evaluate(test_data, test_labels, verbose=0)[1]
    return acc

def reduce_features(solution, features):
    selected_elements_indices = np.where(solution == 1)[0]
    reduced_features = features[:, selected_elements_indices]
    return reduced_features


def classification_accuracy(labels, predictions):
    correct = np.where(labels == predictions)[0]
    accuracy = correct.shape[0]/labels.shape[0]
    return accuracy


def cal_pop_fitness(pop, features, labels, train_indices, test_indices):
    accuracies = np.zeros(pop.shape[0])
    idx = 0


    for curr_solution in pop:
        reduced_features = reduce_features(curr_solution, features)
        train_data = reduced_features[train_indices, :]
        test_data = reduced_features[test_indices, :]


        train_labels = labels[train_indices]
        test_labels = labels[test_indices]


        #SV_classifier = sklearn.svm.SVC(gamma='scale')
        #SV_classifier.fit(X=train_data, y=train_labels)

        #predictions = SV_classifier.predict(test_data)
        accuracy = modelGA(train_data,train_labels,test_data,test_labels)
        #accuracies[idx] = classification_accuracy(test_labels, predictions)
        accuracies[idx] = accuracy
        idx = idx + 1
    return accuracies


def select_mating_pool(pop, fitness, num_parents):
    # Selecting the best individuals in the current generation as parents for producing the offspring of the next generation.
    parents = np.empty((num_parents, pop.shape[1]))
    for parent_num in range(num_parents):
        max_fitness_idx = np.where(fitness == np.max(fitness))
        max_fitness_idx = max_fitness_idx[0][0]
        parents[parent_num, :] = pop[max_fitness_idx, :]
        fitness[max_fitness_idx] = -99999999999
    return parents


def crossover(parents, offspring_size):
    offspring = np.empty(offspring_size)
    # The point at which crossover takes place between two parents. Usually, it is at the center.
    crossover_point = np.uint8(offspring_size[1]/2)


    for k in range(offspring_size[0]):
        # Index of the first parent to mate.
        parent1_idx = k%parents.shape[0]
        # Index of the second parent to mate.
        parent2_idx = (k+1)%parents.shape[0]
        # The new offspring will have its first half of its genes taken from the first parent.
        offspring[k, 0:crossover_point] = parents[parent1_idx, 0:crossover_point]
        # The new offspring will have its second half of its genes taken from the second parent.
        offspring[k, crossover_point:] = parents[parent2_idx, crossover_point:]
    return offspring


def mutation(offspring_crossover, num_mutations=2):
    mutation_idx = np.random.randint(low=0, high=offspring_crossover.shape[1], size=num_mutations)
    # Mutation changes a single gene in each offspring randomly.
    for idx in range(offspring_crossover.shape[0]):
        # The random value to be added to the gene.
        offspring_crossover[idx, mutation_idx] = 1 - offspring_crossover[idx, mutation_idx]
    return offspring_crossover
data_inputs = X
data_outputs = y
num_samples = data_inputs.shape[0]
num_feature_elements = data_inputs.shape[1]
print("num samples: ",num_samples)
print("num_feature_elements: ", num_feature_elements)


train_indices = np.arange(1, num_samples, 4)
test_indices = np.arange(0, num_samples, 4)
print("Number of training samples: ", train_indices.shape[0])
print("Number of test samples: ", test_indices.shape[0])


"""
Genetic algorithm parameters:
    Population size
    Mating pool size
    Number of mutations
"""
sol_per_pop = 5 # Population size.
num_parents_mating = 3 # Number of parents inside the mating pool.
num_mutations = 2 # Number of elements to mutate.


# Defining the population shape.
pop_shape = (sol_per_pop, num_feature_elements)


# Creating the initial population.
new_population = np.random.randint(low=0, high=2, size=pop_shape)
print("shape = ",new_population.shape[1])


best_outputs = []
num_generations = 20
for generation in range(num_generations):
    print("Generation : ", generation)
    # Measuring the fitness of each chromosome in the population.
    fitness = cal_pop_fitness(new_population, data_inputs, data_outputs, train_indices, test_indices)


    best_outputs.append(np.max(fitness))
    # The best result in the current iteration.
    print("Best result : ", best_outputs[-1])


    # Selecting the best parents in the population for mating.
    parents = select_mating_pool(new_population, fitness, num_parents_mating)


    # Generating next generation using crossover.
    offspring_crossover = crossover(parents, offspring_size=(pop_shape[0]-parents.shape[0], num_feature_elements))


    # Adding some variations to the offspring using mutation.
    offspring_mutation = mutation(offspring_crossover, num_mutations=num_mutations)


    # Creating the new population based on the parents and offspring.
    new_population[0:parents.shape[0], :] = parents
    new_population[parents.shape[0]:, :] = offspring_mutation


# Getting the best solution after iterating finishing all generations.
# At first, the fitness is calculated for each solution in the final generation.
fitness = cal_pop_fitness(new_population, data_inputs, data_outputs, train_indices, test_indices)
# Then return the index of that solution corresponding to the best fitness.
best_match_idx = np.where(fitness == np.max(fitness))[0]
best_match_idx = best_match_idx[0]


best_solution = new_population[best_match_idx, :]
best_solution_indices = np.where(best_solution == 1)[0]
best_solution_num_elements = best_solution_indices.shape[0]
best_solution_fitness = fitness[best_match_idx]
数据切分
XZ = X[:,best_solution_indices]
XZ_train, XZ_test, yz_train, yz_test = train_test_split(XZ, y, test_size=0.20, random_state=101)
构建模型
modelZ = Sequential()


# https://stats.stackexchange.com/questions/181/how-to-choose-the-number-of-hidden-layers-and-nodes-in-a-feedforward-neural-netw


# input layer
modelZ.add(Dense(best_solution_num_elements,input_dim = best_solution_num_elements,  activation='tanh'))
#model.add(Dropout(0.2))


# hidden layer
modelZ.add(Dense(13, activation='relu'))
modelZ.add(Dropout(0.2))


# hidden layer
modelZ.add(Dense(13, activation='relu'))
modelZ.add(Dropout(0.2))


# output layer
modelZ.add(Dense(units=1,activation='tanh'))


# Compile model
modelZ.compile(loss='binary_crossentropy', optimizer='adam',metrics = ['accuracy'])
模型训练
modelZ.fit(XZ_train, yz_train, validation_data=(XZ_test, yz_test), epochs=200, verbose=2,batch_size = 50)
预测结果
predictionsZ = modelZ.predict_classes(XZ_test)
print(classification_report(yz_test,predictionsZ))

从结果看来似乎达到100%的准确率,实际应用效果还有待验证,我们现在这个模型只能预测出机器出现了问题,并不能预测出是什么问题。
听说关注公众号的都是大牛
