异步绘制专题
1 图片处理
1.1 编辑图片的几个方法
第一种
先用UIImage对象加载一张图片
然后转化成CGImageRef放到CGContext中去编辑
第二种
用CGImageCreate函数创建CGImageRef
然后把CGImageRef放到CGContext中去编辑
第三种
用CGImageCreateCopy或者CGImageCreateCopyWithColorSpace
函数拷贝
CGImageRef CGImageCreate (
size_t width, //图片的宽度
size_t height, //图片的高度
size_t bitsPerComponent, //图片每个颜色的bits,比如rgb颜色空间,有可能是5或者 8 ==
size_t bitsPerPixel, //每一个像素占用的buts,15位24位 32位等等
size_t bytesPerRow, //每一行占用多少bytes注意是bytes不是bits 1byte= 8bit
CGColorSpaceRef colorspace, //颜色空间,比如rgb
CGBitmapInfo bitmapInfo, //layout,像素中bit的布局,是rgba还是 argb,==
CGDataProviderRefprovider, //数据源提供者,url或者内存==
const CGFloat decode[], //一个解码数组
bool shouldInterpolate, //抗锯齿参数
CGColorRenderingIntent intent
//图片渲染相关参数
);
1.2 示例代码
CGImageRef CGImageCreate(size_t width,size_t height,
size_tbitsPerComponent,size_t bitsPerPixel,size_t bytesPerRow,
CGColorSpaceRef space, CGBitmapInfo bitmapInfo, CGDataProviderRefprovider,
constCGFloat decode[],bool shouldInterpolate,
CGColorRenderingIntent intent);
通过这个方法,我们可以创建出一个CGImageRef类型的对象,下面分别对参数进行解释:
sizt_t是定义的一个可移植性的单位,在64位机器中为8字节,32位位4字节。
width:图片宽度像素
height:图片高度像素
bitsPerComponent:每个颜色的比特数,例如在rgba-32模式下为8
bitsPerPixel:每个像素的总比特数
bytesPerRow:每一行占用的字节数,注意这里的单位是字节
space:颜色空间模式,例如constCFStringRef kCGColorSpaceGenericRGB这个函数可以返回一个颜色空间对象。
bitmapInfo:位图像素布局,枚举如下:
?
| 1 2 3 4 5 6 7 8 9 10 11 |
typedef CF_OPTIONS(uint32_t, CGBitmapInfo) { kCGBitmapAlphaInfoMask = 0x1F, kCGBitmapFloatComponents = (1 << 8), kCGBitmapByteOrderMask = 0x7000, kCGBitmapByteOrderDefault = (0 << 12), kCGBitmapByteOrder16Little = (1 << 12), kCGBitmapByteOrder32Little = (2 << 12), kCGBitmapByteOrder16Big = (3 << 12), kCGBitmapByteOrder32Big = (4 << 12) } |
provider:数据源提供者
decode[]:解码渲染数组
shouldInterpolate:是否抗锯齿
intent:图片相关参数
CGImageRef CGImageMaskCreate(size_t width,size_t height,
size_t bitsPerComponent,size_t bitsPerPixel,size_t bytesPerRow,
CGDataProviderRef provider,constCGFloat decode[],bool shouldInterpolate)
这个方法用于创建mask图片图层,可以设置其显示部分与不显示部分达到特殊的效果,参数意义同上。
CGImageRef CGImageCreateCopy(CGImageRef image)
这个方法可以复制一个CGImageRef对象
CGImageRef CGImageCreateWithJPEGDataProvider(CGDataProviderRef
source, constCGFloat decode[],bool shouldInterpolate,
CGColorRenderingIntent intent)
通过JPEG数据源获取图像
CGImageRef CGImageCreateWithPNGDataProvider(CGDataProviderRef source,
constCGFloat decode[],bool shouldInterpolate,
CGColorRenderingIntent intent)
通过PNG数据源获取图像
CGImageRef CGImageCreateWithImageInRect(CGImageRef image,
CGRect rect)
截取图像的一个区域重绘图像
CGImageRef CGImageCreateWithMask(CGImageRef image,CGImageRef mask)
截取mask图像的某一区域重绘
CGImageRef CGImageCreateWithMaskingColors(CGImageRef image,
constCGFloat components[])
通过颜色分量数组创建位图
CGImageRef CGImageCreateCopyWithColorSpace(CGImageRef image,
CGColorSpaceRef space)
通过颜色空间模式复制位图
CGImageRef CGImageRetain(CGImageRef image)
引用+1
void CGImageRelease(CGImageRef image)
引用-1
bool CGImageIsMask(CGImageRef image)
返回是否为Mask图层
size_t CGImageGetWidth(CGImageRef image)
获取宽度像素
size_t CGImageGetHeight(CGImageRef image)
获取高度像素
下面这些方法分别获取相应属性
size_t CGImageGetBitsPerComponent(CGImageRef image)
size_t CGImageGetBitsPerPixel(CGImageRef image)
size_t CGImageGetBytesPerRow(CGImageRef image)
CGColorSpaceRef CGImageGetColorSpace(CGImageRef image)CG_EXTERNCGImageAlphaInfo CGImageGetAlphaInfo(CGImageRef image)
CGDataProviderRef CGImageGetDataProvider(CGImageRef image)
constCGFloat *CGImageGetDecode(CGImageRef image)
bool CGImageGetShouldInterpolate(CGImageRef image)
CGColorRenderingIntent CGImageGetRenderingIntent(CGImageRef image)
CGBitmapInfo CGImageGetBitmapInfo(CGImageRef image)
1.3 PNG与JPEG优劣比较
存储速度:JPG更快
压缩比:JPG更大;
图片质量:JPG更好
JPG不支持透明效果;
UIImageJPEGRepresentation方法在耗时上比较少 而UIImagePNGRepresentation耗时操作时间比较长
UIImageJPEGRepresentation函数需要两个参数:图片的引用和压缩系数.而UIImagePNGRepresentation只需要图片引用作为参数.通过在实际使用过程中,比较发现:UIImagePNGRepresentation(UIImage* image) 要比UIImageJPEGRepresentation(UIImage*image, 1.0) 返回的图片数据量大很多.譬如,同样是读取摄像头拍摄的同样景色的照片, UIImagePNGRepresentation()返回的数据量大小为199K ,而 UIImageJPEGRepresentation(UIImage* image, 1.0)返回的数据量大小只为140KB,比前者少了50多KB.如果对图片的清晰度要求不高,还可以通过设置 UIImageJPEGRepresentation函数的第二个参数,大幅度降低图片数据量.譬如,刚才拍摄的图片, 通过调用UIImageJPEGRepresentation(UIImage*image, 1.0)读取数据时,返回的数据大小为140KB,但更改压缩系数后,通过调用UIImageJPEGRepresentation(UIImage* image, 0.5)读取数据时,返回的数据大小只有11KB多,大大压缩了图片的数据量 ,而且从视角角度看,图片的质量并没有明显的降低.因此,在读取图片数据内容时,建议优先使用UIImageJPEGRepresentation,并可根据自己的实际使用场景,设置压缩系数,进一步降低图片数据量大小.
1.4 图片缩放
图片缩放的三个函数
http://www.cnblogs.com/pengyingh/articles/2355052.html
程序中一个界面用到了好多张大图,内存报警告了,所以做了一下图片缩放,在网上找了别人写的代码
//把图片做等比缩放,生成一个新图片
1 - (UIImage*) imageByScalingProportionallyToSize:(CGSize)targetSize sourceImage:(UIImage*)sourceImage {
2
3 UIGraphicsBeginImageContext(targetSize);
4 [sourceImage drawInRect:CGRectMake(0,0,targetSize.width, targetSize.height)];
5 UIImage* scaledImage =UIGraphicsGetImageFromCurrentImageContext();
6 UIGraphicsEndImageContext();
7 returnscaledImage;
8
9 UIImage *newImage = nil;
10 CGSize imageSize = sourceImage.size;
11 CGFloat width = imageSize.width;
12 CGFloat height = imageSize.height;
13 CGFloat targetWidth = targetSize.width;
14 CGFloat targetHeight = targetSize.height;
15 CGFloat scaleFactor = 0.0;
16 CGFloat scaledWidth = targetWidth;
17 CGFloat scaledHeight = targetHeight;
18 CGPoint thumbnailPoint = CGPointMake(0.0,0.0);
19
20 UIGraphicsBeginImageContext(targetSize);// this will crop
21
22 CGRect thumbnailRect = CGRectZero;
23 thumbnailRect.origin = thumbnailPoint;
24 thumbnailRect.size.width = scaledWidth;
25 thumbnailRect.size.height = scaledHeight;
26
27 [sourceImage drawInRect:thumbnailRect];
28
29 newImage =UIGraphicsGetImageFromCurrentImageContext();
30 if(newImage== nil)
31 NSLog(@"couldnot scale image");
32
33 //pop thecontext to get back to the default
34 UIGraphicsEndImageContext();
35 returnnewImage;
36 }
//把图片按照新大小进行裁剪,生成一个新图片
1 - (UIImage*)imageByScalingAndCroppingForSize:(CGSize)targetSize image:(UIImage *)sourceImage
2 {
3 // UIImage *sourceImage = self;
4 UIImage *newImage = nil;
5 CGSize imageSize = sourceImage.size;
6 CGFloat width = imageSize.width;
7 CGFloat height = imageSize.height;
8 CGFloat targetWidth = targetSize.width;
9 CGFloat targetHeight = targetSize.height;
10 CGFloat scaleFactor = 0.0;
11 CGFloat scaledWidth = targetWidth;
12 CGFloat scaledHeight = targetHeight;
13 CGPoint thumbnailPoint = CGPointMake(0.0,0.0);
14
15 if(CGSizeEqualToSize(imageSize, targetSize) == NO)
16 {
17 CGFloat widthFactor = targetWidth /width;
18 CGFloat heightFactor = targetHeight / height;
19
20 if(widthFactor > heightFactor)
21 scaleFactor = widthFactor;// scale to fit height
22 else
23 scaleFactor = heightFactor;// scale to fit width
24 scaledWidth = width * scaleFactor;
25 scaledHeight = height * scaleFactor;
26
27 // centerthe image
28 if(widthFactor > heightFactor)
29 {
30 thumbnailPoint.y = (targetHeight -scaledHeight) *0.5;
31 }
32 else
33 if(widthFactor < heightFactor)
34 {
35 thumbnailPoint.x =(targetWidth - scaledWidth) *0.5;
36 }
37 }
38
39 UIGraphicsBeginImageContext(targetSize);// this will crop
40
41 CGRect thumbnailRect = CGRectZero;
42 thumbnailRect.origin = thumbnailPoint;
43 thumbnailRect.size.width = scaledWidth;
44 thumbnailRect.size.height = scaledHeight;
45
46 [sourceImage drawInRect:thumbnailRect];
47
48 newImage =UIGraphicsGetImageFromCurrentImageContext();
49 if(newImage== nil)
50 NSLog(@"couldnot scale image");
51
52 //pop thecontext to get back to the default
53 UIGraphicsEndImageContext();
54 returnnewImage;
55 }
1 - (UIImage*)generatePhotoThumbnail:(UIImage *)image
2 {
3 // Create a thumbnail version of the imagefor the event object.
4 CGSize size = image.size;
5 CGSize croppedSize;
6 CGFloat ratio = 64.0;//这个是设置转换后图片的尺寸大小
7 CGFloat offsetX = 0.0;
8 CGFloat offsetY = 0.0;
9
10 // check thesize of the image, we want to make it
11 // a square with sides the size of the smallest dimension
12 if(size.width > size.height) {
13 offsetX = (size.height - size.width) /2;
14 croppedSize = CGSizeMake(size.height,size.height);
15 } else {
16 offsetY = (size.width - size.height) /2;
17 croppedSize = CGSizeMake(size.width,size.width);
18 }
19
20 // Crop theimage before resize
21 CGRect clippedRect = CGRectMake(offsetX *-1, offsetY * -1,croppedSize.width, croppedSize.height);
22 //裁剪图片
CGImageRef imageRef =CGImageCreateWithImageInRect([image CGImage], clippedRect);
23 // Donecropping
24
25 // Resize the image
26 CGRect rect = CGRectMake(0.0,0.0,ratio, ratio);
27
28 UIGraphicsBeginImageContext(rect.size);
29 [[UIImage imageWithCGImage:imageRef]drawInRect:rect];
30 UIImage *thumbnail =UIGraphicsGetImageFromCurrentImageContext();
31 UIGraphicsEndImageContext();
32 // DoneResizing
33
34 returnthumbnail;
35 }
实际应用简化
- (UIImage *)generatePhotoThumbnail:(UIImage*)image
{
CGRect rect=CGRectMake(0, 0, 60, 78);
//裁剪图片
CGImageRef imageRef=CGImageCreateWithImageInRect([image CGImage],CGRectMake(0,0,140,182));
UIGraphicsBeginImageContext(rect.size);
[[UIImage imageWithCGImage:imageRef]drawInRect:rect];
//如果不裁剪图片可以直接画
//[image drawInRect:CGRectMake(0, 0, theSize.width, theSize.height)];
UIImage *thumbnail=UIGraphicsGetImageFromCurrentImageContext();
UIGraphicsEndImageContext();
return thumbnail;
}
附:
UIImage类并没有提供缩放图片需要用到的API,是不是觉得很吃惊?没关系,我们自己来添加一个。
定义缩放图片的Category
// UIImage+Scale.h
@interface UIImage (scale)
-(UIImage*)scaleToSize:(CGSize)size;
@end
实现这个Category的定义
// UIImage+Scale.m
#import "UIImage+Scale.h"
@implementation UIImage (scale)
-(UIImage*)scaleToSize:(CGSize)size
{// 创建一个bitmap的context//并把它设置成为当前正在使用的context
UIGraphicsBeginImageContext(size);
// 绘制改变大小的图片
[self drawInRect:CGRectMake(0,0,size.width, size.height)];
// 从当前context中创建一个改变大小后的图片
UIImage* scaledImage = UIGraphicsGetImageFromCurrentImageContext();
// 使当前的context出堆栈
UIGraphicsEndImageContext();
// 返回新的改变大小后的图片
return scaledImage;
}
@end
如何使用
// 创建图片
UIImage *image =[UIImage imageNamed:@"myImage.png"];
// 更改图片大小
UIImage *scaledImage =[image scaleToSize:CGSizeMake(25.0f,35.0f)]
1.5 参考链接
IOS-图片操作集合
http://blog.csdn.net/ch_soft/article/details/7685753
UIImagePNGRepresentation 存在缓慢问题
http://blog.sina.com.cn/s/blog_95a3991f010162ws.html
<iOS>UIImage变为NSData并进行压缩
http://www.cnblogs.com/robinkey/archive/2013/01/21/2869930.html
UIImageJPEGRepresentation和UIImagePNGRepresentation
http://blog.csdn.net/mideveloper/article/details/11473627
png有透明通道,JPEG无
http://blog.163.com/chentong1115@126/blog/static/45314732200972323921819/
透明PNG圖片有黑邊的解決方法
http://www.minroad.com/?p=9
用UIImage和UIButton画出的按钮,使用透明的png图片,为什么会出现白边
http://segmentfault.com/q/1010000000095447
JPG、PNG和GIF图片的基本原理及优化方法
http://www.mahaixiang.cn/Photoshop/400.html
JPEG 原理详细
http://blog.chinaunix.net/uid-27002868-id-3220554.html
IOS开发中图片资源使用png还是jpg格式
http://www.cnblogs.com/wengzilin/p/3485298.html
(good)ios开发图片格式的选择:png和jpg
http://m.blog.csdn.net/blog/awaylin113/22712317
IOS开发之保存图片到Documents目录及PNG,JPEG格式相互转换
http://blog.csdn.net/sanpintian/article/details/7418755
iOS过滤png图片透明部分点击事件
http://www.cocoachina.com/industry/20121127/5192.html
JPEG压缩原理
http://blog.csdn.net/xfortius/article/details/8904012
png压缩原理
http://blog.csdn.net/zykun/article/details/1825086
iOS开发,图片使用png好还是jpg好?
http://www.cocoachina.com/bbs/read.php?tid=110115
2 绘制文本
2.1 NSMutableAttributedString绘制
CGRect textViewRect = CGRectMake(ICON_SPACE*1-2,_imageHeight +ICON_SPACE,_postContentTextView.frame.size.width,_labelSize);//ceilf(_labelSize)
// [_postContentTextViewdrawRect:textViewRect];
NSMutableAttributedString *str = [[NSMutableAttributedStringalloc]initWithString:_vm.contentText];
[str addAttribute:NSForegroundColorAttributeNamevalue:kContentTextColorrange:NSMakeRange(0,[_vm.contentTextlength])];
[str addAttribute:NSFontAttributeNamevalue:kContentTextFontrange:NSMakeRange(0,[_vm.contentTextlength])];
[str addAttribute:NSBackgroundColorDocumentAttributevalue:[UIColorwhiteColor]range:NSMakeRange(0,[_vm.contentTextlength])];
// NSLog(@"ContentText:%@, Frame:%@",_vm.contentText, NSStringFromCGRect(_postContentTextView.frame));
// NSLog(@"TextViewRect:%@",NSStringFromCGRect(textViewRect));
[str drawInRect:textViewRect];
2.2 参考资料
IOS开发(78)之绘制文本
http://www.2cto.com/kf/201305/212045.html
iOS 界面上绘制不同字体 颜色 大小的字符串
http://blog.csdn.net/wsk_123_123/article/details/23277457
初探NSAttributedString和NSMutableAttributedString的使用 -LiuWJ
http://www.tuicool.com/articles/Fvqia2
iOS 字符属性NSAttributedString描述
http://my.oschina.net/lanrenbar/blog/395909
NSAttributedString 详解
http://www.cnblogs.com/zhw511006/archive/2012/09/21/2696700.html
3 异步绘制
3.1 异步绘制示例
dispatch_async(dispatch_get_global_queue(DISPATCH_QUEUE_PRIORITY_DEFAULT,0), ^{
CGRect drawRect = _bgImageView.frame;
UIGraphicsBeginImageContextWithOptions(drawRect.size,YES,0);
CGContextRef context = UIGraphicsGetCurrentContext();
if (!context) {
return;
}
[[UIColor whiteColor] set];
CGContextFillRect(context, drawRect);
CGRect imgRect = CGRectZero;
if ([_vm.contentImgPathlength] >0) {
imgRect = CGRectMake(0,0,BODY_HEIGTH,_imageHeight);//_postContentImageView.frame;
[_vm.contentImagedrawInRect:_postContentImageView.frameblendMode:kCGBlendModeNormalalpha:1];
}
CGRect textViewRect = CGRectZero;
if ([_vm.contentTextlength] >0) {
NSMutableAttributedString*str;
if (!_isContentDisplayCompletly) {
if (_vm.digestText) {
str = [[NSMutableAttributedStringalloc]initWithString:_vm.digestTextattributes:_postContentTextView.typingAttributes];
} else
str = [[NSMutableAttributedStringalloc]initWithString:_vm.contentTextattributes:_postContentTextView.typingAttributes];
} else
str = [[NSMutableAttributedStringalloc]initWithString:_vm.contentTextattributes:_postContentTextView.typingAttributes];
[str drawInRect:_postContentTextView.frame];
}
if (_subjectTitleHeight>0) {
CGRectsubjectIconFrame =CGRectMake(_subjectButton.frame.origin.x,_subjectButton.frame.origin.y,10,12);//kContentToSubjectSpace
UIImage*iconImg = [UIImageimageNamed:@"PostChannelFlageIcon"];
subjectIconFrame.size =iconImg.size;
[iconImg drawInRect:subjectIconFrameblendMode:kCGBlendModeNormalalpha:1];
CGRectsubjectTitleFrame =CGRectMake(subjectIconFrame.origin.x +subjectIconFrame.size.width +2,subjectIconFrame.origin.y-1,200,_subjectTitleHeight);
[_subjectButton.titleLabel.attributedTextdrawInRect:subjectTitleFrame];
// [_subjectButtondrawRect:_subjectButton.frame];
}
UIImage*temp = UIGraphicsGetImageFromCurrentImageContext();
UIGraphicsEndImageContext();
dispatch_async(dispatch_get_main_queue(),^{
_bgImageView.image =nil;
_bgImageView.image =temp;
[self setHidden:NO];
});
});
3.2 DrawRect之后注意用hitTest:withEvent:方法处理事件接收
//用户触摸时第一时间加载内容
- (UIView*)hitTest:(CGPoint)point withEvent:(UIEvent*)event{
UIView*result = [superhitTest:pointwithEvent:event];
CGPointbuttonPoint = [_subjectButtonconvertPoint:pointfromView:self];
if ([_subjectButtonpointInside:buttonPointwithEvent:event]){
return _subjectButton;
}
returnresult;
}
3.3 参考链接
[iOS Animation]-CALayer 绘图效率-异步绘制
http://my.oschina.net/u/2438875/blog/507545?fromerr=R4LnEaJ5
CGDataProviderCreateWithData对内存数据的释放
http://www.taofengping.com/2012/11/04/cgdataprovidercreatewithdata_memory_release/#.VnJQ6jaitZF
IOS中使用像素位图(CGImageRef)对图片进行处理
http://my.oschina.net/u/2340880/blog/406437?p={{currentPage-1}}
4 Asyncdisplaykit
4.1 参考链接
Asyncdisplaykit 指南(一)
http://www.th7.cn/Program/IOS/201410/302413.shtml
AsyncDisplayKit 教程:达到 60FPS 的滚动帧率
http://www.cocoachina.com/swift/20141124/10298.html
http://asyncdisplaykit.org/guide/
AsyncDisplayKit入门指南
http://www.cocoachina.com/ios/20141020/9975.html
5 开发技巧
5.1 常见问题
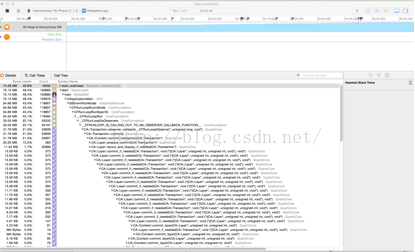
5.1.1 CGBitmapContextCreateImage绘制后内存泄露导致内存告警
1、 CGBitmapContextCreateImage绘制的图片会造成内存无法释放,应该换用CGDataProviderCreateWithCFData。
5.1.1.1 方案一:修改源代码,入缓存前压缩
http://my.oschina.net/u/1244672/blog/510379
SDWebImage有一个SDWebImageDownloaderOperation类来执行下载操作的。里面有个下载完成的方法:
- (void)connectionDidFinishLoading:(NSURLConnection*)aConnection {
SDWebImageDownloaderCompletedBlockcompletionBlock = self.completedBlock;
@synchronized(self) {
CFRunLoopStop(CFRunLoopGetCurrent());
self.thread= nil;
self.connection= nil;
[[NSNotificationCenterdefaultCenter] postNotificationName:SDWebImageDownloadStopNotificationobject:nil];
}
if(![[NSURLCache sharedURLCache] cachedResponseForRequest:_request]) {
responseFromCached= NO;
}
if(completionBlock)
{
if(self.options & SDWebImageDownloaderIgnoreCachedResponse &&responseFromCached) {
completionBlock(nil,nil, nil, YES);
}
else {
UIImage *image= [UIImage sd_imageWithData:self.imageData];
NSString *key= [[SDWebImageManager sharedManager] cacheKeyForURL:self.request.URL];
image = [selfscaledImageForKey:key image:image];
// Do notforce decoding animated GIFs
if(!image.images) {
image = [UIImagedecodedImageWithImage:image];
}
if(CGSizeEqualToSize(image.size, CGSizeZero)) {
completionBlock(nil,nil, [NSError errorWithDomain:@"SDWebImageErrorDomain" code:0userInfo:@{NSLocalizedDescriptionKey : @"Downloaded image has 0pixels"}], YES);
}
else {
completionBlock(image,self.imageData, nil, YES);
}
}
}
self.completionBlock= nil;
[self done];
}
其中,UIImage*image = [UIImage sd_imageWithData:self.imageData];就是将data转换成image。
再看看sd_imageWithData:这个方法:
+ (UIImage*)sd_imageWithData:(NSData *)data {
UIImage*image;
NSString*imageContentType = [NSData sd_contentTypeForImageData:data];
if([imageContentType isEqualToString:@"image/gif"]) {
image =[UIImage sd_animatedGIFWithData:data];
}
#ifdef SD_WEBP
else if([imageContentType isEqualToString:@"image/webp"])
{
image =[UIImage sd_imageWithWebPData:data];
}
#endif
else {
image =[[UIImage alloc] initWithData:data];
UIImageOrientationorientation = [self sd_imageOrientationFromImageData:data];
if(orientation != UIImageOrientationUp) {
image =[UIImage imageWithCGImage:image.CGImage
scale:image.scale
orientation:orientation];
}
}
return image;
}
这个方法在UIImage+MultiFormat里面,是UIImage的一个类别处理。这句话很重要image =[[UIImage alloc] initWithData:data]; SDWebImage把下载下来的data直接转成image,然后没做等比缩放直接存起来使用。所以,我们只需要在这边做处理即可:
UIImage+MultiFormat添加一个方法:
+(UIImage*)compressImageWith:(UIImage *)image
{
float imageWidth= image.size.width;
float imageHeight = image.size.height;
float width =640;
float height =image.size.height/(image.size.width/width);
float widthScale = imageWidth /width;
float heightScale = imageHeight /height;
// 创建一个bitmap的context
// 并把它设置成为当前正在使用的context
UIGraphicsBeginImageContext(CGSizeMake(width,height));
if (widthScale> heightScale) {
[imagedrawInRect:CGRectMake(0, 0, imageWidth /heightScale , height)];
}
else {
[imagedrawInRect:CGRectMake(0, 0, width , imageHeight /widthScale)];
}
// 从当前context中创建一个改变大小后的图片
UIImage*newImage = UIGraphicsGetImageFromCurrentImageContext();
// 使当前的context出堆栈
UIGraphicsEndImageContext();
returnnewImage;
}
然后在:image =[[UIImage alloc] initWithData:data];下面调用以下:
if(data.length/1024 > 1024) {
image = [selfcompressImageWith:image];
}
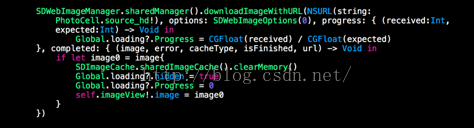
当data大于1M的时候做压缩处理。革命尚未成功,还需要一步处理。在SDWebImageDownloaderOperation的connectionDidFinishLoading方法里面的:
UIImage *image= [UIImage sd_imageWithData:self.imageData];
//将等比压缩过的image在赋在转成data赋给self.imageData
NSData *data =UIImageJPEGRepresentation(image, 1);
self.imageData = [NSMutableDatadataWithData:data];
5.1.1.2 方案二:设置全局缓存大小
http://www.myexception.cn/swift/2033029.html
1、首先在appdelegate方法 didFinishLaunchingWithOptions
SDImageCache.sharedImageCache().maxCacheSize=1024*1024*8设置一下最大的缓存大小。
2、在appdelegate applicationDidReceiveMemoryWarning里加入
SDImageCache.sharedImageCache().clearMemory()
SDWebImageManager.sharedManager().cancelAll()
5.1.1.3 方案三:定时清理内存缓存
http://www.bubuko.com/infodetail-956863.html
经过尝试,发现了一个最简单的完美解决该问题的方法
在使用SDWebImage加载较多图片造成内存警告时,定期调用
[[SDImageCache sharedImageCache] setValue:nilforKey:@"memCache"];
5.1.1.4 方案四(不推荐):修复SD库代码,不做解压,直接返回压缩的原图
5.1.1.5 方案五(推荐):使用CGDataProviderRef进行图形解压重绘
iOS开发中界面展示大图片时UIImage的性能有关问题
http://www.myexception.cn/operating-system/578931.html
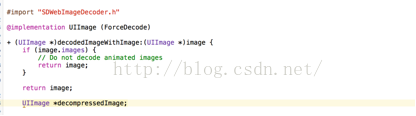
#import "SDWebImageDecoder.h"
@implementation UIImage (ForceDecode)
+ (UIImage*)decodedImageWithImage:(UIImage *)image {
if (image.images) {
// Do notdecode animated images
return image;
}
//仅仅作为临时应付方案
// return image;
UIImage*decompressedImage;
@autoreleasepool {
//核心代码,可以解决内存未释放问题
NSData *data=UIImageJPEGRepresentation(image,1);
CGDataProviderRef dataProvider =CGDataProviderCreateWithCFData((__bridgeCFDataRef)data);
CGImageRefimageRef =CGImageCreateWithPNGDataProvider(dataProvider,
NULL,NO,
kCGRenderingIntentDefault);
// CGImageRef imageRef = image.CGImage;
CGSizeimageSize = CGSizeMake(CGImageGetWidth(imageRef),CGImageGetHeight(imageRef));
CGRectimageRect = (CGRect){.origin =CGPointZero, .size =imageSize};
CGColorSpaceRefcolorSpace =CGColorSpaceCreateDeviceRGB();
CGBitmapInfobitmapInfo = CGImageGetBitmapInfo(imageRef);
intinfoMask = (bitmapInfo &kCGBitmapAlphaInfoMask);
BOOLanyNonAlpha = (infoMask ==kCGImageAlphaNone ||
infoMask == kCGImageAlphaNoneSkipFirst ||
infoMask == kCGImageAlphaNoneSkipLast);
// CGBitmapContextCreatedoesn't support kCGImageAlphaNone with RGB.
// https://developer.apple.com/library/mac/#qa/qa1037/_index.html
if(infoMask == kCGImageAlphaNone&& CGColorSpaceGetNumberOfComponents(colorSpace)>1) {
// Unset the old alpha info.
bitmapInfo &= ~kCGBitmapAlphaInfoMask;
// Set noneSkipFirst.
bitmapInfo |= kCGImageAlphaNoneSkipFirst;
}
// Some PNGs tell us theyhave alpha but only 3 components. Odd.
else if(!anyNonAlpha && CGColorSpaceGetNumberOfComponents(colorSpace)==3) {
// Unset the old alphainfo.
bitmapInfo &= ~kCGBitmapAlphaInfoMask;
bitmapInfo |= kCGImageAlphaPremultipliedFirst;
}
// It calculates thebytes-per-row based on the bitsPerComponent and width arguments.
CGContextRefcontext = CGBitmapContextCreate(NULL,
imageSize.width,
imageSize.height,
CGImageGetBitsPerComponent(imageRef),
0,
colorSpace,
bitmapInfo);
CGColorSpaceRelease(colorSpace);
// If failed, returnundecompressed image
if(!context) return image;
CGContextDrawImage(context,imageRect, imageRef);
CGImageRefdecompressedImageRef =CGBitmapContextCreateImage(context);
CGContextRelease(context);
decompressedImage = [UIImageimageWithCGImage:decompressedImageRefscale:image.scaleorientation:image.imageOrientation];
CGImageRelease(decompressedImageRef);
}
// CVPixelBufferRef pixelBuffer;
//
// CreateCGImageFromCVPixelBuffer(pixelBuffer,&decompressedImageRef);
// CGImage *cgImage =CGBitmapContextCreateImage(context);
// CFDataRef dataRef =CGDataProviderCopyData(CGImageGetDataProvider(cgImage));
// CGImageRelease(cgImage);
// image->imageRef = dataRef;
// image->image =CFDataGetBytePtr(dataRef);
returndecompressedImage;
}
5.1.2 绘制时底部出现高度不定的细微黑线
问题原因:
将Text做宽高计算时,高度值容易得出小数数值,而页面绘制均是基于整数像素点绘制,对于小数点部分,系统会做舍去处理(即便有缩放),固留下高度不定的未绘制区域(为黑色)。
解决方案:
将计算出来的高度值做向下取整处理即可。
CGRect labelFrame = [content boundingRectWithSize:size options: NSStringDrawingTruncatesLastVisibleLine | NSStringDrawingUsesLineFragmentOrigin |NSStringDrawingUsesFontLeadingattributes:_postContentTextView.typingAttributescontext:nil];
labelSize = labelFrame.size;
labelSize.height = ceilf(labelSize.height);
6 参考链接
(GOOD)iOS开发中界面展示大图片时UIImage的性能有关问题
http://www.myexception.cn/operating-system/578931.html
(Good)iPhone - UIImage Leak, CGBitmapContextCreateImage Leak
http://stackoverflow.com/questions/1427478/iphone-uiimage-leak-cgbitmapcontextcreateimage-leak
Another iPhone - CGBitmapContextCreateImage Leak
http://stackoverflow.com/questions/1434714/another-iphone-cgbitmapcontextcreateimage-leak
UIGraphicsBeginImageContext vs CGBitmapContextCreate
http://stackoverflow.com/questions/4683448/uigraphicsbeginimagecontext-vs-cgbitmapcontextcreate
iPhone - CGBitmapContextCreateImage Leak, Anyone else withthis problem?
http://stackoverflow.com/questions/1431566/iphone-cgbitmapcontextcreateimage-leak-anyone-else-with-this-problem
Build and Analyze false positive on leak detection?
http://stackoverflow.com/questions/8438249/build-and-analyze-false-positive-on-leak-detection
iPhone - Multiple CGBitmapContextCreateImage Calls -ObjectAlloc climbing
http://stackoverflow.com/questions/1436465/iphone-multiple-cgbitmapcontextcreateimage-calls-objectalloc-climbing
(Good)ios开发图片处理,内存泄露
http://www.oschina.net/question/736524_69802
主题 : CGBitmapContextCreateImage(bitmap)内存泄露问题处理
http://www.cocoachina.com/bbs/read.php?tid=31835
iOS异步图片加载优化与常用开源库分析
http://luoyibu.com/2015/05/12/iOS异步图片加载优化与常用开源库分析/
主题 : 图片处理开源函数ImageProcessing CGDataProviderCreateWithData Bug修复
http://www.cocoachina.com/bbs/read.php?tid=116149
CGDataProviderCreateWithData对内存数据的释放
http://www.taofengping.com/2012/11/04/cgdataprovidercreatewithdata_memory_release/#.VmpqgoSitZE
IOS7.x下UIGraphicsGetImageFromCurrentImageContext引发内存暴涨,导致应用被结束掉
http://blog.163.com/l1_jun/blog/static/1438638820155593641529/
在 iOS 中与CGContextRef 的内存泄漏
http://www.itstrike.cn/Question/55b86ce7-dfba-4548-a103-22dc5317420a.html
Quartz 2D (ProgrammingWithQuartz) note
http://renxiangzyq.iteye.com/blog/1188025
使用AFNetworking, SDWebimage和OHHTTPStubs
http://blog.shiqichan.com/using-afnetworking-sdwebimage-and-ohhttpstubs/
SDWebImage缓存图片的机制(转)
http://blog.csdn.net/zhun36/article/details/8900327
近来一个swift项目用uicollectionview 用sdwebimage 加载图片,发生内存猛增,直接闪退的情况,简单说一下解决方案
http://www.myexception.cn/swift/2033029.html
关于SDWebImage加载高清图片导致app崩溃的问题
http://www.bubuko.com/infodetail-956863.html
SDWebImage加载大图导致的内存警告问题
http://blog.csdn.net/richer1997/article/details/43481959
解决MWPhotoBrowser中的SDWebImage加载大图导致的内存警告问题
http://my.oschina.net/u/1244672/blog/510379
使用SDWebImage加载大量图片后造成内存泄露的解决办法
http://www.bubuko.com/infodetail-985746.html
UIGraphicsBeginImageContext系列知识
http://blog.sina.com.cn/s/blog_5fb39f9101017n1v.html
iOS绘图教程
http://blog.csdn.net/nogodoss/article/details/18660153
Quartz 2D 参考-文本
http://blog.csdn.net/kmyhy/article/details/7258338
CGBitmapContextCreate函数
http://blog.csdn.net/thanklife/article/details/25790433
UIGraphicsBeginImageContext创建的映像停留在内存中永恒
http://codego.net/589714/
多次在cell中加载网络图片后,内存增长,以前资源未释放
http://bbs.csdn.net/topics/390891681
请问下面的代码有潜在的内存泄漏?
http://codego.net/459077/
[ios]UIGraphicsGetImageFromCurrentImageContext()-内存泄漏
http://www.itstrike.cn/Question/88ada9bd-911c-44a7-874b-e04c1a1c2bca.html
[转载]ios开发之View属性hidden, opaque, alpha的区别
http://blog.sina.com.cn/s/blog_7da2c9030101ev8n.html
利用预渲染加速iOS设备的图像显示
http://www.keakon.net/2011/07/26/利用预渲染加速iOS设备的图像显示
iOS使用CGContextRef绘制各种图形
http://www.devstore.cn/essay/essayInfo/116.html
iOS CGContextRef画图小结
http://blog.sina.com.cn/s/blog_9693f61a0101deko.html
IOS用CGContextRef画各种图形(文字、圆、直线、弧线、矩形、扇形、椭圆、三角形、圆角矩形、贝塞尔曲线、图片)
http://blog.csdn.net/rhljiayou/article/details/9919713
iOS 画图 以及清空
http://blog.csdn.net/woshidaniu/article/details/46683409
iOS通过Quartz画矩形、文字、线
http://blog.csdn.net/onlyou930/article/details/7726399