Linux环境搭建Maven私服
- 一、概要说明
- 二、搭建Nexus3.X(3.18)
- 2.1、下载Nexus
- 2.2、解压Nexus
- 2.3、启动Nexus
- 2.3.1、创建一个nis用户来启动nexus
- 2.3.2、修改nexus3的运行用户为nis
- 2.3.3、启动Nexus报错Cannot open file ../sonatype-work/nexus3/log/jvm.log due to Permission denied
- 2.3.4、使用./nexus run &后台启动遇到的坑
- 2.3.5、使用./nexus start启动
- 2.3.6、给防火墙添加8081的端口暴露
- 三、登录Nexus
- 3.1、如果Nexus的版本不是3.7之后则使用admin/admin123登录
- 3.2、如果Nexus的版本是3.7之后
- 四、上传自己的jar包到Nexus
- 4.1、nexus简单介绍
- 4.1.1、仓库种类介绍
- 4.1.2、私有仓库工作原理
- 4.1.3、私有仓库简单配置
- 4.1.3.1、添加阿里云私服代理
- 4.1.3.2、配置组仓库maven-public
- 4.2、配置maven使用私服下载jar
- 4.2.1、配置全局下载
- 4.2.1.1、maven的setting.xml文件配置maven-public仓库镜像
- 4.2.1.2、全局配置下载依赖(即项目pom无需配置)
- 4.2.2、配置单项目maven私服下载
- 4.2.2.1、maven的setting文件配置
- 4.2.2.2、maven的setting文件配置
- 4.2.3、IEDA上传jar到maven私服
- 4.3、参考链接
一、概要说明
在项目开发过程中,我们从原有的使用eclipse自己做项目jar包的管理到使用Maven来帮助我们管理jar包。但是有一些jar包可能是自己公司内部开发编译的,那么如何更优雅的让公司同事使用到内部开发的jar包呢?一个方案是搭建一个局域网下的Maven私服,将内部的jar放到私服上,同一个局域网下的开发人员即可以获取到jar包了。
二、搭建Nexus3.X(3.18)
2.1、下载Nexus
nexus下载传送门
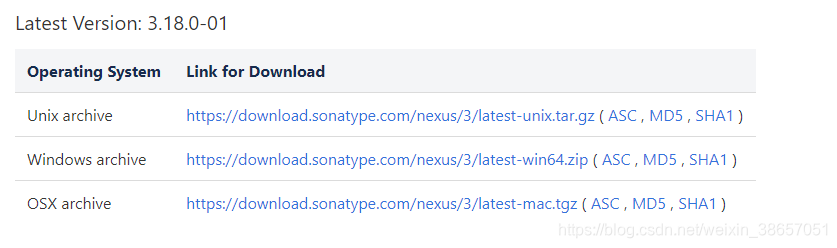
PS:貌似不翻墙就下载不了;需要翻墙才行!
2.2、解压Nexus
解压Nexus
sudo tar -xzvf nexus-3.18.0-01-unix.tar.gz

解压后,我们可以看到有两个文件夹
1.nexus-3.18.0-01 ===> nexus的核心文件
2.sonatype-work ===> maven下载jar存放地址
2.3、启动Nexus
2.3.1、创建一个nis用户来启动nexus
进入到nexus的bin目录
cd /home/nis/software/nexus/nexus-3.18.0-01/bin
查看nexus可以使用的命令
./nexus --help

PS:注意点,启动Nexus官方建议不使用root用户。
[root@localhost bin]
[root@localhost local]
2.3.2、修改nexus3的运行用户为nis
vim nexus.rc
run_as_user="nis"
2.3.3、启动Nexus报错Cannot open file …/sonatype-work/nexus3/log/jvm.log due to Permission denied
修改文件的权限
sudo chown nis:nis -R sonatype-work/
2.3.4、使用./nexus run &后台启动遇到的坑
./nexus run &
如果使用以上方法来启动nexus则会发现不能使用之前的./nexus stop ./nexus restart等命令。
尴尬得发现不能使用“./nexus stop”命令停止服务。

发现虽然状态是stopped的但是访问网页还是能够访问到。
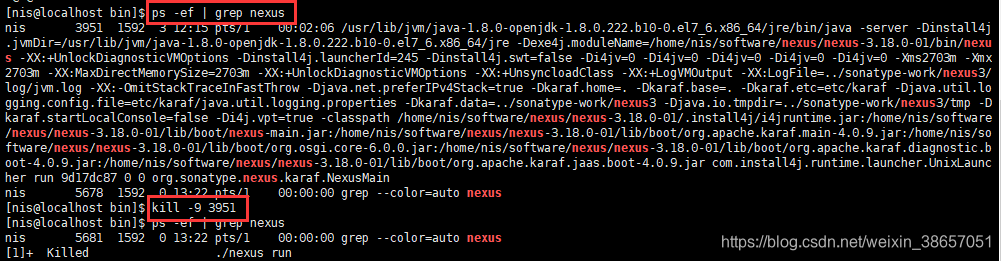
迫不得已只能通过以下命令查询nexus服务的进程,然后通过kill命令结束该nexus服务
ps -ef | grep nexus
kill -9 [进程号]
启动Nexus还是需要使用./nexus start
2.3.5、使用./nexus start启动
./nexus start
使用命令启动,但是启动时间会比较长,界面会一直停留在这个画面

我们直接到浏览器使用ip+8081端口访问,如果访问失败的话过一会继续刷新。
But~~~~~~~~ 刷新了大半天也没能刷新出来,怀疑是否是由于防火墙的问题
sudo service firewalld status
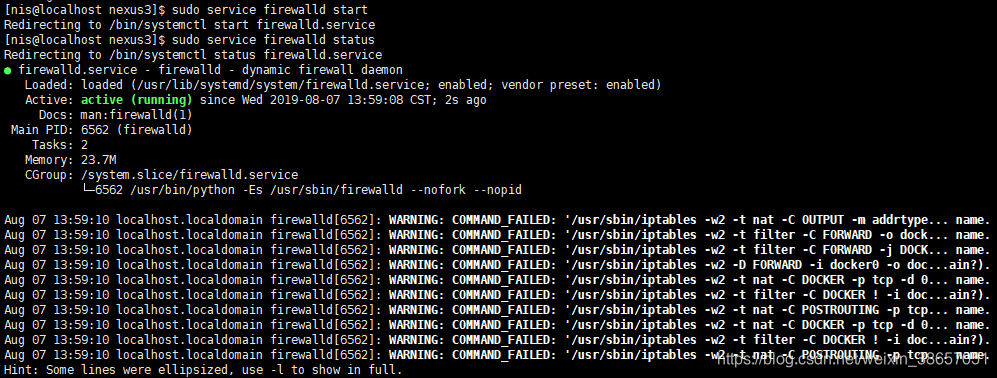
关闭防火墙测试下是否能够访问到登陆界面
sudo service firewalld stop
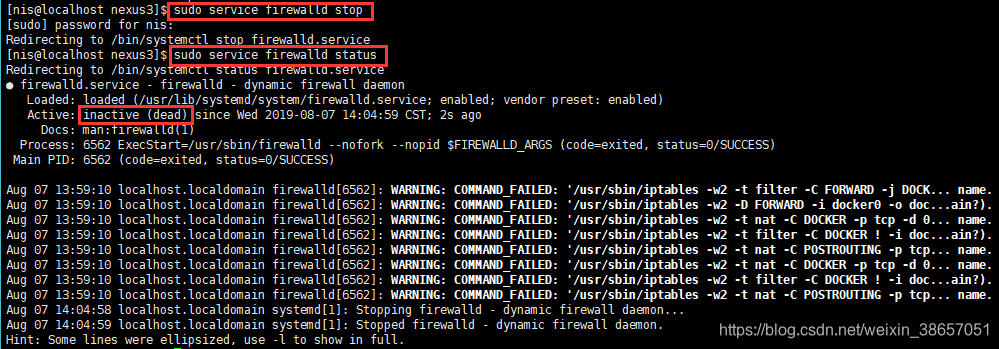
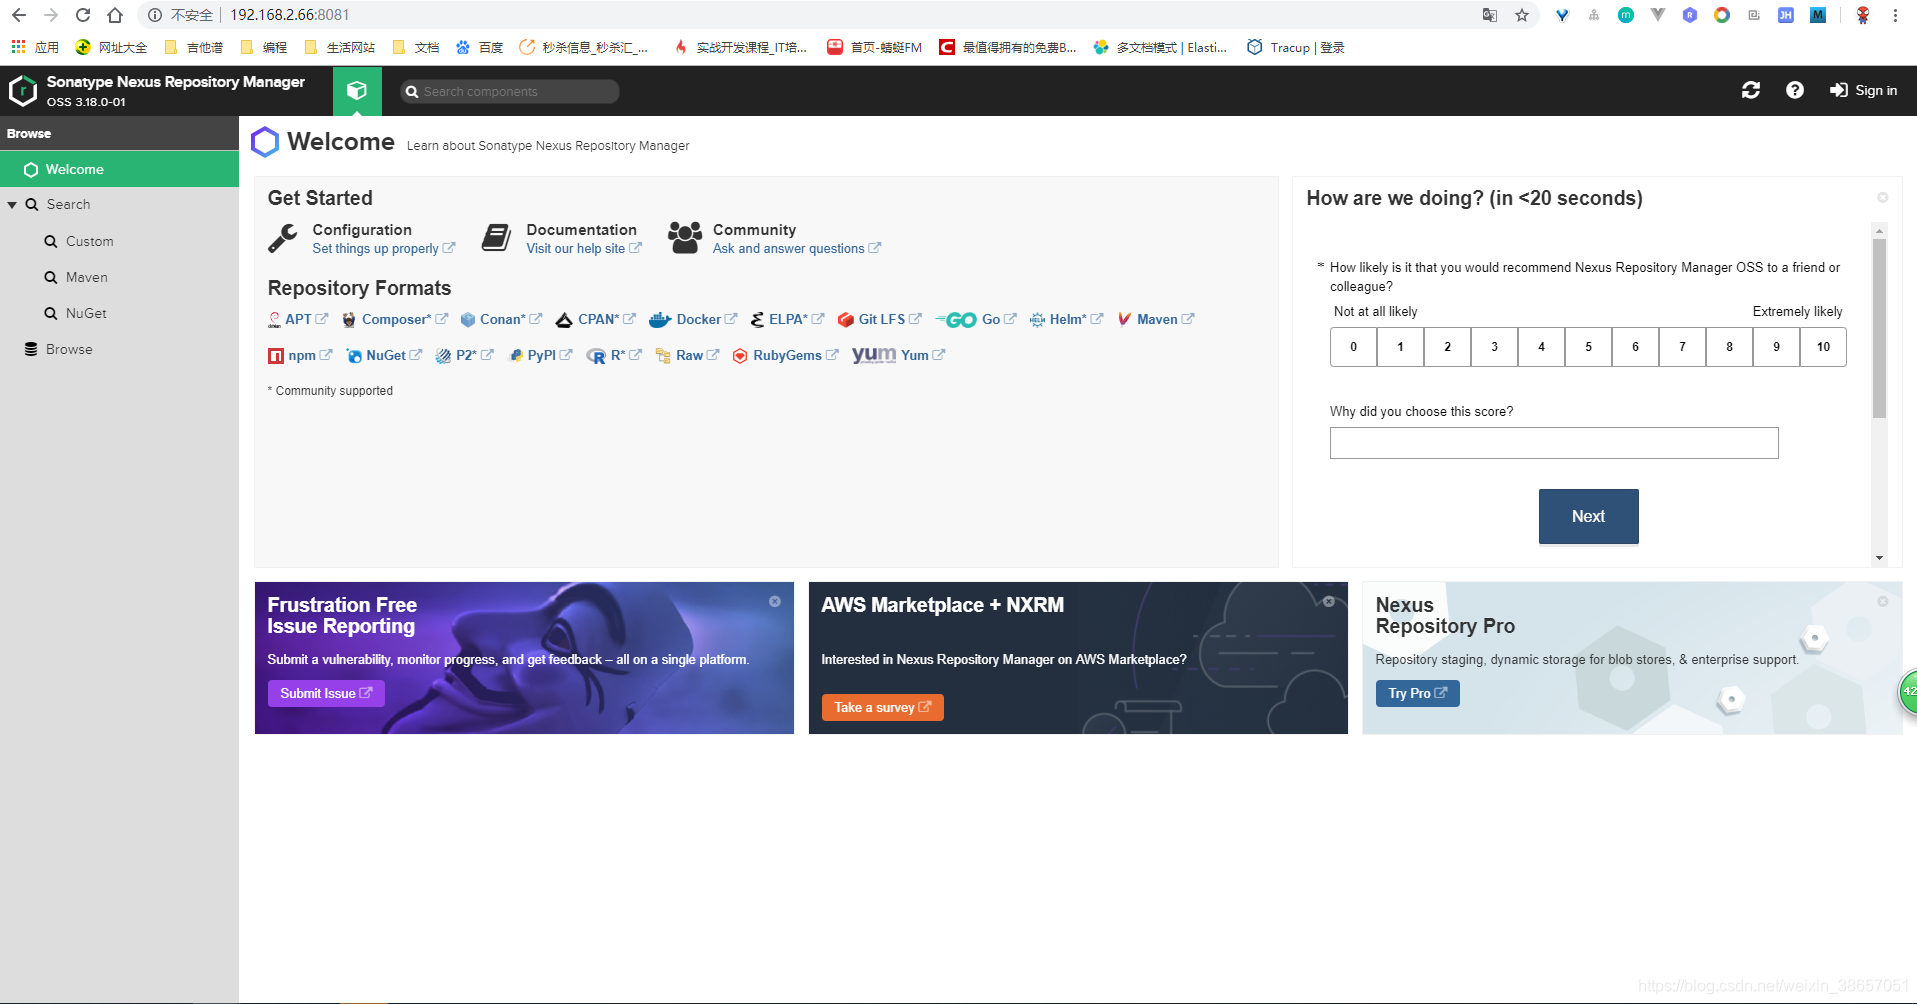
关闭后再次刷新页面,发现可以访问到登陆界面了
2.3.6、给防火墙添加8081的端口暴露
sudo firewall-cmd --add-port=8081/tcp
sudo firewall-cmd --list-ports
sudo firewall-cmd --remove-port=8081/tcp

三、登录Nexus
3.1、如果Nexus的版本不是3.7之后则使用admin/admin123登录
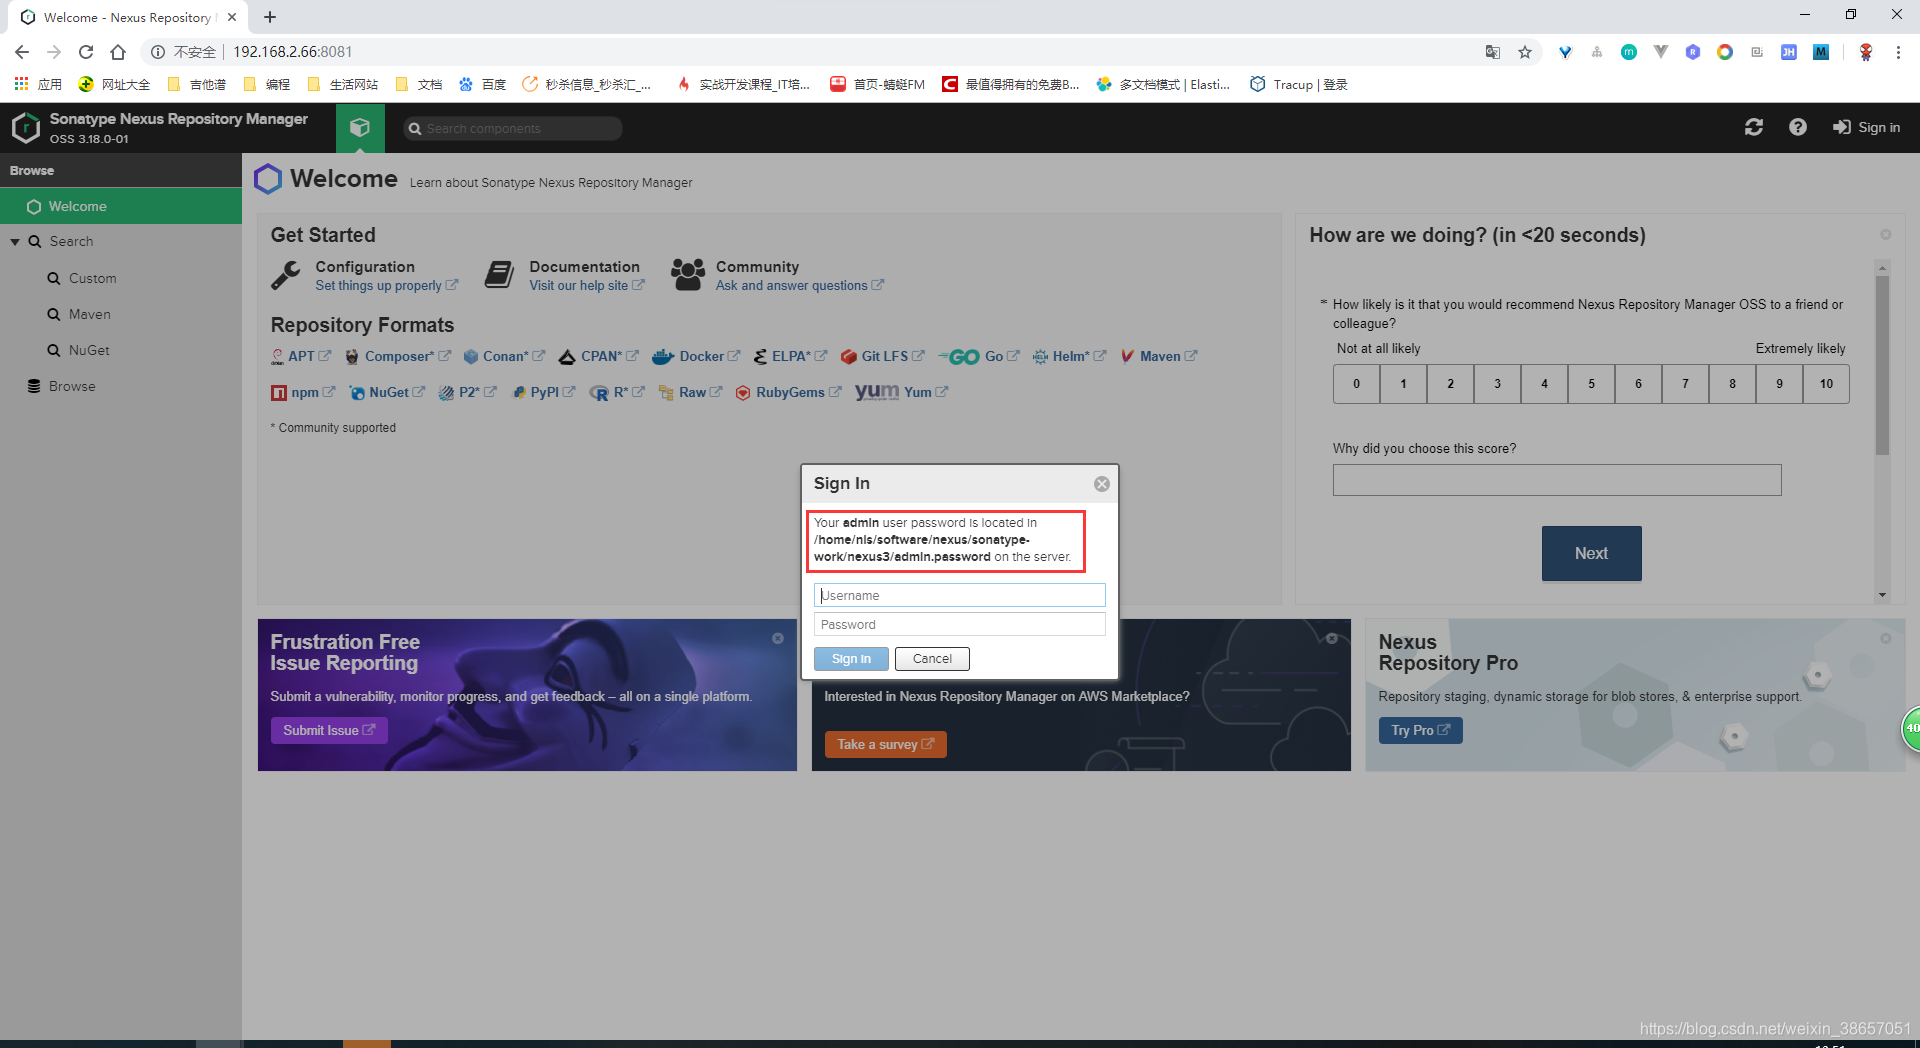
3.2、如果Nexus的版本是3.7之后
在3.7之后登录的密码变成了动态生成,在提示框中我们可以看到动态生成的密码在哪里
/home/nis/software/nexus/sonatype-work/nexus3/admin.password
按照路径进入到相关目录
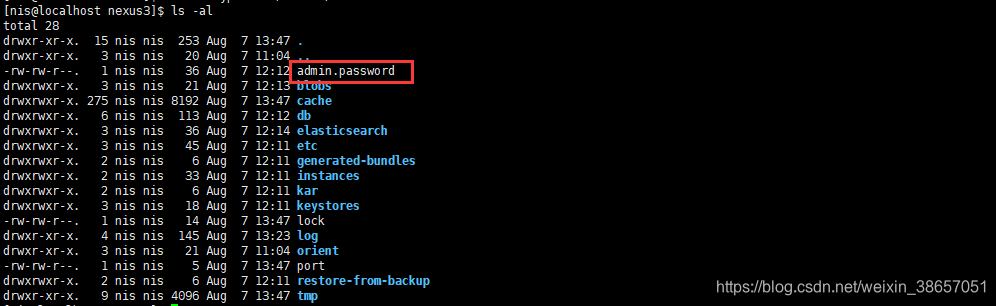
使用cat命令获取密码

登陆之后提示需要重新设置密码
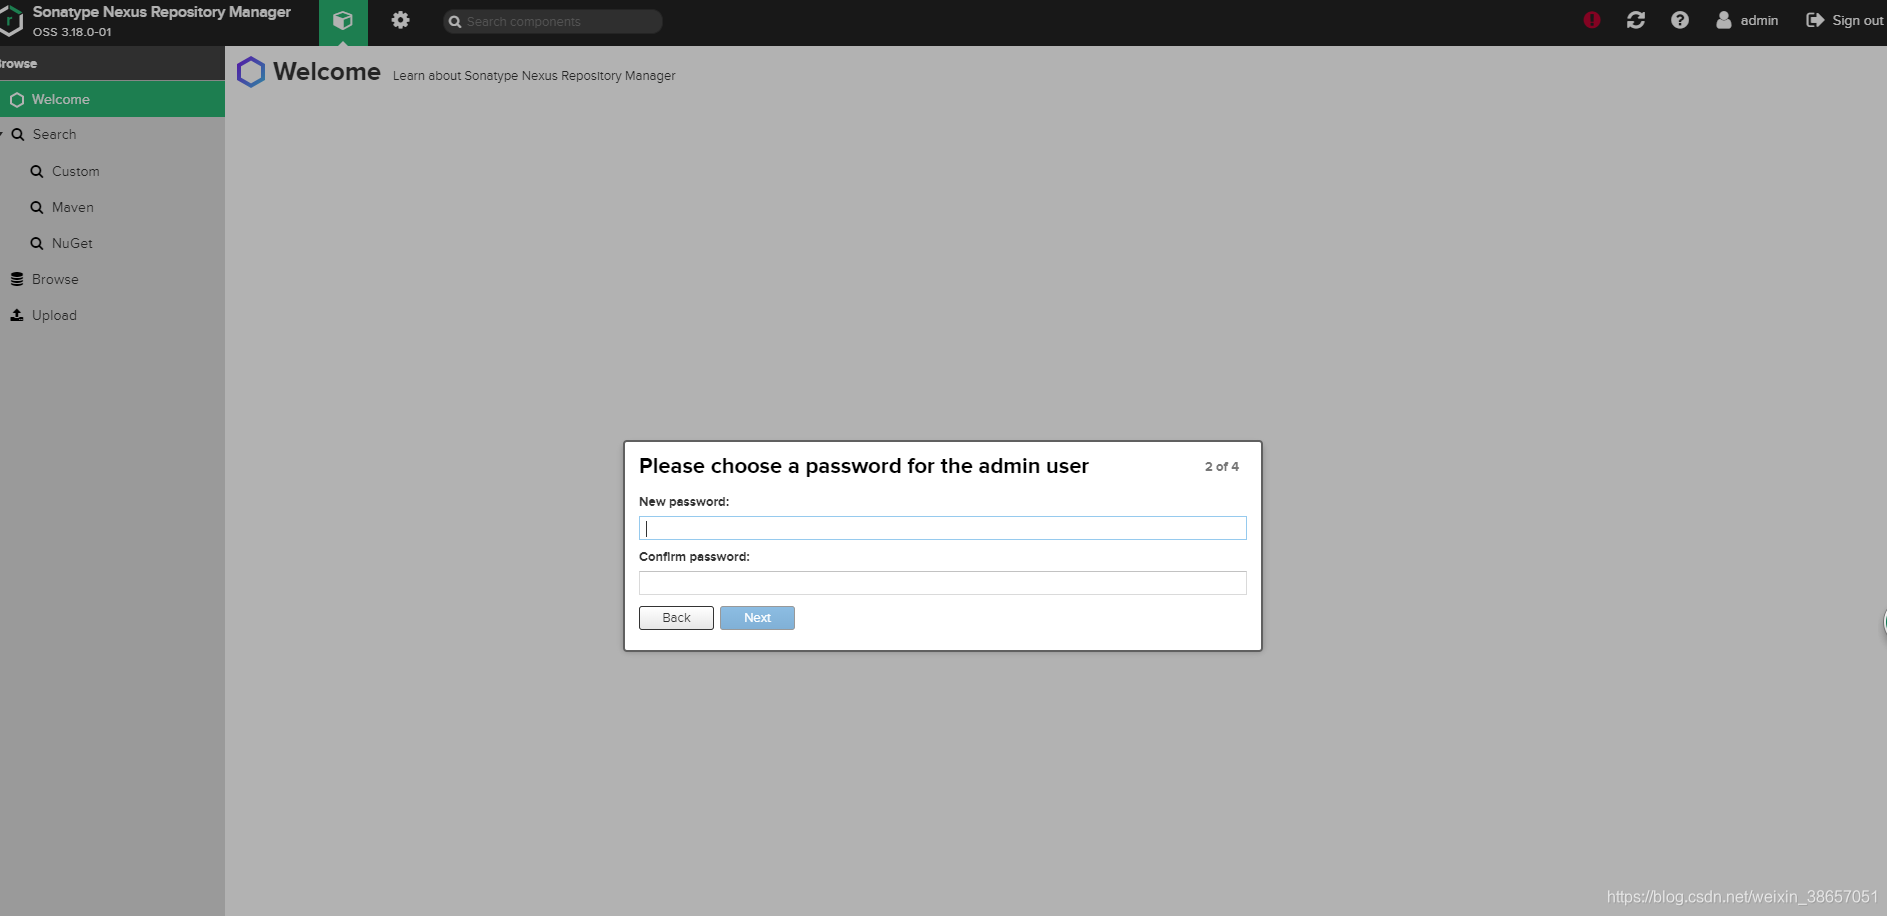
重新设置密码之后即可登录;
四、上传自己的jar包到Nexus
4.1、nexus简单介绍
4.1.1、仓库种类介绍
- hosted(宿主仓库库) :存放本公司开发的jar包(正式版本、测试版本)
- proxy(代理仓库):代理中央仓库、Apache下测试版本的jar包
- group(组仓库):使用时连接组仓库,包含Hosted(宿主仓库)和Proxy(代理仓库)
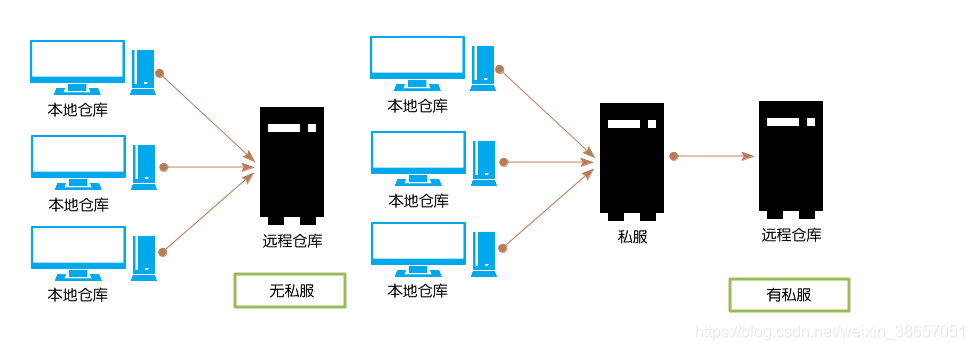
4.1.2、私有仓库工作原理
首先在本地仓库中找,如果没命中,那么就找远程私服;远程私服的查找规则同样是先找host属性的私有库,然后再去找proxy属性的远程仓库;可以配置多个proxy;

4.1.3、私有仓库简单配置
4.1.3.1、添加阿里云私服代理
阿里云私服地址:http://maven.aliyun.com/nexus/content/groups/public/
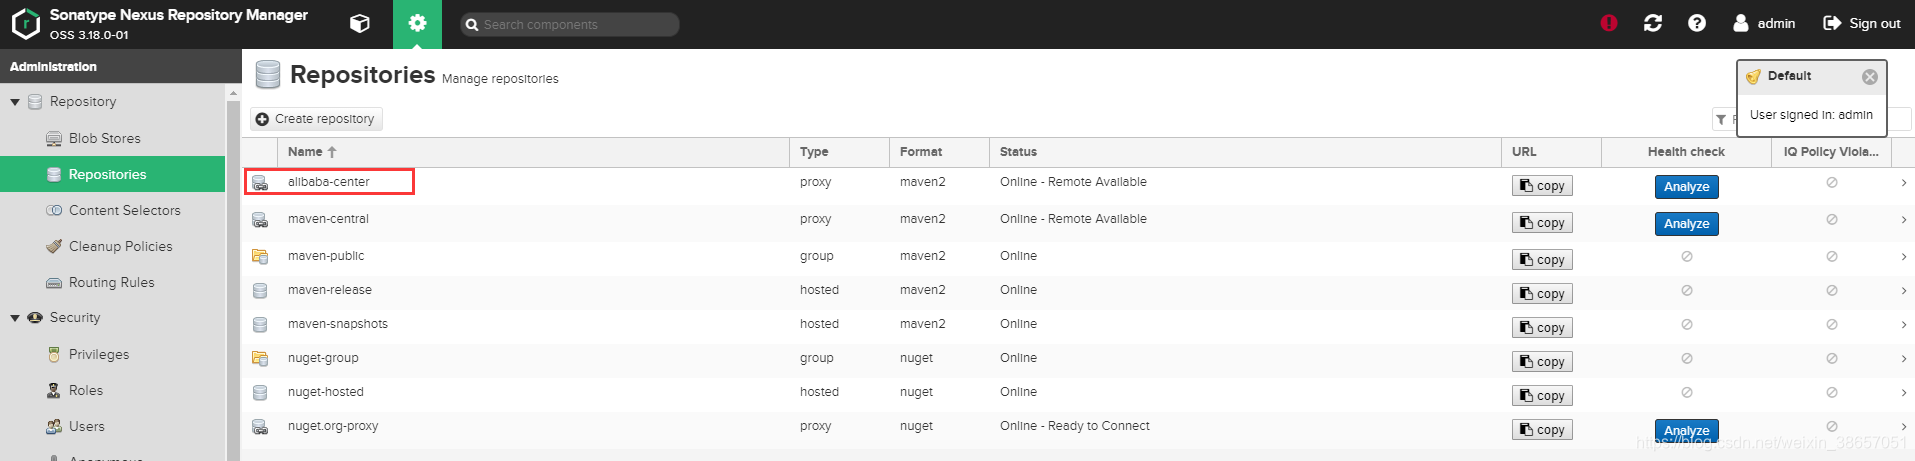

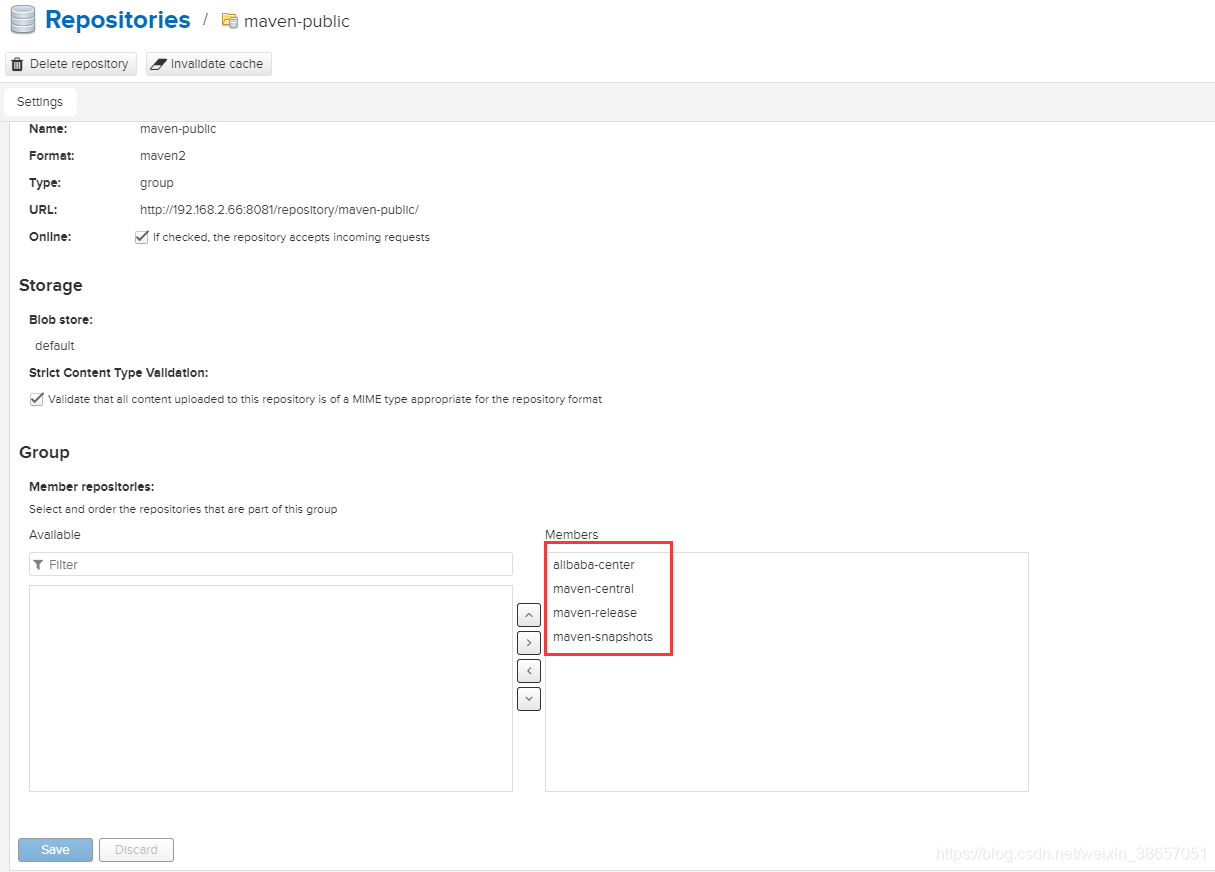
4.1.3.2、配置组仓库maven-public
将阿里云仓库和其他的几个仓库都放到该组仓库中;
4.2、配置maven使用私服下载jar
4.2.1、配置全局下载
4.2.1.1、maven的setting.xml文件配置maven-public仓库镜像
<mirror>
<id>nexus</id>
<mirrorOf>*</mirrorOf>
<name>nexus maven</name>
<url>http://192.168.2.66:8081/repository/maven-public/</url>
</mirror>
4.2.1.2、全局配置下载依赖(即项目pom无需配置)
在maven的setting.xml文件中配置私服配置,这种方式配置后所有本地使用该配置的maven项目的pom文件都无需配置私服下载相关配置。
<profiles>
<profile>
<id>mycof</id>
<repositories>
<repository>
<id>nexus</id>
<url>http://192.168.2.66:8081/repository/maven-public/</url>
<releases>
<enabled>true</enabled>
</releases>
<snapshots>
<enabled>true</enabled>
</snapshots>
</repository>
</repositories>
<pluginRepositories>
<pluginRepository>
<id>nexus</id>
<url>http://192.168.2.66:8081/repository/maven-public/</url>
<releases>
<enabled>true</enabled>
</releases>
<snapshots>
<enabled>true</enabled>
</snapshots>
</pluginRepository>
</pluginRepositories>
</profile>
</profiles>
激活使用上面的配置
<activeProfiles>
<activeProfile>mycof</activeProfile>
</activeProfiles>
4.2.2、配置单项目maven私服下载
4.2.2.1、maven的setting文件配置
配置了一个releases和一个snapshots的仓库用户名和密码;
    <server>
        <id>maven-releases</id>
        <username>admin</username>
        <password>123456</password>
	</server>
	<server>
        <id>maven-snapshots</id>
        <username>admin</username>
        <password>123456</password>
	</server>
4.2.2.2、maven的setting文件配置
<repositories>
<repository>
<id>nexus</id>
<name>192.168.2.66 private nexus</name>
<url>http://192.168.2.66:8081/repository/maven-public/</url>
<releases>
<enabled>true</enabled>
</releases>
<snapshots>
<enabled>true</enabled>
</snapshots>
</repository>
</repositories>
<pluginRepositories>
<pluginRepository>
<id>nexus</id>
<name>local private nexus</name>
<url>http://192.168.2.66:8081/repository/maven-public/</url>
<releases>
<enabled>true</enabled>
</releases>
<snapshots>
<enabled>true</enabled>
</snapshots>
</pluginRepository>
</pluginRepositories>
<distributionManagement>
	<repository>
		<id>maven-releases</id>
		<name>Releases</name>
		<url>http://192.168.2.66:8081/repository/maven-release/</url>
	</repository>
	<snapshotRepository>
		<id>maven-snapshots</id>
		<name>Snapshot</name>
		<url>http://192.168.2.66:8081/repository/maven-snapshots/</url>
	</snapshotRepository>
</distributionManagement>
测试发现只需要配置以下代码即可做IDEA的上传操作
<distributionManagement>
<repository>
<id>maven-releases</id>
<name>Releases</name>
<url>http://192.168.2.66:8081/repository/maven-release/</url>
</repository>
<snapshotRepository>
<id>maven-snapshots</id>
<name>Snapshot</name>
<url>http://192.168.2.66:8081/repository/maven-snapshots/</url>
</snapshotRepository>
</distributionManagement>
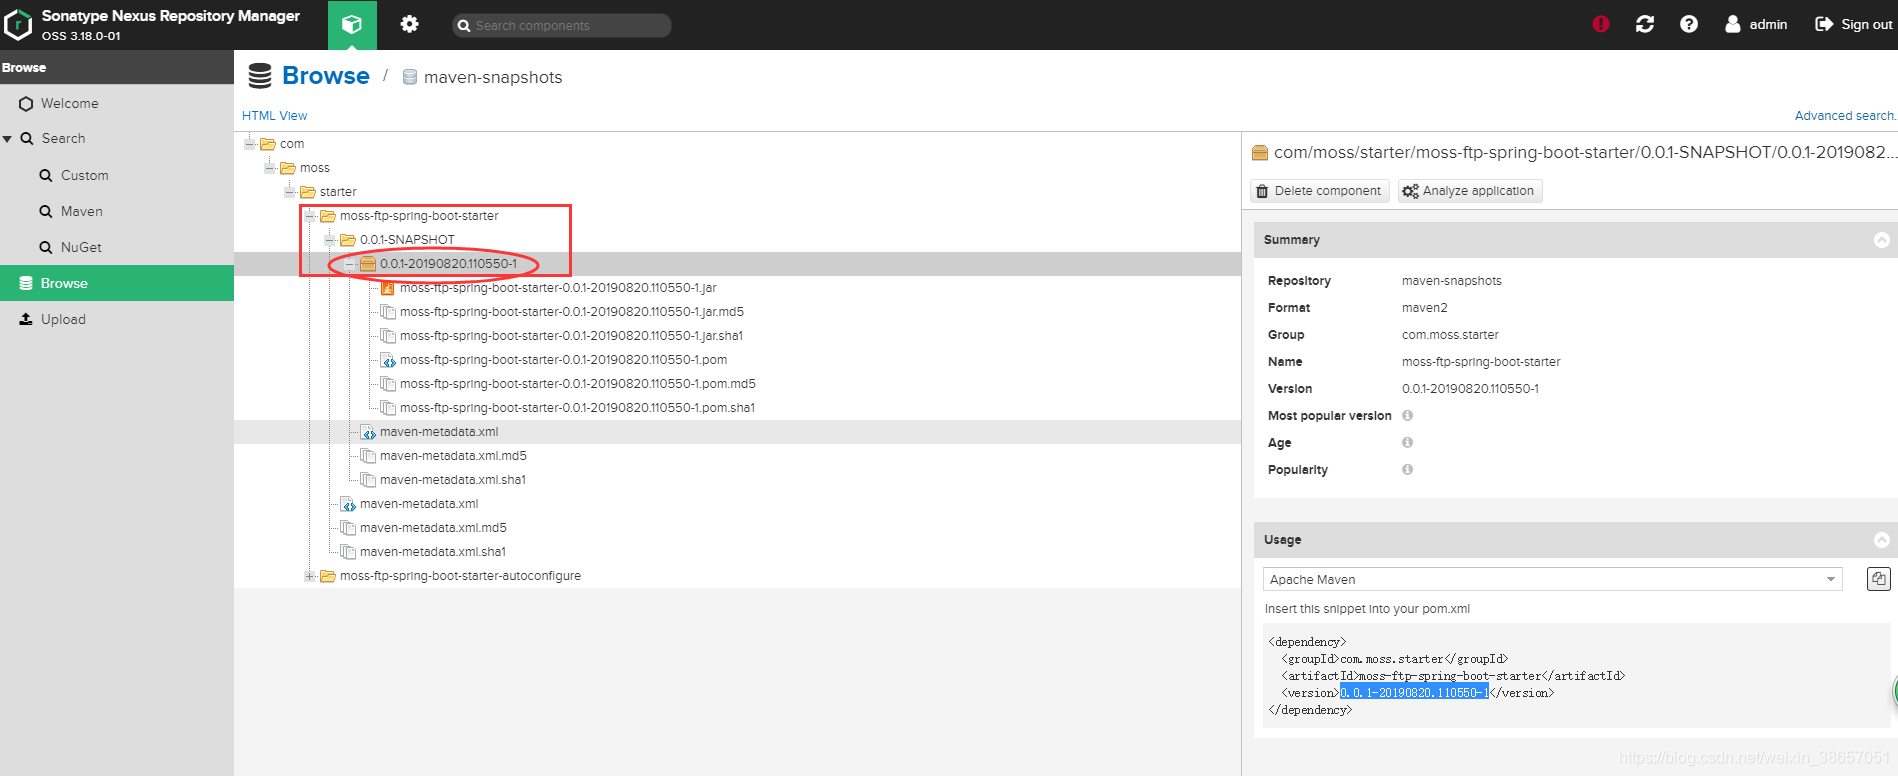
4.2.3、IEDA上传jar到maven私服
如下图所示的deploy按钮点击后即可开始打包上传到maven私服;
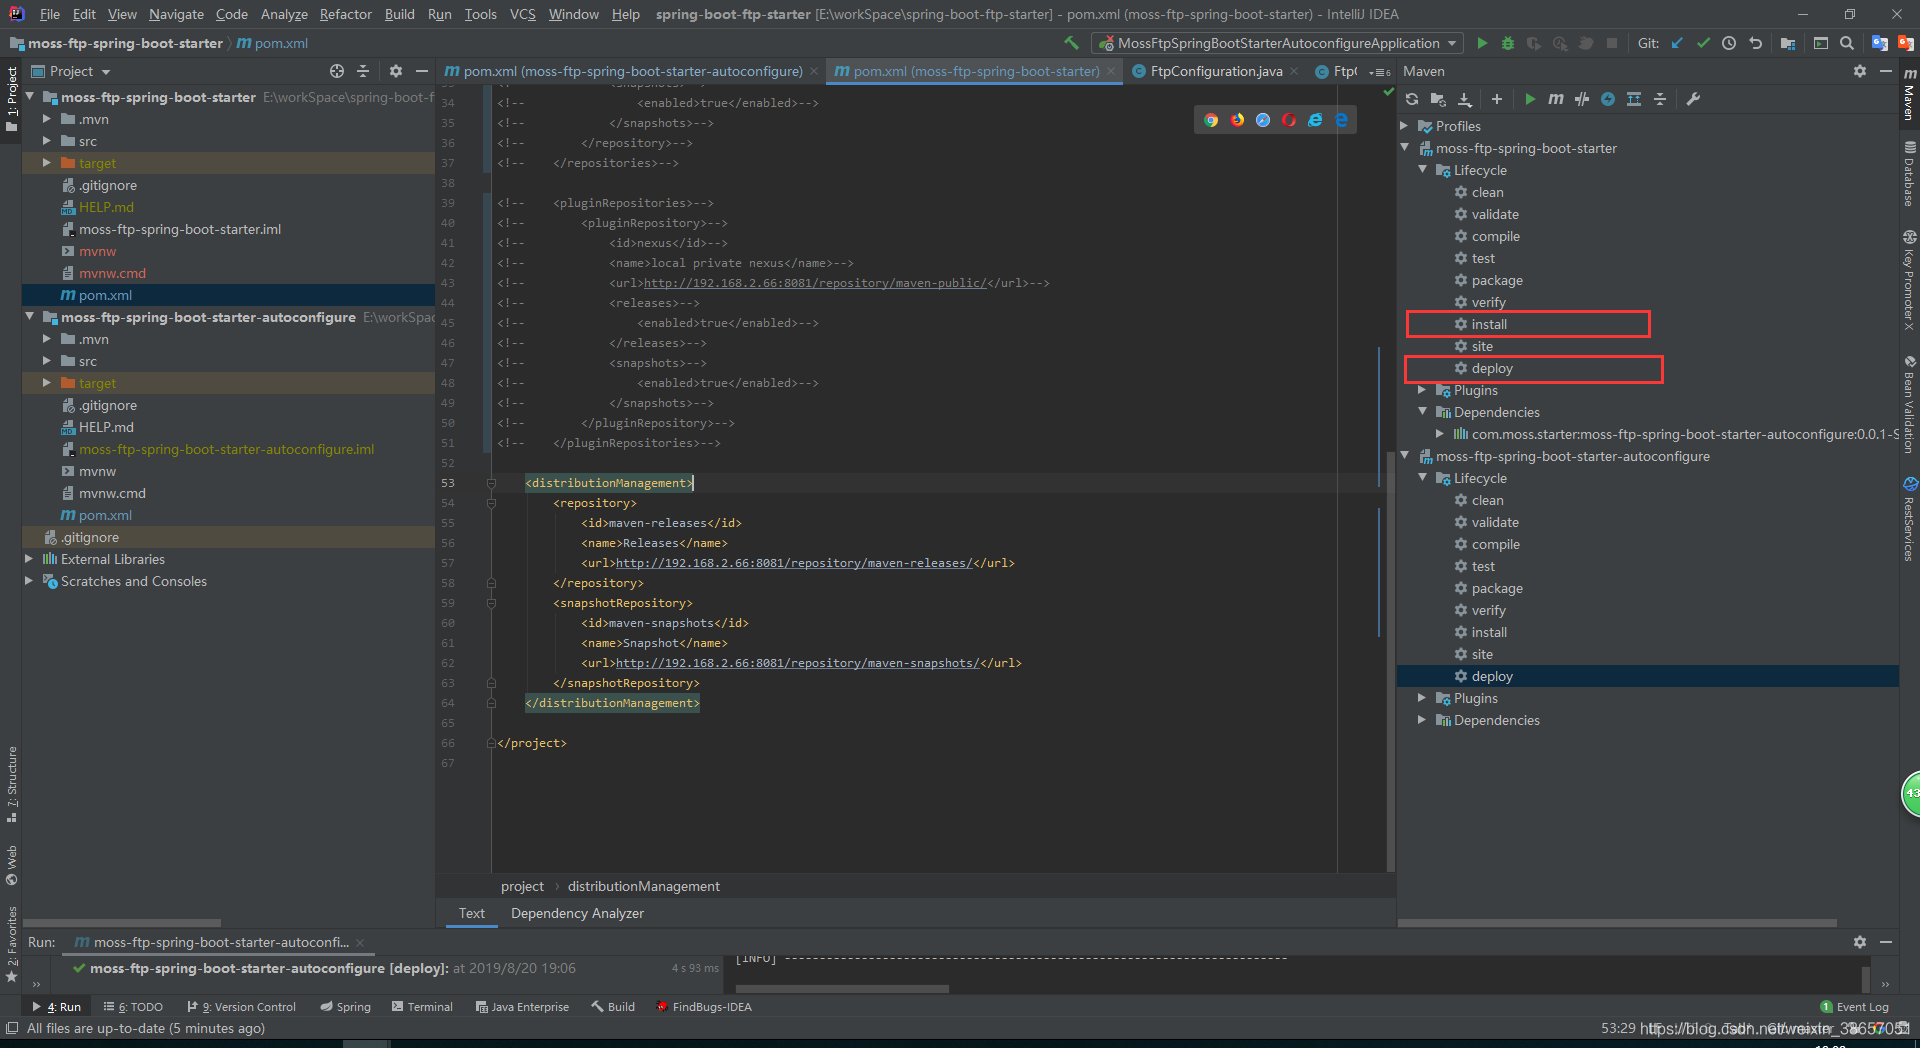
下图包结构中版本号后还有个实际jar的version是不同的,因为在snapshots版本是允许进行同一个版本的多次推送的。
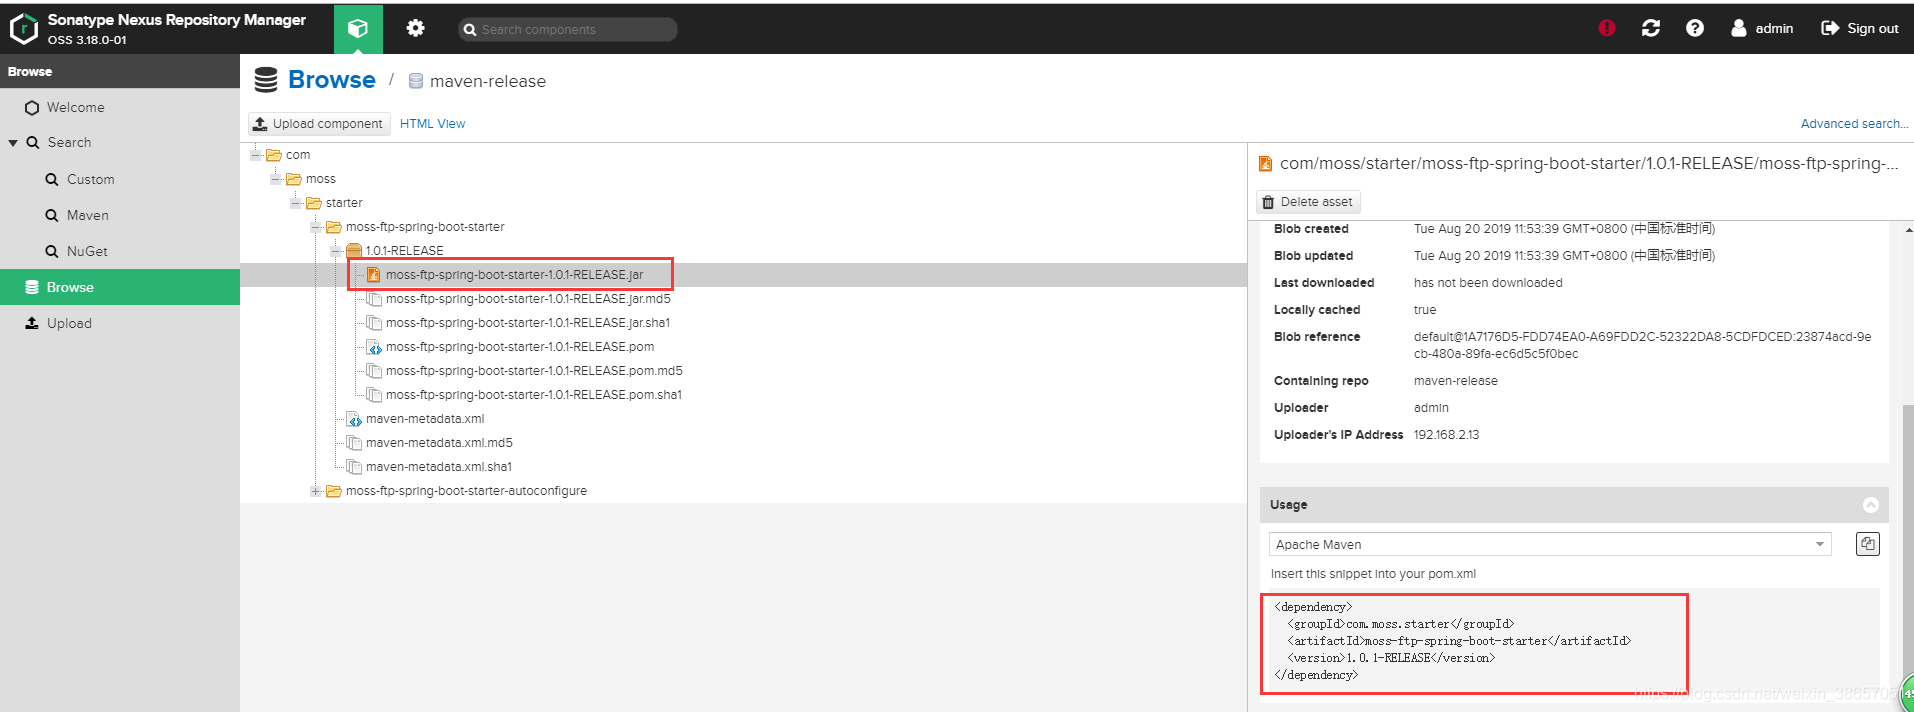
如下图为上传的正式版本的jar,则会显示与在pom中定义的版本一致的version;但是release版本不允许同版本多次推送,只能通过修改pom.xml文件中的version版本;
4.3、参考链接
https://www.jianshu.com/p/1cfbc1518fce
本文内容由网友自发贡献,版权归原作者所有,本站不承担相应法律责任。如您发现有涉嫌抄袭侵权的内容,请联系:hwhale#tublm.com(使用前将#替换为@)