在之前发布的一篇博文《MNIST数据集实现车牌识别--初步演示版》中,我们演示了如何使用TensorFlow进行车牌识别,但是,当时采用的数据集是MNIST数字手写体,只能分类0-9共10个数字,无法分类省份简称和字母,局限性较大,无实际意义。
经过图像定位分割处理,博主收集了相关省份简称和26个字母的图片数据集,结合前述博文中贴出的python+TensorFlow代码,实现了完整的车牌识别功能。本着分享精神,在此送上全部代码和车牌数据集。
车牌数据集下载地址(约4000张图片):https://pan.baidu.com/s/1RyoMbHtLUlsMDsvLBCLZ2w
省份简称训练+识别代码(保存文件名为train-license-province.py)(拷贝代码请务必注意python文本缩进,只要有一处缩进错误,就无法得到正确结果,或者出现异常):
#!/usr/bin/python3.5
# -*- coding: utf-8 -*-

import sys
import os
import time
import random

import numpy as np
import tensorflow as tf

from PIL import Image


SIZE = 1280
WIDTH = 32
HEIGHT = 40
NUM_CLASSES = 6
iterations = 300

SAVER_DIR = "train-saver/province/"

PROVINCES = ("京","闽","粤","苏","沪","浙")
nProvinceIndex = 0

time_begin = time.time()


# 定义输入节点,对应于图片像素值矩阵集合和图片标签(即所代表的数字)
x = tf.placeholder(tf.float32, shape=[None, SIZE])
y_ = tf.placeholder(tf.float32, shape=[None, NUM_CLASSES])

x_image = tf.reshape(x, [-1, WIDTH, HEIGHT, 1])


# 定义卷积函数
def conv_layer(inputs, W, b, conv_strides, kernel_size, pool_strides, padding):
    L1_conv = tf.nn.conv2d(inputs, W, strides=conv_strides, padding=padding)
    L1_relu = tf.nn.relu(L1_conv + b)
    return tf.nn.max_pool(L1_relu, ksize=kernel_size, strides=pool_strides, padding='SAME')

# 定义全连接层函数
def full_connect(inputs, W, b):
    return tf.nn.relu(tf.matmul(inputs, W) + b)


if __name__ =='__main__' and sys.argv[1]=='train':
    # 第一次遍历图片目录是为了获取图片总数
    input_count = 0
    for i in range(0,NUM_CLASSES):
        dir = './train_images/training-set/chinese-characters/%s/' % i           # 这里可以改成你自己的图片目录,i为分类标签
        for rt, dirs, files in os.walk(dir):
            for filename in files:
                input_count += 1

    # 定义对应维数和各维长度的数组
    input_images = np.array([[0]*SIZE for i in range(input_count)])
    input_labels = np.array([[0]*NUM_CLASSES for i in range(input_count)])

    # 第二次遍历图片目录是为了生成图片数据和标签
    index = 0
    for i in range(0,NUM_CLASSES):
        dir = './train_images/training-set/chinese-characters/%s/' % i          # 这里可以改成你自己的图片目录,i为分类标签
        for rt, dirs, files in os.walk(dir):
            for filename in files:
                filename = dir + filename
                img = Image.open(filename)
                width = img.size[0]
                height = img.size[1]
                for h in range(0, height):
                    for w in range(0, width):
                        # 通过这样的处理,使数字的线条变细,有利于提高识别准确率
                        if img.getpixel((w, h)) > 230:
                            input_images[index][w+h*width] = 0
                        else:
                            input_images[index][w+h*width] = 1
                input_labels[index][i] = 1
                index += 1

    # 第一次遍历图片目录是为了获取图片总数
    val_count = 0
    for i in range(0,NUM_CLASSES):
        dir = './train_images/validation-set/chinese-characters/%s/' % i           # 这里可以改成你自己的图片目录,i为分类标签
        for rt, dirs, files in os.walk(dir):
            for filename in files:
                val_count += 1

    # 定义对应维数和各维长度的数组
    val_images = np.array([[0]*SIZE for i in range(val_count)])
    val_labels = np.array([[0]*NUM_CLASSES for i in range(val_count)])

    # 第二次遍历图片目录是为了生成图片数据和标签
    index = 0
    for i in range(0,NUM_CLASSES):
        dir = './train_images/validation-set/chinese-characters/%s/' % i          # 这里可以改成你自己的图片目录,i为分类标签
        for rt, dirs, files in os.walk(dir):
            for filename in files:
                filename = dir + filename
                img = Image.open(filename)
                width = img.size[0]
                height = img.size[1]
                for h in range(0, height):
                    for w in range(0, width):
                        # 通过这样的处理,使数字的线条变细,有利于提高识别准确率
                        if img.getpixel((w, h)) > 230:
                            val_images[index][w+h*width] = 0
                        else:
                            val_images[index][w+h*width] = 1
                val_labels[index][i] = 1
                index += 1

    with tf.Session() as sess:
        # 第一个卷积层
        W_conv1 = tf.Variable(tf.truncated_normal([8, 8, 1, 16], stddev=0.1), name="W_conv1")
        b_conv1 = tf.Variable(tf.constant(0.1, shape=[16]), name="b_conv1")
        conv_strides = [1, 1, 1, 1]
        kernel_size = [1, 2, 2, 1]
        pool_strides = [1, 2, 2, 1]
        L1_pool = conv_layer(x_image, W_conv1, b_conv1, conv_strides, kernel_size, pool_strides, padding='SAME')

        # 第二个卷积层
        W_conv2 = tf.Variable(tf.truncated_normal([5, 5, 16, 32], stddev=0.1), name="W_conv2")
        b_conv2 = tf.Variable(tf.constant(0.1, shape=[32]), name="b_conv2")
        conv_strides = [1, 1, 1, 1]
        kernel_size = [1, 1, 1, 1]
        pool_strides = [1, 1, 1, 1]
        L2_pool = conv_layer(L1_pool, W_conv2, b_conv2, conv_strides, kernel_size, pool_strides, padding='SAME')


        # 全连接层
        W_fc1 = tf.Variable(tf.truncated_normal([16 * 20 * 32, 512], stddev=0.1), name="W_fc1")
        b_fc1 = tf.Variable(tf.constant(0.1, shape=[512]), name="b_fc1")
        h_pool2_flat = tf.reshape(L2_pool, [-1, 16 * 20*32])
        h_fc1 = full_connect(h_pool2_flat, W_fc1, b_fc1)


        # dropout
        keep_prob = tf.placeholder(tf.float32)

        h_fc1_drop = tf.nn.dropout(h_fc1, keep_prob)


        # readout层
        W_fc2 = tf.Variable(tf.truncated_normal([512, NUM_CLASSES], stddev=0.1), name="W_fc2")
        b_fc2 = tf.Variable(tf.constant(0.1, shape=[NUM_CLASSES]), name="b_fc2")

        # 定义优化器和训练op
        y_conv = tf.matmul(h_fc1_drop, W_fc2) + b_fc2
        cross_entropy = tf.reduce_mean(tf.nn.softmax_cross_entropy_with_logits(labels=y_, logits=y_conv))
        train_step = tf.train.AdamOptimizer((1e-4)).minimize(cross_entropy)

        correct_prediction = tf.equal(tf.argmax(y_conv, 1), tf.argmax(y_, 1))
        accuracy = tf.reduce_mean(tf.cast(correct_prediction, tf.float32))

        # 初始化saver
        saver = tf.train.Saver()

        sess.run(tf.global_variables_initializer())

        time_elapsed = time.time() - time_begin
        print("读取图片文件耗费时间:%d秒" % time_elapsed)
        time_begin = time.time()

        print ("一共读取了 %s 个训练图像, %s 个标签" % (input_count, input_count))

        # 设置每次训练op的输入个数和迭代次数,这里为了支持任意图片总数,定义了一个余数remainder,譬如,如果每次训练op的输入个数为60,图片总数为150张,则前面两次各输入60张,最后一次输入30张(余数30)
        batch_size = 60
        iterations = iterations
        batches_count = int(input_count / batch_size)
        remainder = input_count % batch_size
        print ("训练数据集分成 %s 批, 前面每批 %s 个数据,最后一批 %s 个数据" % (batches_count+1, batch_size, remainder))

        # 执行训练迭代
        for it in range(iterations):
            # 这里的关键是要把输入数组转为np.array
            for n in range(batches_count):
                train_step.run(feed_dict={x: input_images[n*batch_size:(n+1)*batch_size], y_: input_labels[n*batch_size:(n+1)*batch_size], keep_prob: 0.5})
            if remainder > 0:
                start_index = batches_count * batch_size;
                train_step.run(feed_dict={x: input_images[start_index:input_count-1], y_: input_labels[start_index:input_count-1], keep_prob: 0.5})

            # 每完成五次迭代,判断准确度是否已达到100%,达到则退出迭代循环
            iterate_accuracy = 0
            if it%5 == 0:
                iterate_accuracy = accuracy.eval(feed_dict={x: val_images, y_: val_labels, keep_prob: 1.0})
                print ('第 %d 次训练迭代: 准确率 %0.5f%%' % (it, iterate_accuracy*100))
                if iterate_accuracy >= 0.9999 and it >= 150:
                    break;

        print ('完成训练!')
        time_elapsed = time.time() - time_begin
        print ("训练耗费时间:%d秒" % time_elapsed)
        time_begin = time.time()

        # 保存训练结果
        if not os.path.exists(SAVER_DIR):
            print ('不存在训练数据保存目录,现在创建保存目录')
            os.makedirs(SAVER_DIR)
        saver_path = saver.save(sess, "%smodel.ckpt"%(SAVER_DIR))


if __name__ =='__main__' and sys.argv[1]=='predict':
    saver = tf.train.import_meta_graph("%smodel.ckpt.meta"%(SAVER_DIR))
    with tf.Session() as sess:
        model_file=tf.train.latest_checkpoint(SAVER_DIR)
        saver.restore(sess, model_file)

        # 第一个卷积层
        W_conv1 = sess.graph.get_tensor_by_name("W_conv1:0")
        b_conv1 = sess.graph.get_tensor_by_name("b_conv1:0")
        conv_strides = [1, 1, 1, 1]
        kernel_size = [1, 2, 2, 1]
        pool_strides = [1, 2, 2, 1]
        L1_pool = conv_layer(x_image, W_conv1, b_conv1, conv_strides, kernel_size, pool_strides, padding='SAME')

        # 第二个卷积层
        W_conv2 = sess.graph.get_tensor_by_name("W_conv2:0")
        b_conv2 = sess.graph.get_tensor_by_name("b_conv2:0")
        conv_strides = [1, 1, 1, 1]
        kernel_size = [1, 1, 1, 1]
        pool_strides = [1, 1, 1, 1]
        L2_pool = conv_layer(L1_pool, W_conv2, b_conv2, conv_strides, kernel_size, pool_strides, padding='SAME')


        # 全连接层
        W_fc1 = sess.graph.get_tensor_by_name("W_fc1:0")
        b_fc1 = sess.graph.get_tensor_by_name("b_fc1:0")
        h_pool2_flat = tf.reshape(L2_pool, [-1, 16 * 20*32])
        h_fc1 = full_connect(h_pool2_flat, W_fc1, b_fc1)


        # dropout
        keep_prob = tf.placeholder(tf.float32)

        h_fc1_drop = tf.nn.dropout(h_fc1, keep_prob)


        # readout层
        W_fc2 = sess.graph.get_tensor_by_name("W_fc2:0")
        b_fc2 = sess.graph.get_tensor_by_name("b_fc2:0")

        # 定义优化器和训练op
        conv = tf.nn.softmax(tf.matmul(h_fc1_drop, W_fc2) + b_fc2)

        for n in range(1,2):
            path = "test_images/%s.bmp" % (n)
            img = Image.open(path)
            width = img.size[0]
            height = img.size[1]

            img_data = [[0]*SIZE for i in range(1)]
            for h in range(0, height):
                for w in range(0, width):
                    if img.getpixel((w, h)) < 190:
                        img_data[0][w+h*width] = 1
                    else:
                        img_data[0][w+h*width] = 0

            result = sess.run(conv, feed_dict = {x: np.array(img_data), keep_prob: 1.0})
            max1 = 0
            max2 = 0
            max3 = 0
            max1_index = 0
            max2_index = 0
            max3_index = 0
            for j in range(NUM_CLASSES):
                if result[0][j] > max1:
                    max1 = result[0][j]
                    max1_index = j
                    continue
                if (result[0][j]>max2) and (result[0][j]<=max1):
                    max2 = result[0][j]
                    max2_index = j
                    continue
                if (result[0][j]>max3) and (result[0][j]<=max2):
                    max3 = result[0][j]
                    max3_index = j
                    continue

            nProvinceIndex = max1_index
            print ("概率:  [%s %0.2f%%]    [%s %0.2f%%]    [%s %0.2f%%]" % (PROVINCES[max1_index],max1*100, PROVINCES[max2_index],max2*100, PROVINCES[max3_index],max3*100))

        print ("省份简称是: %s" % PROVINCES[nProvinceIndex])
城市代号训练+识别代码(保存文件名为train-license-letters.py):
#!/usr/bin/python3.5
# -*- coding: utf-8 -*-

import sys
import os
import time
import random

import numpy as np
import tensorflow as tf

from PIL import Image


SIZE = 1280
WIDTH = 32
HEIGHT = 40
NUM_CLASSES = 26
iterations = 500

SAVER_DIR = "train-saver/letters/"

LETTERS_DIGITS = ("A","B","C","D","E","F","G","H","J","K","L","M","N","P","Q","R","S","T","U","V","W","X","Y","Z","I","O")
license_num = ""

time_begin = time.time()


# 定义输入节点,对应于图片像素值矩阵集合和图片标签(即所代表的数字)
x = tf.placeholder(tf.float32, shape=[None, SIZE])
y_ = tf.placeholder(tf.float32, shape=[None, NUM_CLASSES])

x_image = tf.reshape(x, [-1, WIDTH, HEIGHT, 1])


# 定义卷积函数
def conv_layer(inputs, W, b, conv_strides, kernel_size, pool_strides, padding):
    L1_conv = tf.nn.conv2d(inputs, W, strides=conv_strides, padding=padding)
    L1_relu = tf.nn.relu(L1_conv + b)
    return tf.nn.max_pool(L1_relu, ksize=kernel_size, strides=pool_strides, padding='SAME')

# 定义全连接层函数
def full_connect(inputs, W, b):
    return tf.nn.relu(tf.matmul(inputs, W) + b)


if __name__ =='__main__' and sys.argv[1]=='train':
    # 第一次遍历图片目录是为了获取图片总数
    input_count = 0
    for i in range(0+10,NUM_CLASSES+10):
        dir = './train_images/training-set/letters/%s/' % i           # 这里可以改成你自己的图片目录,i为分类标签
        for rt, dirs, files in os.walk(dir):
            for filename in files:
                input_count += 1

    # 定义对应维数和各维长度的数组
    input_images = np.array([[0]*SIZE for i in range(input_count)])
    input_labels = np.array([[0]*NUM_CLASSES for i in range(input_count)])

    # 第二次遍历图片目录是为了生成图片数据和标签
    index = 0
    for i in range(0+10,NUM_CLASSES+10):
        dir = './train_images/training-set/letters/%s/' % i          # 这里可以改成你自己的图片目录,i为分类标签
        for rt, dirs, files in os.walk(dir):
            for filename in files:
                filename = dir + filename
                img = Image.open(filename)
                width = img.size[0]
                height = img.size[1]
                for h in range(0, height):
                    for w in range(0, width):
                        # 通过这样的处理,使数字的线条变细,有利于提高识别准确率
                        if img.getpixel((w, h)) > 230:
                            input_images[index][w+h*width] = 0
                        else:
                            input_images[index][w+h*width] = 1
                #print ("i=%d, index=%d" % (i, index))
                input_labels[index][i-10] = 1
                index += 1

    # 第一次遍历图片目录是为了获取图片总数
    val_count = 0
    for i in range(0+10,NUM_CLASSES+10):
        dir = './train_images/validation-set/%s/' % i           # 这里可以改成你自己的图片目录,i为分类标签
        for rt, dirs, files in os.walk(dir):
            for filename in files:
                val_count += 1

    # 定义对应维数和各维长度的数组
    val_images = np.array([[0]*SIZE for i in range(val_count)])
    val_labels = np.array([[0]*NUM_CLASSES for i in range(val_count)])

    # 第二次遍历图片目录是为了生成图片数据和标签
    index = 0
    for i in range(0+10,NUM_CLASSES+10):
        dir = './train_images/validation-set/%s/' % i          # 这里可以改成你自己的图片目录,i为分类标签
        for rt, dirs, files in os.walk(dir):
            for filename in files:
                filename = dir + filename
                img = Image.open(filename)
                width = img.size[0]
                height = img.size[1]
                for h in range(0, height):
                    for w in range(0, width):
                        # 通过这样的处理,使数字的线条变细,有利于提高识别准确率
                        if img.getpixel((w, h)) > 230:
                            val_images[index][w+h*width] = 0
                        else:
                            val_images[index][w+h*width] = 1
                val_labels[index][i-10] = 1
                index += 1

    with tf.Session() as sess:
        # 第一个卷积层
        W_conv1 = tf.Variable(tf.truncated_normal([8, 8, 1, 16], stddev=0.1), name="W_conv1")
        b_conv1 = tf.Variable(tf.constant(0.1, shape=[16]), name="b_conv1")
        conv_strides = [1, 1, 1, 1]
        kernel_size = [1, 2, 2, 1]
        pool_strides = [1, 2, 2, 1]
        L1_pool = conv_layer(x_image, W_conv1, b_conv1, conv_strides, kernel_size, pool_strides, padding='SAME')

        # 第二个卷积层
        W_conv2 = tf.Variable(tf.truncated_normal([5, 5, 16, 32], stddev=0.1), name="W_conv2")
        b_conv2 = tf.Variable(tf.constant(0.1, shape=[32]), name="b_conv2")
        conv_strides = [1, 1, 1, 1]
        kernel_size = [1, 1, 1, 1]
        pool_strides = [1, 1, 1, 1]
        L2_pool = conv_layer(L1_pool, W_conv2, b_conv2, conv_strides, kernel_size, pool_strides, padding='SAME')


        # 全连接层
        W_fc1 = tf.Variable(tf.truncated_normal([16 * 20 * 32, 512], stddev=0.1), name="W_fc1")
        b_fc1 = tf.Variable(tf.constant(0.1, shape=[512]), name="b_fc1")
        h_pool2_flat = tf.reshape(L2_pool, [-1, 16 * 20*32])
        h_fc1 = full_connect(h_pool2_flat, W_fc1, b_fc1)


        # dropout
        keep_prob = tf.placeholder(tf.float32)

        h_fc1_drop = tf.nn.dropout(h_fc1, keep_prob)


        # readout层
        W_fc2 = tf.Variable(tf.truncated_normal([512, NUM_CLASSES], stddev=0.1), name="W_fc2")
        b_fc2 = tf.Variable(tf.constant(0.1, shape=[NUM_CLASSES]), name="b_fc2")

        # 定义优化器和训练op
        y_conv = tf.matmul(h_fc1_drop, W_fc2) + b_fc2
        cross_entropy = tf.reduce_mean(tf.nn.softmax_cross_entropy_with_logits(labels=y_, logits=y_conv))
        train_step = tf.train.AdamOptimizer((1e-4)).minimize(cross_entropy)

        correct_prediction = tf.equal(tf.argmax(y_conv, 1), tf.argmax(y_, 1))
        accuracy = tf.reduce_mean(tf.cast(correct_prediction, tf.float32))

        sess.run(tf.global_variables_initializer())

        time_elapsed = time.time() - time_begin
        print("读取图片文件耗费时间:%d秒" % time_elapsed)
        time_begin = time.time()

        print ("一共读取了 %s 个训练图像, %s 个标签" % (input_count, input_count))

        # 设置每次训练op的输入个数和迭代次数,这里为了支持任意图片总数,定义了一个余数remainder,譬如,如果每次训练op的输入个数为60,图片总数为150张,则前面两次各输入60张,最后一次输入30张(余数30)
        batch_size = 60
        iterations = iterations
        batches_count = int(input_count / batch_size)
        remainder = input_count % batch_size
        print ("训练数据集分成 %s 批, 前面每批 %s 个数据,最后一批 %s 个数据" % (batches_count+1, batch_size, remainder))

        # 执行训练迭代
        for it in range(iterations):
            # 这里的关键是要把输入数组转为np.array
            for n in range(batches_count):
                train_step.run(feed_dict={x: input_images[n*batch_size:(n+1)*batch_size], y_: input_labels[n*batch_size:(n+1)*batch_size], keep_prob: 0.5})
            if remainder > 0:
                start_index = batches_count * batch_size;
                train_step.run(feed_dict={x: input_images[start_index:input_count-1], y_: input_labels[start_index:input_count-1], keep_prob: 0.5})

            # 每完成五次迭代,判断准确度是否已达到100%,达到则退出迭代循环
            iterate_accuracy = 0
            if it%5 == 0:
                iterate_accuracy = accuracy.eval(feed_dict={x: val_images, y_: val_labels, keep_prob: 1.0})
                print ('第 %d 次训练迭代: 准确率 %0.5f%%' % (it, iterate_accuracy*100))
                if iterate_accuracy >= 0.9999 and it >= iterations:
                    break;

        print ('完成训练!')
        time_elapsed = time.time() - time_begin
        print ("训练耗费时间:%d秒" % time_elapsed)
        time_begin = time.time()

        # 保存训练结果
        if not os.path.exists(SAVER_DIR):
            print ('不存在训练数据保存目录,现在创建保存目录')
            os.makedirs(SAVER_DIR)
        # 初始化saver
        saver = tf.train.Saver()
        saver_path = saver.save(sess, "%smodel.ckpt"%(SAVER_DIR))


if __name__ =='__main__' and sys.argv[1]=='predict':
    saver = tf.train.import_meta_graph("%smodel.ckpt.meta"%(SAVER_DIR))
    with tf.Session() as sess:
        model_file=tf.train.latest_checkpoint(SAVER_DIR)
        saver.restore(sess, model_file)

        # 第一个卷积层
        W_conv1 = sess.graph.get_tensor_by_name("W_conv1:0")
        b_conv1 = sess.graph.get_tensor_by_name("b_conv1:0")
        conv_strides = [1, 1, 1, 1]
        kernel_size = [1, 2, 2, 1]
        pool_strides = [1, 2, 2, 1]
        L1_pool = conv_layer(x_image, W_conv1, b_conv1, conv_strides, kernel_size, pool_strides, padding='SAME')

        # 第二个卷积层
        W_conv2 = sess.graph.get_tensor_by_name("W_conv2:0")
        b_conv2 = sess.graph.get_tensor_by_name("b_conv2:0")
        conv_strides = [1, 1, 1, 1]
        kernel_size = [1, 1, 1, 1]
        pool_strides = [1, 1, 1, 1]
        L2_pool = conv_layer(L1_pool, W_conv2, b_conv2, conv_strides, kernel_size, pool_strides, padding='SAME')


        # 全连接层
        W_fc1 = sess.graph.get_tensor_by_name("W_fc1:0")
        b_fc1 = sess.graph.get_tensor_by_name("b_fc1:0")
        h_pool2_flat = tf.reshape(L2_pool, [-1, 16 * 20*32])
        h_fc1 = full_connect(h_pool2_flat, W_fc1, b_fc1)


        # dropout
        keep_prob = tf.placeholder(tf.float32)

        h_fc1_drop = tf.nn.dropout(h_fc1, keep_prob)


        # readout层
        W_fc2 = sess.graph.get_tensor_by_name("W_fc2:0")
        b_fc2 = sess.graph.get_tensor_by_name("b_fc2:0")

        # 定义优化器和训练op
        conv = tf.nn.softmax(tf.matmul(h_fc1_drop, W_fc2) + b_fc2)

        for n in range(2,3):
            path = "test_images/%s.bmp" % (n)
            img = Image.open(path)
            width = img.size[0]
            height = img.size[1]

            img_data = [[0]*SIZE for i in range(1)]
            for h in range(0, height):
                for w in range(0, width):
                    if img.getpixel((w, h)) < 190:
                        img_data[0][w+h*width] = 1
                    else:
                        img_data[0][w+h*width] = 0

            result = sess.run(conv, feed_dict = {x: np.array(img_data), keep_prob: 1.0})

            max1 = 0
            max2 = 0
            max3 = 0
            max1_index = 0
            max2_index = 0
            max3_index = 0
            for j in range(NUM_CLASSES):
                if result[0][j] > max1:
                    max1 = result[0][j]
                    max1_index = j
                    continue
                if (result[0][j]>max2) and (result[0][j]<=max1):
                    max2 = result[0][j]
                    max2_index = j
                    continue
                if (result[0][j]>max3) and (result[0][j]<=max2):
                    max3 = result[0][j]
                    max3_index = j
                    continue

            if n == 3:
                license_num += "-"
            license_num = license_num + LETTERS_DIGITS[max1_index]
            print ("概率:  [%s %0.2f%%]    [%s %0.2f%%]    [%s %0.2f%%]" % (LETTERS_DIGITS[max1_index],max1*100, LETTERS_DIGITS[max2_index],max2*100, LETTERS_DIGITS[max3_index],max3*100))

        print ("城市代号是: 【%s】" % license_num)
车牌编号训练+识别代码(保存文件名为train-license-digits.py):
#!/usr/bin/python3.5
# -*- coding: utf-8 -*-

import sys
import os
import time
import random

import numpy as np
import tensorflow as tf

from PIL import Image


SIZE = 1280
WIDTH = 32
HEIGHT = 40
NUM_CLASSES = 34
iterations = 1000

SAVER_DIR = "train-saver/digits/"

LETTERS_DIGITS = ("0","1","2","3","4","5","6","7","8","9","A","B","C","D","E","F","G","H","J","K","L","M","N","P","Q","R","S","T","U","V","W","X","Y","Z")
license_num = ""

time_begin = time.time()


# 定义输入节点,对应于图片像素值矩阵集合和图片标签(即所代表的数字)
x = tf.placeholder(tf.float32, shape=[None, SIZE])
y_ = tf.placeholder(tf.float32, shape=[None, NUM_CLASSES])

x_image = tf.reshape(x, [-1, WIDTH, HEIGHT, 1])


# 定义卷积函数
def conv_layer(inputs, W, b, conv_strides, kernel_size, pool_strides, padding):
    L1_conv = tf.nn.conv2d(inputs, W, strides=conv_strides, padding=padding)
    L1_relu = tf.nn.relu(L1_conv + b)
    return tf.nn.max_pool(L1_relu, ksize=kernel_size, strides=pool_strides, padding='SAME')

# 定义全连接层函数
def full_connect(inputs, W, b):
    return tf.nn.relu(tf.matmul(inputs, W) + b)


if __name__ =='__main__' and sys.argv[1]=='train':
    # 第一次遍历图片目录是为了获取图片总数
    input_count = 0
    for i in range(0,NUM_CLASSES):
        dir = './train_images/training-set/%s/' % i           # 这里可以改成你自己的图片目录,i为分类标签
        for rt, dirs, files in os.walk(dir):
            for filename in files:
                input_count += 1

    # 定义对应维数和各维长度的数组
    input_images = np.array([[0]*SIZE for i in range(input_count)])
    input_labels = np.array([[0]*NUM_CLASSES for i in range(input_count)])

    # 第二次遍历图片目录是为了生成图片数据和标签
    index = 0
    for i in range(0,NUM_CLASSES):
        dir = './train_images/training-set/%s/' % i          # 这里可以改成你自己的图片目录,i为分类标签
        for rt, dirs, files in os.walk(dir):
            for filename in files:
                filename = dir + filename
                img = Image.open(filename)
                width = img.size[0]
                height = img.size[1]
                for h in range(0, height):
                    for w in range(0, width):
                        # 通过这样的处理,使数字的线条变细,有利于提高识别准确率
                        if img.getpixel((w, h)) > 230:
                            input_images[index][w+h*width] = 0
                        else:
                            input_images[index][w+h*width] = 1
                input_labels[index][i] = 1
                index += 1

    # 第一次遍历图片目录是为了获取图片总数
    val_count = 0
    for i in range(0,NUM_CLASSES):
        dir = './train_images/validation-set/%s/' % i           # 这里可以改成你自己的图片目录,i为分类标签
        for rt, dirs, files in os.walk(dir):
            for filename in files:
                val_count += 1

    # 定义对应维数和各维长度的数组
    val_images = np.array([[0]*SIZE for i in range(val_count)])
    val_labels = np.array([[0]*NUM_CLASSES for i in range(val_count)])

    # 第二次遍历图片目录是为了生成图片数据和标签
    index = 0
    for i in range(0,NUM_CLASSES):
        dir = './train_images/validation-set/%s/' % i          # 这里可以改成你自己的图片目录,i为分类标签
        for rt, dirs, files in os.walk(dir):
            for filename in files:
                filename = dir + filename
                img = Image.open(filename)
                width = img.size[0]
                height = img.size[1]
                for h in range(0, height):
                    for w in range(0, width):
                        # 通过这样的处理,使数字的线条变细,有利于提高识别准确率
                        if img.getpixel((w, h)) > 230:
                            val_images[index][w+h*width] = 0
                        else:
                            val_images[index][w+h*width] = 1
                val_labels[index][i] = 1
                index += 1

    with tf.Session() as sess:
        # 第一个卷积层
        W_conv1 = tf.Variable(tf.truncated_normal([8, 8, 1, 16], stddev=0.1), name="W_conv1")
        b_conv1 = tf.Variable(tf.constant(0.1, shape=[16]), name="b_conv1")
        conv_strides = [1, 1, 1, 1]
        kernel_size = [1, 2, 2, 1]
        pool_strides = [1, 2, 2, 1]
        L1_pool = conv_layer(x_image, W_conv1, b_conv1, conv_strides, kernel_size, pool_strides, padding='SAME')

        # 第二个卷积层
        W_conv2 = tf.Variable(tf.truncated_normal([5, 5, 16, 32], stddev=0.1), name="W_conv2")
        b_conv2 = tf.Variable(tf.constant(0.1, shape=[32]), name="b_conv2")
        conv_strides = [1, 1, 1, 1]
        kernel_size = [1, 1, 1, 1]
        pool_strides = [1, 1, 1, 1]
        L2_pool = conv_layer(L1_pool, W_conv2, b_conv2, conv_strides, kernel_size, pool_strides, padding='SAME')


        # 全连接层
        W_fc1 = tf.Variable(tf.truncated_normal([16 * 20 * 32, 512], stddev=0.1), name="W_fc1")
        b_fc1 = tf.Variable(tf.constant(0.1, shape=[512]), name="b_fc1")
        h_pool2_flat = tf.reshape(L2_pool, [-1, 16 * 20*32])
        h_fc1 = full_connect(h_pool2_flat, W_fc1, b_fc1)


        # dropout
        keep_prob = tf.placeholder(tf.float32)

        h_fc1_drop = tf.nn.dropout(h_fc1, keep_prob)


        # readout层
        W_fc2 = tf.Variable(tf.truncated_normal([512, NUM_CLASSES], stddev=0.1), name="W_fc2")
        b_fc2 = tf.Variable(tf.constant(0.1, shape=[NUM_CLASSES]), name="b_fc2")

        # 定义优化器和训练op
        y_conv = tf.matmul(h_fc1_drop, W_fc2) + b_fc2
        cross_entropy = tf.reduce_mean(tf.nn.softmax_cross_entropy_with_logits(labels=y_, logits=y_conv))
        train_step = tf.train.AdamOptimizer((1e-4)).minimize(cross_entropy)

        correct_prediction = tf.equal(tf.argmax(y_conv, 1), tf.argmax(y_, 1))
        accuracy = tf.reduce_mean(tf.cast(correct_prediction, tf.float32))

        sess.run(tf.global_variables_initializer())

        time_elapsed = time.time() - time_begin
        print("读取图片文件耗费时间:%d秒" % time_elapsed)
        time_begin = time.time()

        print ("一共读取了 %s 个训练图像, %s 个标签" % (input_count, input_count))

        # 设置每次训练op的输入个数和迭代次数,这里为了支持任意图片总数,定义了一个余数remainder,譬如,如果每次训练op的输入个数为60,图片总数为150张,则前面两次各输入60张,最后一次输入30张(余数30)
        batch_size = 60
        iterations = iterations
        batches_count = int(input_count / batch_size)
        remainder = input_count % batch_size
        print ("训练数据集分成 %s 批, 前面每批 %s 个数据,最后一批 %s 个数据" % (batches_count+1, batch_size, remainder))

        # 执行训练迭代
        for it in range(iterations):
            # 这里的关键是要把输入数组转为np.array
            for n in range(batches_count):
                train_step.run(feed_dict={x: input_images[n*batch_size:(n+1)*batch_size], y_: input_labels[n*batch_size:(n+1)*batch_size], keep_prob: 0.5})
            if remainder > 0:
                start_index = batches_count * batch_size;
                train_step.run(feed_dict={x: input_images[start_index:input_count-1], y_: input_labels[start_index:input_count-1], keep_prob: 0.5})

            # 每完成五次迭代,判断准确度是否已达到100%,达到则退出迭代循环
            iterate_accuracy = 0
            if it%5 == 0:
                iterate_accuracy = accuracy.eval(feed_dict={x: val_images, y_: val_labels, keep_prob: 1.0})
                print ('第 %d 次训练迭代: 准确率 %0.5f%%' % (it, iterate_accuracy*100))
                if iterate_accuracy >= 0.9999 and it >= iterations:
                    break;

        print ('完成训练!')
        time_elapsed = time.time() - time_begin
        print ("训练耗费时间:%d秒" % time_elapsed)
        time_begin = time.time()

        # 保存训练结果
        if not os.path.exists(SAVER_DIR):
            print ('不存在训练数据保存目录,现在创建保存目录')
            os.makedirs(SAVER_DIR)
        # 初始化saver
        saver = tf.train.Saver()
        saver_path = saver.save(sess, "%smodel.ckpt"%(SAVER_DIR))


if __name__ =='__main__' and sys.argv[1]=='predict':
    saver = tf.train.import_meta_graph("%smodel.ckpt.meta"%(SAVER_DIR))
    with tf.Session() as sess:
        model_file=tf.train.latest_checkpoint(SAVER_DIR)
        saver.restore(sess, model_file)

        # 第一个卷积层
        W_conv1 = sess.graph.get_tensor_by_name("W_conv1:0")
        b_conv1 = sess.graph.get_tensor_by_name("b_conv1:0")
        conv_strides = [1, 1, 1, 1]
        kernel_size = [1, 2, 2, 1]
        pool_strides = [1, 2, 2, 1]
        L1_pool = conv_layer(x_image, W_conv1, b_conv1, conv_strides, kernel_size, pool_strides, padding='SAME')

        # 第二个卷积层
        W_conv2 = sess.graph.get_tensor_by_name("W_conv2:0")
        b_conv2 = sess.graph.get_tensor_by_name("b_conv2:0")
        conv_strides = [1, 1, 1, 1]
        kernel_size = [1, 1, 1, 1]
        pool_strides = [1, 1, 1, 1]
        L2_pool = conv_layer(L1_pool, W_conv2, b_conv2, conv_strides, kernel_size, pool_strides, padding='SAME')


        # 全连接层
        W_fc1 = sess.graph.get_tensor_by_name("W_fc1:0")
        b_fc1 = sess.graph.get_tensor_by_name("b_fc1:0")
        h_pool2_flat = tf.reshape(L2_pool, [-1, 16 * 20*32])
        h_fc1 = full_connect(h_pool2_flat, W_fc1, b_fc1)


        # dropout
        keep_prob = tf.placeholder(tf.float32)

        h_fc1_drop = tf.nn.dropout(h_fc1, keep_prob)


        # readout层
        W_fc2 = sess.graph.get_tensor_by_name("W_fc2:0")
        b_fc2 = sess.graph.get_tensor_by_name("b_fc2:0")

        # 定义优化器和训练op
        conv = tf.nn.softmax(tf.matmul(h_fc1_drop, W_fc2) + b_fc2)

        for n in range(3,8):
            path = "test_images/%s.bmp" % (n)
            img = Image.open(path)
            width = img.size[0]
            height = img.size[1]

            img_data = [[0]*SIZE for i in range(1)]
            for h in range(0, height):
                for w in range(0, width):
                    if img.getpixel((w, h)) < 190:
                        img_data[0][w+h*width] = 1
                    else:
                        img_data[0][w+h*width] = 0

            result = sess.run(conv, feed_dict = {x: np.array(img_data), keep_prob: 1.0})

            max1 = 0
            max2 = 0
            max3 = 0
            max1_index = 0
            max2_index = 0
            max3_index = 0
            for j in range(NUM_CLASSES):
                if result[0][j] > max1:
                    max1 = result[0][j]
                    max1_index = j
                    continue
                if (result[0][j]>max2) and (result[0][j]<=max1):
                    max2 = result[0][j]
                    max2_index = j
                    continue
                if (result[0][j]>max3) and (result[0][j]<=max2):
                    max3 = result[0][j]
                    max3_index = j
                    continue

            license_num = license_num + LETTERS_DIGITS[max1_index]
            print ("概率:  [%s %0.2f%%]    [%s %0.2f%%]    [%s %0.2f%%]" % (LETTERS_DIGITS[max1_index],max1*100, LETTERS_DIGITS[max2_index],max2*100, LETTERS_DIGITS[max3_index],max3*100))

        print ("车牌编号是: 【%s】" % license_num)
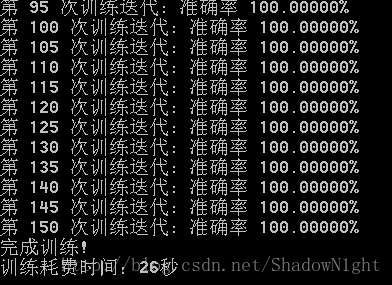
保存好上面三个python脚本后,我们首先进行省份简称训练。在运行代码之前,需要先把数据集解压到训练脚本所在目录。然后,在命令行中进入脚本所在目录,输入执行如下命令:
python train-license-province.py train
训练结果如下:
然后进行省份简称识别,在命令行输入执行如下命令:
python train-license-province.py predict

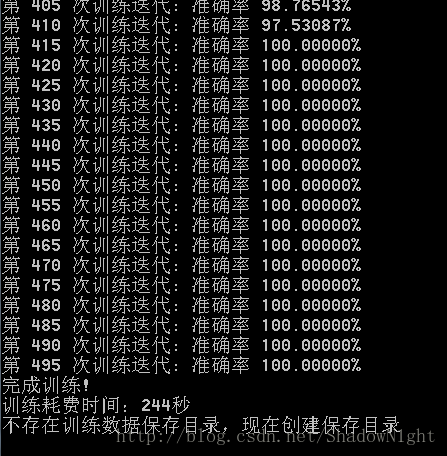
执行城市代号训练(相当于训练26个字母):
python train-license-letters.py train
识别城市代号:
python train-license-letters.py predict

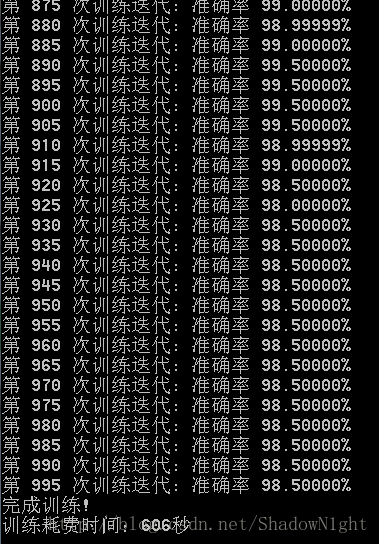
执行车牌编号训练(相当于训练24个字母+10个数字,我国交通法规规定车牌编号中不包含字母I和O):
python train-license-digits.py train
识别车牌编号:
python train-license-digits.py predict
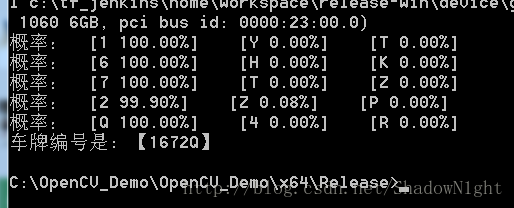
可以看到,在测试图片上,识别准确率很高。识别结果是闽O-1672Q。
下图是测试图片的车牌原图:

关于 使用 opencv 做 车牌提取 及 分割 看我的另一篇 博客
https://blog.csdn.net/u011808673/article/details/78510692
本文内容由网友自发贡献,版权归原作者所有,本站不承担相应法律责任。如您发现有涉嫌抄袭侵权的内容,请联系:hwhale#tublm.com(使用前将#替换为@)