virt-install是一个使用libvirt库构建新虚拟机的命令行工具,此工具使用串行控制台,SDL(Simple DirectMedia Layer)图形或者VNC客户端/服务器,来支持命令行和图形安装。
1 ubuntu下安装: apt-get install virtinst
# apt-get install virtinst
Reading package lists... Done
Building dependency tree
Reading state information... Done
The following extra packages will be installed:
  adwaita-icon-theme at-spi2-core colord colord-data dconf-gsettings-backend dconf-service fontconfig fontconfig-config
  fonts-dejavu-core glib-networking glib-networking-common glib-networking-services gsettings-desktop-schemas hicolor-icon-theme
  ...
  libxinerama1 libxkbcommon0 libxpm4 libxrandr2 libxrender1 libxtst6 python-libxml2 python-pycurl python-urlgrabber ubuntu-mono
  virt-viewer x11-common
Suggested packages:
  colord-sensor-argyll cups-common libgd-tools gphoto2 gvfs liblcms2-utils librsvg2-bin avahi-daemon hplip libsane-extras
  sane-utils python-pycurl-dbg python-pycurl-doc
...
2 virt-install常用参数
-n --name= 客户端虚拟机名称
-r --ram= 客户端虚拟机分配的内存
-u --uuid= 客户端UUID 默认不写时,系统会自动生成
--vcpus= 客户端的vcpu个数
-v --hvm 全虚拟化
-p --paravirt 半虚拟化
-l --location=localdir 安装源,有本地、nfs、http、ftp几种,多用于ks网络安装
--vnc 使用vnc ,另有--vnclient=监听的IP --vncport =VNC监听的端口
-c --cdrom= 光驱 安装途径
--disk= 使用不同选项作为磁盘使用安装介质
-w NETWORK, --network=NETWORK 连接客户机到主机网络
-s --file-size= 使用磁盘映像的大小 单位为GB
-f --file= 作为磁盘映像使用的文件
--cpuset=设置哪个物理CPU能够被虚拟机使用
--os-type=OS_TYPE 针对一类操作系统优化虚拟机配置(例如:‘linux’,‘windows’)
--os-variant=OS_VARIANT 针对特定操作系统变体(例如’rhel6’, ’winxp’,'win2k3')进一步优化虚拟机配置
--host-device=HOSTDEV 附加一个物理主机设备到客户机。HOSTDEV是随着libvirt使用的一个节点设备名(具体设备如’virsh nodedev-list’的显示的结果)
--accelerate KVM或KQEMU内核加速,这个选项是推荐最好加上。如果KVM和KQEMU都支持,KVM加速器优先使用。
-x EXTRA, --extra-args=EXTRA 当执行从"--location"选项指定位置的客户机安装时,附加内核命令行参数到安装程序
--nographics "virt-install" 将默认使用--vnc选项,使用nographics指定没有控制台被分配给客户机
3 安装
Use the virt-installtool to boot the virtual machine through libvirt and connect to the graphical console from a VNC client installed on your local machine.
3.1 查看default网络
# virsh net-list
 Name                 State      Autostart     Persistent
----------------------------------------------------------
 default              active     yes           yes
If the network is not active, start it by doing:
# virsh net-start default
Starting this network will create a Linux bridge (usually called virbr0), iptables rules, and a dnsmasq process that will serve as a DHCP server.
查看default网络的配置
root@zhaicompute# brctl show
bridge name     bridge id               STP enabled     interfaces
virbr0          8000.5254000f5c96       yes             virbr0-nic

root@zhaicompute# ifconfig virbr0
virbr0    Link encap:Ethernet  HWaddr 52:54:00:0f:5c:96
          inet addr:192.168.22.1  Bcast:192.168.22.255  Mask:255.255.255.0
          UP BROADCAST RUNNING MULTICAST  MTU:1500  Metric:1
          RX packets:0 errors:0 dropped:0 overruns:0 frame:0
          TX packets:0 errors:0 dropped:0 overruns:0 carrier:0
          collisions:0 txqueuelen:0
          RX bytes:0 (0.0 B)  TX bytes:0 (0.0 B)
root@zhaicompute# cat /etc/libvirt/qemu/networks/default.xml
<!--
WARNING: THIS IS AN AUTO-GENERATED FILE. CHANGES TO IT ARE LIKELY TO BE
OVERWRITTEN AND LOST. Changes to this xml configuration should be made using:
  virsh net-edit default
or other application using the libvirt API.
-->

<network>
  <name>default</name>
  <uuid>6acb-ed0a-4ad1-b8dc-527168a2</uuid>
  <forward mode='nat'/>
  <bridge name='virbr0' stp='on' delay='0'/>
  <mac address='52:33:00:0f:5c:96'/>
  <ip address='192.168.22.1' netmask='255.255.255.0'>
    <dhcp>
      <range start='192.168.22.2' end='192.168.22.254'/>
    </dhcp>
  </ip>
</network>
default网络设置保存在/etc/libvirt/qemu/networks目录下,从配置中可看出具体的网桥virbr0.
3.2 qemu-img和virt-install
qemu-img command to create an empty image file
root@zhaicompute# qemu-img create -f qcow2 zhai-ubuntu14.04.4.qcow2 10G
Formatting 'zhai-ubuntu14.04.4.qcow2', fmt=qcow2 size=10737418240 encryption=off cluster_size=65536 lazy_refcounts=off refcount_bits=16
root@zhaicompute# ls
ubuntu-14.04.3-server-ppc64el.iso              zhai-ubuntu14.04.4.qcow2
root@zhaicompute# qemu-img info zhai-ubuntu14.04.4.qcow2
image: zhai-ubuntu14.04.4.qcow2
file format: qcow2
virtual size: 10G (10737418240 bytes)
disk size: 196K
cluster_size: 65536
Format specific information:
    compat: 1.1
    lazy refcounts: false
    refcount bits: 16
    corrupt: false
virt-install command to start up a virtual machine using that image file.
命令行:
virt-install --virt-type kvm --name zhai-ubuntu --ram 1024 \
> --cdrom=/var/lib/libvirt/images/zhaipool/ubuntu-14.04.4-server-ppc64el.iso \
> --disk /var/lib/libvirt/images/zhaipool/zhai-ubuntu14.04.4.qcow2,format=qcow2 \
> --network network=default \
> --graphics vnc,listen=0.0.0.0 --noautoconsole \
> --os-type=linux --os-variant=ubuntutrusty
其中,--os-variant后面的值使用virt-install --os-variant list查看
root@zhaicompute#  virt-install --os-variant list
win2k8               : Microsoft Windows Server 2008 (or later)
win2k3               : Microsoft Windows Server 2003
win7                 : Microsoft Windows 7 (or later)
vista                : Microsoft Windows Vista
winxp64              : Microsoft Windows XP (x86_64)
winxp                : Microsoft Windows XP
win2k                : Microsoft Windows 2000
openbsd4             : OpenBSD 4.x (or later)
freebsd9             : FreeBSD 9.x
freebsd8             : FreeBSD 8.x
freebsd7             : FreeBSD 7.x
freebsd6             : FreeBSD 6.x
freebsd10            : FreeBSD 10.x (or later)
solaris9             : Sun Solaris 9
solaris11            : Sun Solaris 11 (or later)
solaris10            : Sun Solaris 10
opensolaris          : Sun OpenSolaris (or later)
netware6             : Novell Netware 6 (or later)
netware5             : Novell Netware 5
netware4             : Novell Netware 4
msdos                : MS-DOS
generic              : Generic
altlinux             : ALT Linux (or later)
debianwheezy         : Debian Wheezy (or later)
debiansqueeze        : Debian Squeeze
debianlenny          : Debian Lenny
debianetch           : Debian Etch
fedora20             : Fedora 20 (or later)
fedora19             : Fedora 19
fedora18             : Fedora 18
fedora17             : Fedora 17
fedora16             : Fedora 16
fedora15             : Fedora 15
fedora14             : Fedora 14
fedora13             : Fedora 13
fedora12             : Fedora 12
fedora11             : Fedora 11
fedora10             : Fedora 10
fedora9              : Fedora 9
fedora8              : Fedora 8
fedora7              : Fedora 7
fedora6              : Fedora Core 6
fedora5              : Fedora Core 5
mes5.1               : Mandriva Enterprise Server 5.1 (or later)
mes5                 : Mandriva Enterprise Server 5.0
mandriva2010         : Mandriva Linux 2010 (or later)
mandriva2009         : Mandriva Linux 2009 and earlier
mageia1              : Mageia 1 (or later)
rhel7                : Red Hat Enterprise Linux 7 (or later)
rhel6                : Red Hat Enterprise Linux 6
rhel5.4              : Red Hat Enterprise Linux 5.4 or later
rhel5                : Red Hat Enterprise Linux 5
rhel4                : Red Hat Enterprise Linux 4
rhel3                : Red Hat Enterprise Linux 3
rhel2.1              : Red Hat Enterprise Linux 2.1
sles11               : Suse Linux Enterprise Server 11 (or later)
sles10               : Suse Linux Enterprise Server
opensuse12           : openSuse 12 (or later)
opensuse11           : openSuse 11
ubuntuutopic         : Ubuntu 14.10 (Utopic Unicorn) (or later)
ubuntutrusty         : Ubuntu 14.04 LTS (Trusty Tahr)
ubuntusaucy          : Ubuntu 13.10 (Saucy Salamander)
ubunturaring         : Ubuntu 13.04 (Raring Ringtail)
ubuntuquantal        : Ubuntu 12.10 (Quantal Quetzal)
ubuntuprecise        : Ubuntu 12.04 LTS (Precise Pangolin)
ubuntuoneiric        : Ubuntu 11.10 (Oneiric Ocelot)
ubuntunatty          : Ubuntu 11.04 (Natty Narwhal)
ubuntumaverick       : Ubuntu 10.10 (Maverick Meerkat)
ubuntulucid          : Ubuntu 10.04 LTS (Lucid Lynx)
ubuntukarmic         : Ubuntu 9.10 (Karmic Koala)
ubuntujaunty         : Ubuntu 9.04 (Jaunty Jackalope)
ubuntuintrepid       : Ubuntu 8.10 (Intrepid Ibex)
ubuntuhardy          : Ubuntu 8.04 LTS (Hardy Heron)
mbs1                 : Mandriva Business Server 1 (or later)
virtio26             : Generic 2.6.25 or later kernel with virtio
generic26            : Generic 2.6.x kernel
generic24            : Generic 2.4.x kernel
执行过程:
root@zhaicompute# virt-install --virt-type kvm --name zhai-ubuntu --ram 1024 \
> --cdrom=/var/lib/libvirt/images/zhaipool/ubuntu-14.04.4-server-ppc64el.iso \
> --disk /var/lib/libvirt/images/zhaipool/zhai-ubuntu14.04.4.qcow2,format=qcow2 \
> --network network=default \
> --graphics vnc,listen=0.0.0.0 --noautoconsole \
> --os-type=linux --os-variant=ubuntutrusty


Starting install...
Creating domain...                                                                                         |    0 B     00:00
Domain installation still in progress. You can reconnect to
the console to complete the installation process.
root@zhaicompute# ps -ef | grep zhai
libvirt+  27531      1 99 03:39 ?        00:00:22 qemu-system-ppc64 -enable-kvm -name zhai-ubuntu -S -machine pseries-2.3,accel=kvm,usb=off -m 1024 -realtime mlock=off -smp 1,sockets=1,cores=1,threads=1 -uuid de480a35-4ab5-42e5-b3b6-a47c8b05d9c8 -no-user-config -nodefaults -chardev socket,id=charmonitor,path=/var/lib/libvirt/qemu/zhai-ubuntu.monitor,server,nowait -mon chardev=charmonitor,id=monitor,mode=control -rtc base=utc -no-reboot -boot strict=on -device pci-ohci,id=usb,bus=pci.0,addr=0x2 -device spapr-vscsi,id=scsi0,reg=0x2000 -drive file=/var/lib/libvirt/images/zhaipool/zhai-ubuntu14.04.4.qcow2,if=none,id=drive-scsi0-0-0-0,format=qcow2 -device scsi-hd,bus=scsi0.0,channel=0,scsi-id=0,lun=0,drive=drive-scsi0-0-0-0,id=scsi0-0-0-0,bootindex=2 -drive file=/var/lib/libvirt/images/zhaipool/ubuntu-14.04.4-server-ppc64el.iso,if=none,id=drive-scsi0-0-0-1,readonly=on,format=raw -device scsi-cd,bus=scsi0.0,channel=0,scsi-id=0,lun=1,drive=drive-scsi0-0-0-1,id=scsi0-0-0-1,bootindex=1 -netdev tap,fd=29,id=hostnet0 -device rtl8139,netdev=hostnet0,id=net0,mac=52:54:00:cb:ad:fa,bus=pci.0,addr=0x1 -chardev pty,id=charserial0 -device spapr-vty,chardev=charserial0,reg=0x30000000 -device usb-kbd,id=input0 -device usb-mouse,id=input1 -vnc 0.0.0.0:2 -device VGA,id=video0,vgamem_mb=16,bus=pci.0,addr=0x4 -device virtio-balloon-pci,id=balloon0,bus=pci.0,addr=0x3 -msg timestamp=on
root      27540  23850  0 03:40 pts/8    00:00:00 grep --color=auto zhai
从上看出:virt-install执行后,最终调用的是qemu-system-ppc64命令来创建vm。
一个虚拟机占用一个进程,可以通过进程管理和控制虚拟机。
log日志:
root@zhaicompute# ls /var/log/libvirt/qemu/
zhai-ubuntu.log
创建后,查看网络:
root@zhaicompute# brctl show
bridge name     bridge id               STP enabled     interfaces
virbr0          8000.5254000f5c96       yes             virbr0-nic
                                                        vnet0
可看出
virbr0上多了一下端口vnet0.
virbr0    Link encap:Ethernet  HWaddr 52:54:00:0f:5c:96
          inet addr:192.168.122.1  Bcast:192.168.122.255  Mask:255.255.255.0
          UP BROADCAST RUNNING MULTICAST  MTU:1500  Metric:1
          RX packets:10646 errors:0 dropped:0 overruns:0 frame:0
          TX packets:14645 errors:0 dropped:0 overruns:0 carrier:0
          collisions:0 txqueuelen:0
          RX bytes:617571 (617.5 KB)  TX bytes:20396983 (20.3 MB)

virbr0-nic Link encap:Ethernet  HWaddr 52:54:00:0f:5c:96
          BROADCAST MULTICAST  MTU:1500  Metric:1
          RX packets:0 errors:0 dropped:0 overruns:0 frame:0
          TX packets:0 errors:0 dropped:0 overruns:0 carrier:0
          collisions:0 txqueuelen:500
          RX bytes:0 (0.0 B)  TX bytes:0 (0.0 B)

vnet0     Link encap:Ethernet  HWaddr fe:54:00:7e:60:d0
          inet6 addr: fe80::fc54:ff:fe7e:60d0/64 Scope:Link
          UP BROADCAST RUNNING MULTICAST  MTU:1500  Metric:1
          RX packets:10646 errors:0 dropped:0 overruns:0 frame:0
          TX packets:17480 errors:0 dropped:0 overruns:0 carrier:0
          collisions:0 txqueuelen:500
          RX bytes:766615 (766.6 KB)  TX bytes:20544635 (20.5 MB)
查看生成的xml配置文件 :
# ls -lrt /etc/libvirt/qemu
-rw------- 1 root root 2511 Apr 15 11:25 zhai-ubuntu.xml
zhai-ubuntu.xml内容:
# cat /etc/libvirt/qemu/zhai-ubuntu.xml
<!--
WARNING: THIS IS AN AUTO-GENERATED FILE. CHANGES TO IT ARE LIKELY TO BE
OVERWRITTEN AND LOST. Changes to this xml configuration should be made using:
  virsh edit zhai-ubuntu
or other application using the libvirt API.
-->

<domain type='kvm'>
  <name>zhai-ubuntu</name>
  <uuid>0e5684f5-23aa-8568-ed10-52c844b4d85d</uuid>
  <memory unit='KiB'>1048576</memory>
  <currentMemory unit='KiB'>1048576</currentMemory>
  <vcpu placement='static'>2</vcpu>
  <os>
    <type arch='ppc64le' machine='pseries-2.3'>hvm</type>
    <boot dev='cdrom'/>
    <boot dev='hd'/>
    <bootmenu enable='yes'/>
  </os>
  <features>
    <acpi/>
    <apic/>
    <pae/>
  </features>
  <clock offset='utc'/>
  <on_poweroff>destroy</on_poweroff>
  <on_reboot>restart</on_reboot>
  <on_crash>restart</on_crash>
  <devices>
    <emulator>/usr/bin/kvm</emulator>
    <disk type='file' device='disk'>
      <driver name='qemu' type='qcow2' cache='none'/>
      <source file='/var/lib/libvirt/images/zhaipool/zhai-ubuntu14.04.4.qcow2'/>
      <target dev='vda' bus='virtio'/>
      <address type='pci' domain='0x0000' bus='0x00' slot='0x03' function='0x0'/>
    </disk>
    <disk type='file' device='disk'>
      <driver name='qemu' type='raw' cache='none'/>
      <source file='/var/lib/libvirt/images/zhaipool/ubuntu-14.04.4-server-ppc64el.iso'/>
      <target dev='sda' bus='usb'/>
    </disk>
    <controller type='usb' index='0'>
      <address type='pci' domain='0x0000' bus='0x00' slot='0x02' function='0x0'/>
    </controller>
    <controller type='pci' index='0' model='pci-root'/>
    <interface type='network'>
      <mac address='52:54:00:7e:60:d0'/>
      <source network='default'/>
      <model type='virtio'/>
      <address type='pci' domain='0x0000' bus='0x00' slot='0x01' function='0x0'/>
    </interface>
    <serial type='pty'>
      <target port='0'/>
      <address type='spapr-vio' reg='0x30000000'/>
    </serial>
    <console type='pty'>
      <target type='serial' port='0'/>
      <address type='spapr-vio' reg='0x30000000'/>
    </console>
    <input type='tablet' bus='usb'/>
    <input type='keyboard' bus='usb'/>
    <input type='mouse' bus='usb'/>
    <graphics type='vnc' port='-1' autoport='yes'/>
    <video>
      <model type='vga' vram='16384' heads='1'/>
      <address type='pci' domain='0x0000' bus='0x00' slot='0x05' function='0x0'/>
    </video>
    <memballoon model='virtio'>
      <address type='pci' domain='0x0000' bus='0x00' slot='0x04' function='0x0'/>
    </memballoon>
  </devices>
</domain>
基于KVM建立的虚拟机相关文件默认存放位置
kvm虚拟机配置文件位置/etc/libvirt/qemu/ <---都是xml文件
kvm虚拟机文件位置:/var/lib/libvirt/images/ <---可以在建立虚拟机时指定
建立的虚拟机在运行时相关文件及存放位置
在虚拟机运行时,会在/var/run/libvirt/qemu目录下存放虚拟机的pid文件和配置文件,配置文件与/etc/libvirt/qemu目录下对应的虚拟机文件相同,pid文件保存有此虚拟机进程号。虚拟机的日志文件存放在/var/log/libvirt/qemu目录下,每个虚拟机一个,文件名称为:虚拟机名称(或UUID)+“.log”
virt-install在生产虚拟机的最后调用virt-viewer打开虚拟机图形界面
,进行操作系统的安装,可以通过vnc或者virt-manager打开虚拟机图形界面,继续完成guest操作系统的安装即可。
3.3 virsh vncdisplay命令
Use the virsh vncdisplay vm-name command to get the VNC port number.
root@zhaicompute# virsh vncdisplay zhai-ubuntu
:2
root@zhaicompute# ps -ef | grep vnc
libvirt+  27531      1 99 03:39 ?        00:09:35 qemu-system-ppc64 -enable-kvm -name zhai-ubuntu -S -machine pseries-2.3,accel=kvm,usb=off -m 1024 -realtime mlock=off -smp 1,sockets=1,cores=1,threads=1 -uuid de480a35-4ab5-42e5-b3b6-a47c8b05d9c8 -no-user-config -nodefaults -chardev socket,id=charmonitor,path=/var/lib/libvirt/qemu/zhai-ubuntu.monitor,server,nowait -mon chardev=charmonitor,id=monitor,mode=control -rtc base=utc -no-reboot -boot strict=on -device pci-ohci,id=usb,bus=pci.0,addr=0x2 -device spapr-vscsi,id=scsi0,reg=0x2000 -drive file=/var/lib/libvirt/images/zhaipool/zhai-ubuntu14.04.4.qcow2,if=none,id=drive-scsi0-0-0-0,format=qcow2 -device scsi-hd,bus=scsi0.0,channel=0,scsi-id=0,lun=0,drive=drive-scsi0-0-0-0,id=scsi0-0-0-0,bootindex=2 -drive file=/var/lib/libvirt/images/zhaipool/ubuntu-14.04.4-server-ppc64el.iso,if=none,id=drive-scsi0-0-0-1,readonly=on,format=raw -device scsi-cd,bus=scsi0.0,channel=0,scsi-id=0,lun=1,drive=drive-scsi0-0-0-1,id=scsi0-0-0-1,bootindex=1 -netdev tap,fd=29,id=hostnet0 -device rtl8139,netdev=hostnet0,id=net0,mac=52:54:00:cb:ad:fa,bus=pci.0,addr=0x1 -chardev pty,id=charserial0 -device spapr-vty,chardev=charserial0,reg=0x30000000 -device usb-kbd,id=input0 -device usb-mouse,id=input1 -vnc 0.0.0.0:2 -device VGA,id=video0,vgamem_mb=16,bus=pci.0,addr=0x4 -device virtio-balloon-pci,id=balloon0,bus=pci.0,addr=0x3 -msg timestamp=on
3.4 在本机上使用vncviewer或tigervnc连接
qemu不使用linux下的vncserver提供vnc服务,因此在此服务没有启动的情况下,也能通过vnc客户端连接到虚拟机。
在win7下,打开vnc-viewer,输入virt-install命令所在的服务器IP与所安装的虚拟机据点用的vnc端口号0;
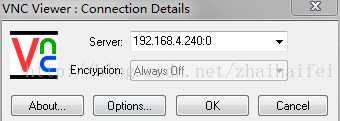
点击“OK”,进入安装界面
安装完成后,使用命令virsh start vm-name启动此虚拟机:
root@ctler:~# virsh list --all
 Id    Name                           State
----------------------------------------------------
 -     net                            shut off

root@ctler:~# virsh start net
Domain net started

root@ctler:~# virsh list --all
 Id    Name                           State
----------------------------------------------------
 5     net                            running
在linux下:
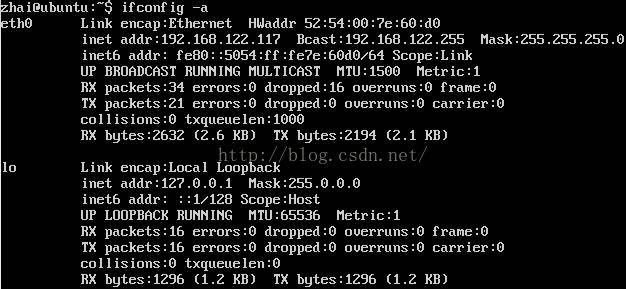
安装完成后,登录虚机,查看IP
4 本地安装示例
给guest主机划分物理机分区
lvcreate -L20G -n host.demo.com kvm-storage
下载镜像并loop到本地:
wget http://mirrors.manchester.icecolo.com/centos/5.5/isos/x86_64/CentOS-5.5-x86_64-bin-1of8.iso
mkdir /mnt/centos55
mount -o loop CentOS-5.5-x86_64-bin-1of8.iso /mnt/centos55/
通过location本地安装,并通过console管理:
virt-install
-n host.demo.com
-r 512
--vcpus=1
--os-variant=rhel5.4
--accelerate
--nographics
-v
-l /mnt/centos55/
-w bridge:br1
--disk path=/dev/kvm-storage/host.demo.com
-x "console=ttyS0"
管理时可以通过
#查看guest id、name 及状态
virsh list --all
#通过console连接查看
virsh console id或name
#连接完成后会要求输入用户名和密码
5 virt-manager图形安装
通过图形向导界面也可以完成安装,virt-manager可以通过在终端中输入virt-manager或者从菜单应用程序->系统工具中打开。
6 弹出安装
To eject a disk using virsh, libvirt requires that you attach an empty disk at the same target
that the CDROM was previously attached, which should be hdc. You can confirm the appropriate target using the dom dumpxml vm-image command.
# virsh dumpxml trusty
<domain type='kvm'>
<name>trusty</name>
...
<disk type='block' device='cdrom'>
<driver name='qemu' type='raw'/>
<target dev='hdc' bus='ide'/>
<readonly/>
<address type='drive' controller='0' bus='1' target='0' unit='0'/>
</disk>
...
</domain>
Run the following commands in the host as root to start up the machine again as paused,
eject the disk and resume. If you are using virt-manager, you may use the GUI instead.
#
virsh start trusty --paused
#
virsh attach-disk --type cdrom --mode readonly trusty "" hdc
#
virsh resume trusty
7 cloud-init及其它安装
Log in to newly created image
When you boot for the first time after install, it may ask you about authentication tools, you can just choose Exit. Then, log in as root using the root password you specified.
Install cloud-init
The cloud-init script starts on instance boot and will search for a metadata provider to fetch a public key from. The public key will be placed in the default user account for the image.
Install the cloud-init package:
# apt-get install cloud-init
When building Ubuntu images cloud-init must be explicitly configured for the metadata source in use. The OpenStack metadata server emulates the EC2 metadata service used by images in Amazon EC2.
To set the metadata source to be used by the image run the dpkg-reconfigure command against the cloud-init package. When prompted select the EC2 data source:
# dpkg-reconfigure cloud-init
The account varies by distribution. On Ubuntu-based virtual machines, the account is called ubuntu. On Fedora-based virtual machines, the account is called ec2-user.
You can change the name of the account used by cloud-init by editing the /etc/cloud/cloud.cfg file and adding a line with a different user. For example, to configure cloud-init to put the key in an account named admin, use the following syntax in the configuration file:
users:
  - name: admin
    (...)
Shut down the instance
From inside the instance, as root:
Clean up (remove MAC address details)
The operating system records the MAC address of the virtual Ethernet card in locations such as /etc/udev/rules.d/70-persistent-net.rules during the installation process. However, each time the image boots up, the virtual Ethernet card will have a different MAC address, so this information must be deleted from the configuration file.
There is a utility called virt-sysprep, that performs various cleanup tasks such as removing the MAC address references. It will clean up a virtual machine image in place:
Undefine the libvirt domain
Now that the image is ready to be uploaded to the Image service, you no longer need to have this virtual machine image managed by libvirt. Use the virsh undefine vm-image command to inform libvirt:
Image is complete
The underlying image file that you created with the qemu-img create command, such as /tmp/trusty.qcow2, is now ready for uploading to the Image service by using the openstack image create command. For more information, see the Glance User Guide.
8 压缩镜像
convert [-c] [-p] [-n] [-f fmt] [-t cache] [-T src_cache] [-O output_fmt] [-o options] [-s snapshot_id_or_name] [-l snapshot_param] [-S sparse_size] filename
       [filename2 [...]] output_filename
           Convert the disk image filename or a snapshot snapshot_param(snapshot_id_or_name is deprecated) to disk image output_filename using format output_fmt. It can be
           optionally compressed ("-c" option) or use any format specific options like encryption ("-o" option).

           Only the formats "qcow" and "qcow2" support compression. The compression is read-only. It means that if a compressed sector is rewritten, then it is rewritten
           as uncompressed data.

           Image conversion is also useful to get smaller image when using a growable format such as "qcow": the empty sectors are detected and suppressed from the
           destination image.

           sparse_size indicates the consecutive number of bytes (defaults to 4k) that must contain only zeros for qemu-img to create a sparse image during conversion. If
           sparse_size is 0, the source will not be scanned for unallocated or zero sectors, and the destination image will always be fully allocated.

           You can use the backing_file option to force the output image to be created as a copy on write image of the specified base image; the backing_file should have
           the same content as the input's base image, however the path, image format, etc may differ.

           If the "-n" option is specified, the target volume creation will be skipped. This is useful for formats such as "rbd" if the target volume has already been
           created with site specific options that cannot be supplied through qemu-img.
命令:
qemu-img convert -c -O qcow2 image compressed_image
参考:
1 virt-install 使用说明: http://blog.csdn.net/starshine/article/details/6998189
2 kvm, qemu-kvm以及libvirt之间的关系图:http://blog.csdn.net/zhaihaifei/article/details/51018113
3 kvm虚拟化之virt-install: http://www.361way.com/virt-install/2721.html
4 kvm显示VM的IP:http://www.chengxuyuans.com/Unix/83251.html
5 virbr0: http://blog.chinaunix.net/uid-26000137-id-3723948.html
本文内容由网友自发贡献,版权归原作者所有,本站不承担相应法律责任。如您发现有涉嫌抄袭侵权的内容,请联系:hwhale#tublm.com(使用前将#替换为@)