在完成用urdf文件后,接下来就是利用arbotix舵机接口来控制机械臂。该部分参考教材《ROS进阶实例》,英文原版为《ROS By Example(volume2)》。
一、安装ArbotiX程序包
$ sudo apt-get install ros-indigo-arbotix
二、启动ArbotiX节点
参考教材的pi_robot_with_gripper.launch文件,修改之后,如下,文件命名为my_robot_arbotix.launch
<launch>
   <!-- Make sure we are not using simulated time -->
   <param name="/use_sim_time" value="false" />

   <!-- Launch the arbotix driver in fake mode by default -->
   <arg name="sim" default="true" />

   <!-- If using a real controller, look on /dev/ttyUSB0 by default -->
   <arg name="port" default="/dev/ttyUSB0" />

   <!-- Load the URDF/Xacro model of our robot -->
   <param name="robot_description" textfile="/home/xs/catkin_ws2/src/mybot_description/urdf/robot_arm.urdf" />

   <!-- Bring up the arbotix driver with a configuration file appropriate to the robot -->
   <node name="arbotix" pkg="arbotix_python" type="arbotix_driver" clear_params="true" output="screen">
      <rosparam file="/home/xs/catkin_ws2/src/mybot_description/my_robot_arbotix.yaml" command="load" />
      <param name="sim" value="$(arg sim)" />
      <param name="port" value="$(arg port)" />
   </node>

   <!-- Run a separate controller for the one sided gripper
   <node name="right_gripper_controller" pkg="arbotix_controllers" type="gripper_controller" output="screen">
      <rosparam>
         model: singlesided
         invert: true
         center: 0.0
         pad_width: 0.004
         finger_length: 0.065
         min_opening: -0.8
         max_opening: 0.5
         joint: right_gripper_finger_joint
      </rosparam>
   </node>-->

   <!-- Publish the robot state -->
   <node name="robot_state_publisher" pkg="robot_state_publisher" type="state_publisher">
       <param name="publish_frequency" type="double" value="20.0" />
   </node>

 <node
    name="rviz"
    pkg="rviz"
    type="rviz"
    args="-d /home/xs/catkin_ws2/src/robot_arm/urdf.rviz" />


   <!-- Start all servos in a relaxed state
   <node pkg="rbx2_dynamixels" type="arbotix_relax_all_servos.py" name="relax_all_servos" unless="$(arg sim)" />-->

   <!-- Load diagnostics -->
   <node pkg="diagnostic_aggregator" type="aggregator_node" name="diagnostic_aggregator" clear_params="true" unless="$(arg sim)">
      <rosparam command="load" file="$(find rbx2_dynamixels)/config/dynamixel_diagnostics.yaml" />
   </node>


   <node pkg="rqt_robot_monitor" type="rqt_robot_monitor" name="rqt_robot_monitor" unless="$(arg sim)" />

</launch>
三、配置arbotix的配置文件
根据自己的三关节实验机械臂的urdf文件,对教材中的pi_robot_with_gripper.yaml文件修改,如下,命名为my_robot_arbotix.yaml。
port: /dev/ttyUSB0
baud: 1000000
rate: 100
sync_write: True
sync_read: False
read_rate: 10
write_rate: 10

joints: {
     joint_1: {id: 4, neutral: 512, min_angle: -90, max_angle: 90},
     joint_2: {id: 5, neutral: 512, min_angle: -90, max_angle: 90},
     joint_3: {id: 6, neutral: 512, min_angle: -90, max_angle: 90}
}

controllers: {

   right_arm_controller: {onboard: False, action_name: right_arm_controller/follow_joint_trajectory, type: follow_controller, joints: [ joint_1, joint_2, joint_3]}

}
四、运行测试arbotix关节轨迹控制器
1、运行launch文件 $ roslaunch my_robot_arbotix.launch
运行结果如下

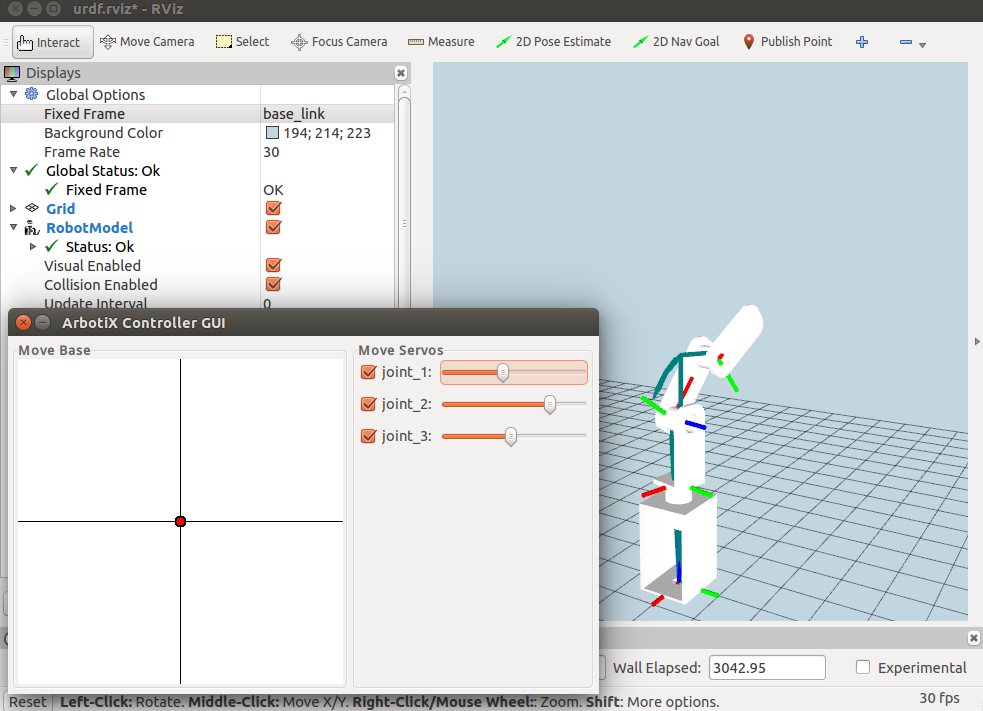
2、启动arbotix_gui来测试机械臂 $ arbotix_gui
拖动joint_1、joint_2、joint_3滑块可实现对机械臂控制
本文内容由网友自发贡献,版权归原作者所有,本站不承担相应法律责任。如您发现有涉嫌抄袭侵权的内容,请联系:hwhale#tublm.com(使用前将#替换为@)