import pyrealsense2 as rs
import numpy as np
import cv2
import os
import time
-
声明了个类,以后也许会添加重置旋转等操作,目前只用了暂停
class State:
    def __init__(self, *args, **kwargs):
        self.WIN_NAME = 'RealSense'
        self.paused = False

state = State()
saved_count = 0
# 设置
pipeline = rs.pipeline()
config = rs.config()

pipeline_wrapper = rs.pipeline_wrapper(pipeline)
pipeline_profile = config.resolve(pipeline_wrapper)
device = pipeline_profile.get_device()

found_rgb = False
for s in device.sensors:
    if s.get_info(rs.camera_info.name) == 'RGB Camera':
        found_rgb = True
        break
if not found_rgb:
    print("The demo requires Depth camera with Color sensor")
    exit(0)

config.enable_stream(rs.stream.depth, 1280, 720, rs.format.z16, 30)
config.enable_stream(rs.stream.color, 1280, 720, rs.format.bgr8, 30)

# config.enable_stream(rs.stream.depth, 848, 480, rs.format.z16, 30)
# config.enable_stream(rs.stream.color, 848, 480, rs.format.bgr8, 30)

pipeline.start(config)

# 声明点云对象
pc = rs.pointcloud()
points = rs.points()

# 创建对齐对象与color流对齐
align_to = rs.stream.color
align = rs.align(align_to)

cv2.namedWindow("live", cv2.WINDOW_AUTOSIZE)
# 保存路径
f_path = r".\test\test3"
if not os.path.exists(f_path):
    os.mkdir(f_path)
    os.mkdir(os.path.join(f_path, "images"))
    os.mkdir(os.path.join(f_path, "information"))
    os.mkdir(os.path.join(f_path, "live_record"))

save_path = os.path.join(os.getcwd(), f_path + "\live_record", time.strftime("%Y_%m_%d_%H_%M_%S", time.localtime()))
os.mkdir(save_path)
os.mkdir(os.path.join(save_path, "color"))
os.mkdir(os.path.join(save_path, "depth"))
def get_aligned_images():
    frames = pipeline.wait_for_frames()  # 等待获取图像帧,获取颜色和深度的框架集
    aligned_frames = align.process(frames)  # 获取对齐帧,将深度框与颜色框对齐

    aligned_depth_frame = aligned_frames.get_depth_frame()  # 获取对齐帧中的的depth帧
    aligned_color_frame = aligned_frames.get_color_frame()  # 获取对齐帧中的的color帧

    # 将images转为numpy arrays
    img_color = np.asanyarray(aligned_color_frame.get_data())  # RGB图
    img_depth = np.asanyarray(aligned_depth_frame.get_data())  # 深度图

    # 获取相机参数
    depth_intrin = aligned_depth_frame.profile.as_video_stream_profile().intrinsics  # 获取深度参数(像素坐标系转相机坐标系会用到)
    color_intrin = aligned_color_frame.profile.as_video_stream_profile().intrinsics  # 获取相机内参

    depth_mapped_image = cv2.applyColorMap(cv2.convertScaleAbs(img_depth, alpha=0.03), cv2.COLORMAP_JET)

    return color_intrin, depth_intrin, img_color, img_depth, depth_mapped_image, aligned_color_frame, aligned_depth_frame
def get_3d_camera_coordinate(depth_pixel, aligned_color_frame, aligned_depth_frame):
    x = int(depth_pixel[0])
    y = int(depth_pixel[1])
    # 计算点云
    pc.map_to(aligned_color_frame)
    points = pc.calculate(aligned_depth_frame)
    vtx = np.asanyarray(points.get_vertices())
    # print('vtx_before_reshape: ', vtx.shape)  # 921600
    vtx = np.reshape(vtx, (720, 1280, -1))
    # print('vtx_after_reshape: ', vtx.shape)  # (720, 1280, 1)

    camera_coordinate = vtx[y][x][0]
    # print ('camera_coordinate: ',camera_coordinate)
    dis = camera_coordinate[2]
    return dis, camera_coordinate
if __name__ == "__main__":
while True:
if not state.paused:
# 获取对齐图像帧与相机参数
color_intrin, depth_intrin, img_color, img_depth, depth_mapped_image, aligned_color_frame, aligned_depth_frame = get_aligned_images() # 获取对齐图像与相机参数
# 显示画面
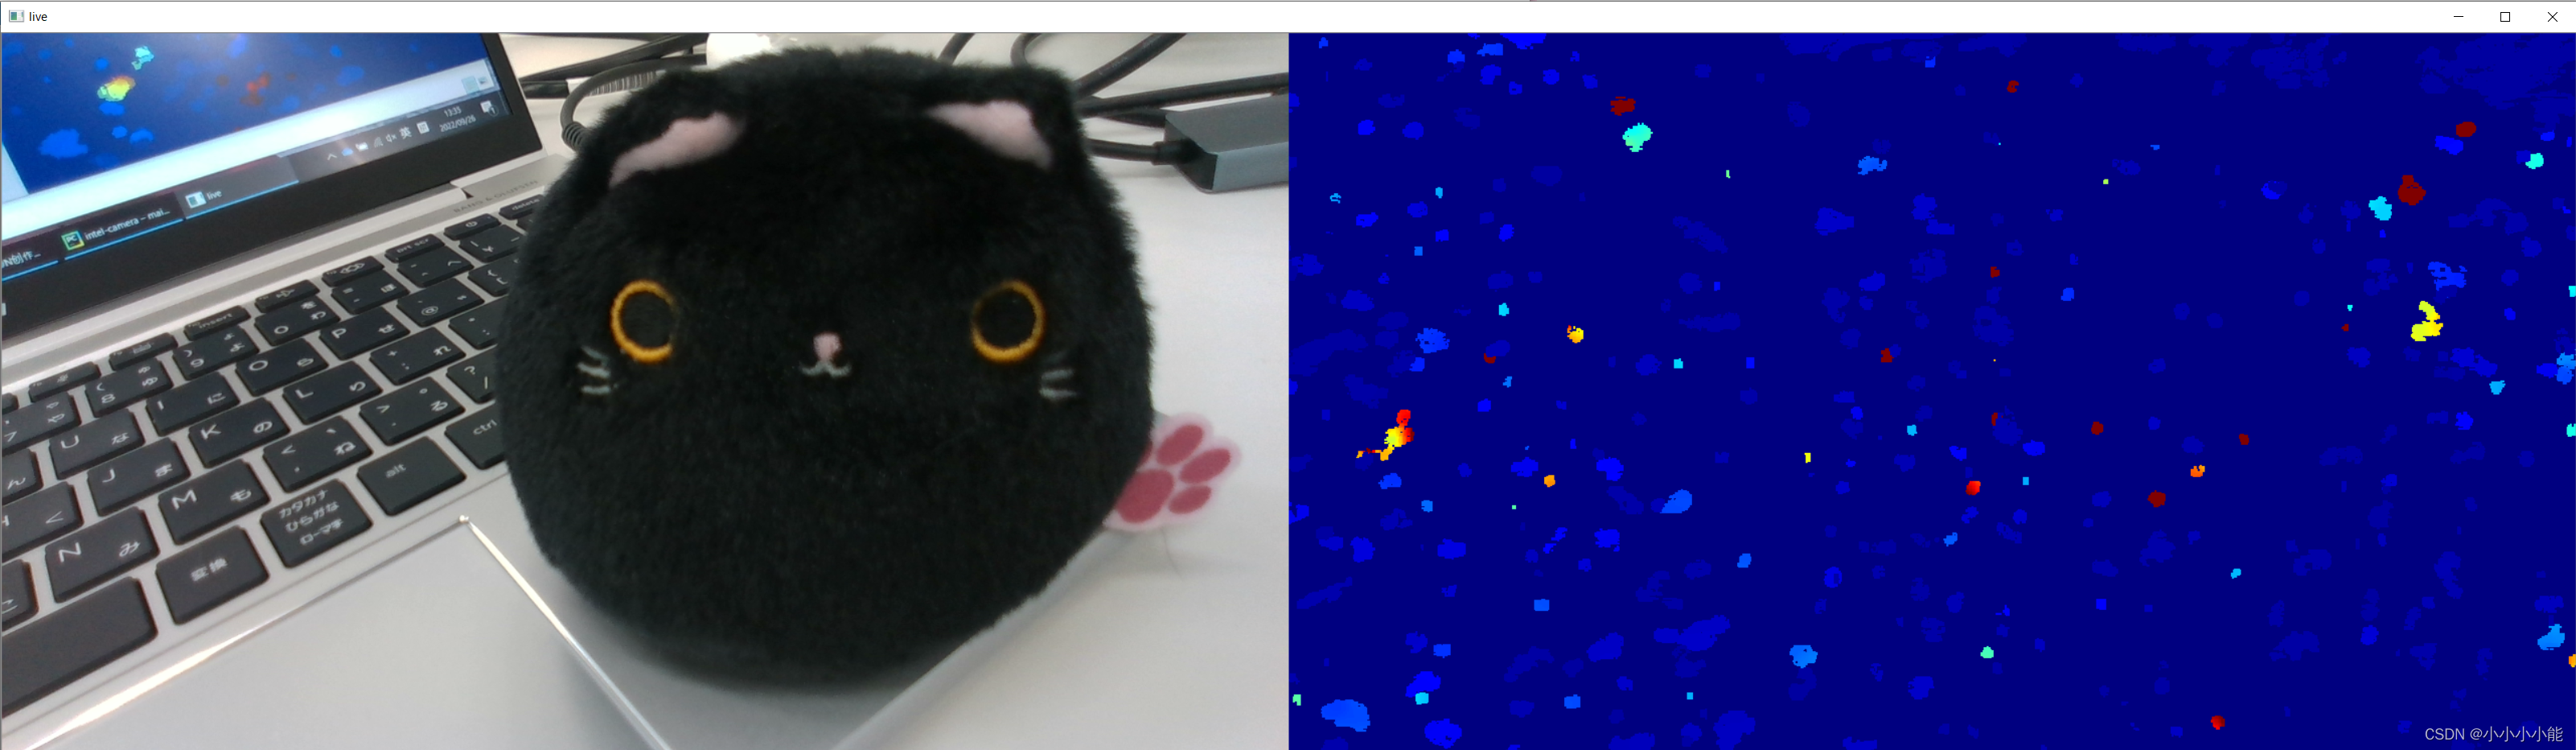
cv2.imshow("live", np.hstack((img_color, depth_mapped_image)))
key = cv2.waitKey(1)
此时效果(左侧RGB图,右侧深度图)(过近时深度信息几乎显示不出来)
        if key == ord("p"):
            state.paused ^= True
        if key == ord("s"):
            saved_color_image = img_color
            saved_depth_mapped_image = depth_mapped_image

            cv2.imwrite(os.path.join((save_path), "color", "{}.jpg".format(saved_count)), saved_color_image)
            cv2.imwrite(f_path + r"\images\target.jpg", saved_color_image)
            np.save(os.path.join((save_path), "depth", "{}".format(saved_count)), img_depth)
            saved_count += 1
-
按下r键读取刚才保存的图片,并通过image_sliced文件将图片裁剪到自己需要的范围
        if key == ord("r"):
            color_image = cv2.imread(f_path + r"\images\target.jpg")
            cv2.imshow("color", color_image)
            img_sliced = image_sliced.img_sliced(f_path)
            cv2.imshow("img_sliced", img_sliced)
image_sliced.py
import cv2
import os

def img_sliced(f_path):
    image_full = cv2.imread(f_path + r"\images\target.jpg")
    size = image_full.shape
    print('原尺寸=', size)
    target_sliced = image_full[80:370, 309:625]
    print('裁剪后=', target_sliced.shape)
    save_path = os.path.join(f_path + r"\images\target_sliced.jpg")
    cv2.imwrite(save_path, target_sliced)
    # cv2.imshow('image_full', image_full)
    # cv2.imshow('target_sliced', target_sliced)
    # cv2.waitKey(0)
    return target_sliced

# img_sliced(r'.\test\test3')
-
按下g键进行图像处理,判断方向,并将三维信息显示在图片上
        if key == ord("g"):
            image_processing.main(f_path)
            img_rect = cv2.imread(f_path + r".\images\target_rect_1.jpg")
image_processing.py处理过程参考文章:用python和opencv实现物体框选并保存坐标信息及面积信息(附代码)
调用方向判断文件判断方向并获取物体中心点(x,y)坐标
direction_func.py参考:使用opencv判断物体方向
            cenx, ceny = direction_func.main(f_path)
            print("cenx,ceny", cenx, ceny)
            depth_pixel = [ceny, cenx]
调用获取三维坐标函数计算深度信息并标在图片上
dis, camera_coordinate = get_3d_camera_coordinate(depth_pixel, aligned_color_frame, aligned_depth_frame)
print('depth: ', dis) # 深度单位是m
print('camera_coordinate: ', camera_coordinate)
img_rect_direction = cv2.imread(f_path + r".\images\target_rect_direction.jpg")
# 在图中标记物体中心点及其坐标
cv2.circle(img_rect_direction, (int(cenx), int(ceny)), 8, [255, 0, 255], thickness=-1)
cv2.putText(img_rect_direction, "Dis:" + str(dis) + " m", (40, 40), cv2.FONT_HERSHEY_SIMPLEX, 1.2, [0, 0, 255])
cv2.putText(img_rect_direction, "X:" + str(camera_coordinate[0]) + " m", (80, 80), cv2.FONT_HERSHEY_SIMPLEX, 1.2, [255, 0, 0])
cv2.putText(img_rect_direction, "Y:" + str(camera_coordinate[1]) + " m", (80, 120), cv2.FONT_HERSHEY_SIMPLEX, 1.2, [255, 0, 0])
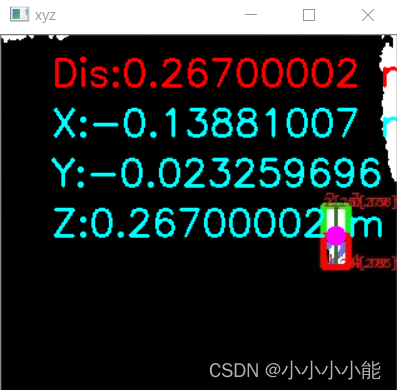
cv2.putText(img_rect_direction, "Z:" + str(camera_coordinate[2]) + " m", (80, 160), cv2.FONT_HERSHEY_SIMPLEX, 1.2, [255, 0, 0])
cv2.imshow('xyz', img_rect_direction)
效果:
        if key & 0xFF == ord('q') or key == 27:
            cv2.destroyAllWindows()
            break
结束
pipeline.stop()
本文内容由网友自发贡献,版权归原作者所有,本站不承担相应法律责任。如您发现有涉嫌抄袭侵权的内容,请联系:hwhale#tublm.com(使用前将#替换为@)