vrpn sdk的频率上限就是60hz,想要提高频率可以使用natnet_client进行话题接收。
1.basalt_vrpn_client
src下需要的其他package
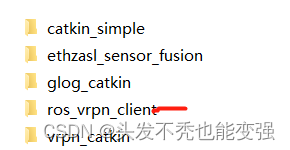
vrpn_catkin
glog_catkin
catkin_simple
ethzasl_sensor_fusion
下载地址
链接:https://pan.baidu.com/s/1r0rIcV1nBsGZ7P9C475I3w?pwd=v8el
提取码:v8el
1.首先安装fmt库以及sophus库
链接:https://pan.baidu.com/s/1LvmnAwgAmwFil5mrwhlNUg?pwd=05yf
提取码:05yf
高翔视觉SLAM十四讲Sophus安装指南(经历)
2.安装gflags库
GitHub - gflags/gflags: The gflags package contains a C++ library that implements commandline flags processing. It includes built-in support for standard types such as string and the ability to define flags in the source file in which they are used. Online documentation available at:
3.安装glog库
linux 下glog的安装
1、cd ~

2、git clone https://github.com/google/glog         //or  git clone https://gitee.com/boxingcao/glog.git

3、sudo apt-get install autoconf automake libtool
4、cd glog
5、mkdir build
6、cd build
7、cmake ..
8、make
9、sudo make install

10、sudo ldconfig
3.2 catkin_make 报错
Project ‘control’ tried to find library ‘gflags’. The library is neither a
target nor built/installed properly. Did you compile project
‘other_utils’? Did you find_package() it before the subdirectory containing
its code is included?
解决办法:
sudo apt-get install libgflags-dev
glog有问题
flled/exported glog CMake configuration if available.
-- Failed to find installed glog CMake configuration, searching for glog build directories exported with CMake.
-- Failed to find an installed/exported CMake configuration for glog, will perform search for installed glog components.
-- Suitable Glog version found.
-- Using system Glog.
-- Failed to find installed glog CMake configuration, searching for glog build directories exported with CMake.
-- Failed to find an installed/exported CMake configuration for glog, will perform search for installed glog components.
sudo apt-get install libgoogle-glog-dev
4.error: ‘decay_t’ is not a member of ‘std’
pangiln库版本问题或者是c++版本问题
5.catkin_make 有可能一次不成功。建议多catkin_make两次
6.执行接收数据的步骤
source ../devel/setup.bash (1 workspace下source一下)
<arg name="object_name" default="localhost" />
arg name= 刚体定义的名字(object_name)
default为object_name默认值
开启多节点的时候需要将object_name 改为motive里面的body_name
roslaunch ros_vrpn_client asl_optitrack.launch object_name:=body3 (2 执行launch文件,开启节点接收数据)
rostopic list
rostopic echo topic_name (3. 打印话题名为 topic_name的话题的数据)
rostopic hz topic_name
2.vrpn_ros_client(ros官方的package)
这个客户端得launch文件可以直接检测到moive发布的刚体名称和数据流id号,只需要更改ip,比basalt使用方便,环境配置也很方便。
首先,从github上获取源码
cd ~/catkin_ws/src
git clone https://github.com/clearpathrobotics/vrpn_client_ros.git
sudo apt-get install ros-kinetic-vrpn
这里的ros-***-vrpn。需要根据自己的ros版本进行apt_get。不更改就会定位不到软件源。
ubuntu20.04对应得ros1为noetic
ubuntu18.04对于得ros1为melotic(可能没打对)。
cd ~/catkin_ws
catkin_make
source devel/setup.bash
roslaunch vrpn_client_ros sample.launch  server:=192.168.1.2(ip为运行motive主机得ip)
可以ping ip进行尝试能否与主机通信。接受话题需要在同一局域网下
<launch>

  <arg name="server" default="localhost"/>

  <node pkg="vrpn_client_ros" type="vrpn_client_node" name="vrpn_client_node" output="screen">
    <rosparam subst_value="true">
      server: $(arg server)
      port: 3883

      update_frequency: 100.0
      frame_id: world

      # Use the VRPN server's time, or the client's ROS time.
      use_server_time: false
      broadcast_tf: true

      # Must either specify refresh frequency > 0.0, or a list of trackers to create
      refresh_tracker_frequency: 1.0
      #trackers:
      #- FirstTracker
      #- SecondTracker
    </rosparam>
  </node>

</launch>
3.mocap_optitrack 使用natnet接口的客户端
wiki介绍:
sudo apt-get install ros-melodic-mocap-optitrack
roscd mocap_optitrack/config
sudo chmod 777 mocap.yaml
sudo nano mocap.yaml
修改参数
data port
multicast_address
rigidbody下的标签
本文内容由网友自发贡献,版权归原作者所有,本站不承担相应法律责任。如您发现有涉嫌抄袭侵权的内容,请联系:hwhale#tublm.com(使用前将#替换为@)