文章目录
- 🚈开头车
-
- 🚲过路车
- 1、导包,版本可以和我不一致
- 2、写入一个接口,定义好要实现的方法
- 3、重要文件配置
- 3.1、mybatis-config.xml
- 3.2、spring-dao.xml(重)
- 3.3、applicationContext.xml
- 4、测试
🚈开头车
🛴前面两班车:
快上车,Spring快速整合Mybatis实现方法一
二班车,Spring快速整合Mybatis实现方法二(SqlSessionDaoSupport +事务处理)
根据前面的例子,我们知道每次写接口都要多写一个它的实现类,特别麻烦,不过也没办法,因为要有SqlSession,不然根本玩不下去。
这里介绍一种方法,不需要创建接口实现类,那就是使用MapperScannerConfigure
作用
MapperScannerConfigure会为由它创建的映射器开启自动装配,它创建的所有映射器都会被自动注入SqlSessionFactory实例,与@Autowired和@Resource注解配合使用, 自动创建映射器的实现并注入业务组件,能最大限度的减少Dao组件与业务组件的编码和配置工作。
具体使用看示例
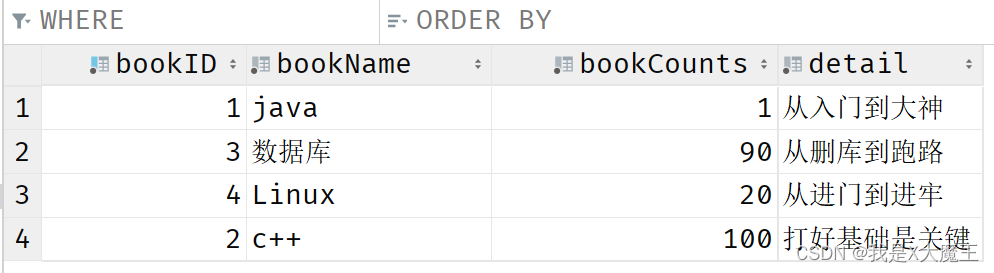
这里用到的数据库数据:
🚲过路车
1、导包,版本可以和我不一致
<dependency>
<groupId>mysql</groupId>
<artifactId>mysql-connector-java</artifactId>
<version>8.0.19</version>
</dependency>
<dependency>
<groupId>org.mybatis</groupId>
<artifactId>mybatis</artifactId>
<version>3.5.9</version>
</dependency>
<dependency>
<groupId>org.springframework</groupId>
<artifactId>spring-webmvc</artifactId>
<version>5.3.15</version>
</dependency>
<dependency>
<groupId>org.springframework</groupId>
<artifactId>spring-jdbc</artifactId>
<version>5.3.15</version>
</dependency>
<dependency>
<groupId>org.aspectj</groupId>
<artifactId>aspectjweaver</artifactId>
<version>1.9.7</version>
</dependency>
<dependency>
<groupId>org.mybatis</groupId>
<artifactId>mybatis-spring</artifactId>
<version>2.0.7</version>
</dependency>
2、写入一个接口,定义好要实现的方法
BookMapper 接口
package com.xmonster.mapper;
import com.xmonster.pojo.Books;
import org.apache.ibatis.annotations.*;
import org.springframework.stereotype.Repository;
import java.util.List;
@Repository
public interface BookMapper {
@Select("select * from ssmbuild.books;")
List<Books> selectAll();
@Select("select * from ssmbuild.books where id= #{bookID};")
Books selectById(@Param("bookID") int id);
@Insert("insert into ssmbuild.books(bookName, bookCounts, detail)\n" +
" values (#{bookName}, #{bookCounts}, #{detail});")
int addBook(Books book);
@Update("update ssmbuild.books set bookName=#{bookName},\n" +
" bookCounts=#{bookCounts},\n" +
" detail=#{detail}\n" +
" where bookID=#{bookID}")
int updateBook(Books book);
@Delete("delete from ssmbuild.books where bookID=#{bookID}")
int deleteBook(@Param("bookID") int id);
}
3、重要文件配置
先建立叫做mybatis-config.xml、spring-dao.xml文件在resources目录下
3.1、mybatis-config.xml
这里其实原本可以完全舍弃掉这个文件了,但是我个人的习惯就是在这个文件里设置别名和setting,所以我保留
<?xml version="1.0" encoding="UTF8" ?>
<!DOCTYPE configuration
PUBLIC "-//mybatis.org//DTD Config 3.0//EN"
"http://mybatis.org/dtd/mybatis-3-config.dtd">
<configuration>
<typeAliases>
<package name="com.xmonster.pojo"/>
</typeAliases>
<mappers>
<mapper class="com.xmonster.mapper.BookMapper" />
</mappers>
</configuration>
3.2、spring-dao.xml(重)
1.开启注解
2.关联数据库配置文件
3.开启扫描mapper包
4.设置dataSource 以及连接池相关信息
5.设置sqlsessionfactory
6.配置dao接口扫描包, 动态实现了dao接口可以注入到spring容器中(使用MapperScannerConfigurer)
database.properties:
按照自己的来配置即可
jdbc.driver=com.mysql.cj.jdbc.Driver
jdbc.url=jdbc:mysql://localhost:3306/mybatis?useSSL=true&useUnicode=true&characterEncoding=UTF-8&serverTimezone=UTC
jdbc.username=root
jdbc.password=123456
spring-dao.xml:
<?xml version="1.0" encoding="UTF8"?>
<beans xmlns="http://www.springframework.org/schema/beans"
xmlns:xsi="http://www.w3.org/2001/XMLSchema-instance"
xmlns:c="http://www.springframework.org/schema/c"
xmlns:aop="http://www.springframework.org/schema/aop"
xmlns:context="http://www.springframework.org/schema/context"
xmlns:mvc="http://www.springframework.org/schema/mvc"
xsi:schemaLocation=
"http://www.springframework.org/schema/beans
https://www.springframework.org/schema/beans/spring-beans.xsd
http://www.springframework.org/schema/aop
https://www.springframework.org/schema/aop/spring-aop.xsd
http://www.springframework.org/schema/context
https://www.springframework.org/schema/context/spring-context.xsd
http://www.springframework.org/schema/mvc
https://www.springframework.org/schema/mvc/spring-mvc.xsd">
<context:annotation-config/>
<context:property-placeholder location="classpath:database.properties" />
<context:component-scan base-package="com.xmonster.mapper" />
<bean id="dataSource" class="com.mchange.v2.c3p0.ComboPooledDataSource">
<property name="driverClass" value="${jdbc.driver}" />
<property name="jdbcUrl" value="${jdbc.url}" />
<property name="user" value="${jdbc.username}" />
<property name="password" value="${jdbc.password}" />
<property name="autoCommitOnClose" value="false" />
<property name="checkoutTimeout" value="1000" />
<property name="acquireRetryAttempts" value="2" />
</bean>
<bean id="sqlSessionFactory" class="org.mybatis.spring.SqlSessionFactoryBean">
<property name="dataSource" ref="dataSource" />
<property name="configLocation" value="classpath:mybatis-config.xml" />
</bean>
<bean class="org.mybatis.spring.mapper.MapperScannerConfigurer">
<property name="sqlSessionFactoryBeanName" value="sqlSessionFactory" />
<property name="basePackage" value="com.xmonster.mapper" />
</bean>
</beans>
3.3、applicationContext.xml
好习惯
<?xml version="1.0" encoding="UTF8"?>
<beans xmlns="http://www.springframework.org/schema/beans"
xmlns:xsi="http://www.w3.org/2001/XMLSchema-instance"
xmlns:context="http://www.springframework.org/schema/context"
xmlns:mvc="http://www.springframework.org/schema/mvc"
xsi:schemaLocation=
"http://www.springframework.org/schema/beans
https://www.springframework.org/schema/beans/spring-beans.xsd
http://www.springframework.org/schema/context
https://www.springframework.org/schema/context/spring-context.xsd
http://www.springframework.org/schema/mvc
https://www.springframework.org/schema/mvc/spring-mvc.xsd
">
<import resource="classpath:spring-dao.xml" />
</beans>
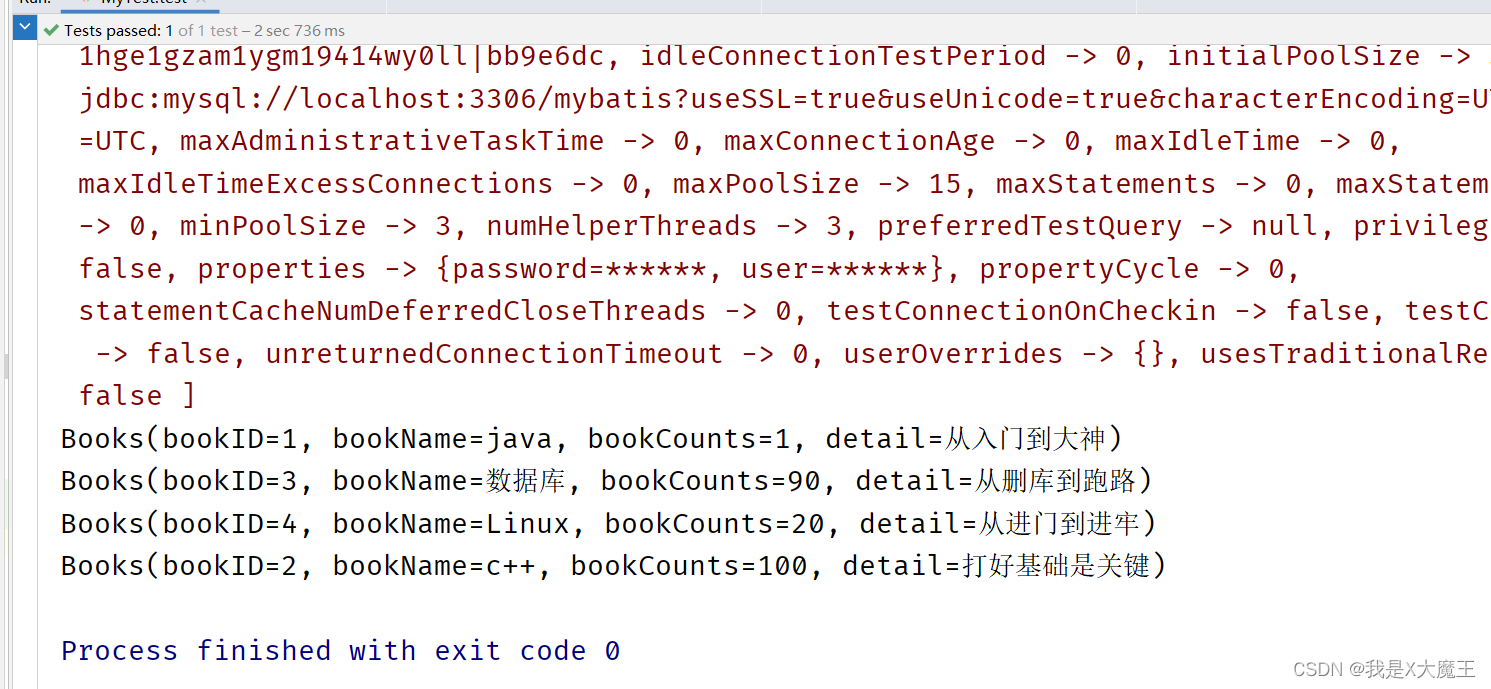
4、测试
import com.xmonster.mapper.BookMapper;
import com.xmonster.pojo.Books;
import com.xmonster.service.BookService;
import com.xmonster.service.BookServiceImpl;
import org.junit.Test;
import org.springframework.context.ApplicationContext;
import org.springframework.context.support.ClassPathXmlApplicationContext;
public class MyTest {
@Test
public void test(){
ApplicationContext context = new ClassPathXmlApplicationContext("applicationContext.xml");
BookMapper bookMapper = context.getBean("bookMapper", BookMapper.class);
for (Books books : bookMapper.selectAll()) {
System.out.println(books);
}
}
}
本文内容由网友自发贡献,版权归原作者所有,本站不承担相应法律责任。如您发现有涉嫌抄袭侵权的内容,请联系:hwhale#tublm.com(使用前将#替换为@)