hi,大家好,这里是X,最近又来整活啦,这次玩的是微信小程序这一块内容,个人认为这一块的内容非常常用,而且实现起来的方法也是多种多样的,使用Vant-weapp的原因也非常简单——那就是写样式真的太难了😭有别人写好的样式那还是很舒服的~没用过Vant-weapp的朋友,也可以去使用试试看,本期内容需要一定开发基础的朋友观看,如果你服务器不了解或者没玩过可以先去了解服务器玩法再回来😎
这个系列出2期内容

Vant-weapp官网传送门:Vant Weapp
文章目录
- 效果展示
- 后台
- 服务器部分
- 安装配置
- 设置保存图片位置
- spring boot项目搭建
- 上传图片接口
- 图片URL地址保存至数据库
- application.yml(可参考)
- 实体类
- service层
- controller层
- 小程序端
- 工具类封装
- 后端请求工具类[附带模拟网络延迟]
- 用到的vant-weapp组件:
- 上传服务器全部config
- 上传至服务器工具类
- 页面编写
- 测试
- 正式上传
-
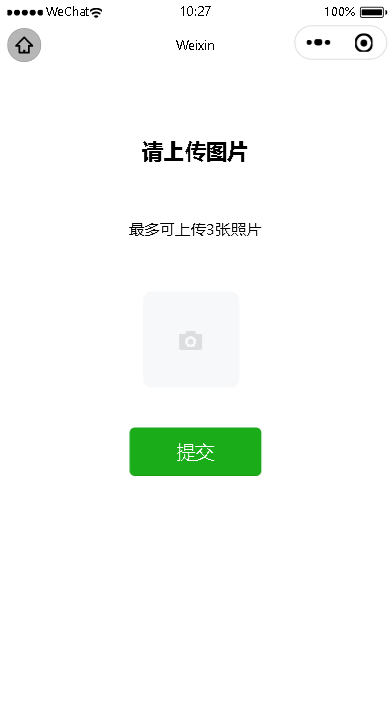
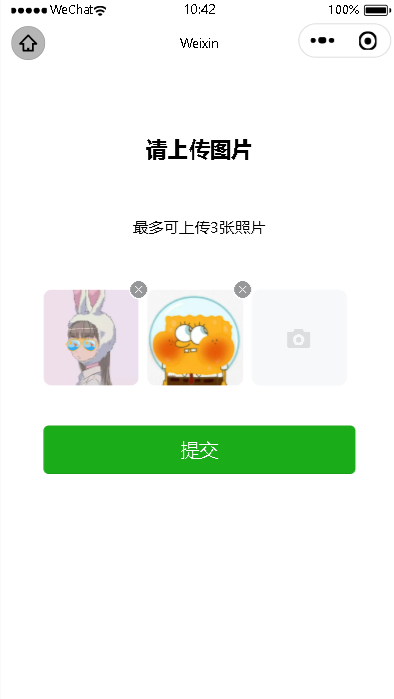
效果展示
💤💤💤💤💤💤💤💤💤💤💤
后台
上传图片可以上传至本地服务器,远程的FTP服务器、Nginx、tomcat服务器等方式上传,这里演示上传至tomcat服务器,所以这里大家要先自行在宝塔或者命令行搭建好自己的远程tomcat服务器并为其开放好相应的端口
服务器部分
🐱💻本项目使用的是2核4G
安装配置
如果是使用宝塔来进行搭建的朋友的话:

安装tomcat他会帮你自动安装好JDK,所以不用另外安装,还是很方便的
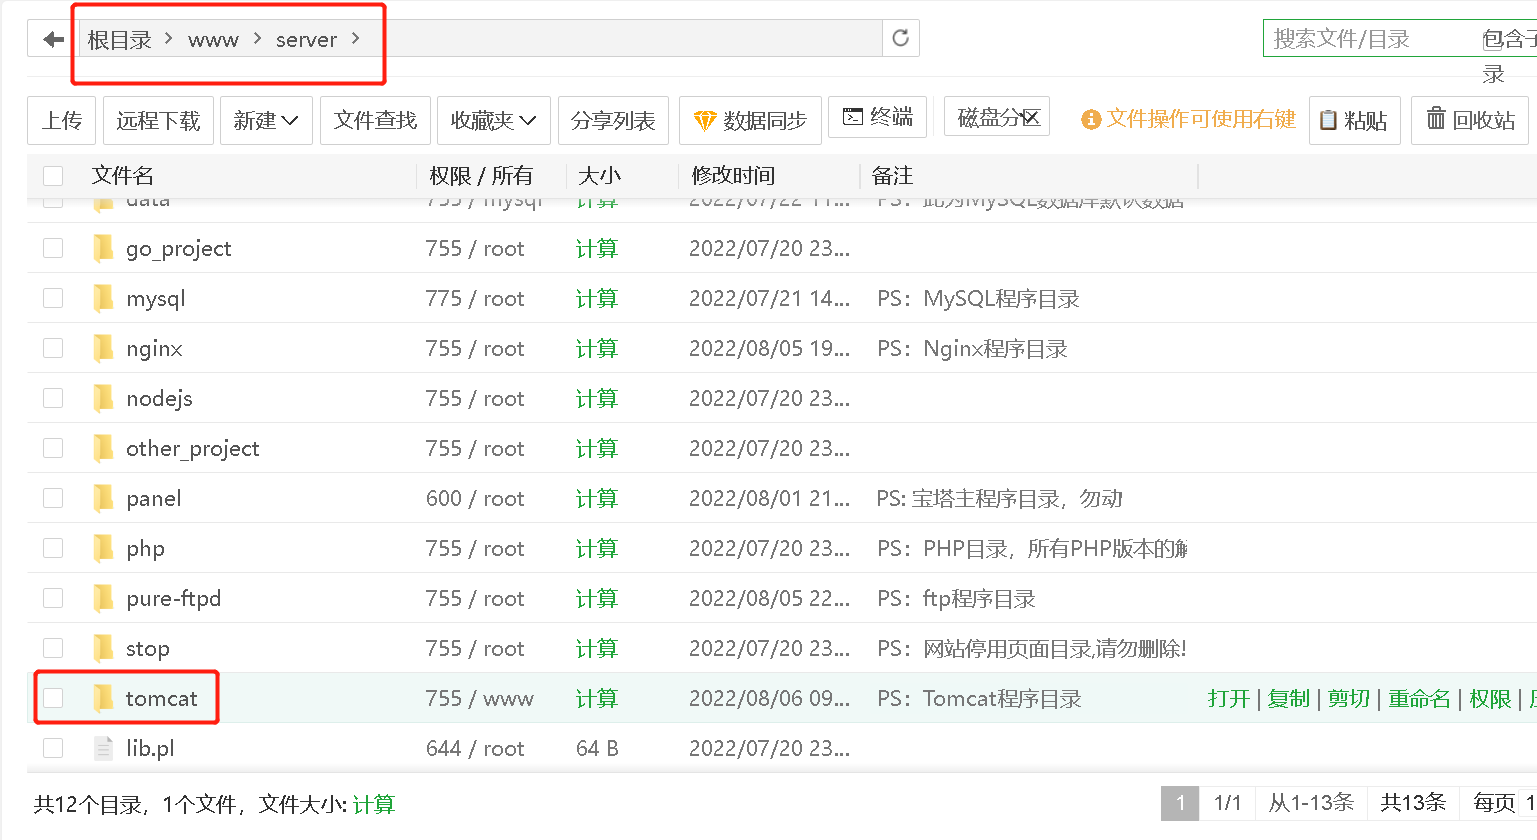
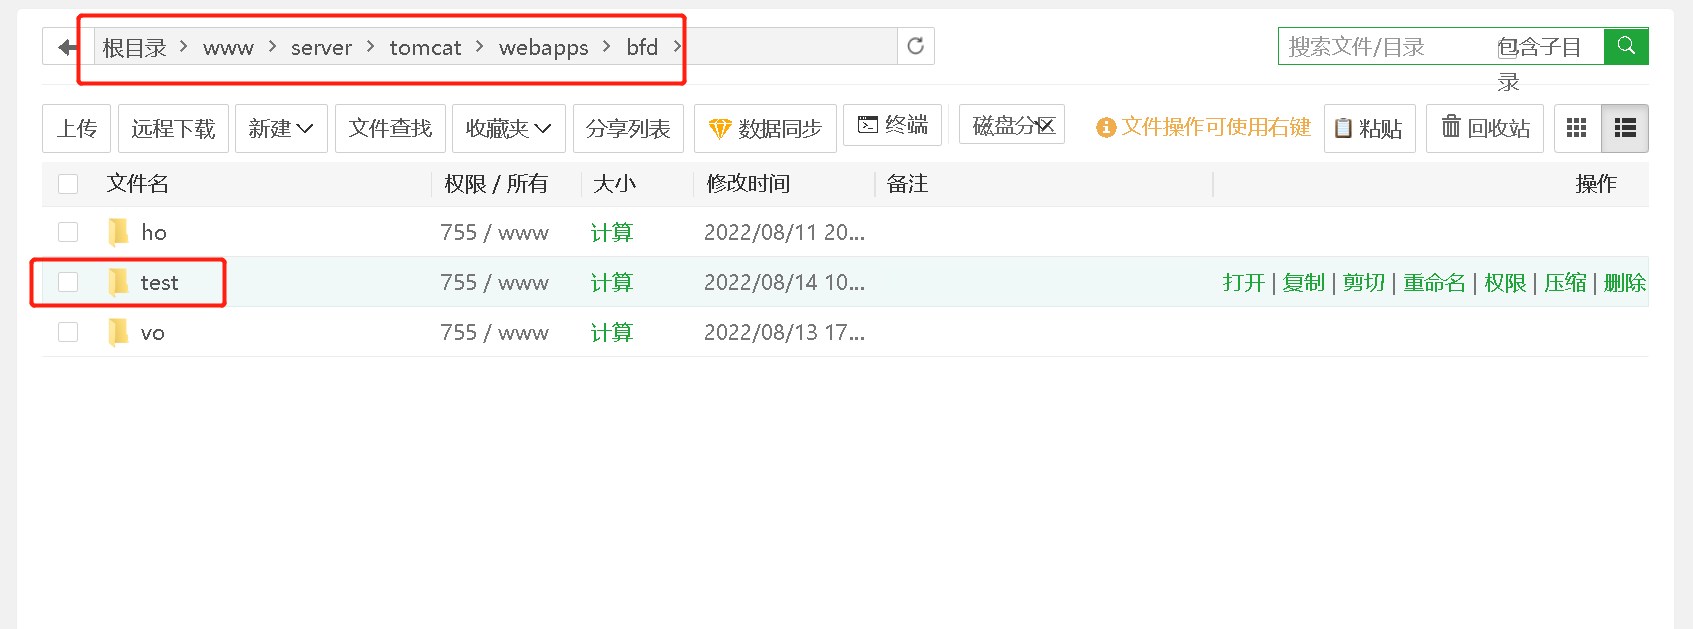
设置保存图片位置
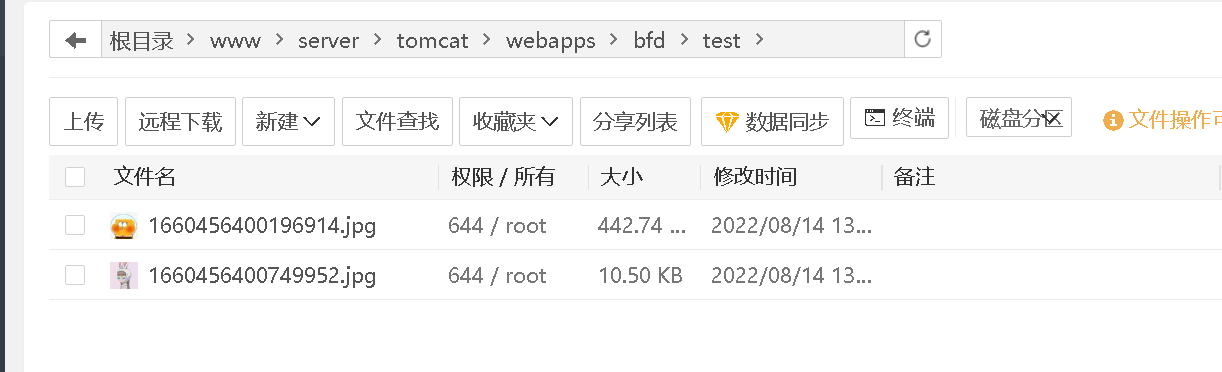
这里自行创建图片保存的文件夹,这里我是在webapps上建立bfd文件夹和test文件夹来保存我的图片
spring boot项目搭建
这里就跳过搭建项目,直接上代码
可以参考我的依赖,版本号可以根据自己的喜好来
pom.xml
<dependencies>
<dependency>
<groupId>org.springframework.boot</groupId>
<artifactId>spring-boot-starter-web</artifactId>
</dependency>
<dependency>
<groupId>org.apache.commons</groupId>
<artifactId>commons-lang3</artifactId>
<version>3.8.1</version>
</dependency>
<dependency>
<groupId>org.apache.commons</groupId>
<artifactId>commons-io</artifactId>
<version>1.3.2</version>
</dependency>
<dependency>
<groupId>commons-net</groupId>
<artifactId>commons-net</artifactId>
<version>3.6</version>
</dependency>
<dependency>
<groupId>commons-fileupload</groupId>
<artifactId>commons-fileupload</artifactId>
<version>1.3.3</version>
</dependency>
<dependency>
<groupId>org.projectlombok</groupId>
<artifactId>lombok</artifactId>
<version>1.16.22</version>
</dependency>
<dependency>
<groupId>com.jcraft</groupId>
<artifactId>jsch</artifactId>
<version>0.1.54</version>
</dependency>
<dependency>
<groupId>joda-time</groupId>
<artifactId>joda-time</artifactId>
<version>2.10.3</version>
</dependency>
<dependency>
<groupId>junit</groupId>
<artifactId>junit</artifactId>
<scope>test</scope>
</dependency>
<dependency>
<groupId>mysql</groupId>
<artifactId>mysql-connector-java</artifactId>
<scope>runtime</scope>
</dependency>
<dependency>
<groupId>com.baomidou</groupId>
<artifactId>mybatis-plus-boot-starter</artifactId>
<version>3.4.2</version>
</dependency>
<dependency>
<groupId>com.baomidou</groupId>
<artifactId>mybatis-plus-generator</artifactId>
<version>3.4.1</version>
</dependency>
<dependency>
<groupId>org.apache.velocity</groupId>
<artifactId>velocity-engine-core</artifactId>
<version>2.2</version>
</dependency>
<dependency>
<groupId>com.alibaba</groupId>
<artifactId>druid-spring-boot-starter</artifactId>
<version>1.2.2</version>
</dependency>
</dependencies>
上传图片接口
ip、用户名、密码这些大家看着来根据自己实际情况配置就好
package com.cn.shirly.fud.controller;
import com.jcraft.jsch.*;
import org.joda.time.DateTime;
import org.springframework.web.bind.annotation.PostMapping;
import org.springframework.web.bind.annotation.RequestParam;
import org.springframework.web.bind.annotation.RestController;
import org.springframework.web.multipart.MultipartFile;
import java.io.IOException;
import java.io.InputStream;
import java.util.Properties;
import java.util.Random;
@RestController
public class UploadController {
private static String host = "39.108.182.79";
private static int port = 22;
private static String userName = "";
private static String password = "";
@PostMapping("/uploadFile")
public String upload(@RequestParam("file") MultipartFile uploadFile) {
String oldFilename= uploadFile.getOriginalFilename();
InputStream inputStream=null;
int rand=(new Random()).nextInt(999);
long millis=System.currentTimeMillis();
String str=millis+String.format("%03d",rand);
String pathStr=(new DateTime()).toString("/yyMMdd/");
String newFileName=str+oldFilename.substring(oldFilename.lastIndexOf("."));
System.out.println("newFileName-->"+newFileName);
try {
inputStream=uploadFile.getInputStream();
} catch (IOException e) {
e.printStackTrace();
}
JSch jSch=new JSch();
try {
Session sshSession = jSch.getSession(userName, host, 22);
sshSession.setPassword(password);
Properties sshConfig=new Properties();
sshConfig.put("StrictHostKeyChecking", "no");
sshSession.setConfig(sshConfig);
sshSession.connect();
Channel channel = sshSession.openChannel("sftp");
channel.connect();
ChannelSftp channelSftp=(ChannelSftp)channel;
channelSftp.put(inputStream,"/www/server/tomcat/webapps/bfd/test/"+newFileName);
System.out.println("上传成功");
channelSftp.quit();
channelSftp.exit();
String fileUpSuccess = "http://39.108.182.79:8080/bfd/vo/"+newFileName;
return fileUpSuccess;
} catch (JSchException e) {
e.printStackTrace();
} catch (SftpException e) {
e.printStackTrace();
}
return "fail";
}
}
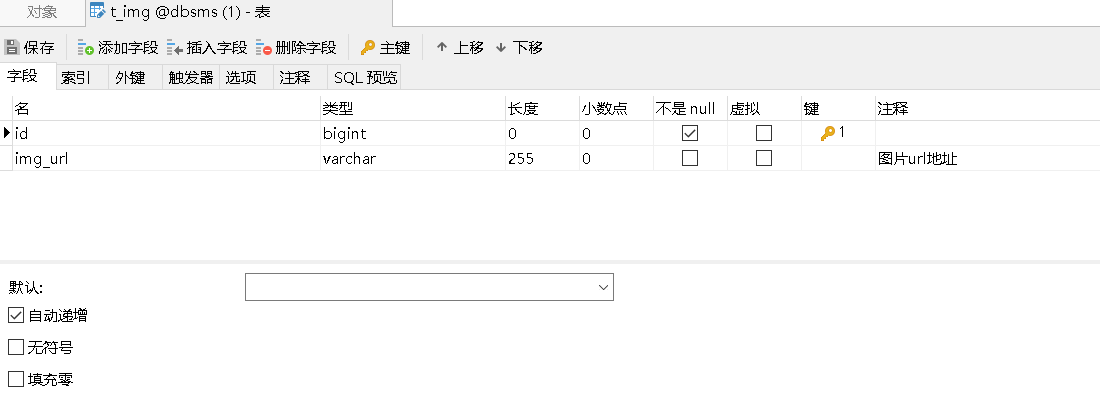
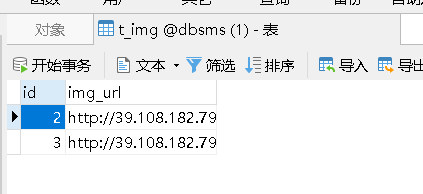
图片URL地址保存至数据库
看到实体类大家应该就懂啦,很简单的一个类,后续代码也不复杂,继续往下看吧
保存至数据库的处理,存储图片的表结构如下:
application.yml(可参考)
如果使用,别忘了将xxx替换你的数据库信息还有账号和密码
# 数据源配置
spring:
  datasource:
    url: jdbc:mysql://xxx.xxx.xxx.xxx:3306/xxx?useUnicode=true&characterEncoding=utf8&zeroDateTimeBehavior=convertToNull&useSSL=true&serverTimezone=GMT%2B8
    username: xxx
    password: xxx
    type: com.alibaba.druid.pool.DruidDataSource
    druid:
      # 初始连接数
      initialSize: 5
      # 最小连接池数量
      minIdle: 10
      # 最大连接池数量
      maxActive: 20
      # 配置获取连接等待超时的时间
      maxWait: 60000

#配置Mybatis-plus的相关属性
mybatis-plus:
  mapper-locations: classpath:mapper/*.xml #指定mapper XML文件的位置
  type-aliases-package: com.**.**.**.domain  #指定实体类的别名的映射路径
  configuration:
    log-impl: org.apache.ibatis.logging.stdout.StdOutImpl  #打印输出SQL语句
    use-generated-keys: true      #开启自增组件
实体类
import com.baomidou.mybatisplus.annotation.TableName;
import com.baomidou.mybatisplus.annotation.IdType;
import com.baomidou.mybatisplus.annotation.TableId;
import com.baomidou.mybatisplus.annotation.TableField;
import java.io.Serializable;
import lombok.Data;
import lombok.EqualsAndHashCode;
import lombok.experimental.Accessors;
@Data
@EqualsAndHashCode(callSuper = false)
@Accessors(chain = true)
@TableName("t_img")
public class Img implements Serializable {
@TableId(value = "id", type = IdType.AUTO)
private Long id;
@TableField("img_url")
private String imgUrl;
}
service层
import com.cn.shirly.fud.domain.Img;
import com.cn.shirly.fud.mapper.ImgMapper;
import com.cn.shirly.fud.service.ImgService;
import com.baomidou.mybatisplus.extension.service.impl.ServiceImpl;
import org.springframework.beans.factory.annotation.Autowired;
import org.springframework.stereotype.Service;
@Service
public class ImgServiceImpl extends ServiceImpl<ImgMapper, Img> implements ImgService {
@Autowired
private ImgMapper mapper;
@Override
public void insert(String imgUrl){
Img img = new Img();
img.setImgUrl(imgUrl);
mapper.insert(img);
}
}
controller层
import com.cn.shirly.fud.service.ImgService;
import org.springframework.beans.factory.annotation.Autowired;
import org.springframework.web.bind.annotation.PostMapping;
import org.springframework.web.bind.annotation.RequestBody;
import org.springframework.web.bind.annotation.RestController;
import java.util.List;
@RestController
public class ImgController {
@Autowired
private ImgService imgService;
@PostMapping("/imgToDb")
public void imgToDb(@RequestBody List<String> imgList){
if(imgList.size()==0){
System.out.println("不能够插入空白图片url!");
return;
}
for (int i = 0; i < imgList.size(); i++) {
imgService.insert(imgList.get(i));
}
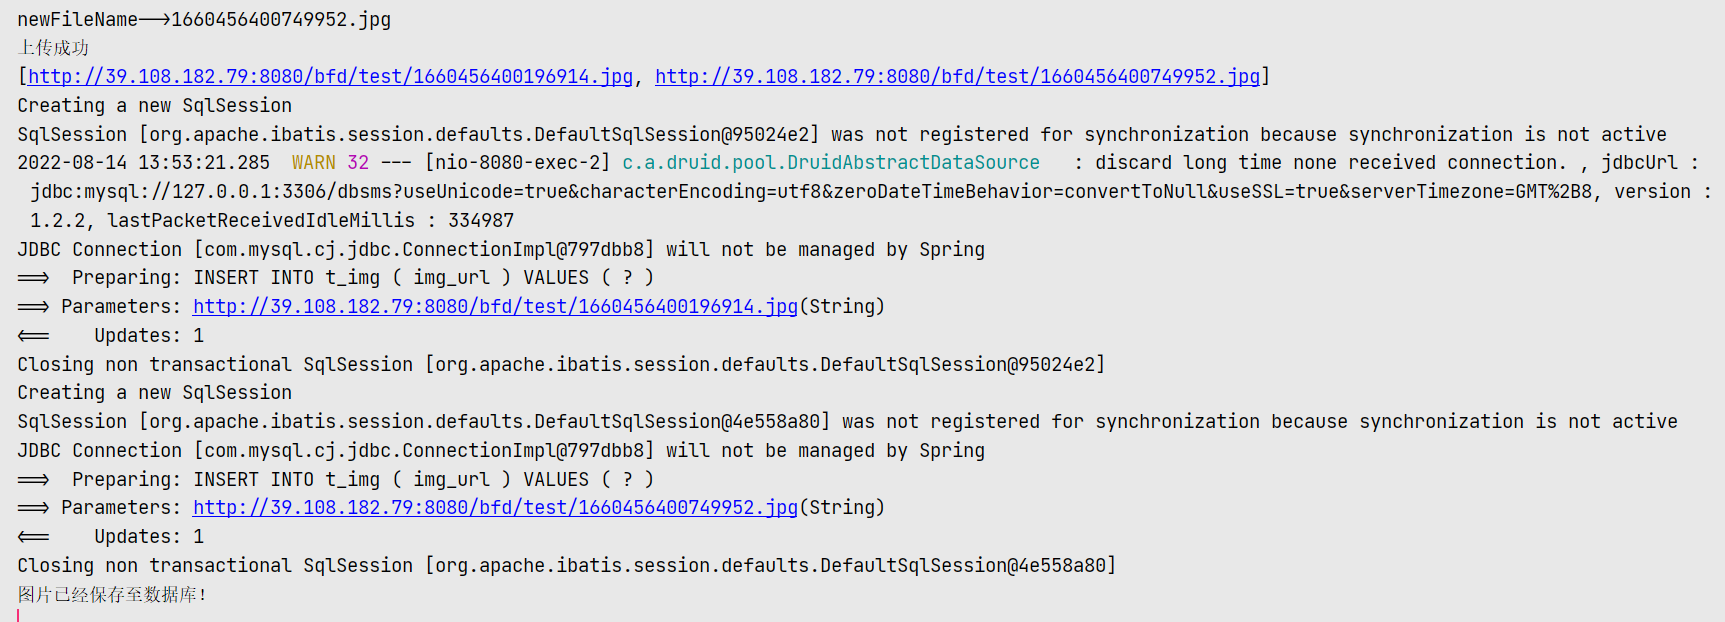
System.out.println("图片已经保存至数据库!");
return;
}
}
至此,我们的准备工作全部做好💨
小程序端
工具类封装
建立文件
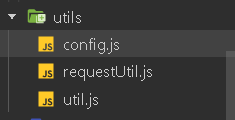
后端请求工具类[附带模拟网络延迟]
utils下建一个requestUtil.js文件用来封装请求request和指定项目路径
const baseUrl="http://localhost:8080";
let ajaxTimes=0;
export const getBaseUrl=()=>{
return baseUrl;
}
export const requestUtil=(params)=>{
var start=new Date().getTime();
console.log(start)
ajaxTimes++;
wx.showLoading({
title: '加载中...',
mask:true
})
while(true){
if(new Date().getTime()-start>1*100) break;
}
return new Promise((resolve,reject)=>{
wx.request({
...params,
header,
url:baseUrl+params.url,
success:(result)=>{
resolve(result.data)
},
fail:(err)=>{
reject(err)
},
complete:()=>{
ajaxTimes--;
if(ajaxTimes==0){
wx.hideLoading();
}
}
})
});
}
用到的vant-weapp组件:
app.json
 "usingComponents": {
   "van-uploader": "@vant/weapp/uploader/index",
   "van-notice-bar": "@vant/weapp/notice-bar/index",
   "van-notify": "@vant/weapp/notify/index",
   "van-field": "@vant/weapp/field/index"
 }
上传服务器全部config
const UPLOAD_URL = 'http://localhost:8080/uploadFile/'
module.exports = {
UPLOAD_URL
};
上传至服务器工具类
同样是在utils下,建utils.js文件,调用config文件中的地址
import {UPLOAD_URL} from './config'
const uploadFile = (uploadFile, judge) =>{
return new Promise((resolve, reject) => {
wx.uploadFile({
url: UPLOAD_URL,
filePath: uploadFile,
header: {
"Content-Type": "multipart/form-data",
},
name: 'file',
formData: {
'judge': judge
},
success:(res) => {
const data = res.data
resolve({
data:data
})
},
fail:function(res){
console.log(`第${index+1}张上传失败!`+res);
wx.showToast({
title: "网络出错,上传失败",
icon: 'none',
duration: 1000
});
reject(res);
}
})
})
}
module.exports = {
uploadFile
}
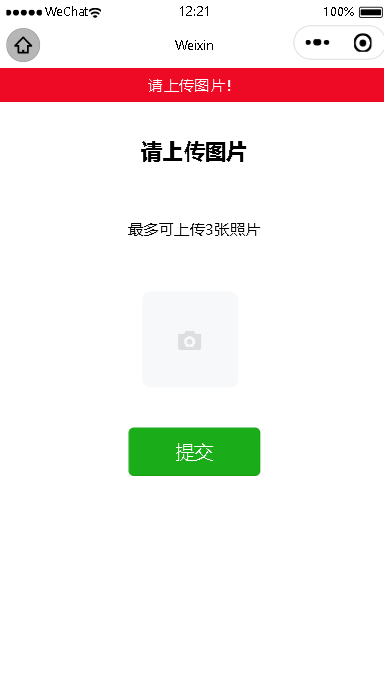
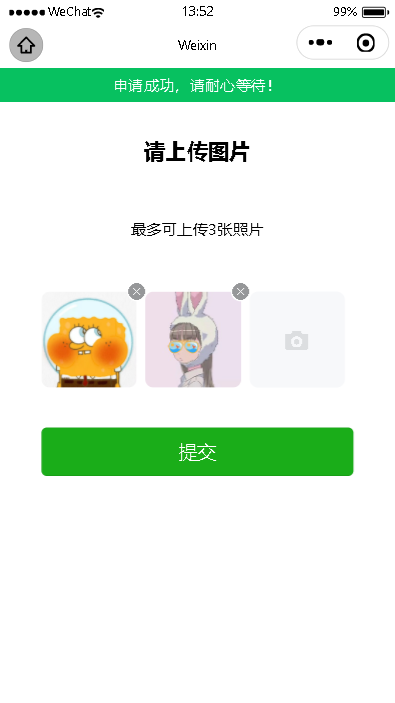
页面编写
index.wxml
<view class="container">
  <view class="main">
    <form bindsubmit="formSubmit" bindreset="formReset">
      <text class="title">请上传图片</text>
      <text class="tip">最多可上传3张照片</text>
      <view class="uploapImg">
       <van-uploader file-list="{{ fileList }}" bind:after-read="afterRead"  bind:delete="deleteClick" multiple="true" max-count="3"></van-uploader>
      </view>
      <button class="btn" form-type="submit" type="primary" >提交</button>
     </form>
  </view>
</view>
<van-notify id="van-notify" />
js文件
import {
getBaseUrl,
requestUtil
} from '../../utils/requestUtil.js';
import Notify from '../../miniprogram_npm/@vant/weapp/notify/notify';
const util = require('../../utils/util')
const app = getApp()
Page({
data: {
baseUrl: '',
fileList: [],
fileImgUrl: []
},
onLoad: function () {
const baseUrl = getBaseUrl();
this.setData({
baseUrl
});
},
afterRead(event){
let that = this;
const {file} = event.detail;
const {fileList1 = []} = this.data;
console.log(typeof event.detail.file)
file.forEach(function(e){
fileList1.push({url: e.path});
});
if(that.data.fileList.length!=0){
that.setData({
fileList:that.data.fileList.concat(fileList1)
});
}
else{
that.setData({
fileList:fileList1
});
}
},
deleteClick(event){
var jsonlist =this.data.fileList;
jsonlist.splice(event.detail.index,1)
this.setData({
fileList:jsonlist
})
},
async formSubmit(e){
var that = this;
if(that.data.fileList.length==0){
Notify({ type: 'danger', message: '请上传图片!' });
return;
}
for(let i =0 ;i<that.data.fileList.length; i++){
let resImgUrl = await util.uploadFile(that.data.fileList[i].url,1);
console.log("await返回的内容==="+resImgUrl.data);
that.setData({
fileImgUrl: that.data.fileImgUrl.concat(resImgUrl.data)
})
}
console.log("fileImgUrl "+JSON.stringify(that.data.fileImgUrl) )
const res = await requestUtil({url:"/imgToDb", data: that.data.fileImgUrl, method: "post"});
Notify({ type: 'success', message: '申请成功,请耐心等待!' });
},
});
测试
什么都不上传
正式上传
🐱💻本项目使用的是2核4G
图片上传
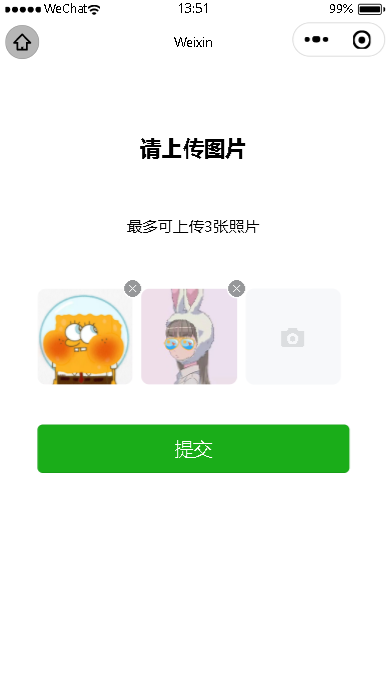
上传至服务器
数据库
后台输出:
本文内容由网友自发贡献,版权归原作者所有,本站不承担相应法律责任。如您发现有涉嫌抄袭侵权的内容,请联系:hwhale#tublm.com(使用前将#替换为@)