C#下使用RealSense D435i获取图像,深度,导出.ply点云

2023-05-16

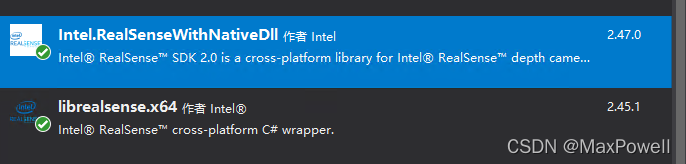
首先需要在NuGet管理中安装RealSense库相关包。

主要安装下面两个包:

 代码中引入:

using Intel.RealSense;
//配置相机
var cfg = new Config();

using (var ctx = new Context())
{

    var devices = ctx.QueryDevices();
    var dev = devices[0];

    Console.WriteLine("\nUsing device 0, an {0}", dev.Info[CameraInfo.Name]);
    Console.WriteLine("    Serial number: {0}", dev.Info[CameraInfo.SerialNumber]);
    Console.WriteLine("    Firmware version: {0}", dev.Info[CameraInfo.FirmwareVersion]);

    var sensors = dev.QuerySensors();
    var depthSensor = sensors[0];
    var colorSensor = sensors[1];
    
    var depthProfile = depthSensor.StreamProfiles.Where(p => p.Stream == Intel.RealSense.Stream.Depth).OrderBy(p => p.Framerate).Select(p => p.As<VideoStreamProfile>()).First();

    var colorProfile = colorSensor.StreamProfiles.Where(p => p.Stream == Intel.RealSense.Stream.Color).OrderBy(p => p.Framerate).Select(p => p.As<VideoStreamProfile>()).First();

    //配置相机宽高,深度,帧数
    cfg.EnableStream(Intel.RealSense.Stream.Depth, 640, 480, Format.Z16, 30);
    cfg.EnableStream(Intel.RealSense.Stream.Color, 640, 480, Format.Bgr8, 30);
}

var pipe = new Pipeline();

//启动相机并应用配置
pipe.Start(cfg);

Colorizer color_map = new Colorizer();

while (true)
{
   using (var frames = pipe.WaitForFrames())
   {
       //对齐深度图像
       Align align = new Align(Intel.RealSense.Stream.Color).DisposeWith(frames);
       Frame aligned = align.Process(frames).DisposeWith(frames);
       FrameSet alignedframeset = aligned.As<FrameSet>().DisposeWith(frames);
       var colorFrame = alignedframeset.ColorFrame.DisposeWith(alignedframeset);
       var depthFrame = alignedframeset.DepthFrame.DisposeWith(alignedframeset);

       var colorizedDepth = color_map.Process<VideoFrame>(depthFrame).DisposeWith(alignedframeset);

       //获取视频帧并转bitmap
       System.Drawing.Bitmap DepthImg = new System.Drawing.Bitmap(colorFrame.Width, colorFrame.Height, colorFrame.Stride, System.Drawing.Imaging.PixelFormat.Format24bppRgb, colorizedDepth.Data);

       System.Drawing.Bitmap ColorImg = new System.Drawing.Bitmap(colorFrame.Width, colorFrame.Height, colorFrame.Stride, System.Drawing.Imaging.PixelFormat.Format24bppRgb, frames.ColorFrame.Data);

       //将图像显示到picturebox控件中,需提前放置好控件
       PictureBox.Image = ColorImg;
       PictureBox2.Image = DepthImg;
   }
}

如果需要导出.ply点云数据,插入以下代码即可:

//点云数据
PointCloud pointcloud = new PointCloud();
//设置Texture
pointcloud.MapTexture(colorFrame);
//生成点云
Points points = pointcloud.Process(depthFrame).As<Points>();
//导出.ply
points.ExportToPLY("standard.ply", colorFrame);

具体demo下载:C#RealSense获取图像流Demo-C#文档类资源-CSDN下载

本文内容由网友自发贡献,版权归原作者所有,本站不承担相应法律责任。如您发现有涉嫌抄袭侵权的内容,请联系:hwhale#tublm.com(使用前将#替换为@)

C#下使用RealSense D435i获取图像,深度,导出.ply点云 的相关文章

  • UCOSIII(1)——SVC与PenSV实现任务切换

    本文基于STM32F407ZGT6 SVC异常 xff1a SVC 系统服务调用 xff0c 亦简称系统调用 用于产生系统函数的调用请求 SVC 异常是必须立即得到响应的应用程序执行 SVC 时都是希望所需的请求立即得到响应 在 UCOS

随机推荐

  • Windows编程之核心书籍推荐

    一 Windows程序设计 xff08 第5版 珍藏版 xff09 Windows程序设计 xff08 第5版 珍藏版 xff09 这是一本经典的Windows编程圣经 xff0c 曾经伴随着近50万Windows程序员步入编程殿堂 xff
  • 使用dockerfile创建镜像报错

    do 34 docker build requires exactly 1 argument See docker build help Usage docker build OPTIONS PATH URL Build an image
  • 基于MxNet实现目标检测-YoloV4【附部分源码及模型】

    文章目录 前言目标检测发展史及意义一 数据集的准备1 标注工具的安装2 数据集的准备3 标注数据4 解释xml文件的内容 二 网络结构的介绍三 代码实现0 工程目录结构如下1 导入库2 配置GPU CPU环境3 数据加载器4 模型构建5 模
  • http://www.houdeblog.com/fakeoakleys/ 45121

    Big Buddha Womens Bb Gate FlatsAmazon Price 42 Kluane SpakeThis Hub was last updated on September 4 2008Christina Aguile
  • QT QGC安装包生成问题

    最后生成安装包的时候 xff0c 提示错误 xff1a FAILURE Build failed with an exception What went wrong Execution failed for task 39 compileD
  • 位置式 PID 控制算法和增量式 PID 控制算法

    数字 PID 控制算法通常分为位置式 PID 控制算法和增量式 PID 控制算法 一 位置式 PID 算法 span class token function e span span class token punctuation span
  • GPS北斗模块串口助手输出测试

    GPS北斗模块测试 材料 北斗模块 usb转ttl 杜邦线 1 模块接线如下图所示 可用5v跟3 3v 2 usb转ttl连接电脑通电指示灯亮 3 电脑通过串口调试助手可以收到北斗模块发送的数据 还没定位信息 波特率为9600 4 接上天线
  • Jetson Nano外接

    外接显示器 HDIM接口用于显示器 xff0c 直接通过HDMI的连线器接入支持接口的显示器 也可使用DVI的转接口 xff0c 但不建议使用VGA的转接口 xff0c 这种接入方式对于转接线和显示器有很大的依赖性 外接电源可以通过Micr
  • Docker无介绍快使用,docker拉取Nginx(六)

    Docker无介绍快使用 xff0c docker拉取Nginx xff08 六 xff09 问题背景Docker无介绍快使用 xff0c 安装部署hello测试 xff08 一 xff09 Docker无介绍快使用 xff0c docke
  • 【教程向】通过windows在树莓派3B上安装Ubuntu MATE 16.04.2 (Xenial)

    本文参考了http www ituring com cn article 273613 61 61 61 61 61 61 61 61 61 61 61 61 61 61 61 61 61 61 61 61 61 61 61 61 61 6
  • Docker无介绍快使用,docker拉取rabbitmq(十三)

    Docker无介绍快使用 xff0c docker拉取rabbitmq xff08 十三 xff09 问题背景Docker无介绍快使用 xff0c 安装部署hello测试 xff08 一 xff09 Docker无介绍快使用 xff0c d
  • 【ROS2&AI】电脑摄像头、intel-D435,利用ros2发布订阅图像(Python)

    本文欲分享两个代码来实现图像的传输 xff0c 利用ros2 xff0c ROS2 xff5e 配置 xff1a Ubuntu20 04 Python ROS2 foxy opencv xff1b 电脑相机 or Intel D435相机
  • 2021年嵌入式面试题汇总(最新经典)

    写在前面 xff1a 秋招嵌入式开发方向 xff0c 经过了很多场的笔试与面试 xff0c 在准备的过程中看了非常多的资料 xff0c 现在把他们整理一下 xff0c 有的资料看过了觉得不错就保存下来了 xff0c 如果有不对的地方 xff
  • 垂直起降无人机 Gazebo + PX4 HITL simulation

    环境 xff1a ubuntu版本 xff1a 20 04 px4固件版本 xff1a stable v1 12 3 QgroundControl版本 xff1a v4 14 飞控硬件 xff1a pixhawk cuav v5 43 ga
  • PX4飞控源码L1制导律详解

    PX4飞控源码L1制导律详解 本文目的在于帮助大家看清楚L1制导律选择参考点的策略 xff0c 所以作者将与L1知道无关的代码添加删除线 所有以下划线开头的变量在PX4中都是全局变量 xff0c 在下面的函数中 xff0c 有 target
  • Ubuntu下PX4飞控开发环境搭建

    双清微电子 前言 xff1a PX4支持Pixhawk pixracer 高通骁龙飞控板 树莓派 派诺特等硬件 PX4是构建在Nuttx实时操作系统上的 第一步 xff1a 安装Linux基础软件 第二步 xff1a 下载源代码 第三步 安
  • 开源飞控APM/PX4的发展史

    开源 Open Source 的概念最早被应用于软件 xff0c 开放源代码促进会 Open Source Initiative 用其描述那些源码可以被公众使用的软件 xff0c 并且此软件的使用 修改和发行也不受许可证的限制 每一个开源项
  • Mexican lolita ghds sale images

    The clip on hair extensions are available cheap ghd a variety of different colors and lengths will be the very best choi
  • python 获取当前文件路径

    一 Python 获取当前文件路径方法 sys path 0 获取文件当前工作目录路径 绝对路径 sys argv 0 获得模块所在的路径 由系统决定是否是全名 若显示调用python指令 xff0c 如python demo py xff
  • C#下使用RealSense D435i获取图像,深度,导出.ply点云

    首先需要在NuGet管理中安装RealSense库相关包 主要安装下面两个包 xff1a 代码中引入 xff1a using Intel RealSense 配置相机 var cfg 61 new Config using var ctx