【Gazebo入门教程】第六讲 控制器插件的编写与配置(下)

\qquad
文章目录
- 【Gazebo入门教程】第六讲 控制器插件的编写与配置(下)
- 一、系统插件
- 二、Velodyne传感器插件
- 1. 基本插件文件创建
- 2. 插件连接与测试
- 3. 插件配置
- 三、创造API
-
- 总结
前言:在上一篇博客中,我们首先了解了控制器插件的具体使用方法和配置流程,采用多个实例了解了模型插件和世界插件等的具体使用方法,本节博客将继续深入体会插件的功能效用,以两个实例重点介绍系统插件和传感器插件的配置方法,其中传感器插件的配置是重点,与之前的教程一致,可统一学习,最后通过创造API实现动态调整。
一、系统插件
- 创建插件文件:
cd ~/gazebo_plugin_tutorial
gedit system_gui.cc
- 编写插件文件:
#include <functional>
#include <gazebo/gui/GuiIface.hh>
#include <gazebo/rendering/rendering.hh>
#include <gazebo/gazebo.hh>
namespace gazebo
{
class SystemGUI : public SystemPlugin
{
public: virtual ~SystemGUI()
{
this->connections.clear();
if (this->userCam)
this->userCam->EnableSaveFrame(false);
this->userCam.reset();
}
public: void Load(int , char ** )
{
this->connections.push_back(
event::Events::ConnectPreRender(
std::bind(&SystemGUI::Update, this)));
}
private: void Init()
{
}
private: void Update()
{
if (!this->userCam)
{
this->userCam = gui::get_active_camera();
this->userCam->EnableSaveFrame(true);
this->userCam->SetSaveFramePathname("/tmp/gazebo_frames");
}
rendering::ScenePtr scene = rendering::get_scene();
if (!scene || !scene->Initialized())
return;
if (scene->GetVisual("ground_plane"))
std::cout << "Has ground plane visual\n";
}
private: rendering::UserCameraPtr userCam;
private: std::vector<event::ConnectionPtr> connections;
};
GZ_REGISTER_SYSTEM_PLUGIN(SystemGUI)
}
- 修改编译规则(底部添加):
add_library(system_gui SHARED system_gui.cc)
target_link_libraries(system_gui ${GAZEBO_LIBRARIES})
- 编译插件:
cd ~/gazebo_plugin_tutorial/build
cmake ..
make
gzserver &
gzclient -g libsystem_gui.so
- 在
tmp/gazebo_frames目录下,应该会出现一些照片

- 在同一个终端输入如下代码终止后台运行的程序
fg - 按Ctrl+C终止进程
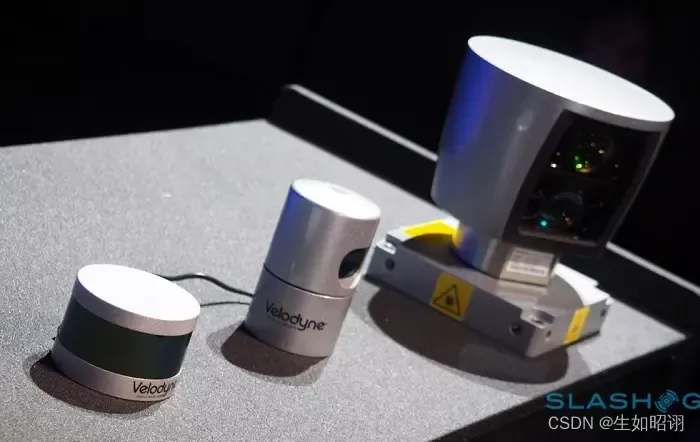
二、Velodyne传感器插件
1. 基本插件文件创建
mkdir ~/velodyne_plugin
cd ~/velodyne_plugin
gedit velodyne_plugin.cc
#ifndef _VELODYNE_PLUGIN_HH_
#define _VELODYNE_PLUGIN_HH_
#include <gazebo/gazebo.hh>
#include <gazebo/physics/physics.hh>
namespace gazebo
{
class VelodynePlugin : public ModelPlugin
{
public: VelodynePlugin() {}
public: virtual void Load(physics::ModelPtr _model, sdf::ElementPtr _sdf)
{
std::cerr << "\nThe velodyne plugin is attach to model[" <<
_model->GetName() << "]\n";
}
};
GZ_REGISTER_MODEL_PLUGIN(VelodynePlugin)
}
#endif
gedit CMakeLists.txt
cmake_minimum_required(VERSION 2.8 FATAL_ERROR)

# Find Gazebo
find_package(gazebo REQUIRED)
include_directories(${GAZEBO_INCLUDE_DIRS})
link_directories(${GAZEBO_LIBRARY_DIRS})
set(CMAKE_CXX_FLAGS "${CMAKE_CXX_FLAGS} ${GAZEBO_CXX_FLAGS}")

# Build our plugin
add_library(velodyne_plugin SHARED velodyne_plugin.cc)
target_link_libraries(velodyne_plugin ${GAZEBO_LIBRARIES})
2. 插件连接与测试
- 将插件附加到SDF文件中,连接到传感器,并通过include功能进行测试:
- 创建世界文件:
gedit velodyne.world
- 编写世界文件:
<?xml version="1.0" ?>
<sdf version="1.5">
<world name="default">
<include>
<uri>model://sun</uri>
</include>
<include>
<uri>model://ground_plane</uri>
</include>
<model name="my_velodyne">
<include>
<uri>model://velodyne_hdl32</uri>
</include>
<plugin name="velodyne_control" >filename="libvelodyne_plugin.so"/>
</model>
</world>
</sdf>
- 构造目录并编译文件:
cd ~/gazebo_plugin_tutorial/build/
cmake ..
make
- 添加库路径并从build目录中运行gazebo:
cd ~/velodyne_plugin/build
cexport LD_LIBRARY_PATH=${LD_LIBRARY_PATH}:~/velodyne_plugin/build
cgazebo ../velodyne.world
- 效果展示:
The velodyne plugin is attached to model[my_velodyne]
3. 插件配置
- 修改插件源文件
gedit ~/velodyne_plugin/velodyne_plugin.cc
- 修改
Load函数,代码如下:
public: virtual void Load(physics::ModelPtr _model, sdf::ElementPtr _sdf)
{
if (_model->GetJointCount() == 0)
{
std::cerr << "Invalid joint count, Velodyne plugin not loaded\n";
return;
}
this->model = _model;
this->joint = _model->GetJoints()[0];
this->pid = common::PID(0.1, 0, 0);
this->model->GetJointController()->SetVelocityPID(
this->joint->GetScopedName(), this->pid);
this->model->GetJointController()->SetVelocityTarget(
this->joint->GetScopedName(), 10.0);
}
- 将如下私有成员添加到对应类中:
private: physics::ModelPtr model;
private: physics::JointPtr joint;
private: common::PID pid;
- 在世界文件中配置插件,读取自定义SDF参数:
gedit ~/gazebo_plugin_tutorial/velodyne.world
- 修改标签来包含一个元素:
<plugin name="velodyne_control" filename="libvelodyne_plugin.so">
 <velocity>25</velocity>
</plugin>
- 重新修改插件文件中的Load函数的底部,使用 sdf::ElementPtr参数来读取:
double velocity = 0;
if (_sdf->HasElement("velocity"))
velocity = _sdf->Get<double>("velocity");
this->model->GetJointController()->>SetVelocityTarget(this->joint->GetScopedName(), >velocity);
- 效果: 重新编译并运行gazebo,修改,传感器应进行旋转
cd ~/velodyne_plugin/build
cmake ..
make
gazebo --verbose ../velodyne.world
三、创造API

1. 基本概念
- 目的:动态调整目标速度,无需手动修改SDF文件
- 分类:此处可以实现两种API类型:消息传递,和函数【此处我们可以同时实现】
- 消息传递:
依赖于Gazebo的传输机制,它将涉及创建一个命名的主题,发布者可以在该主题上发送double值。这样插件将接受到这些消息,并正确地设置速度值。对于进程间通信,消息传递是很方便的。 - 函数法:
新建一个公共函数来调整速度值。一个新的插件将继承我们当前的插件。子级插件将被实例化(而不是我们当前的插件),通过调用函数,我们可以控制速度。当Gazebo与ROS交互时,这一方法最常用。
2. 方法具体实现
gedit ~/gazebo_plugin_tutorial/velodyne_plugin.cc
public: void SetVelocity(const double &_vel)
{
this->model->GetJointController()->SetVelocityTarget(this->joint->GetScopedName(), _vel);
}
- 2.3 在插件中添加一个节点和订阅者,设置消息结构:
private: transport::NodePtr node;
private: transport::SubscriberPtr sub;
- 2.4 在Load函数底部实例化节点和订阅者,node和 subscriber:
this->node = transport::NodePtr(new transport::Node());
#if GAZEBO_MAJOR_VERSION < 8
this->node->Init(this->model->GetWorld()->GetName());
#else
this->node->Init(this->model->GetWorld()->Name());
#endif
std::string topicName = "~/" + this->model->GetName() + "/vel_cmd";
this->sub = this->node->Subscribe(topicName, &VelodynePlugin::OnMsg, this);
private: void OnMsg(ConstVector3dPtr &_msg)
{
this->SetVelocity(_msg->x());
}
#include <gazebo/transport/transport.hh>
#include <gazebo/msgs/msgs.hh>
#ifndef _VELODYNE_PLUGIN_HH_
#define _VELODYNE_PLUGIN_HH_
#include <gazebo/gazebo.hh>
#include <gazebo/physics/physics.hh>
#include <gazebo/transport/transport.hh>
#include <gazebo/msgs/msgs.hh>
namespace gazebo
{
class VelodynePlugin : public ModelPlugin
{
public: VelodynePlugin() {}
public: virtual void Load(physics::ModelPtr _model, sdf::ElementPtr _sdf)
{
if (_model->GetJointCount() == 0)
{
std::cerr << "Invalid joint count, Velodyne plugin not loaded\n";
return;
}
this->model = _model;
this->joint = _model->GetJoints()[0];
this->pid = common::PID(0.1, 0, 0);
this->model->GetJointController()->SetVelocityPID(
this->joint->GetScopedName(), this->pid);
double velocity = 0;
if (_sdf->HasElement("velocity"))
velocity = _sdf->Get<double>("velocity");
this->SetVelocity(velocity);
this->node = transport::NodePtr(new transport::Node());
#if GAZEBO_MAJOR_VERSION < 8
this->node->Init(this->model->GetWorld()->GetName());
#else
this->node->Init(this->model->GetWorld()->Name());
#endif
std::string topicName = "~/" + this->model->GetName() + "/vel_cmd";
this->sub = this->node->Subscribe(topicName,
&VelodynePlugin::OnMsg, this);
}
public: void SetVelocity(const double &_vel)
{
this->model->GetJointController()->SetVelocityTarget(
this->joint->GetScopedName(), _vel);
}
private: void OnMsg(ConstVector3dPtr &_msg)
{
this->SetVelocity(_msg->x());
}
private: transport::NodePtr node;
private: transport::SubscriberPtr sub;
private: physics::ModelPtr model;
private: physics::JointPtr joint;
private: common::PID pid;
};
GZ_REGISTER_MODEL_PLUGIN(VelodynePlugin)
}
#endif
3. 测试API
- 在gazebo_plugin_tutorial目录下新建源文件:
gedit ~/velodyne_plugin/vel.cc
#include <gazebo/gazebo_config.h>
#include <gazebo/transport/transport.hh>
#include <gazebo/msgs/msgs.hh>
#if GAZEBO_MAJOR_VERSION < 6
#include <gazebo/gazebo.hh>
#else
#include <gazebo/gazebo_client.hh>
#endif
int main(int _argc, char **_argv)
{
#if GAZEBO_MAJOR_VERSION < 6
gazebo::setupClient(_argc, _argv);
#else
gazebo::client::setup(_argc, _argv);
#endif
gazebo::transport::NodePtr node(new gazebo::transport::Node());
node->Init();
gazebo::transport::PublisherPtr pub =
node->Advertise<gazebo::msgs::Vector3d>("~/my_velodyne/vel_cmd");
pub->WaitForConnection();
gazebo::msgs::Vector3d msg;
#if GAZEBO_MAJOR_VERSION < 6
gazebo::msgs::Set(&msg, gazebo::math::Vector3(std::atof(_argv[1]), 0, 0));
#else
gazebo::msgs::Set(&msg, ignition::math::Vector3d(std::atof(_argv[1]), 0, 0));
#endif
pub->Publish(msg);
#if GAZEBO_MAJOR_VERSION < 6
gazebo::shutdown();
#else
gazebo::client::shutdown();
#endif
}
# Build the stand-alone test program
add_executable(vel vel.cc)

if (${gazebo_VERSION_MAJOR} LESS 6)
  # These two
  include(FindBoost)
  find_package(Boost ${MIN_BOOST_VERSION} REQUIRED system filesystem regex)
  target_link_libraries(vel ${GAZEBO_LIBRARIES} ${Boost_LIBRARIES})
else()
  target_link_libraries(vel ${GAZEBO_LIBRARIES})
endif()
cd ~/gazebo_plugin_tutorial/build
cmake ..
make
gazebo --verbose ../velodyne.world
- 新建终端,进入文件所在目录并运行vel命令,确保设置数值,该数值被解释为目标速度值。
cd ~/gazebo_plugin_tutorial/build/
./vel 2
总结
- 内容分析:本篇博客主要介绍了Gazebo中系统插件的使用和配置方法,并且重点从头到尾分析研究了velodyne传感器插件的配置、设计、测试流程,最后针对于插件调整设计了两种API,完成了编程后的便捷使用,与上节博客一起完成了对于Gazebo仿真插件的使用教程介绍。

- 注意:本文参考了Gazebo官方网站以及古月居中的Gazebo有关教程、知乎Bruce的教程等,主要目的是方便自行查询知识,巩固学习经验,无任何商业用途。
本文内容由网友自发贡献,版权归原作者所有,本站不承担相应法律责任。如您发现有涉嫌抄袭侵权的内容,请联系:hwhale#tublm.com(使用前将#替换为@)