BOCHS 简介及配置
Bochs 简介
Bochs(读音同 Box)是用C++开发的以 LGPL 许可证发放的开放源代码的x86,x86-64模拟器,模拟整个PC。它被设计成可以运行于多种主流平台下,包括x86, PPC, Alpha, Sun和MIPS。
和 Bochs 类似的虚拟机软件还有:VMware,Virtual PC,VirtualBox,但这些都使用了虚拟化技术,部分指令直接交给硬件执行。而Bochs完全是靠软件模拟来实现的(所以Bochs虚拟机的速度慢很多,而且应该称Bochs为模拟器,而非虚拟机)。从启动到重启,包括PC的外设键盘,鼠标,VGA卡,磁盘,网卡等,全部都是由软件来模拟的。也正是由于Bochs完全是靠软件来模拟整个PC环境,因此它非常的适合开发操作系统,这对广大操作系统爱好者来说是一个福音。因为有它,使得调试操作系统非常非常的容易,它自带一个调试器bochsdbg,它可以从PC机刚启动的那一刹那起就开始模拟,注意,这不是从读取磁盘中的引导扇区那开始模拟。
在Bochs中安装操作系统,不会分区宿主机硬盘,而仅仅是在宿主机中建立一个大文件——磁盘镜像文件。
使用Bochs自带的bximage工具可以创建软盘,硬盘的镜像文件。
在Bochs中运行操作系统的最低要求:
- Bochs 软件
- BIOS 镜像
- VGA BIOS 镜像
至少一个可引导的磁盘镜像(软盘,硬盘,光盘)或物理磁盘(软盘,光盘)
配置Bochs —— 告诉Bochs你想模拟一台拥有何种硬件配置的PC。
这里只介绍如何使用配置文件配置 Bochs。
Bochs为我们提供了一个配置文件的模版,这个模版为bochsrc-sample.txt,可以在Bochs的安装目录中找到。在配置文件中”#”为注释符号,表明#后面的全部是注释的内容(类似于C / C++ 中的行注释“//”)。
——其实只要懂点硬件,看看这个模板文件就懂如何配置了,要学习,官网的资料最好。
Romimage
    # ROMIMAGE:
    # The ROM BIOS controls what the PC does when it first powers on.
    # Normally, you can use a precompiled BIOS in the source or binary
    # distribution called BIOS-bochs-latest. The ROM BIOS is usually loaded
    # starting at address 0xf0000, and it is exactly 64k long. Another option
    # is 128k BIOS which is loaded at address 0xe0000.
    # You can also use the environment variable $BXSHARE to specify the
    # location of the BIOS.
    # The usage of external large BIOS images (up to 512k) at memory top is
    # now supported, but we still recommend to use the BIOS distributed with
    # Bochs. The start address optional, since it can be calculated from image size.
    #=======================================================================
    #romimage: file=$BXSHARE/BIOS-bochs-latest
    #romimage: file=bios/seabios-0.5.1.bin
    #romimage: file=mybios.bin, address=0xfff80000 # 512k at memory top
    使用安装目录下的文件就可以了。
Vgaromimage
使用安装目录下的文件就可以了。
Megs
指定内存大小。“megs: 32”表示虚拟系统被分配到32MB内存,如果你嫌少的话,可以在行首添加“
Floppya
这是A驱动器的参数,当然,自然也是模拟的。通常所用的软驱是1.44MB的,因此后面跟的参数是1_44=/dev/fd0 注意:/dev/fd0表示你当前的真实软驱。如果你想使用镜像文件(在编写操作系统中,我们一般都使用镜像文件)则把/dev/fd0改成你镜像文件的路径,如果你的配置文件和镜像文件在同一个文件夹中则可以直接写镜像名称,比如1_44=msdos.img就可以。
当然,也可以模拟其它的软驱,如2.88M,720K,360K的,这非常的有用!后面的参数status标明软驱的状态,只能有两个inserted(软盘插入软驱),ejected(软盘未插入软驱)。完整的就是“floppya: 1_44=msdos: 1_44=/dev/rfd0a, status=inserted”。
Boot
    这是启动的驱动器,它的频率也比较高。它可以带的参数有floppy(软驱启动),disk(磁盘启动),cdrom(光驱启动)。

ATA[0-3]-MASTER,ATA[0-3]-SLAVE
    指定硬盘或光盘的参数,并指明它是主盘还是从盘。标准的参数是ata0-master: type=disk, mode=flat, path="30M.sample", cylinders=615, heads=6, spt=17,type参数只能是两者,disk(硬盘),cdrom(光盘),mode这个参数镜像类型,它仅仅是针对磁盘才有效,有几种,flat(一个文件的布局)concat(多个文件的布局)external(开发者指定的,通过C++的类BOCHS就是C++开发的)dll(开发者指定的,通过dll文件)vmware3(wmware3使用的硬盘镜像)。还有几个其它的不介绍;path是指定硬盘或是光盘镜像的文件。Cylinders,Heads,Spt这几个参数通过这名字就能知道了。注意,这通常来说也不算是太重要,但是某些时候,则是特别重要,比如装minix1.5的时候,用bximage这个bochs自带的创建磁盘工具创建了个硬盘,然后就指明路径就运行,结果分区的时候一直出错,查了半天才发现这几个参数没有设置好,bximage创建的硬盘的Heads和Spt似乎是固定的,和模板自带的不一样,结构分区的时候,自然按配置文件里的计算,和实际的自然不符。
总之,有了配置模版文件,只要稍微懂一些英文很容易就能明白各个参数的作用和如何使用。
参数名
说明
config_interface
关于配置文件的接口。其实就是在BOCHS运行过程中改变配置的界面
display_library
图形库。
Romimage
ROM BIOS
Megs
内存
optromimage [1-4]
ROM镜像的选项
vgaromimage
VGA ROM BIOS
floppya
软驱A
floppyb
软驱B
ata[0-3]
硬盘或光驱的ata控制器
ATA[0-3]-MASTER ATA[0-3]-SLAVE
ata设备的类型
Boot
启动驱动器
Ips
模拟的频率,有些时候特别有用,比如我装minix1.5的时候,在login的时候,如果机子高档的话,输入passwd的时间特别短,这时候就需要调整频率了。当然,听说软件如果对实时控制特别研的时候,也必须改它。
Clock
时钟
floppy_bootsig_check
是否检查软盘引导时候的引导的标记0xaa55
log
调试用的日志
logprefix
日志记录的格式
panic
Bochs这个软件本身错误的信息,如配置文件出错或是模拟错误如不支持图形模式
Error
Bochs遇到不能模拟的情况,如出现非法指令
Info
一些不常出现的情况
Debug
主要用来开发Bochs这个软件时报告情况用的
debugger_log
调试器输出错误的文件。
com1
串行端口。
parport1
并行端口。
sb16
声卡
vga_update_interval
VGA卡刷新率
ne2k
网卡
当我们写好配置文件后,将其后缀名改为.bxrc,就可以被Bochs识别了。这时候我们只要双击该配置文件Bochs就启动并按照该配置文件进行配置,自动执行。
Bochs-2.2.1 的模板配置文件 bochsrc_sample.txt
# You many now use double quotes around pathnames, in case
# your pathname includes spaces.

#=======================================================================
# ROMIMAGE:
# You now need to load a ROM BIOS into F0000-FFFFF.  I've wiped
# out most of the BIOS hooks, and replace them with real BIOS
# support.  Normally, you can use a precompiled BIOS in the bios/
# directory, named BIOS-bochs-yymmdd.  Use the latest one in there.
#=======================================================================
#romimage: bios/BIOS-bochs-970717a
romimage: file=$BXSHARE\BIOS-bochs-latest, address=0xf0000
#romimage: file=bios/BIOS-bochs-2-processors, address=0xf0000
#romimage: file=bios/BIOS-bochs-4-processors, address=0xf0000
#romimage: file=bios/rombios.bin, address=0xf0000

#=======================================================================
# MEGS
# set this to the default number of Megabytes of memory you want
# to emulate.  You may also pass the '-megs xyz' option to bochs
#
# The default is 32MB, most OS's won't need more than that.
#=======================================================================
#megs: 256
#megs: 128
#megs: 64
#megs: 32
megs: 16
#megs: 8

#=======================================================================
# VGAROMIMAGE
# You now need to load a VGA ROM BIOS into C0000.
#=======================================================================
#vgaromimage: bios/VGABIOS-lgpl-0.3a
vgaromimage: $BXSHARE\VGABIOS-elpin-2.40

#=======================================================================
# FLOPPYA:
# Point this to pathname of floppy image file or device
# This should be of a bootable floppy(image/device) if you're
# booting from 'a'.
#
# You can set the initial status of the media to 'ejected' or 'inserted'.
#   floppya: 2_88=path, status=ejected             (2.88M 3.5" floppy)
#   floppya: 1_44=path, status=inserted            (1.44M 3.5" floppy)
#   floppya: 1_2=path, status=ejected              (1.2M  5.25" floppy)
#   floppya: 720k=path, status=inserted            (720K  3.5" floppy)
#
# The path should be the name of a disk image file.  On unix, you can use
# a raw device name such as /dev/fd0 on Linux.  On WinNT and Win2k, use
# drive letters such as a: or b: as the path.  Raw floppy access is not
# supported on Windows 95 and 98.
#=======================================================================
#floppya: 1_44=/dev/fd0, status=inserted
#floppya: file=../1.44, status=inserted
#floppya: 1_44=/dev/fd0H1440, status=inserted
#floppya: 1_2=../1_2, status=inserted
#floppya: 1_44=a:, status=inserted             # for win32
floppya: 1_44="E:\tolset\harib02e\haribote.img", status=inserted

#=======================================================================
# FLOPPYB:
# See FLOPPYA above for syntax
#=======================================================================
#floppyb: 1_44=b:, status=inserted
#floppyb: 1_44=b.img, status=inserted
#floppyb: 1_44="rootimage-0.11", status=inserted

#=======================================================================
# DISKC: file=, cyl=, heads=, spt=
# Point this at a 10M, 20M, or 30M hard disk image file.  To create
# a hard disk image, try running bximage.  It will help you choose the
# size and then suggest a diskc line that works with it.
#
# In UNIX it may be possible to use a raw device as a Bochs hard disk,
# but WE DON'T RECOMMEND IT.  In Windows there is no easy way.
#
# Examples:
#   diskc: file=10M.sample, cyl=306, heads=4, spt=17
#   diskc: file=20M.sample, cyl=615, heads=4, spt=17
#   diskc: file=30M.sample, cyl=615, heads=6, spt=17
#   diskc: file=46M.sample, cyl=940, heads=6, spt=17
#   diskc: file=62M.sample, cyl=940, heads=8, spt=17
#   diskc: file=112M.sample, cyl=900, heads=15, spt=17
#   diskc: file=483M.sample, cyl=1024, heads=15, spt=63
#=======================================================================
#ata0-master: type=disk, path="hd.img", cylinders=227, heads=16, spt=63
#ata0-master: type=disk, path="hdc-0.11-new.img", mode=flat, cylinders=121, heads=16, spt=63
#=======================================================================
# DISKD:
# See DISKC above for syntax
#
# NOTE: diskd and cdromd must not be used together!
#=======================================================================
#diskd: file="diskd.img", cyl=615, heads=6, spt=17

#=======================================================================
# CDROM
#
# cdromd: dev=/dev/cdrom, status=inserted
# cdromd: dev=/dev/cdrom, status=ejected
# cdromd: dev=e:, status=ejected
#
# In windows, the drive letter + colon notation should be used.  Depending
# on versions of windows and drivers, you may only be able to access the
# "first" cdrom in the system.
#
# NOTE: diskd and cdromd must not be used together!
#=======================================================================
#cdromd: dev=D:, status=inserted             # for win32
#cdromd: dev=/dev/cdrom, status=inserted

#=======================================================================
# NEWHARDDRIVESUPPORT: enabled=[0|1]
# As of cvs version on 5/17/2001, newharddrivesupport is on by default.
#=======================================================================
#newharddrivesupport: enabled=1

#=======================================================================
# BOOT:
# This defines your boot drive.
# You can either boot from 'a', 'c' or 'cdrom'
# Examples:
#   boot: c
#   boot: a
#   boot: cdrom
#=======================================================================
boot: a
#boot: c

#=======================================================================
# LOG:
# Give the path of the log file you'd like Bochs debug and misc. verbage
# to be written to.  If you really don't want it, make it /dev/null. :^(
#
# Examples:
#   log: ./bochs.out
#   log: /dev/tty
#=======================================================================
#log: /dev/null
log: bochsout.txt

#=======================================================================
# LOG CONTROLS
#
# Bochs now has four severity levels for event logging.
#   panic: cannot proceed.  If you choose to continue after a panic,
#          don't be surprised if you get strange behavior or crashes.
#   error: something went wrong, but it is probably safe to continue the
#          simulation.
#   info: interesting or useful messages.
#   debug: messages useful only when debugging the code.  This may
#          spit out thousands per second.
#
# For events of each level, you can choose to crash, report, or ignore.
# TODO: allow choice based on the facility: e.g. crash on panics from
#       everything except the cdrom, and only report those.
#
# If you are experiencing many panics, it can be helpful to change
# the panic action to report instead of fatal.  However, be aware
# that anything executed after a panic is uncharted territory and can
# cause bochs to become unstable.  The panic is a "graceful exit," so
# if you disable it you may get a spectacular disaster instead.
#=======================================================================
#panic: action=ask
#error: action=report
#info: action=report
#debug: action=ignore

#=======================================================================
# com1:
# Specify the device to use as com1.  This can be a real serial line, or
# a pty.  To use a pty (under X/Unix), create two windows (xterms,
# usually).  One of them will run bochs, and the other will act as com1.
# Find out the tty the com1 window using the `tty' command, and use that
# as the `dev' parameter.  Then do `sleep 1000000' in the com1 window to
# keep the shell from messing with things, and run bochs in the other
# window.  Serial I/O to com1 (port 0x3f8) will all go to the other
# window.
#=======================================================================
#com1: dev=/dev/ttyp9


#=======================================================================
# PARPORT1:
# This defines a parallel (printer) port.  When turned on, the emulated
# printer port sends characters printed by the guest OS into an output file.
#
# Examples:
#   parport1: enable=1, file="parport.out"
#   parport1: enable=0
#=======================================================================
parport1: enable=0

#=======================================================================
# SB16:
# This defines the SB16 sound emulation. It can have several of the
# following properties.
# All properties are in the format sb16: property=value
# midi: The filename is where the midi data is sent. This can be a
#       device or just a file if you want to record the midi data.
# midimode:
#      0=no data
#      1=output to device (system dependent. midi denotes the device driver)
#      2=SMF file output, including headers
#      3=output the midi data stream to the file (no midi headers and no
#        delta times, just command and data bytes)
# wave: This is the device/file where wave output is stored
# wavemode:
#      0=no data
#      1=output to device (system dependent. wave denotes the device driver)
#      2=VOC file output, incl. headers
#      3=output the raw wave stream to the file
# log:  The file to write the sb16 emulator messages to.
# loglevel:
#      0=no log
#      1=only midi program and bank changes
#      2=severe errors
#      3=all errors
#      4=all errors plus all port accesses
#      5=all errors and port accesses plus a lot of extra info
# dmatimer:
#      microseconds per second for a DMA cycle.  Make it smaller to fix
#      non-continous sound.  750000 is usually a good value.  This needs a
#      reasonably correct setting for IPS.
#
# For an example look at the next line:
#=======================================================================

#sb16: midimode=1, midi=/dev/midi00, wavemode=1, wave=/dev/dsp, loglevel=2, log=sb16.log, #dmatimer=600000

#=======================================================================
# VGA_UPDATE_INTERVAL:
# Video memory is scanned for updates and screen updated every so many
# virtual seconds.  The default is 300000, about 3Hz.  This is generally
# plenty.  Keep in mind that you must tweak the 'ips:' directive
# to be as close to the number of emulated instructions-per-second
# your workstation can do, for this to be accurate.
#
# Examples:
#   vga_update_interval: 250000
#=======================================================================
vga_update_interval: 300000

# using for Winstone '98 tests
#vga_update_interval:  100000

#=======================================================================
# KEYBOARD_SERIAL_DELAY:
# Approximate time in microseconds that it takes one character to
# be transfered from the keyboard to controller over the serial path.
# Examples:
#   keyboard_serial_delay: 200
#=======================================================================
keyboard_serial_delay: 200

#=======================================================================
# KEYBOARD_PASTE_DELAY:
# Approximate time in microseconds between attempts to paste
# characters to the keyboard controller. This leaves time for the
# guest os to deal with the flow of characters.  The ideal setting
# depends on how your operating system processes characters.  The
# default of 100000 usec (.1 seconds) was chosen because it works
# consistently in Windows.
#
# If your OS is losing characters during a paste, increase the paste
# delay until it stops losing characters.
#
# Examples:
#   keyboard_paste_delay: 100000
#=======================================================================
keyboard_paste_delay: 100000

#=======================================================================
# FLOPPY_COMMAND_DELAY:
# Time in microseconds to wait before completing some floppy commands
# such as read/write/seek/etc, which normally have a delay associated.
# I had this hardwired to 50,000 before.
#
# Examples:
#   floppy_command_delay: 50000
#=======================================================================
floppy_command_delay: 50000

#=======================================================================
# IPS:
# Emulated Instructions Per Second.  This is the number of IPS that bochs
# is capable of running on your machine.  Read the note in config.h
# on how to find this.  Make sure to recompile after.
#
# IPS is used to calibrate many time-dependent events within the bochs
# simulation.  For example, changing IPS affects the frequency of VGA
# updates, the duration of time before a key starts to autorepeat, and
# the measurement of BogoMips and other benchmarks.
#
# Examples:
# Machine                                         Mips
# ________________________________________________________________
# 650Mhz Athlon K-7 with Linux 2.4.4/egcs-2.91.66 2 to 2.5 Mips
# 400Mhz Pentium II with Linux 2.0.36/egcs-1.0.3  1 to 1.8 Mips
# 166Mhz 64bit Sparc with Solaris 2.x             approx 0.75 Mips
# 200Mhz Pentium with Linux 2.x                   approx 0.5 Mips
#
#=======================================================================
ips: 4000000

#=======================================================================
# mouse: Not used in any of the GUI specific modules, but the option
#        bx_options.mouse_enabled is set to this value.  The idea,
#        is that the GUI code should not generate mouse events when
#        not enabled.  The hardware emualation itself is not disabled
#        by this.  This is to facilitate deterministic runs of bochs.
#
# Examples:
#   mouse: enabled=1
#   mouse: enabled=0
#
# I wouldn't recommend enabling the mouse by default, unless you have a
# really good reason to do so.
#=======================================================================
mouse: enabled=0

#=======================================================================
# private_colormap: Request that the GUI create and use it's own
#                   non-shared colormap.  This colormap will be used
#                   when in the bochs window.  If not enabled, a
#                   shared colormap scheme may be used.  Not implemented
#                   on all GUI's.
#
# Examples:
#   private_colormap: enabled=1
#   private_colormap: enabled=0
#=======================================================================
private_colormap: enabled=0

#=======================================================================
# fullscreen: ONLY IMPLEMENTED ON AMIGA
#             Request that Bochs occupy the entire screen instead of a
#             window.
#
# Examples:
#   fullscreen: enabled=0
#   fullscreen: enabled=1
#=======================================================================
fullscreen: enabled=0
screenmode: name="sample"

#=======================================================================
# ne2k: NE2000 compatible ethernet adapter
#
# Examples:
# ne2k: ioaddr=IOADDR, irq=IRQ, mac=MACADDR, ethmod=MODULE, ethdev=DEVICE
#
# ioaddr, irc: You probably won't need to change ioaddr and irq, unless there
# are IRQ conflicts.
#
# mac: The MAC address MUST NOT match the address of any machine on the net.
# Also, the first byte must be an even number (bit 0 set means a multicast
# address), and you cannot use ff:ff:ff:ff:ff:ff because that's the broadcast
# address.  For the ethertap module, you must use fe:fd:00:00:00:01.  There may
# be other restrictions too.  To be safe, just use the b0:c4... address.
#
# ethdev: The ethdev value is the name of the network interface on your host
# platform.  On UNIX machines, you can get the name by running ifconfig.  On
# Windows machines, you must run niclist to get the name of the ethdev.
# Niclist source code is in misc/niclist.c and it is included in Windows
# binary releases.
#=======================================================================
# ne2k: ioaddr=0x280, irq=9, mac=b0:c4:20:00:00:00, ethmod=fbsd, ethdev=xl0
# ne2k: ioaddr=0x280, irq=9, mac=b0:c4:20:00:00:00, ethmod=linux, ethdev=eth0
# ne2k: ioaddr=0x280, irq=9, mac=b0:c4:20:00:00:01, ethmod=win32, ethdev=MYCARD
# ne2k: ioaddr=0x280, irq=9, mac=fe:fd:00:00:00:01, ethmod=tap, ethdev=tap0

#=======================================================================
# KEYBOARD_MAPPING:
# This enables a remap of a physical localized keyboard to a
# virtualized us keyboard, as the PC architecture expects.
# If enabled, the keymap file must be specified.
#
# Examples:
#   keyboard_mapping: enabled=1, map=gui/keymaps/x11-pc-de.map
#=======================================================================
#keyboard_mapping: enabled=0, map=

#=======================================================================
# KEYBOARD_TYPE:
# Type of keyboard return by a "identify keyboard" command to the
# keyboard controler. It must be one of "xt", "at" or "mf".
# Defaults to "mf". It should be ok for almost everybody. A known
# exception is french macs, that do have a "at"-like keyboard.
#
# Examples:
#   keyboard_type: mf
#=======================================================================
#keyboard_type: mf

#=======================================================================
# other stuff
#=======================================================================
# magic_break

#load32bitOSImage: os=nullkernel, path=../kernel.img, iolog=../vga_io.log
#load32bitOSImage: os=linux, path=../linux.img, iolog=../vga_io.log, initrd=../initrd.img
i440fxsupport: enabled=0
#time0: 938581955

#=======================================================================
# for Macintosh, use the style of pathnames in the following
# examples.
#
# vgaromimage: :bios:VGABIOS-elpin-2.20
# romimage: file=:bios:BIOS-bochs-981222a, address=0xf0000
# floppya: 1_44=[fd:], status=inserted
#=======================================================================
精简
romimage: file=$BXSHARE\BIOS-bochs-latest, address=0xf0000
megs: 16
vgaromimage: $BXSHARE\VGABIOS-elpin-2.40
floppya: 1_44="E:\tolset\harib02e\haribote.img", status=inserted
boot: a
log: bochsout.txt
parport1: enable=0
vga_update_interval: 300000
keyboard_serial_delay: 200
keyboard_paste_delay: 100000
floppy_command_delay: 50000
ips: 4000000
mouse: enabled=0
private_colormap: enabled=0
fullscreen: enabled=0
screenmode: name="sample"
i440fxsupport: enabled=0
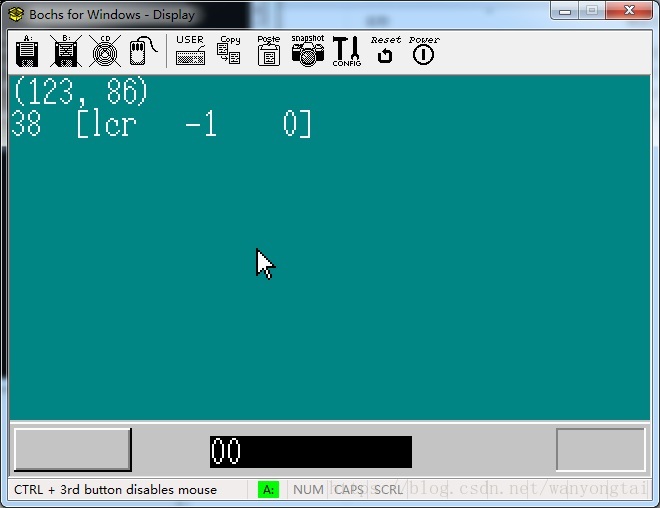
运行效果
本文内容由网友自发贡献,版权归原作者所有,本站不承担相应法律责任。如您发现有涉嫌抄袭侵权的内容,请联系:hwhale#tublm.com(使用前将#替换为@)