一、安装前准备工作
1.卸载系统自带的mariadb
[root@mesdb01 dbdata]# rpm -qa|grep mariadb
mariadb-libs-5.5.68-1.el7.x86_64
[root@mesdb01 dbdata]# rpm -e mariadb-libs-5.5.68-1.el7.x86_64 --nodeps
2.下载mysql安装包
wget https://dev.mysql.com/get/Downloads/MySQL-8.0/mysql-8.0.20-linux-glibc2.12-x86_64.tar.xz
如果执行没反应,可以复制安装包链接在Windows的浏览器下载好,再用SSH移到 /use/local/mysql文件夹下面(这个时候就提现出了SSH的便利性)
3.解压mysql安装包
[root@localhost mysql]# tar -zxvf mysql-8.0.20-linux-glibc2.12-x86_64.tar.xz
4.删除安装包以及修改名称
drwxr-xr-x. 9 root root       129 6月  13 14:53 mysql-8.0.20-linux-glibc2.12-x86_64
-rw-r--r--. 1 root root 490922012 6月  13 14:50 mysql-8.0.20-linux-glibc2.12-x86_64.tar.xz
[root@localhost mysql]# rm -rf mysql-8.0.20-linux-glibc2.12-x86_64.tar.xz
[root@localhost mysql]# mv mysql-8.0.20-linux-glibc2.12-x86_64/ mysql
二、安装mysql
1./use/local/mysql文件夹下创建data文件夹 存储文件
[root@localhost mysql]# mkdir /usr/local/mysql/data
[root@localhost mysql]# ll
总用量 408
drwxr-xr-x.  2 7161 31415   4096 3月  27 2020 bin
drwxr-xr-x.  2 root root       6 6月  13 14:59 data
drwxr-xr-x.  2 7161 31415     55 3月  27 2020 docs
drwxr-xr-x.  3 7161 31415    282 3月  27 2020 include
drwxr-xr-x.  6 7161 31415    201 3月  27 2020 lib
-rw-r--r--.  1 7161 31415 404604 3月  26 2020 LICENSE
drwxr-xr-x.  4 7161 31415     30 3月  27 2020 man
-rw-r--r--.  1 7161 31415    687 3月  26 2020 README
drwxr-xr-x. 28 7161 31415   4096 3月  27 2020 share
drwxr-xr-x.  2 7161 31415     77 3月  27 2020 support-files
2.分别创建用户组以及用户和密码
groupadd mysql
useradd -g mysql mysql
3.授权新建的用户
[root@localhost mysql]# chown -R mysql.mysql /usr/local/mysql/
[root@localhost mysql]# chmod 750 /usr/local/mysql/data -R
4.配置环境,编辑/etc/profile文件
vim /etc/profile
在最后一行加
export PATH=$PATH:/usr/local/mysql/bin:/usr/local/mysql/lib
刷新环境变量配置文件
[root@localhost mysql]# source /etc/profile
5.编辑my.cnf文件
vi /etc/my.cnf
[mysql]
default-character-set=utf8mb4
[client]
#port=3306
socket=/var/lib/mysql/mysql.sock

[mysqld]
#port=3306
#server-id=3306
user=mysql
general_log = 1
general_log_file= /var/log/mysql/mysql.log
socket=/var/lib/mysql/mysql.sock
basedir=/usr/local/mysql
datadir=/usr/local/mysql/data
log-bin=/usr/local/mysql/data/mysql-bin
innodb_data_home_dir=/usr/local/mysql/data
innodb_log_group_home_dir=/usr/local/mysql/data/
character-set-server=utf8mb4
lower_case_table_names=1
autocommit=1
default_authentication_plugin=mysql_native_password
symbolic-links=0
# Disabling symbolic-links is recommended to prevent assorted security risks
# Settings user and group are ignored when systemd is used.
# If you need to run mysqld under a different user or group,
# customize your systemd unit file for mariadb according to the
# instructions in http://fedoraproject.org/wiki/Systemd

[mysqld_safe]
log-error=/usr/local/mysql/data/mysql.log
pid-file=/usr/local/mysql/data/mysql.pid

#
# include all files from the config directory
6.初始化基础信息,得到数据库的初始密码(1AQ-IPFvrdh))
[root@localhost bin]# ./mysqld --user=mysql --basedir=/usr/local/mysql --datadir=/usr/local/mysql/data/ --initialize
2022-06-13T07:06:39.520249Z 0 [Warning] [MY-011070] [Server] 'Disabling symbolic links using --skip-symbolic-links (or equivalent) is the default. Consider not using this option as it' is deprecated and will be removed in a future release.
2022-06-13T07:06:39.520364Z 0 [System] [MY-013169] [Server] /usr/local/mysql/bin/mysqld (mysqld 8.0.20) initializing of server in progress as process 40564
2022-06-13T07:06:39.524990Z 1 [System] [MY-013576] [InnoDB] InnoDB initialization has started.
2022-06-13T07:06:39.900171Z 1 [System] [MY-013577] [InnoDB] InnoDB initialization has ended.
mysqld: File '/var/log/mysql/mysql.log' not found (OS errno 2 - No such file or directory)
2022-06-13T07:06:40.555645Z 0 [ERROR] [MY-011263] [Server] Could not use /var/log/mysql/mysql.log for logging (error 2 - No such file or directory). Turning logging off for the server process. To turn it on again: fix the cause, then either restart the query logging by using "SET GLOBAL GENERAL_LOG=ON" or restart the MySQL server.
2022-06-13T07:06:40.803968Z 6 [Note] [MY-010454] [Server] A temporary password is generated for root@localhost: 1AQ-IPFvrdh)
7.复制 mysql.server 文件,在/usr/local/mysql/mysql-8.0目录下执行
[root@localhost mysql]# cp -a ./support-files/mysql.server /etc/init.d/mysql
[root@localhost mysql]# cp -a ./support-files/mysql.server /etc/init.d/mysqld
8.设置权限
[root@localhost mysql]# chown 777 /etc/my.cnf
[root@localhost mysql]# chmod +x /etc/init.d/mysql
[root@localhost mysql]# chmod +x /etc/init.d/mysqld
9.检查一下/var/lib/mysql是否存在,否则进行创建,然后再赋予权限
[root@localhost lib]# mkdir /var/lib/mysql
[root@localhost lib]# chown -R mysql:mysql /var/lib/mysql/
10.启动数据库
[root@localhost lib]# service mysql start
Starting MySQL.Logging to '/usr/local/mysql/data/mysql.log'.
 SUCCESS!
三、配置mysql
- 进入数据库
[root@localhost mysql]# mysql -uroot -p
Enter password:
Welcome to the MySQL monitor.  Commands end with ; or \g.
Your MySQL connection id is 11
Server version: 8.0.20
2.设置新密码
mysql> ALTER USER 'root'@'localhost' IDENTIFIED WITH mysql_native_password BY 'root';
Query OK, 0 rows affected (0.01 sec)

mysql> flush privileges;
Query OK, 0 rows affected (0.00 sec)
- 开启远程访问
mysql> show databases;
+--------------------+
| Database           |
+--------------------+
| information_schema |
| mysql              |
| performance_schema |
| sys                |
+--------------------+
4 rows in set (0.01 sec)

mysql> use mysql;
Reading table information for completion of table and column names
You can turn off this feature to get a quicker startup with -A

Database changed

mysql> update user set host='%' where user='root';
Query OK, 1 row affected (0.01 sec)
Rows matched: 1  Changed: 1  Warnings: 0

flush privileges;
4.开启防火墙端口
[root@localhost mysql]# firewall-cmd --zone=public --add-port=3306/tcp --permanent
success
[root@localhost mysql]# firewall-cmd --reload
success
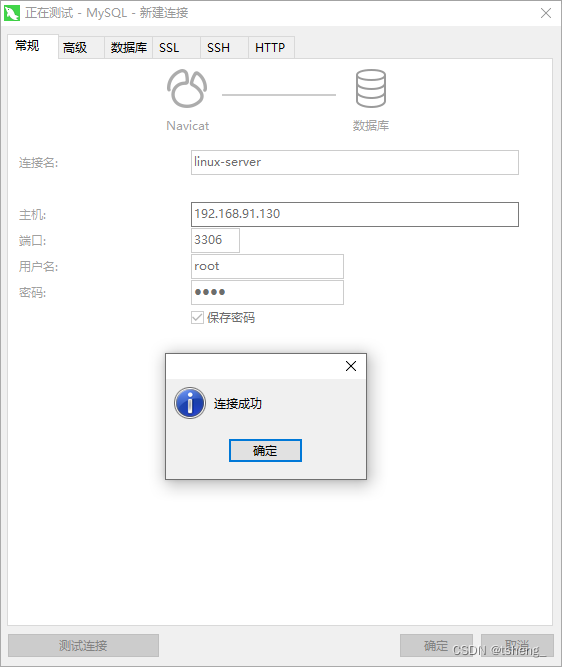
5.测试连接
6.设置mysql自启动
[root@localhost bin]# chkconfig --add mysql
[root@localhost bin]# chkconfig --list

注:该输出结果只显示 SysV 服务,并不包含
原生 systemd 服务。SysV 配置数据
可能被原生 systemd 配置覆盖。

      要列出 systemd 服务,请执行 'systemctl list-unit-files'。
      查看在具体 target 启用的服务请执行
      'systemctl list-dependencies [target]'。

mysql           0:关    1:关    2:开    3:开    4:开    5:开    6:关
netconsole      0:关    1:关    2:关    3:关    4:关    5:关    6:关
network         0:关    1:关    2:开    3:开    4:开    5:开    6:关