Raspbian镜像无头烧录
- 1. 源由
- 2. 需求
- 3. 分析
- 4. 步骤
- 4.1 删除tf卡分区内容
- 4.2 balena烧录镜像
- 4.3 配置USB直接登录
- 4.4 配置WiFi 2.4G网络登录
- 4.5 修改登录账号密码
- 4.6 数据同步和弹出tf卡
- 5. 登录
- 5.1 登录异常处理
- 5.2 WiFi 2.4G网络登录
- 5.3 USB直接登录
- 6. 补充资料
- 6.1 Advanced IP Scanner
- 6.2 USB Ethernet/RNDIS Gadget Drivers
- 6.3 USB配置ssh登录视频
- 6.4 WiFi配置ssh登录视频
- 6.5 WiFi网络扫描
- 7. 参考资料
这里记录下关于Raspberry Pi Zero W采用Raspbian无头镜像烧录的过程,以及一些注意事项。
1. 源由
在实际嵌入式系统应用中,大部分情况没有显示器,甚至没有交互设备(鼠标/键盘等)。因此,需要尽快安装最简系统,并处于可用状态。
2. 需求
从源由的角度,我们这里如下技术需求:
- 最简系统安装
- 可用状态运行
- 无交互设备支持(显示器/鼠标/键盘等)
3. 分析
树莓派是一款开源软硬件支持的嵌入式系统。其性能也推陈出新,适用于非常多的场景。为了满足上面提及的技术需求,采取如下方式完成任务:
- 刷写最新无桌面的raspbian镜像Raspberry Pi OS Lite, 2023-02-21-raspios-bullseye
- 支持Remote NDIS (RNDIS),通过USB直接登录系统
- 支持无线网络,通过WiFi 2.4G无线网络登录系统
4. 步骤
4.1 删除tf卡分区内容
daniel@daniel-ThinkPad-SL410:~$ df
Filesystem     1K-blocks     Used Available Use% Mounted on
udev             1950876        0   1950876   0% /dev
tmpfs             398272     3608    394664   1% /run
/dev/sda5      479078088 99783880 354884864  22% /
tmpfs            1991352        0   1991352   0% /dev/shm
tmpfs               5120        4      5116   1% /run/lock
tmpfs            1991352        0   1991352   0% /sys/fs/cgroup
/dev/loop1        224256   224256         0 100% /snap/gnome-3-34-1804/72
/dev/loop5        224256   224256         0 100% /snap/gnome-3-34-1804/77
/dev/loop7           128      128         0 100% /snap/bare/5
/dev/loop8        354688   354688         0 100% /snap/gnome-3-38-2004/119
/dev/loop0         56960    56960         0 100% /snap/core18/2679
/dev/loop2         56960    56960         0 100% /snap/core18/2697
/dev/loop9         83328    83328         0 100% /snap/gtk-common-themes/1534
/dev/loop3         64896    64896         0 100% /snap/core20/1822
/dev/loop6         64896    64896         0 100% /snap/core20/1778
/dev/loop11        47104    47104         0 100% /snap/snap-store/599
/dev/loop4        354688   354688         0 100% /snap/gnome-3-38-2004/115
/dev/loop10        93952    93952         0 100% /snap/gtk-common-themes/1535
/dev/loop12        47104    47104         0 100% /snap/snap-store/638
/dev/loop13        51072    51072         0 100% /snap/snapd/17950
/dev/loop14        51072    51072         0 100% /snap/snapd/18357
/dev/sda1         523248        4    523244   1% /boot/efi
tmpfs             398268       88    398180   1% /run/user/1000
/dev/sdb1         261108    51018    210090  20% /media/daniel/bootfs
/dev/sdb2        7343704  1329408   5683716  19% /media/daniel/rootfs
daniel@daniel-ThinkPad-SL410:~$ sudo umount /dev/sdb1
daniel@daniel-ThinkPad-SL410:~$ sudo umount /dev/sdb2
daniel@daniel-ThinkPad-SL410:~$ sudo fdisk /dev/sdb

Welcome to fdisk (util-linux 2.34).
Changes will remain in memory only, until you decide to write them.
Be careful before using the write command.


Command (m for help): p
Disk /dev/sdb: 7.41 GiB, 7948206080 bytes, 15523840 sectors
Disk model: Storage Device
Units: sectors of 1 * 512 = 512 bytes
Sector size (logical/physical): 512 bytes / 512 bytes
I/O size (minimum/optimal): 512 bytes / 512 bytes
Disklabel type: dos
Disk identifier: 0x9bd51a97

Device     Boot  Start      End  Sectors  Size Id Type
/dev/sdb1         8192   532479   524288  256M  c W95 FAT32 (LBA)
/dev/sdb2       532480 15523839 14991360  7.2G 83 Linux

Command (m for help): d
Partition number (1,2, default 2): 2

Partition 2 has been deleted.

Command (m for help): d
Selected partition 1
Partition 1 has been deleted.

Command (m for help): 1
1: unknown command

Command (m for help): w

The partition table has been altered.
Calling ioctl() to re-read partition table.
Syncing disks.
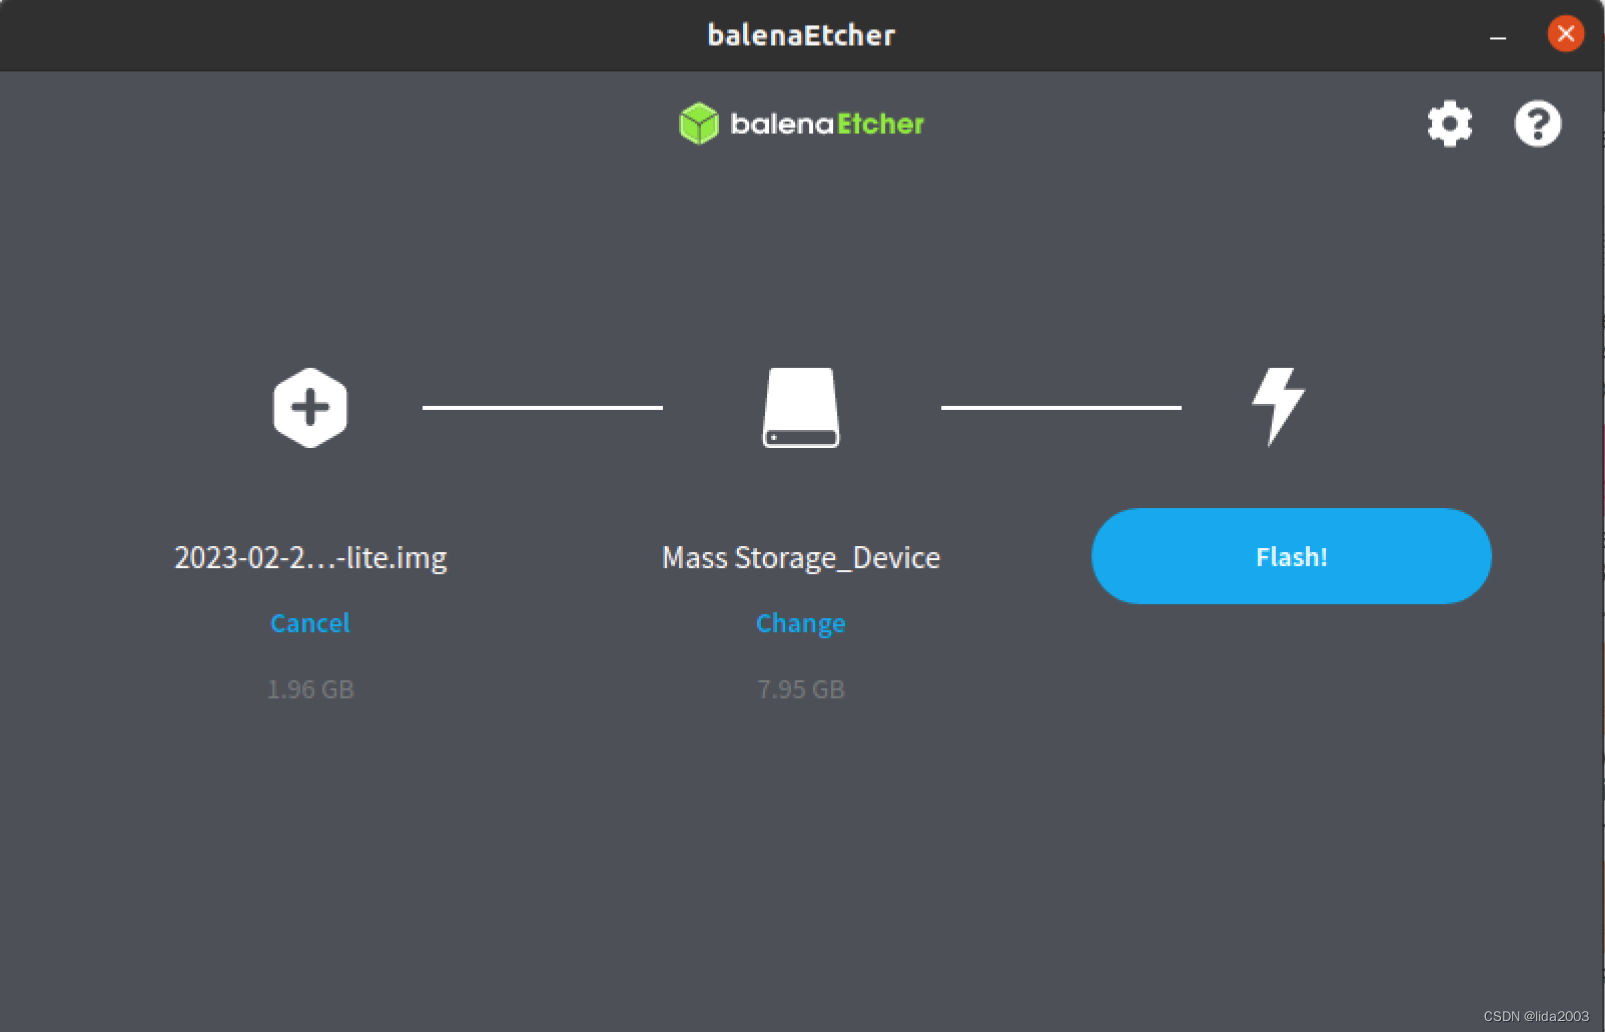
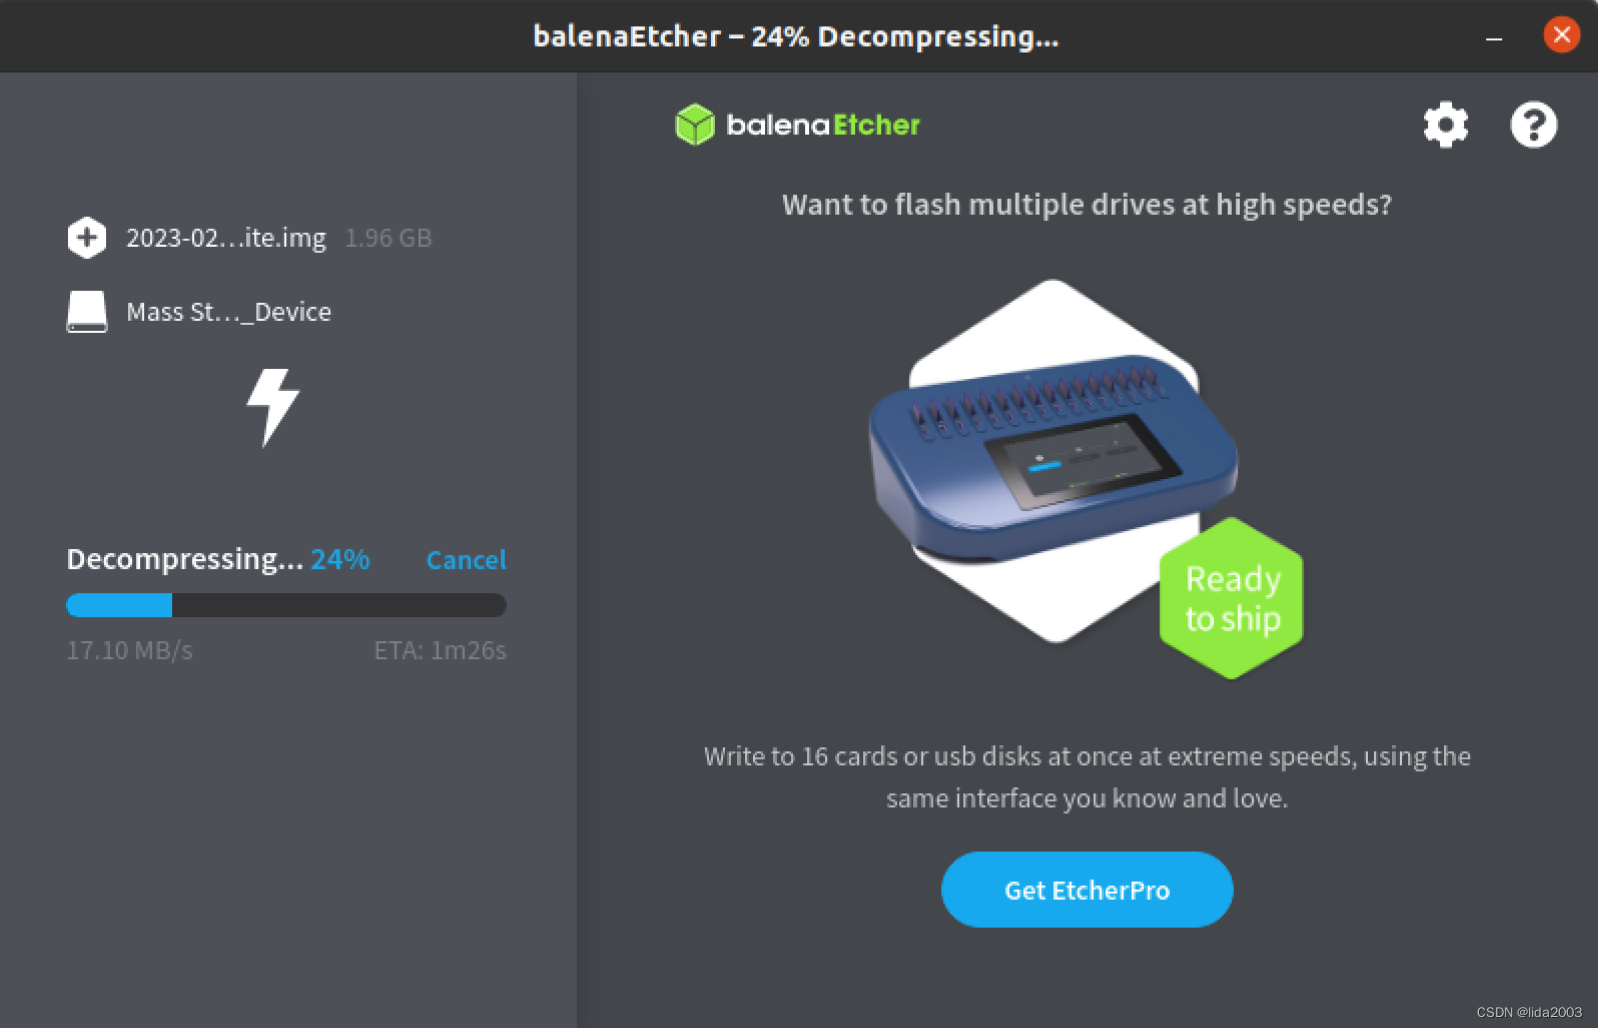
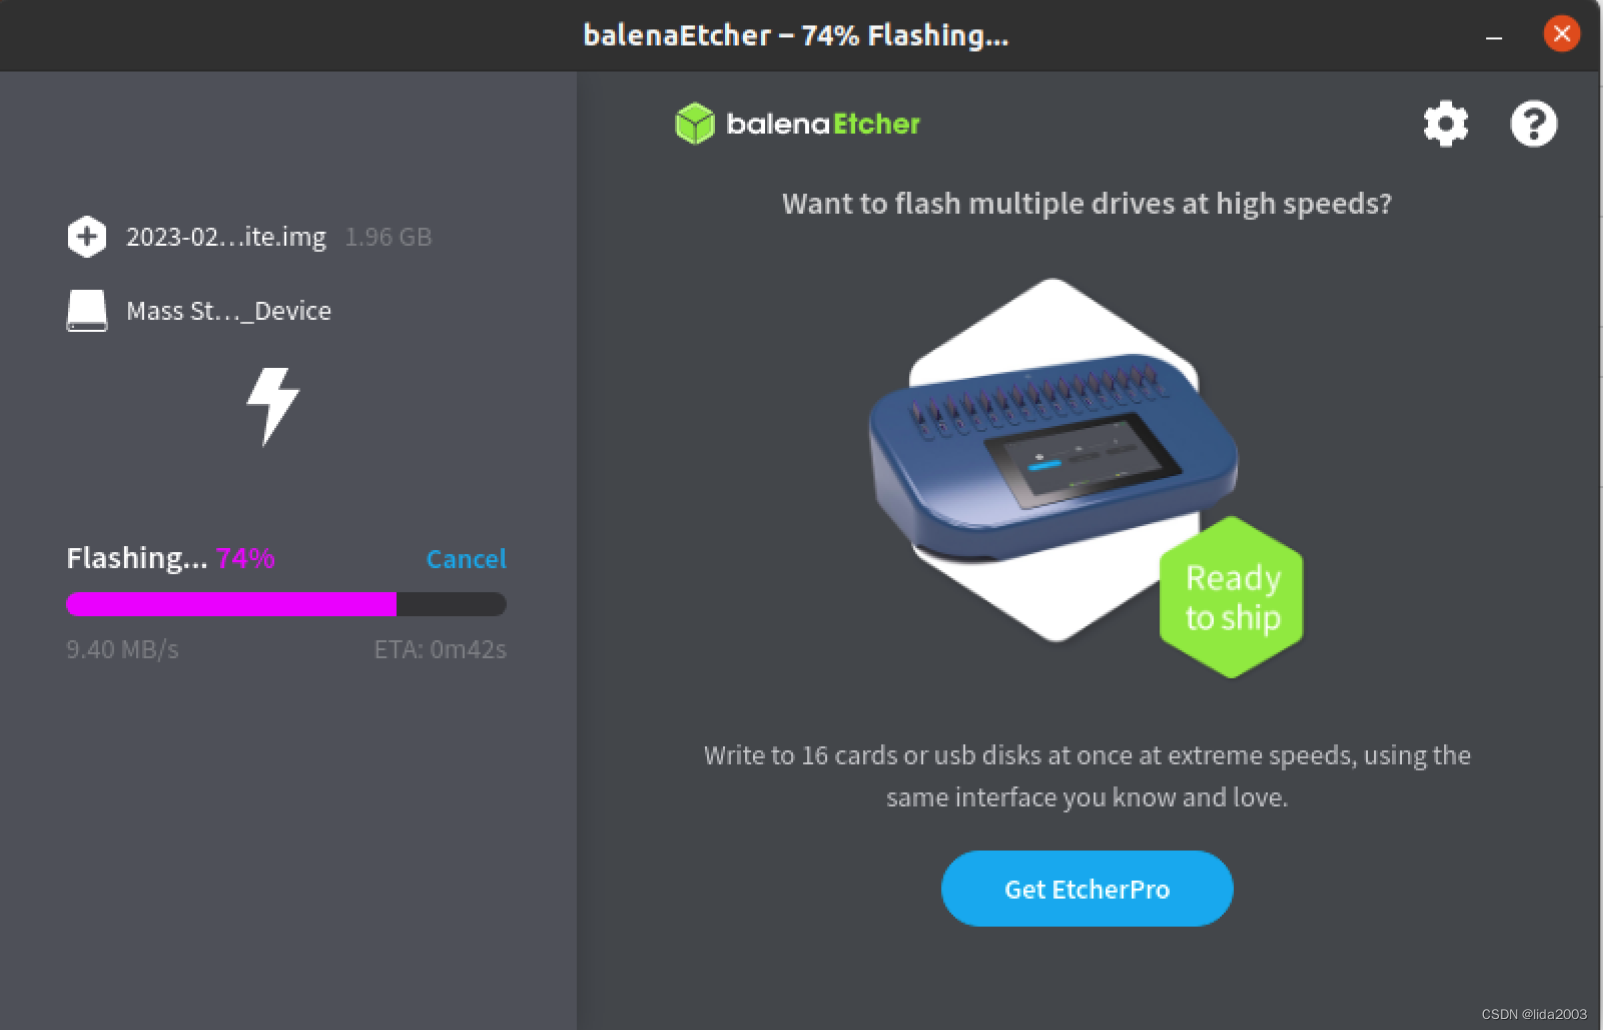
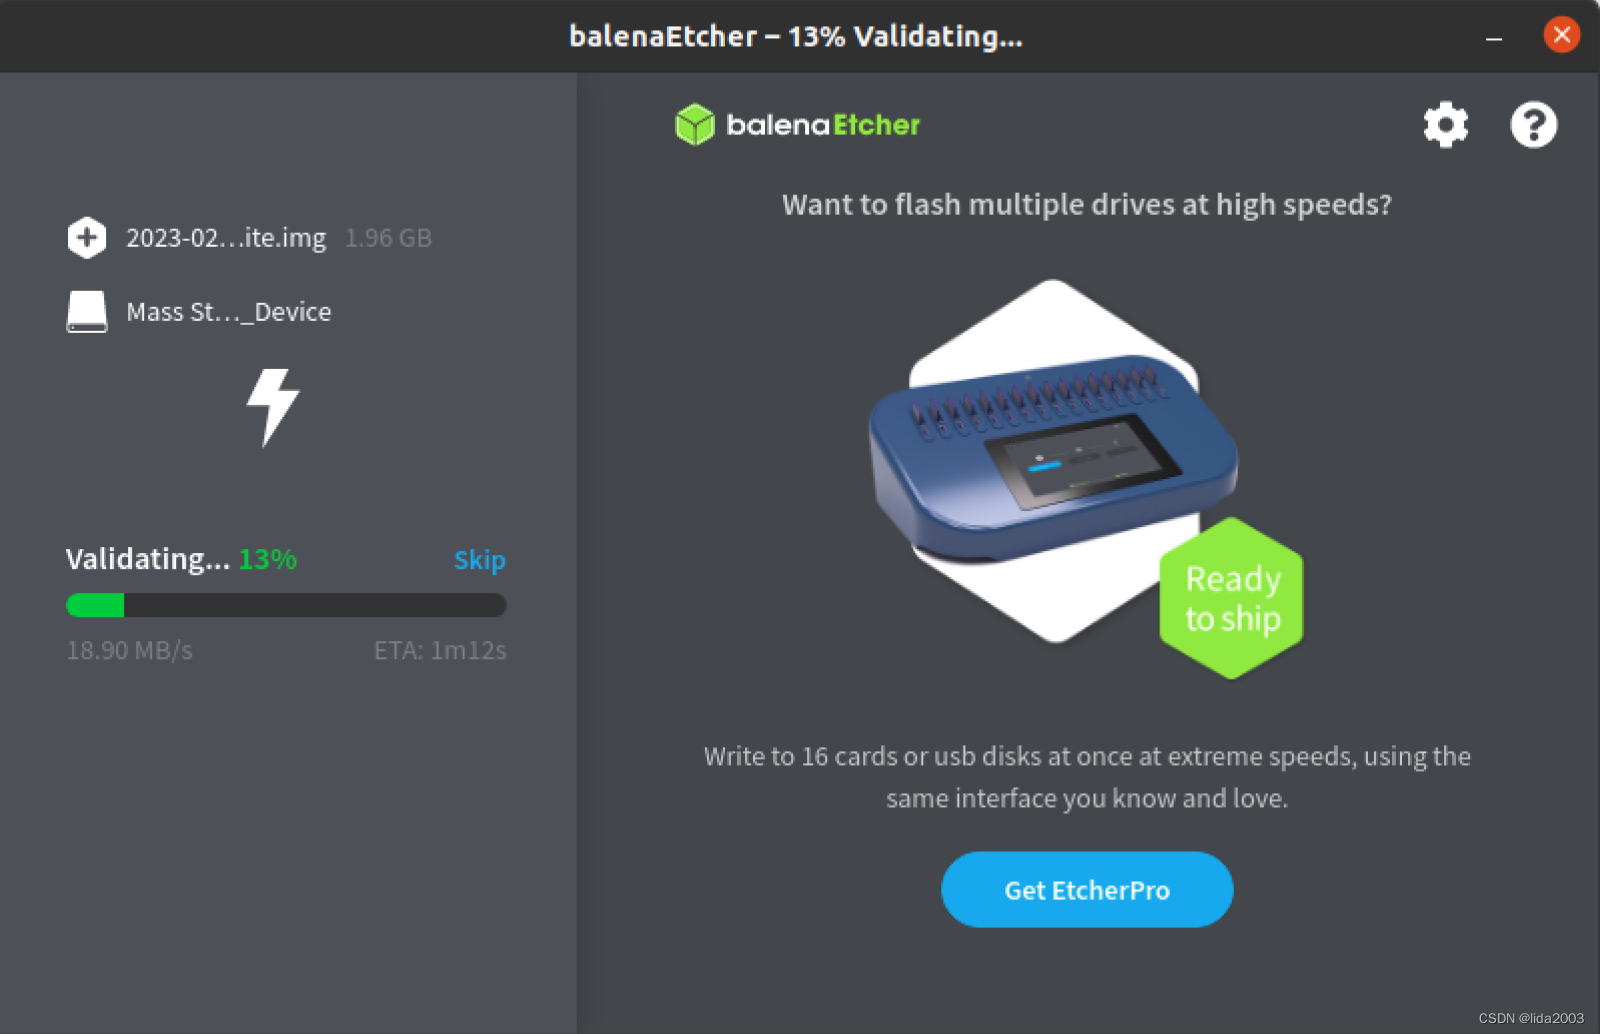
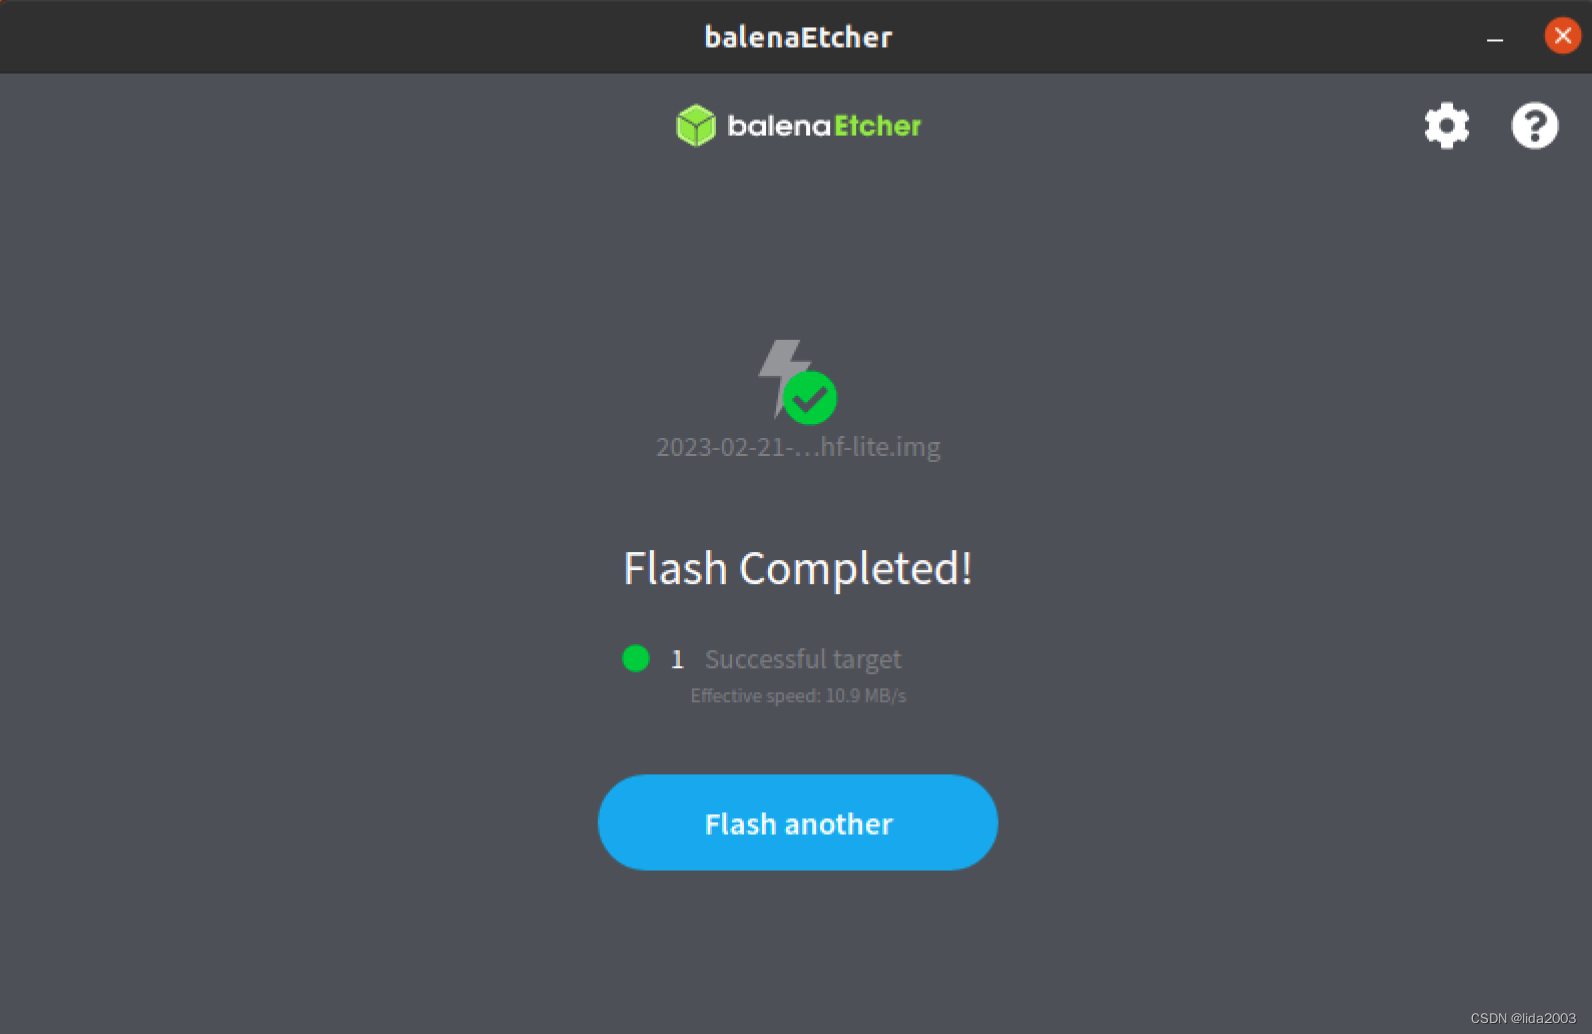
4.2 balena烧录镜像
关于烧录软件其实挺多的,其中Raspberry Pi Imager是官方推荐的工具,确实有些配置选项可以在烧录工具中进行配置,但是有的时候也并不好使。因此这里采用了一款UI比较友好的工具balena。
4.3 配置USB直接登录
进入boot分区
daniel@daniel-ThinkPad-SL410:~$ df
Filesystem     1K-blocks     Used Available Use% Mounted on
udev             1950876        0   1950876   0% /dev
tmpfs             398272     3600    394672   1% /run
/dev/sda5      479078088 99785604 354883140  22% /
tmpfs            1991352    12720   1978632   1% /dev/shm
tmpfs               5120        4      5116   1% /run/lock
tmpfs            1991352        0   1991352   0% /sys/fs/cgroup
/dev/loop1        224256   224256         0 100% /snap/gnome-3-34-1804/72
/dev/loop5        224256   224256         0 100% /snap/gnome-3-34-1804/77
/dev/loop7           128      128         0 100% /snap/bare/5
/dev/loop8        354688   354688         0 100% /snap/gnome-3-38-2004/119
/dev/loop0         56960    56960         0 100% /snap/core18/2679
/dev/loop2         56960    56960         0 100% /snap/core18/2697
/dev/loop9         83328    83328         0 100% /snap/gtk-common-themes/1534
/dev/loop3         64896    64896         0 100% /snap/core20/1822
/dev/loop6         64896    64896         0 100% /snap/core20/1778
/dev/loop11        47104    47104         0 100% /snap/snap-store/599
/dev/loop4        354688   354688         0 100% /snap/gnome-3-38-2004/115
/dev/loop10        93952    93952         0 100% /snap/gtk-common-themes/1535
/dev/loop12        47104    47104         0 100% /snap/snap-store/638
/dev/loop13        51072    51072         0 100% /snap/snapd/17950
/dev/loop14        51072    51072         0 100% /snap/snapd/18357
/dev/sda1         523248        4    523244   1% /boot/efi
tmpfs             398268       88    398180   1% /run/user/1000
/dev/sdb1         261108    51018    210090  20% /media/daniel/bootfs
/dev/sdb2        1589576  1196192    294468  81% /media/daniel/rootfs
daniel@daniel-ThinkPad-SL410:~$ cd /media/daniel/bootfs
默认开启ssh远程登录
daniel@daniel-ThinkPad-SL410:/media/daniel/bootfs$ touch ssh
添加dtoverlay=dwc2到config.txt文件
daniel@daniel-ThinkPad-SL410:/media/daniel/bootfs$ nano config.txt
daniel@daniel-ThinkPad-SL410:/media/daniel/bootfs$ tail config.txt
otg_mode=1
[all]
[pi4]
arm_boost=1
[all]
dtoverlay=dwc2
添加modules-load=dwc2,g_ether到rootwait 后
注意:添加内容前后均保持一个空格。
daniel@daniel-ThinkPad-SL410:/media/daniel/bootfs$ nano cmdline.txt
daniel@daniel-ThinkPad-SL410:/media/daniel/bootfs$ cat cmdline.txt
console=serial0,115200 console=tty1 root=PARTUUID=34f4435e-02 rootfstype=ext4 fsck.repair=yes rootwait modules-load=dwc2,g_ether quiet init=/usr/lib/raspberrypi-sys-mods/firstboot
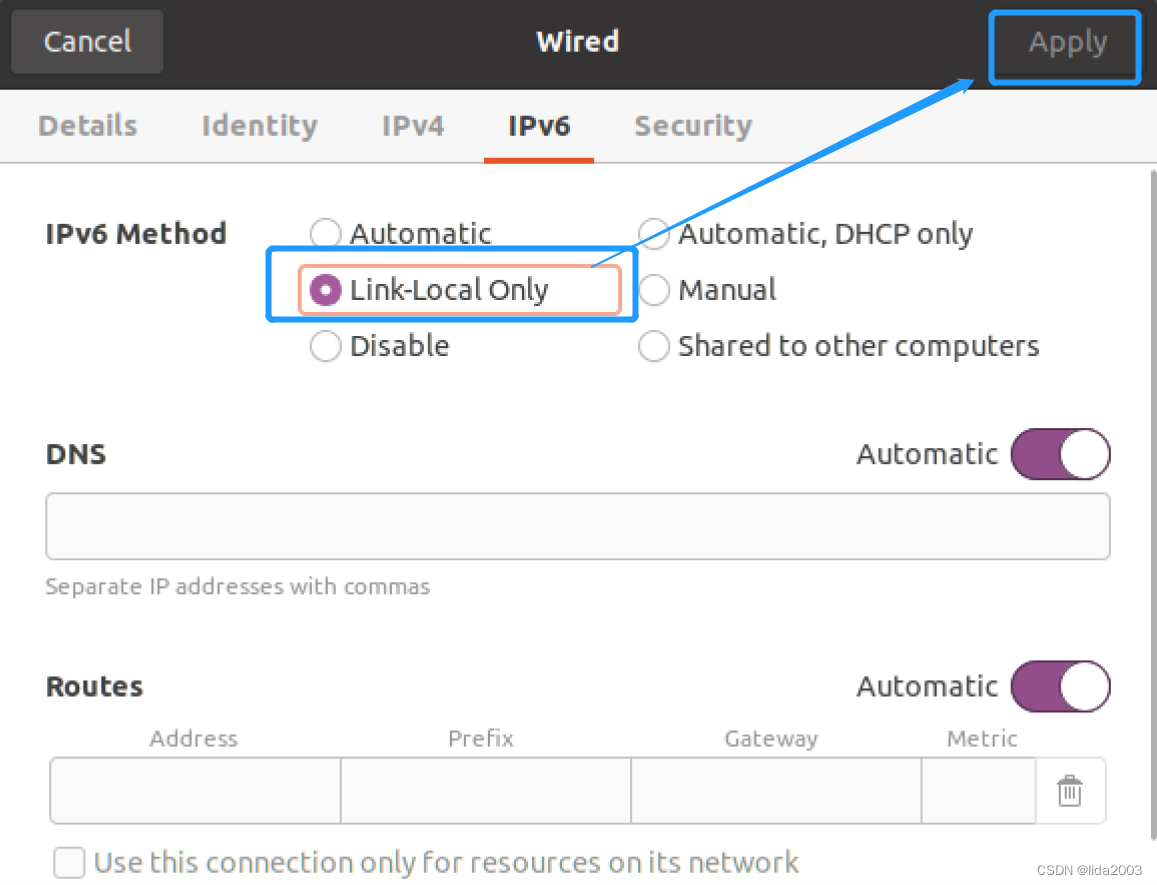
4.4 配置WiFi 2.4G网络登录
daniel@daniel-ThinkPad-SL410:/media/daniel/bootfs$ nano wpa_supplicant.conf
daniel@daniel-ThinkPad-SL410:/media/daniel/bootfs$ cat wpa_supplicant.conf
ctrl_interface=DIR=/var/run/wpa_supplicant GROUP=netdev

update_config=1

country=CN

network={

 ssid="your-network-ssid"

 psk="your-network-password"

}
4.5 修改登录账号密码
鉴于安全性考虑,树莓派增加了账户密码的配置过程。有交互界面的会很方便,但是作为无头烧录的情况,那么就需要在配置文件里面修改。
daniel@daniel-ThinkPad-SL410:/media/daniel/bootfs$ echo 'mypassword' | openssl passwd -6 -stdin
$6$2S.7faFHMW1PFgOo$NoxP.CYxGLT1iWskjCSWxlJ5LiNy2pD4bSY.TaUUPoPk5cJS4hOLlkrlBq0IAtoKDR0moyTVwwGy8WrcgaDFJ1
daniel@daniel-ThinkPad-SL410:/media/daniel/bootfs$ nano userconf
daniel@daniel-ThinkPad-SL410:/media/daniel/bootfs$ cat userconf
daniel:$6$2S.7faFHMW1PFgOo$NoxP.CYxGLT1iWskjCSWxlJ5LiNy2pD4bSY.TaUUPoPk5cJS4hOLlkrlBq0IAtoKDR0moyTVwwGy8WrcgaDFJ1
$6$2S.7faFHMW1PFgOo$NoxP.CYxGLT1iWskjCSWxlJ5LiNy2pD4bSY.TaUUPoPk5cJS4hOLlkrlBq0IAtoKDR0moyTVwwGy8WrcgaDFJ1
此时,系统登录账号密码就被配置为
4.6 数据同步和弹出tf卡
daniel@daniel-ThinkPad-SL410:/media/daniel/bootfs$ sync
daniel@daniel-ThinkPad-SL410:/media/daniel/bootfs$ cd
daniel@daniel-ThinkPad-SL410:~$ df
Filesystem     1K-blocks     Used Available Use% Mounted on
udev             1950876        0   1950876   0% /dev
tmpfs             398272     3592    394680   1% /run
/dev/sda5      479078088 99785780 354882964  22% /
tmpfs            1991352    12720   1978632   1% /dev/shm
tmpfs               5120        4      5116   1% /run/lock
tmpfs            1991352        0   1991352   0% /sys/fs/cgroup
/dev/loop1        224256   224256         0 100% /snap/gnome-3-34-1804/72
/dev/loop5        224256   224256         0 100% /snap/gnome-3-34-1804/77
/dev/loop7           128      128         0 100% /snap/bare/5
/dev/loop8        354688   354688         0 100% /snap/gnome-3-38-2004/119
/dev/loop0         56960    56960         0 100% /snap/core18/2679
/dev/loop2         56960    56960         0 100% /snap/core18/2697
/dev/loop9         83328    83328         0 100% /snap/gtk-common-themes/1534
/dev/loop3         64896    64896         0 100% /snap/core20/1822
/dev/loop6         64896    64896         0 100% /snap/core20/1778
/dev/loop11        47104    47104         0 100% /snap/snap-store/599
/dev/loop4        354688   354688         0 100% /snap/gnome-3-38-2004/115
/dev/loop10        93952    93952         0 100% /snap/gtk-common-themes/1535
/dev/loop12        47104    47104         0 100% /snap/snap-store/638
/dev/loop13        51072    51072         0 100% /snap/snapd/17950
/dev/loop14        51072    51072         0 100% /snap/snapd/18357
/dev/sda1         523248        4    523244   1% /boot/efi
tmpfs             398268       92    398176   1% /run/user/1000
/dev/sdb1         261108    51022    210086  20% /media/daniel/bootfs
/dev/sdb2        1589576  1196192    294468  81% /media/daniel/rootfs
daniel@daniel-ThinkPad-SL410:~$ sudo umount /dev/sdb1
daniel@daniel-ThinkPad-SL410:~$ sudo umount /dev/sdb2
5. 登录
准备如下动作:
- 确保AutoLab配置的路由器处于正常工作状态
- 确保ubuntu laptopn开机,系统正常
- 将tf卡插入Raspberry Pi Zero W
- 采用usb直接与Raspberry Pi Zero W连接供电
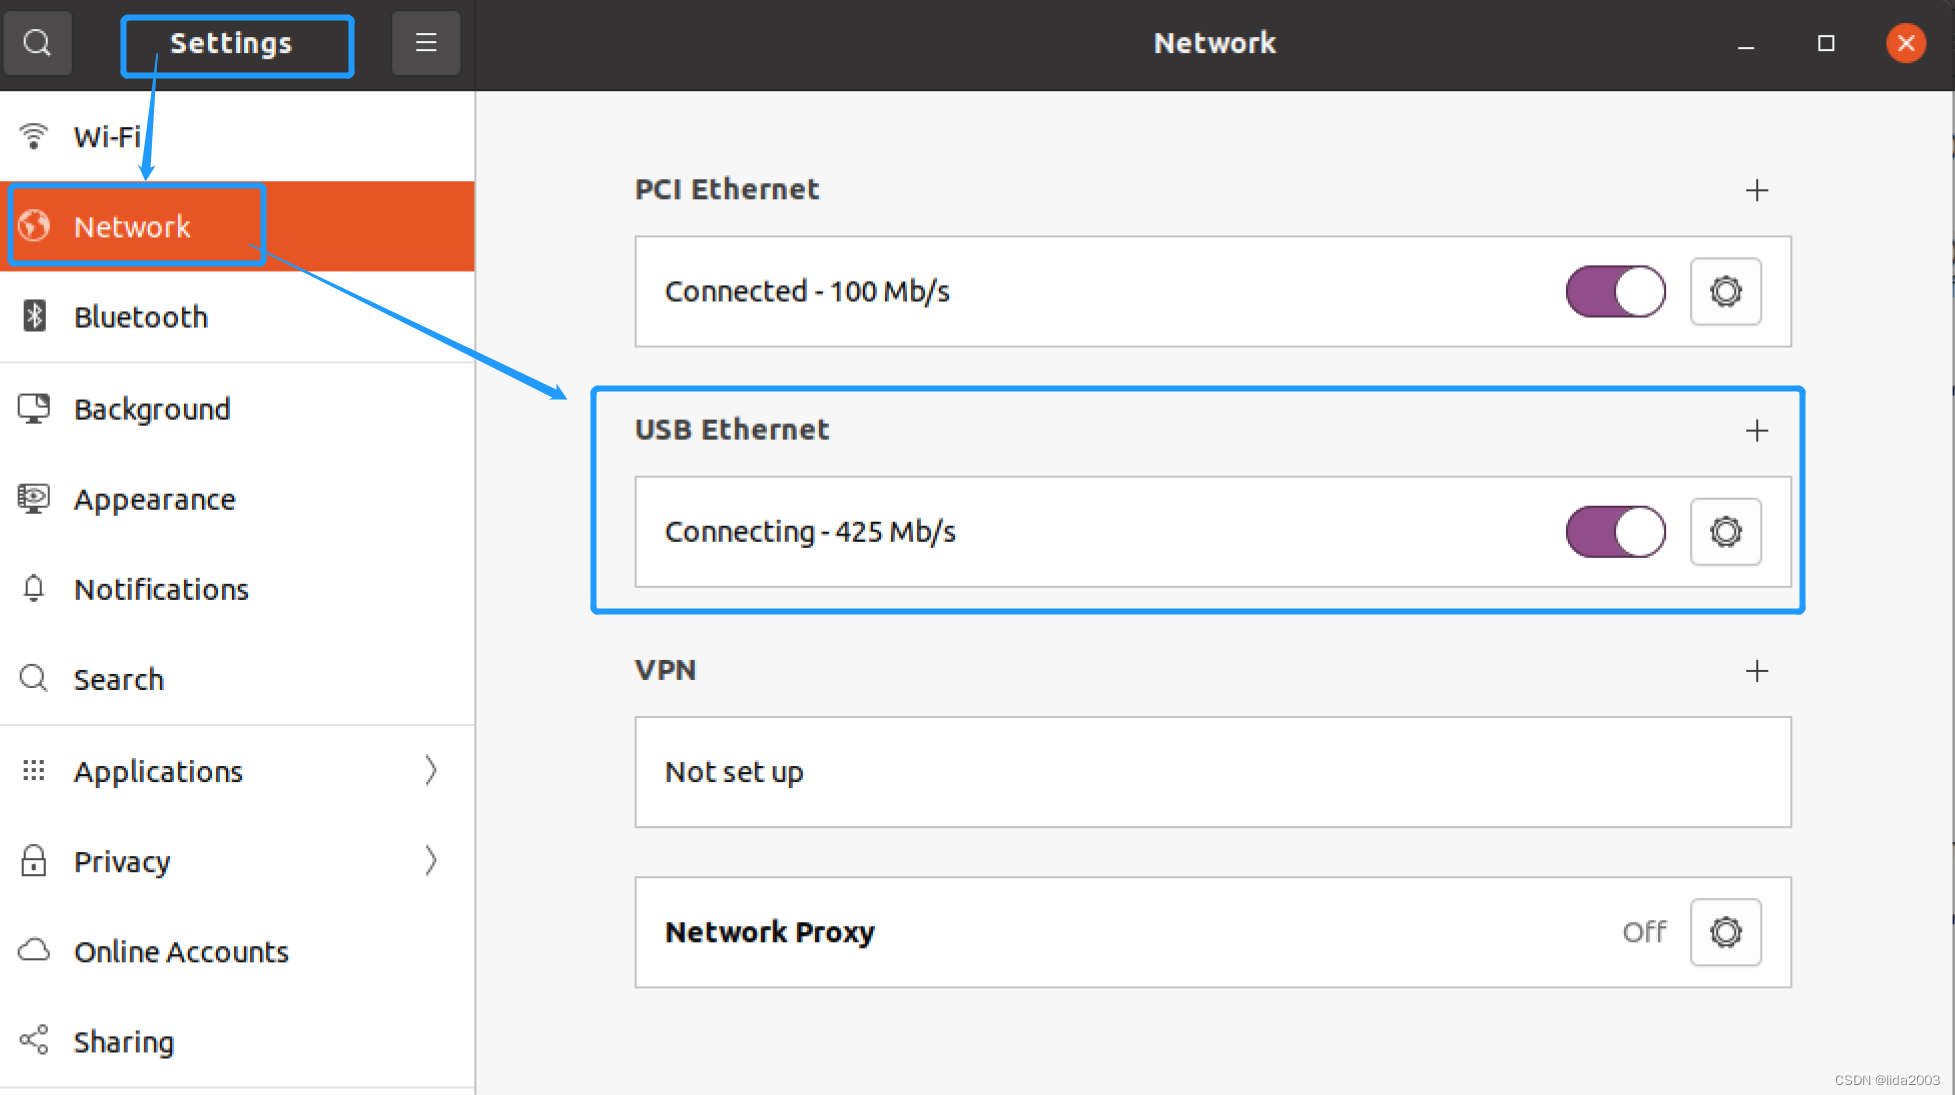
等待一段时间(2~3分钟),在【Settings】-【Network】下出现【USB Ethernet】连接项。
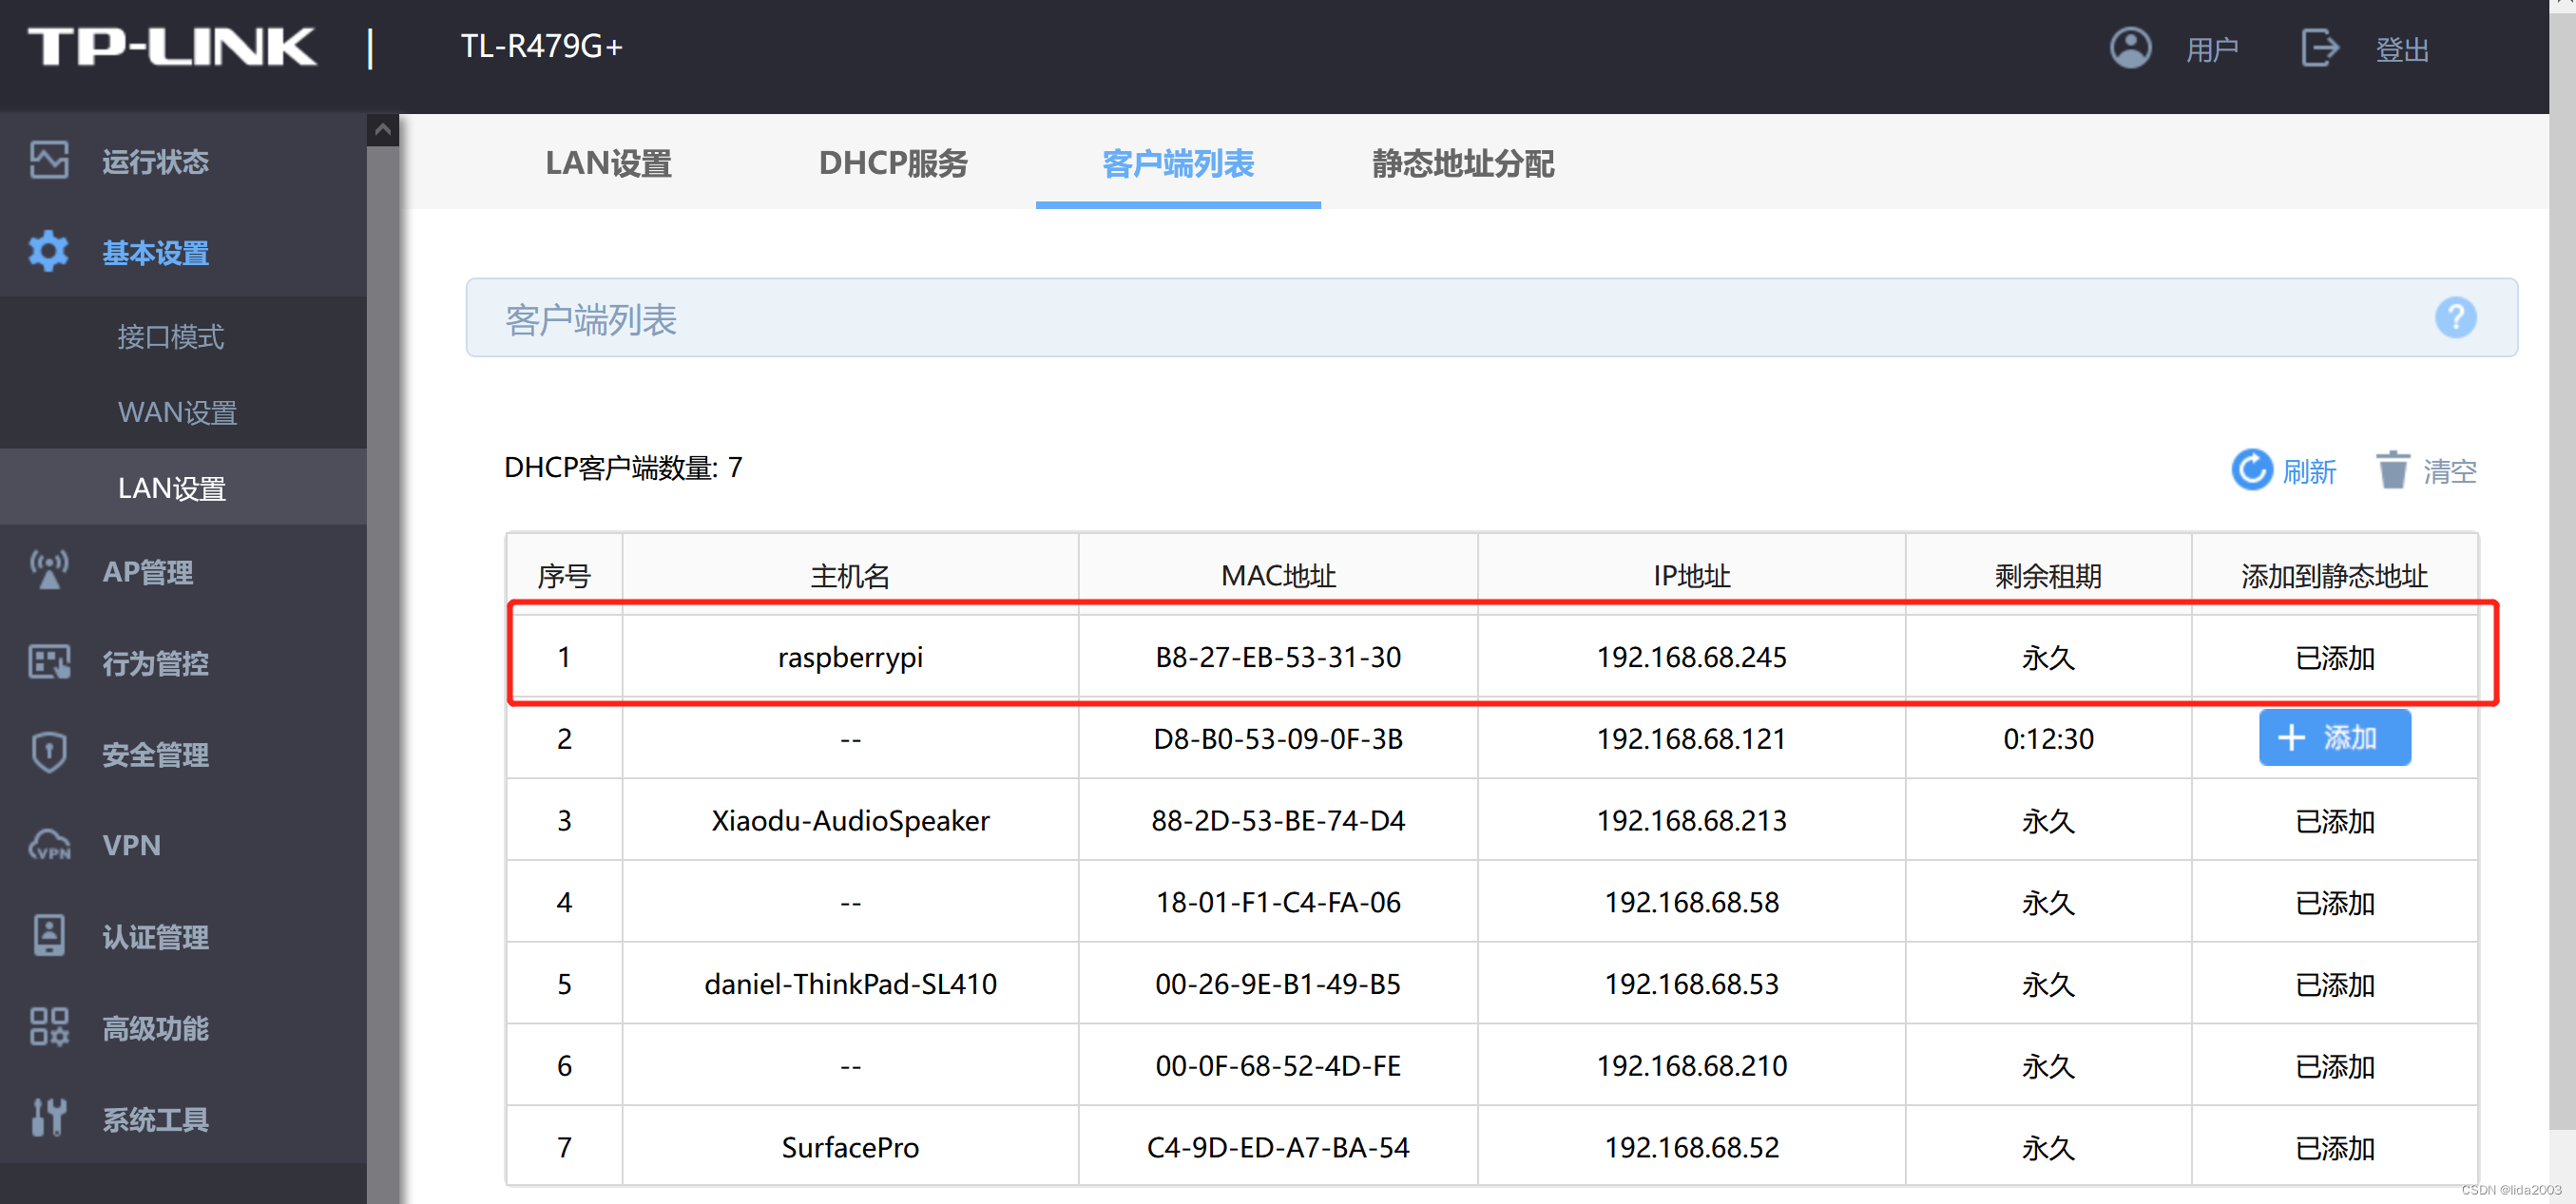
如果ssid和密码配置正确的话,路由器管理页面会看到树莓派已经wifi 2.4G动态获得了ip地址。
5.1 登录异常处理
如果之前登陆过,可能会有IDENTIFICATION 问题,会拒绝登录。
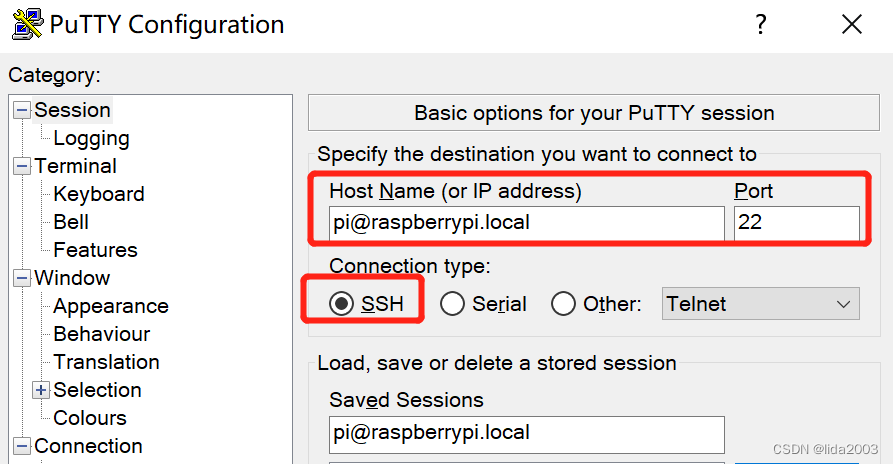
daniel@daniel-ThinkPad-SL410:~$ ssh daniel@raspberrypi.local
@@@@@@@@@@@@@@@@@@@@@@@@@@@@@@@@@@@@@@@@@@@@@@@@@@@@@@@@@@@
@       WARNING: POSSIBLE DNS SPOOFING DETECTED!          @
@@@@@@@@@@@@@@@@@@@@@@@@@@@@@@@@@@@@@@@@@@@@@@@@@@@@@@@@@@@
The ECDSA host key for raspberrypi.local has changed,
and the key for the corresponding IP address 192.168.68.245
has a different value. This could either mean that
DNS SPOOFING is happening or the IP address for the host
and its host key have changed at the same time.
Offending key for IP in /home/daniel/.ssh/known_hosts:1
  remove with:
  ssh-keygen -f "/home/daniel/.ssh/known_hosts" -R "192.168.68.245"
@@@@@@@@@@@@@@@@@@@@@@@@@@@@@@@@@@@@@@@@@@@@@@@@@@@@@@@@@@@
@    WARNING: REMOTE HOST IDENTIFICATION HAS CHANGED!     @
@@@@@@@@@@@@@@@@@@@@@@@@@@@@@@@@@@@@@@@@@@@@@@@@@@@@@@@@@@@
IT IS POSSIBLE THAT SOMEONE IS DOING SOMETHING NASTY!
Someone could be eavesdropping on you right now (man-in-the-middle attack)!
It is also possible that a host key has just been changed.
The fingerprint for the ECDSA key sent by the remote host is
SHA256:eCOHphYnkQDz3KuYx1MpK5Y0z4jjFyBeoTRY2dZ9Ii0.
Please contact your system administrator.
Add correct host key in /home/daniel/.ssh/known_hosts to get rid of this message.
Offending ECDSA key in /home/daniel/.ssh/known_hosts:3
  remove with:
  ssh-keygen -f "/home/daniel/.ssh/known_hosts" -R "raspberrypi.local"
ECDSA host key for raspberrypi.local has changed and you have requested strict checking.
Host key verification failed.
强制更新下ssh-keygen
daniel@daniel-ThinkPad-SL410:~$ ssh-keygen -f "/home/daniel/.ssh/known_hosts" -R "raspberrypi.local"
/home/daniel/.ssh/known_hosts updated.
Original contents retained as /home/daniel/.ssh/known_hosts.old
5.2 WiFi 2.4G网络登录
这个是优选的方式,此时登录的IP地址是’192.168.68.245’
daniel@daniel-ThinkPad-SL410:~$ ssh daniel@raspberrypi.local
The authenticity of host 'raspberrypi.local (192.168.68.245)' can't be established.
ECDSA key fingerprint is SHA256:eCOHphYnkQDz3KuYx1MpK5Y0z4jjFyBeoTRY2dZ9Ii0.
Are you sure you want to continue connecting (yes/no/[fingerprint])? yes
Warning: Permanently added 'raspberrypi.local' (ECDSA) to the list of known hosts.
Warning: the ECDSA host key for 'raspberrypi.local' differs from the key for the IP address '192.168.68.245'
Offending key for IP in /home/daniel/.ssh/known_hosts:1
Are you sure you want to continue connecting (yes/no)? yes
daniel@raspberrypi.local's password:
Linux raspberrypi 5.15.84+
The programs included with the Debian GNU/Linux system are free software;
the exact distribution terms for each program are described in the
individual files in /usr/share/doc/*/copyright.
Debian GNU/Linux comes with ABSOLUTELY NO WARRANTY, to the extent
permitted by applicable law.
5.3 USB直接登录
关闭路由器,并对【USB Ethernet】进行配置
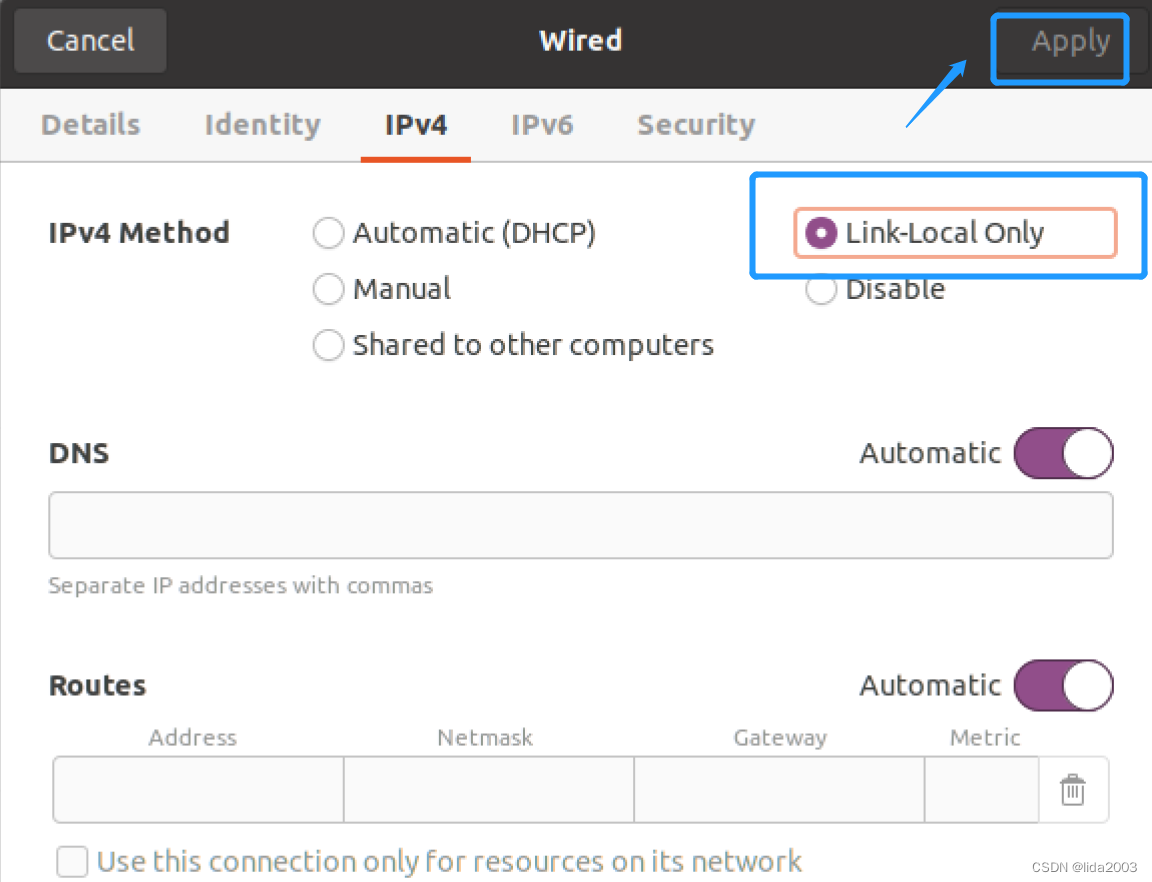
此时,可以看到登录的IP地址是’169.254.78.153’
daniel@daniel-ThinkPad-SL410:~$ ssh daniel@raspberrypi.local
Warning: Permanently added the ECDSA host key for IP address '169.254.78.153' to the list of known hosts.
daniel@raspberrypi.local's password:
Linux raspberrypi 5.15.84+
The programs included with the Debian GNU/Linux system are free software;
the exact distribution terms for each program are described in the
individual files in /usr/share/doc/*/copyright.
Debian GNU/Linux comes with ABSOLUTELY NO WARRANTY, to the extent
permitted by applicable law.
6. 补充资料
6.1 Advanced IP Scanner
Advanced IP Scanner,可以扫描网络设备发现树莓派。
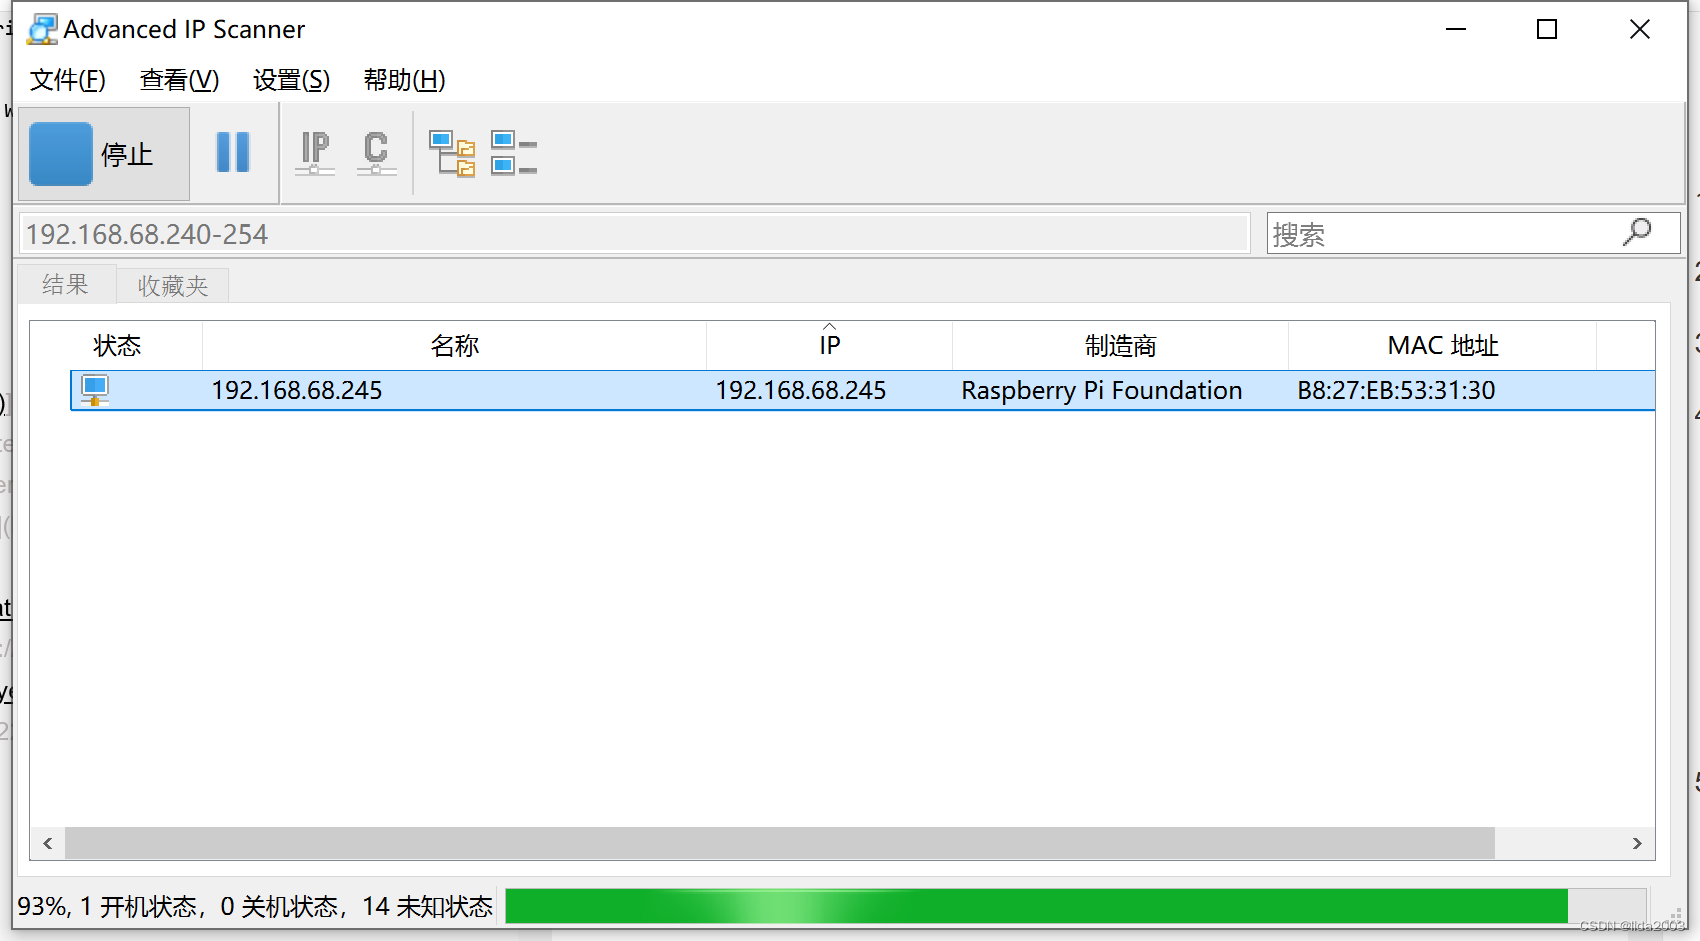
通常我们这里采用 ssh pi@raspberrypi.local方式,IP地址也没有这么重要。
6.2 USB Ethernet/RNDIS Gadget Drivers
下载:USB Ethernet/RNDIS Gadget Drivers
6.3 USB配置ssh登录视频
RaspberryPi Zero | USB and SSH Setup | Ethernet over USB | Windows/Mac
6.4 WiFi配置ssh登录视频
Raspberry Pi Networking Primer -Headless Wi-Fi Configuration for wpa-supplicant.
6.5 WiFi网络扫描
pi@piCamera:~ $ sudo iwlist wlan0 scanning | egrep 'Cell |Encryption|Quality|Last beacon|ESSID'
          Cell 01 - Address: B8:F8:83:6E:16:9F
                    Quality=70/70  Signal level=-21 dBm
                    Encryption key:on
                    ESSID:"AutoConnect"
                    Extra: Last beacon: 10ms ago
          Cell 02 - Address: D0:C7:C0:5C:CE:50
                    Quality=70/70  Signal level=-22 dBm
                    Encryption key:on
                    ESSID:"AutoLab"
                    Extra: Last beacon: 10ms ago
          Cell 03 - Address: 8C:A6:DF:2D:E2:E6
                    Quality=38/70  Signal level=-72 dBm
                    Encryption key:on
                    ESSID:"zjt"
                    Extra: Last beacon: 10ms ago
          Cell 04 - Address: 60:3A:7C:77:22:F1
                    Quality=43/70  Signal level=-67 dBm
                    Encryption key:on
                    ESSID:"suncheng"
                    Extra: Last beacon: 10ms ago
          Cell 05 - Address: 62:3A:7C:27:22:F1
                    Quality=41/70  Signal level=-69 dBm
                    Encryption key:on
                    ESSID:""
                    Extra: Last beacon: 10ms ago
          Cell 06 - Address: 10:55:E4:D2:C3:3E
                    Quality=48/70  Signal level=-62 dBm
                    Encryption key:on
                    ESSID:"201"
                    Extra: Last beacon: 10ms ago
          Cell 07 - Address: F6:6D:2F:20:E0:39
                    Quality=46/70  Signal level=-64 dBm
                    Encryption key:on
                    ESSID:""
                    Extra: Last beacon: 10ms ago
          Cell 08 - Address: F4:6D:2F:30:E0:39
                    Quality=45/70  Signal level=-65 dBm
                    Encryption key:on
                    ESSID:"Suzuki"
                    Extra: Last beacon: 10ms ago
          Cell 09 - Address: 44:22:95:C9:CF:46
                    Quality=54/70  Signal level=-56 dBm
                    Encryption key:on
                    ESSID:"CMCC-pf4h"
                    Extra: Last beacon: 10ms ago
          Cell 10 - Address: 14:B8:37:8F:A0:A8
                    Quality=41/70  Signal level=-69 dBm
                    Encryption key:on
                    ESSID:"ChinaNet-xinu"
                    Extra: Last beacon: 10ms ago
          Cell 11 - Address: A4:39:B3:0B:16:47
                    Quality=35/70  Signal level=-75 dBm
                    Encryption key:on
                    ESSID:"Xiaomi_4ADB"
                    Extra: Last beacon: 10ms ago
          Cell 12 - Address: 14:57:9F:09:16:60
                    Quality=34/70  Signal level=-76 dBm
                    Encryption key:on
                    ESSID:"ChinaNet-HjdH"
                    Extra: Last beacon: 10ms ago
7. 参考资料
【1】Introduction to Remote NDIS (RNDIS)
【2】ssh-into-pi-zero-over-usb
【3】Setting up a Raspberry Pi - Headless
【4】ISO 3166-1 (Codes for the representation of names of countries and their subdivisions – Part 1: Country codes)
【5】An update to Raspberry Pi OS Bullseye
【6】How do I scan for Wireless Access Points?
本文内容由网友自发贡献,版权归原作者所有,本站不承担相应法律责任。如您发现有涉嫌抄袭侵权的内容,请联系:hwhale#tublm.com(使用前将#替换为@)