转载http://blog.csdn.net/hongyouwei/article/details/45011315,这位大佬讲的很好,但是他没有很好地考虑到我等小白的感受,故在此补充说明。
1.在Unity的Project窗口下的Assets里面创建一个文件夹名字叫Editor。(注意,这里一定要是Editor,别问我为什么,我也不知道。)
2.然后在里面创建一个脚本,名字随便,我这里取名为: ImageSlicer,接下来就是打开脚本进行编码了,这里我直接贴上代码。
//------------------------------------------------------------
// Author: 烟雨迷离半世殇
// Mail: 1778139321@qq.com
// Data: 2019年4月23日 21:02:58
//------------------------------------------------------------
using UnityEngine;
using UnityEditor;
using System.IO;

namespace ETEditor
{
    public static class ExportSpritesAsFile
    {
	    /// <summary>
	    /// 注意,使用此编辑器拓展需要先选中图集文件
	    /// </summary>
    	[MenuItem("Tools/图集元素转文件工具")]
    	static void ProcessToSprite()
    	{
    		Texture2D image = Selection.activeObject as Texture2D;//获取选择的对象

    		string rootPath = Path.GetDirectoryName(AssetDatabase.GetAssetPath(image));//获取路径名称

    		string path = rootPath + "/" + image.name + ".PNG";//图片路径名称

    		TextureImporter texImp = AssetImporter.GetAtPath(path) as TextureImporter;//获取图片入口


    		AssetDatabase.CreateFolder(rootPath, image.name);//创建文件夹


    		foreach (SpriteMetaData metaData in texImp.spritesheet)//遍历小图集
    		{
    			Texture2D myimage = new Texture2D((int)metaData.rect.width, (int)metaData.rect.height);

    			for (int y = (int)metaData.rect.y; y < metaData.rect.y + metaData.rect.height; y++)//Y轴像素
    			{
    				for (int x = (int)metaData.rect.x; x < metaData.rect.x + metaData.rect.width; x++)
    					myimage.SetPixel(x - (int)metaData.rect.x, y - (int)metaData.rect.y, image.GetPixel(x, y));
    			}


    			if(myimage.format != TextureFormat.ARGB32 && myimage.format != TextureFormat.RGB24){
    				Texture2D newTexture = new Texture2D(myimage.width, myimage.height);
    				newTexture.SetPixels(myimage.GetPixels(0),0);
    				myimage = newTexture;
    			}
    			var pngData = myimage.EncodeToPNG();

    			File.WriteAllBytes(rootPath + "/" + image.name + "/" + metaData.name + ".PNG", pngData);
    			// 刷新资源窗口界面
    			AssetDatabase.Refresh();
    		}
    	}
    }

}
3.然后大家就可以在选中图片后,选择
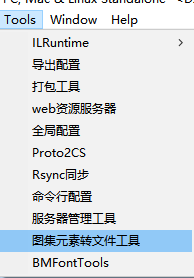
就能得到一个文件夹,里面放有一张张的小图片,现在贴上剪切结果图片。

4.最后大家就可以在工程目录里找到这些图片并使用啦!