一、找到官方文档按步骤安装

mmdetection中包含许多模型的检测框架,下载以后方便后续调用
官方文档地址:依赖 — MMDetection 2.27.0 文档
需要注意的点
按照步骤来基本没有什么问题,注意CUDA、torch、mmcv的版本,不然后续跑不通会报错
1、查看版本
查看CUDA版本:cat /usr/local/cuda/version.txt
查看torch版本:
(1)进入python环境,在终端输入python进入python环境。
(2)输入: import torch
(3)输入:torch._version_
(4)退出python环境,输入:exit()
2、基于 PyTorch 官网安装 PyTorch 和 torchvision:注意版本
3、安装 mmcv-full
不建议直接pip install mmcv-full,后面可能因为版本出问题(因为我就是这个问题弄了好久),下载的版本尽量高点(我中途改成1.2.4版本低了也出了问题)
pip install mmcv-full==XXXXX -f https://download.openmmlab.com/mmcv/dist/{cu_version}/{torch_version}/index.html
MMDetection 和 MMCV 版本兼容性见github说明,需要安装正确的 MMCV 版本以避免安装出现问题。
4、测试mmdetection是否安装成功
在mmdetection目录下新建test.py文件和checkpoints文件夹,打开网址下载好权重文件放在checkpoints文件夹下,在test.py中复制以下代码并运行即可。
from mmdet.apis import init_detector, inference_detector
config_file = 'configs/faster_rcnn/faster_rcnn_r50_fpn_1x_coco.py'
# 从 model zoo 下载 checkpoint 并放在 `checkpoints/` 文件下
# 网址为: http://download.openmmlab.com/mmdetection/v2.0/faster_rcnn/faster_rcnn_r50_fpn_1x_coco/faster_rcnn_r50_fpn_1x_coco_20200130-047c8118.pth
checkpoint_file = 'checkpoints/faster_rcnn_r50_fpn_1x_coco_20200130-047c8118.pth'
device = 'cuda:0'
# 初始化检测器
model = init_detector(config_file, checkpoint_file, device=device)
# 推理演示图像
img = 'demo/demo.jpg'
result = inference_detector(model, img)
model.show_result(img, result)
# 将推理的结果保存
model.show_result(img, result, out_file='result.jpg')
保存以后,终端输入:python test.py
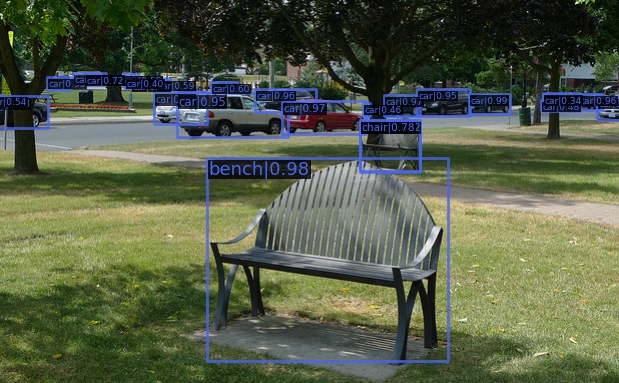
没有问题以后会生成一张名为result.jpg的图片:
二、尝试跑solov2
可以先从https://github.com/open-mmlab/mmdetection/blob/master/demo/inference_demo.ipynb这个入手
1、下载model
mmdetection/README_zh-CN.md at master · open-mmlab/mmdetection (github.com)
在上面这个连接里可以找到各种模型的框架,这里示范solov2
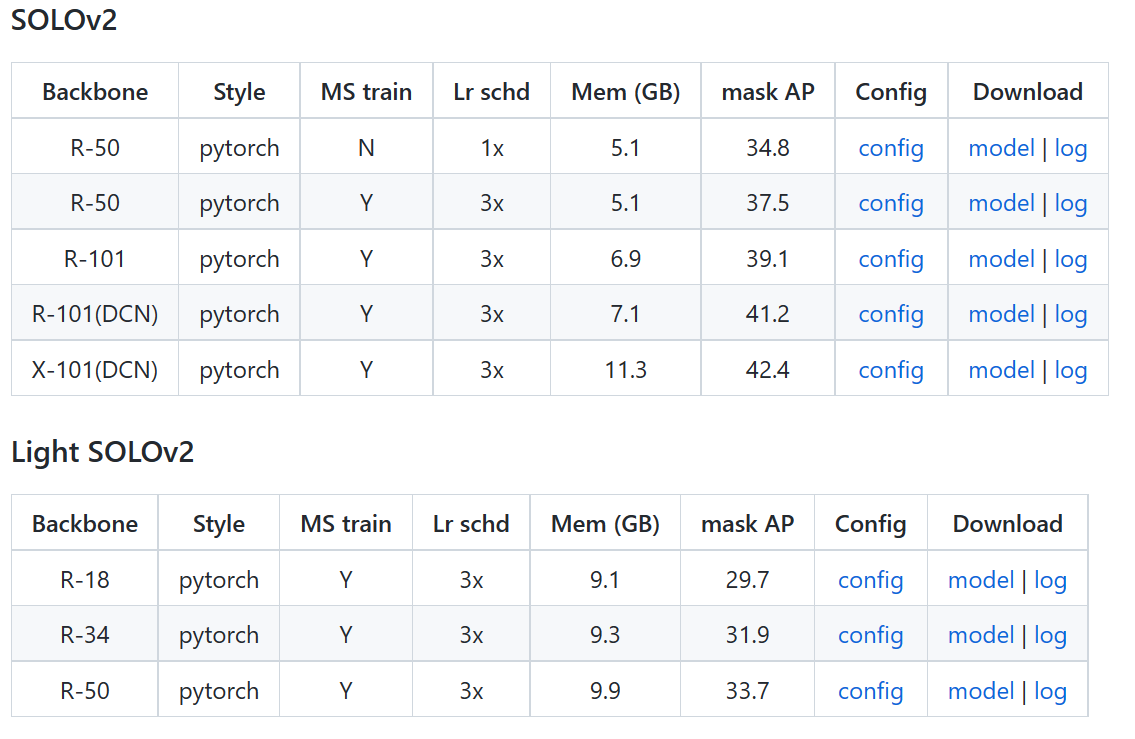
solov2:可以在它的model zoo挑一个config和checkpoint下载下来
2、将model存入之前建的checkpoints文件夹里
3、找到config
在mmdetection文件里面找到对应的solov2的config


4、修改test.py文件内容
根据这个改写:mmdetection/inference_demo.ipynb at master · open-mmlab/mmdetection (github.com)

把标红的地方进行替换 :

保存以后,终端输入:python test.py
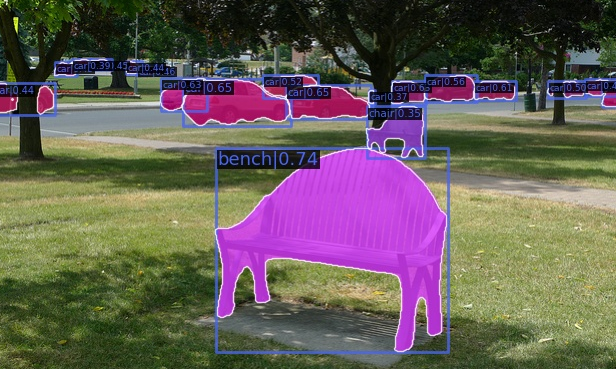
得到结果: