中文原文链接: https://jinlong.github.io/2016/04/24/Debouncing-and-Throttling-Explained-Through-Examples/
英文原文链接: https://css-tricks.com/debouncing-throttling-explained-examples/
1. 序言
防抖(Debounce)和节流(throttle)都是用来控制某个函数在一定时间内执行多少次的技巧,两者相似而又不同。
当我们给 DOM 绑定事件的时候,加了防抖和节流的函数变得特别有用。为什么呢?因为我们在事件和函数执行之间加了一个控制层。记住,我们是无法控制 DOM 事件触发频率的。
看下滚动事件的例子:
// html
<h1>Number of scroll events </h1>
<a href="#" class="reset">Reset</a>
<div id="counter">0</div>
// css
body {
   background: #444444;
   color: white;
    font: 15px/1.51 system, -apple-system, ".SFNSText-Regular", "San Francisco", "Roboto", "Segoe UI", "Helvetica Neue", "Lucida Grande", sans-serif;
   margin:0 auto;
   max-width:600px;
   padding:20px;
   min-height:1000vh; /* 100 times viewport height */
}
#counter {
  position:fixed;
  top:100px;
  left:40%;
  font-size:50px;
}
.reset {
  color:white;
  text-decoration:none;
  border:1px solid white;
  padding:10px 20px;
  background:rgba(0,0,0,0.1);
}
// js
var i = 0;
var $counter = $('#counter');
$(document).ready(function(){
  $(document).on('scroll', function(){
    $counter.html(i);
    i++;
  });
});

$('.reset').on('click', function(){
  $counter.html('');
  i = 0;
})
演示图:
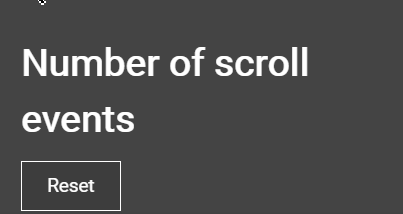
gif抓取帧率太低,可以自己本地写下代码试试
当使用触控板,滚动滚轮,或者拖拽滚动条的时候,一秒可以轻松触发30次事件。经我的测试,在智能手机上,慢慢滚动一下,一秒可以触发事件100次之多。这么高的执行频率,你的滚动回调函数压力大吗?
有个大佬建议的解决方案是,在onScroll事件外部,每 250ms 循环执行一次。简单的技巧,避免了影响用户体验。
现如今,有一些稍微高端的方式处理事件。我来结合用例介绍下 Debounce,Throttle 和 requestAnimationFrame 吧。
2. 防抖动(Debounce)
防抖技术可以把多个顺序地调用合并成一次。 下面看个例子
<a class="trigger-area">Trigger area</a>
<a class="reset">Reset</a>
<div class="visualizations">
<h2>Raw events over time</h2>
<div id="raw-events" class="events"></div>
<h2>Debounced events
  <span class="details"> 400ms, trailing</span></h2>
<div id="debounced-events" class="events"></div>
</div>
body {
   background: #444444;
   color: white;
   font: 15px/1.51 system, -apple-system, ".SFNSText-Regular", "San Francisco", "Roboto", "Segoe UI", "Helvetica Neue", "Lucida Grande", sans-serif;
   margin:0 auto;
   max-width:700px;
   padding:20px;
}

.events{
  padding:0px 20px 10px 20px;
  height: 23px;
}
.events span {
  height:17px;
  width:6px;
  display:inline-block;
  border-right:1px solid #111;

}
.events span:last-of-type {
  border:2px solid black;
  border-bottom: 4px solid #AAA;
  border-top: 0px;
  margin-bottom:-17px;
  margin-left:-2px;
}
h2 {
  margin:10px 0 5px 0;
  clear:both;
  font-weight: normal;
  font-size:14px;
  padding:6px 20px;
}

.trigger-area {
  margin: 0;
  display:inline-block;
  width: 200px;
  height:50px;
  border: 1px solid #5ed1ff;
  padding: 28px 0 0 0;
  text-align: center;
  background-color: transparent;
  cursor:pointer;
  font-size:17px;
  -webkit-user-select: none;  /* Chrome  / Safari */
  -moz-user-select: none;     /* Firefox all */
  -ms-user-select: none;      /* IE 10+ */
  user-select: none;          /* Likely future */
}
.trigger-area.active {
  background:#2F5065;
}
.clickme:hover,
.clickme:active{
  background-color: #333;
}
.clickme:active{
  padding: 4px 5px;
}
.reset {
  display:inline-block;
  width: 120px;
  padding: 10px 0 0 0;
  text-align: center;
  font-size:14px;
  cursor:pointer;
  color:#eee;
}
.visualizations {
  margin-top:10px;
  background:rgba(0,0,0,0.2);
}
.details {
  font-size:13px;
  color:#999;
}

/* stating the obvious: color0 represents our empty color */
.color0 { transparent}

.color1 { background-color: #FFE589}
.color2 { background-color: #B9C6FF}
.color3 { background-color: #99FF7E}
.color4 { background-color: #FFB38A}
.color5 { background-color: #A5FCFF}
.color6 { background-color: #FF8E9B}
.color7 { background-color: #E3FF7E}
.color8 { background-color: #FFA3D8}
.color9 { background-color: #5ca6ff}
.color10 { background-color: #9BFFBB}
$(document).ready(function(){

  var $rawDiv = $('#raw-events'),
      $debounceDiv = $('#debounced-events'),
      $triggerArea = $('.trigger-area'),
      initialized = false,
      frequency = 100,
      barLength = 0,
      globalColor = 2,
      colorNeedChange = false,
      interval_id,
      rawColor = 0,
      debounceColor = 0,
      maxBarLength = 87;

  var drawDebouncedEvent = _.debounce(function(div){
   debounceColor = globalColor;
  }, frequency*4, {leading:false, trailing:true});


  var changeDebouncedColor = _.debounce(function(div){
    // Change colors, to visualize easier the "group of events" that is reperesenting this debounced event

    globalColor++;
    if (globalColor > 9){
      globalColor = 2;
    }
  }, frequency*4, {leading:false, trailing:true});


  function draw_tick_marks(){

      // every x seconds, draw a tick mark in the bar
      interval_id = setInterval(function(){
      barLength++;
      $rawDiv.append('<span class="color' + rawColor + '" >');
      $debounceDiv.append('<span class="color' + debounceColor + '" >');
      rawColor = 0; // make it transparent again
      debounceColor = 0; // make it transparent again

      if (barLength > maxBarLength){
        clearInterval(interval_id);
      }

    }, frequency);
  };


  // Track Mouse movement or clicks for mobile
  $triggerArea.on('click mousemove', function (){
    if (!initialized) {
      initialized = true;
      draw_tick_marks();
      $(this).addClass('active');
    }
    rawColor = globalColor;
    drawDebouncedEvent();
    changeDebouncedColor();
  });

  $('.reset').on('click', function(){
    initialized = false;
    $triggerArea.removeClass('active');
    $rawDiv.empty();
    $debounceDiv.empty();
    barLength = 0;
    clearInterval(interval_id);
  });

});
效果图:
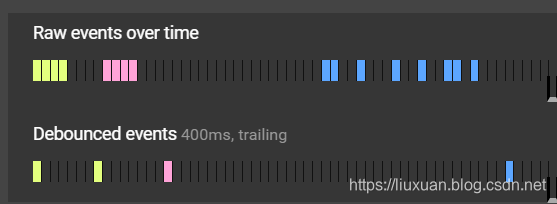
你可以看到连续快速的事件是如何被一个 debounce 事件替代的。但是如果事件触发的时间间隔过长,debounce 则不会生效。
2.1. 前缘(或者“immediate”)
你会发现,直到事件停止快速执行以后,debounce 事件才会触发相应功能。为何不立即触发呢?那样的话就跟原本的非 debounce 处理无异了。
直到两次快速调用之间的停顿结束,事件才会再次触发。
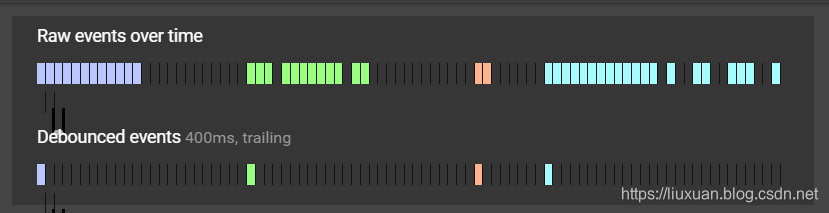
前缘 debounce 的例子,如下方代码:
<a class="trigger-area">Trigger area</a>
<a class="reset">Reset</a>
<div class="visualizations">
<h2>Raw events over time</h2>
<div id="raw-events" class="events"></div>
<h2>Debounced events
  <span class="details"> 400ms, trailing</span></h2>
<div id="debounced-events" class="events"></div>
</div>
body {
   background: #444444;
   color: white;
   font: 15px/1.51 system, -apple-system, ".SFNSText-Regular", "San Francisco", "Roboto", "Segoe UI", "Helvetica Neue", "Lucida Grande", sans-serif;
   margin:0 auto;
   max-width:700px;
   padding:20px;
}

.events{
  padding:0px 20px 10px 20px;
  height: 23px;
}
.events span {
  height:17px;
  width:6px;
  display:inline-block;
  border-right:1px solid #111;

}
.events span:last-of-type {
  border:2px solid black;
  border-bottom: 4px solid #AAA;
  border-top: 0px;
  margin-bottom:-17px;
  margin-left:-2px;
}
h2 {
  margin:10px 0 5px 0;
  clear:both;
  font-weight: normal;
  font-size:14px;
  padding:6px 20px;
}

.trigger-area {
  margin: 0;
  display:inline-block;
  width: 200px;
  height:50px;
  border: 1px solid #5ed1ff;
  padding: 28px 0 0 0;
  text-align: center;
  background-color: transparent;
  cursor:pointer;
  font-size:17px;
  -webkit-user-select: none;  /* Chrome  / Safari */
  -moz-user-select: none;     /* Firefox all */
  -ms-user-select: none;      /* IE 10+ */
  user-select: none;          /* Likely future */
}
.trigger-area.active {
  background:#2F5065;
}
.clickme:hover,
.clickme:active{
  background-color: #333;
}
.clickme:active{
  padding: 4px 5px;
}
.reset {
  display:inline-block;
  width: 120px;
  padding: 10px 0 0 0;
  text-align: center;
  font-size:14px;
  cursor:pointer;
  color:#eee;
}
.visualizations {
  margin-top:10px;
  background:rgba(0,0,0,0.2);
}
.details {
  font-size:13px;
  color:#999;
}

/* stating the obvious: color0 represents our empty color */
.color0 { transparent}

.color1 { background-color: #FFE589}
.color2 { background-color: #B9C6FF}
.color3 { background-color: #99FF7E}
.color4 { background-color: #FFB38A}
.color5 { background-color: #A5FCFF}
.color6 { background-color: #FF8E9B}
.color7 { background-color: #E3FF7E}
.color8 { background-color: #FFA3D8}
.color9 { background-color: #5ca6ff}
.color10 { background-color: #9BFFBB}
$(document).ready(function(){

  var $rawDiv = $('#raw-events'),
      $debounceDiv = $('#debounced-events'),
      $triggerArea = $('.trigger-area'),
      initialized = false,
      frequency = 100,
      barLength = 0,
      globalColor = 2,
      colorNeedChange = false,
      interval_id,
      rawColor = 0,
      debounceColor = 0,
      maxBarLength = 87;

  var drawDebouncedEvent = _.debounce(function(div){
   debounceColor = globalColor;
  }, frequency*4, {leading:true, trailing:false});
  // 在 underscore.js 中,选项叫 immediate ,而不是 leading:


  var changeDebouncedColor = _.debounce(function(div){
    // Change colors, to visualize easier the "group of events" that is reperesenting this debounced event

    globalColor++;
    if (globalColor > 9){
      globalColor = 2;
    }
  }, frequency*4, {leading:false, trailing:true});


  function draw_tick_marks(){

      // every x seconds, draw a tick mark in the bar
      interval_id = setInterval(function(){
      barLength++;
      $rawDiv.append('<span class="color' + rawColor + '" >');
      $debounceDiv.append('<span class="color' + debounceColor + '" >');
      rawColor = 0; // make it transparent again
      debounceColor = 0; // make it transparent again

      if (barLength > maxBarLength){
        clearInterval(interval_id);
      }

    }, frequency);
  };


  // Track Mouse movement or clicks for mobile
  $triggerArea.on('click mousemove', function (){
    if (!initialized) {
      initialized = true;
      draw_tick_marks();
      $(this).addClass('active');
    }
    rawColor = globalColor;
    drawDebouncedEvent();
    changeDebouncedColor();
  });

  $('.reset').on('click', function(){
    initialized = false;
    $triggerArea.removeClass('active');
    $rawDiv.empty();
    $debounceDiv.empty();
    barLength = 0;
    clearInterval(interval_id);
  });

});
效果图:
2.2. Debounce 实现
我首次看到 debounce 的 JavaScript 实现是在 2009 年的 John Hann 的博文。
不久后,Ben Alman 做了个 jQuery插件(不再维护),一年后 Jeremy Ashkenas 把它加入了 underscore.js。而后加入了 Lodash 。
Lodash 给 _.debounce 和_.throttle 添加了不少特性。之前的immediate 被leading(最前面) 和 trailing(最后面) 选项取代。你可以选一种,或者都选,默认只有trailing启用。
新的maxWait 选项(仅 Lodash 有)本文未提及,但是也很有用。事实上,throttle 方法是用 _.debounce 加 maxWait实现的,你可以看 lodash 源码。
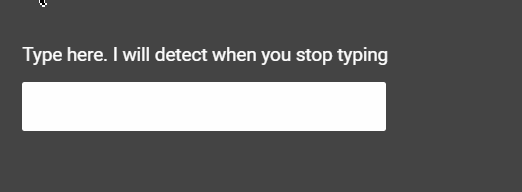
2.3. Debounce 实际例子
输入框中如果不想一边输入一边发请求,_.debounce 可以帮忙,当用户停止输入的时候,再发送请求。
  <form>
    <div class="status-key">Type here. I will detect when you stop typing</div>
    <input type="text" class="autocomplete">
    <div class="status-ajax"></div>
  </form>
body {
   background: #444444;
   color: white;
   font: 15px/1.51 system, -apple-system, ".SFNSText-Regular", "San Francisco", "Roboto", "Segoe UI", "Helvetica Neue", "Lucida Grande", sans-serif;
   margin:0 auto;
   max-width:800px;
   padding:20px;
}

form {
  display: inline-block;
  padding: 0;
  margin: 0;
  padding: 5px;
  margin: 5px 0 0 0;
}

input {
  padding:8px 20px;
  border-radius: 2px;
  border:0;
  font-size:20px;
}
.status-key,
.status-ajax {
  margin:10px 0;
}
.status-ajax {
  color:#99FF7E;
}
$(document).ready(function(){

  var $statusKey = $('.status-key');
  var $statusAjax = $('.status-ajax');
  var intervalId;

  // Fake ajax request. Just for demo
  function make_ajax_request(e){
      var that = this;
      $statusAjax.html('That\'s enough waiting. Making now the ajax request');

      intervalId = setTimeout(function(){
         $statusKey.html('Type here. I will detect when you stop typing');
         $statusAjax.html('');
         $(that).val(''); // empty field
      },2000);
    }

  // Event handlers to show information when events are being emitted
    $('.autocomplete')
      .on('keydown', function (){

        $statusKey.html('Waiting for more keystrokes... ');
      clearInterval(intervalId);
      })


  // Display when the ajax request will happen (after user stops typing)
    // Exagerated value of 1.2 seconds for demo purposes, but in a real example would be better from 50ms to 200ms
  $('.autocomplete').on('keydown',
       _.debounce(make_ajax_request, 1300));
  });
效果图:
3. Throttle(节流阀)
使用 _.throttle 的时候,只允许一个函数在 X 毫秒内执行一次。
跟 debounce 主要的不同在于,throttle 保证 X 毫秒内至少执行一次。
3.1. 节流阀实际例子
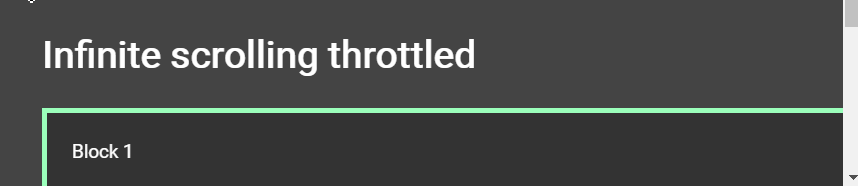
用户向下滚动无限滚动页面,需要检查滚动位置距底部多远,如果邻近底部了,我们可以发 AJAX 请求获取更多的数据插入到页面中。
我们心爱的 _.debounce 就不适用了,只有当用户停止滚动的时候它才会触发。只要用户滚动至邻近底部时,我们就想获取内容。
使用_.throttle可以保证我们不断检查距离底部有多远。下面来个例子
<h1>Infinite scrolling throttled</h1>
<div class="item color-1">Block 1</div>
<div class="item color-2">Block 2</div>
<div class="item color-3">Block 3</div>
<div class="item color-4">Block 4</div>
body {
   background: #444444;
   color: white;
   font: 15px/1.51 system, -apple-system, ".SFNSText-Regular", "San Francisco", "Roboto", "Segoe UI", "Helvetica Neue", "Lucida Grande", sans-serif;
   margin:0 auto;
   max-width:600px;
   padding:20px;
}
.item {
  border:4px solid white;
  height:120px;
  width:100%;
  margin-bottom:50px;
  background:#333;
  padding:20px;
}


.color-1 { border-color: #9BFFBB}
.color-2 { border-color: #B9C6FF}
.color-3 { border-color: #FFA3D8}
.color-4 { border-color: #FF8E9B}
// Very simple example.
// Probably you would want to use a
// full-featured plugin like
// https://github.com/infinite-scroll/infinite-scroll/blob/master/jquery.infinitescroll.js
$(document).ready(function(){

  // Check every 200ms the scroll position
  $(document).on('scroll', _.throttle(function(){
    check_if_needs_more_content();
  }, 300));

  function check_if_needs_more_content() {
    pixelsFromWindowBottomToBottom = 0 + $(document).height() - $(window).scrollTop() -$(window).height();

  // console.log($(document).height());
  // console.log($(window).scrollTop());
  // console.log($(window).height());
  //console.log(pixelsFromWindowBottomToBottom);


    if (pixelsFromWindowBottomToBottom < 200){
      // Here it would go an ajax request
      $('body').append($('.item').clone());

    }
  }
});
效果图:
3.2. requestAnimationFrame(rAF)
requestAnimationFrame 是另一种限速执行的方式。
跟 _.throttle(dosomething, 16)等价。它是高保真的,如果追求更好的精确度的话,可以用浏览器原生的 API 。
可以使用 `AF API 替换 throttle 方法,考虑一下优缺点:
优点
- 动画保持 60fps(每一帧 16 ms),浏览器内部决定渲染的最佳时机
- 简洁标准的 API,后期维护成本低
缺点
- 动画的开始/取消需要开发者自己控制,不像 ‘.debounce’ 或 ‘.throttle’由函数内部处理。
- 浏览器标签未激活时,一切都不会执行。
- 尽管所有的现代浏览器都支持 rAF ,IE9,Opera Mini 和 老的 Android 还是需要打补丁。
- Node.js 不支持,无法在服务器端用于文件系统事件。
根据经验,如果 JavaScript 方法需要绘制或者直接改变属性,我会选择requestAnimationFrame,只要涉及到重新计算元素位置,就可以使用它。
涉及到 AJAX 请求,添加/移除 class (可以触发 CSS 动画),我会选择_.debounce 或者_.throttle ,可以设置更低的执行频率(例子中的200ms 换成16ms)。
4. 如何在lodash中使用 debounce 和 throttle 以及常见的坑
如果只想使用上述两个方法可以只安装该功能的npm包,例
npm i lodash.debounce --save
npm i lodash.throttle --save
常见的坑是,不止一次地调用 _.debounce 方法:
// 错误
$(window).on('scroll', function() {
   _.debounce(doSomething, 300);
});
// 正确
$(window).on('scroll', _.debounce(doSomething, 200));
debounce 方法保存到一个变量以后,就可以用它的私有方法 debounced_version.cancel(),lodash 和 underscore.js 都有效。
var debounced_version = _.debounce(doSomething, 200);
$(window).on('scroll', debounced_version);
// 如果需要的话
debounced_version.cancel();
5. 结论
使用debounce,throttle和 requestAnimationFrame都可以优化事件处理,三者各不相同,又相辅相成。
总之:
-
debounce:把触发非常频繁的事件(比如按键)合并成一次执行。
-
throttle:保证每 X 毫秒恒定的执行次数,比如每200ms检查下滚动位置,并触发 CSS 动画。
-
requestAnimationFrame:可替代 throttle ,函数需要重新计算和渲染屏幕上的元素时,想保证动画或变化的平滑性,可以用它。注意:IE9 不支持。