父项目msagd配置
-
编写pom.xml的属性标签<properties></properties>
 <properties>
	  <!--私有docker仓库地址:ip:port-->
 	  <docker.image.host>docker.io</docker.image.host>
      <!--镜像前缀,随便取(命名空间)-->
      <docker.image.prefix>13711919653</docker.image.prefix>
 </properties>
-
编写pom.xml的构建标签<pluginManagement></pluginManagement>
在父项目中编写dockerfile插件的配置管理,子项目按需引入插件依赖即可
 <build>
      <pluginManagement>
            <plugins>
                <plugin>
                    <!--插件依赖-->
                    <groupId>com.spotify</groupId>
                    <artifactId>dockerfile-maven-plugin</artifactId>
                    <version>1.4.13</version>
                    <executions>
                        <!--通过mvn package 将会执行docker构建、tag、推送功能-->
                        <execution>
                            <id>tag-version</id>
                            <phase>package</phase>
                            <goals>
                                <goal>build</goal>
                                <goal>tag</goal>
                               <goal>push</goal>
                            </goals>
                            <configuration>
                                <!--项目版本号作镜像标签号-->
                                <tag>${project.version}</tag>
                            </configuration>
                        </execution>
                    </executions>
                    <configuration>
                        <!--使用maven的setting.xml方式配置授权-->
                        <useMavenSettingsForAuth>true</useMavenSettingsForAuth>
                        <googleContainerRegistryEnabled>false</googleContainerRegistryEnabled>
                        <!--授权的账号密码,经测试不起作用-->
                        <!--<username>myname</username>-->
                        <!--<password>mypassword</password>-->
                        <!--docker私有仓库地址-->
                        <repository>${docker.image.host}/${docker.image.prefix}/${project.artifactId}</repository>
                        <!--上下文中dockerfile名称-->
                        <dockerfile>Dockerfile</dockerfile>
                        <!--dockerfile上下文路径-->
                        <contextDirectory>${project.basedir}</contextDirectory>
                        <!--项目版本号作镜像标签号-->
                        <tag>${project.version}</tag>
                        <!--构建参数-->
                        <buildArgs>
                            <!--传递到Dockerfile中的参数:jar包名称-->
                            <JAR_FILE>target/${project.build.finalName}.jar</JAR_FILE>
                        </buildArgs>
                    </configuration>
                </plugin>
            </plugins>
        </pluginManagement>
 </build>
子项目msa-xxx配置
-
编写pom.xml的构建标签<plugin></plugin>
<!--docker插件依赖-->
<plugin>
    <groupId>com.spotify</groupId>
    <artifactId>dockerfile-maven-plugin</artifactId>
</plugin>
-
项目根目录上编写Dockerfile文件
FROM openjdk:8-jre-stretch
#配置文件上传递过来的jar包名称
ARG JAR_FILE
COPY  ${JAR_FILE} app.jar
#端口暴露
EXPOSE 1000
ENTRYPOINT ["java", "-jar","-Xms1024m","-Xmx1024m","-Xss1024K","-XX:MetaspaceSize=512m","-XX:MaxMetaspaceSize=512m","app.jar"]
#active
CMD ["--spring.profiles.active=k8s"]
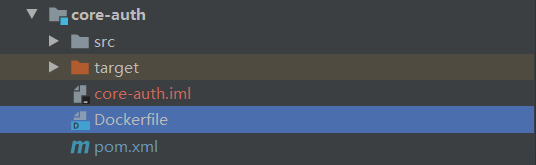
Dockerfile上下文环境如图所示
使用mvn一键部署docker镜像
-
离线环境安装apache-maven3.6.2
#安装wget命令
yum -y install wget
#下载maven安装包
wget http://mirrors.tuna.tsinghua.edu.cn/apache/maven/maven-3/3.6.2/binaries/apache-maven-3.6.2-bin.tar.gz
#解压缩
tar -zxvf apache-maven-3.6.2-bin.tar.gz
#配置maven环境变量
vi /etc/profile
export MAVEN_HOME=/var/local/apache-maven-3.6.2
export MAVEN_HOME
export PATH=$PATH:$MAVEN_HOME/bin
#环境变量立即生效
source /etc/profile
-
编写maven的setting.xml的server标签<server></server>
<servers>
	 <server>
	 	<!--私有docker仓库地址:ip:port-->
	    <id>docker-repo.example.com:8080</id>
	    <!--docker仓库用户名-->
	    <username>me</username>
	    <!--docker仓库密码-->
	    <password>mypassword</password>
	  </server>
 <servers>
-
设置版本编号 mvn versions:set -DnewVersion=x.x.x(不需要可不运行)
-
开始一键部署 mvn package
编写k8s部署文件
本文内容由网友自发贡献,版权归原作者所有,本站不承担相应法律责任。如您发现有涉嫌抄袭侵权的内容,请联系:hwhale#tublm.com(使用前将#替换为@)