通过本篇文章,我们将会学习以下内容:
1、在Windows上安装Metasploit
2、在Linux和MacOS上安装Metasploit
3、在Kali Linux中使用 Metasploit
4、升级Kali Linux
5、使用虚拟化软件构建渗透测试实验环境
6、配置SSH连接
7、使用SSH连接Kali
8、配置PostgreSQL数据库
9、创建工作区
10、使用数据库
11、使用hosts命令
12、理解services命令
简介
Metasploit是目前世界上领先的渗透测试工具,也是信息安全与渗透测试领域最大的开源项目之一。它彻底改变了我们执行安全测试的方式。
Metasploit之所以流行,是因为它可以执行广泛的安全测试任务,从而简化渗透测试的工作。Metasploit 适用于所有流行的操作系统,本文中,主要以Kali Linux为主。因为Kali Linux预装了 Metasploit 框架和运行在框架上的其他第三方工具。
框架和相关术语简介:
Metasploit Framewor****k
:这是一个免费的、开源的渗透测试框架,由 H.D.Moore 在 2003 年发布,后来被 Rapid7 收购。当前稳定版本是使用 Ruby 语言编写的。它拥有世界上最大的渗透测试攻击数据库,每年超过100万次的下载。它也是迄今为止使用 Ruby构建的最复杂的项目之一。
Vulnerability
:允许攻击者入侵或危害系统安全性的弱点称为漏洞,漏洞可能存在于操作系统,应用软件甚至网络协议中。
Exploit
:攻击代码或程序,它允许攻击者利用易受攻击的系统并危害其安全性。每个漏洞都有对应的漏洞利用程序。Metasploit有超过 1700 个漏洞利用程序。
Payload
:攻击载荷。它主要用于建立攻击者和受害者机器直接的连接,Metasploit有超过 500个有效攻击载荷。
Module
:模块是一个完整的构件,每个模块执行特定的任务,并通过几个模块组成一个单元运行。这种架构的好处是可以很容易的将自己写的利用程序和工具集成到框架中。
Metasploit框架具有模块化的体系结构,exploits、payload、encoders都是独立的模块:

Metasploit提供两种不同的UI,msfconsole和WebUI,本书中主要使用msfconsole接口。因为msfconsole对Metasploit支持最好,可以使用所有功能。
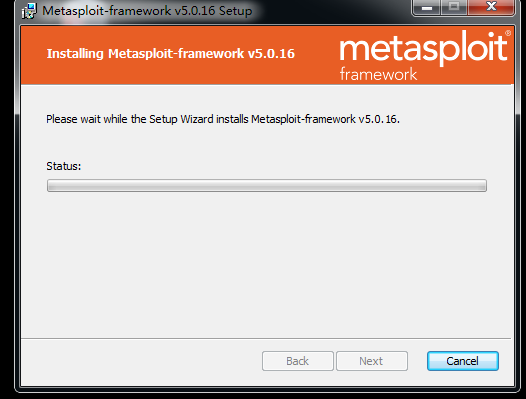
一、在Windows上安装Metasploit
在Windows上安装Metasploit非常简单,直接从官方下载(http://www.metasploit.com/download).安装文件进行安装即可。
准备工作
Metasploit的四个版本:
Pro
:适用于渗透测试人员和IT安全团队
Express
:适用于一般IT人员
Community
:适用于小公司和学生
Framework
:适用于开发人员和安全研究人员
请从官网下载最新版的 Metasploit Framework
(https://windows.metasploit.com/metasploitframework-latest.msi) 它包含控制台程序和其他依赖程序。
如何安装
下载完之后,运行即可,它将自动安装相关所有组件。


Tip:在Windows上安装Metasploit时候,应该禁用防护软件,因为可能会检测到一些安装文件为恶意程序,从而阻止安装过程。安装完后将 Metasploit加入到防护软件的白名单。
二、在Linux和MacOS上安装Metasploit
通过以下快速安装脚本导入Rapid7签名密钥并为受支持的Linux和macOS系统设置程序包:
curl https://raw.githubusercontent.com/rapid7/metasploit-omnibus/master/config/templates/metasploit-framework-wrappers/msfupdate.erb > msfinstall && \

  chmod 755 msfinstall && \

  ./msfinstall
软件包将集成到系统的包管理器中,可以使用 msfupdate 命令或包管理器进行更新。
安装过程差不多是这样的:
bcook@localhost:~$ uname -a

Linux localhost 3.14.0 #1 SMP PREEMPT Mon Feb 6 21:59:30 PST 2017 armv7l armv7l armv7l GNU/Linux

bcook@localhost:~$ curl https://raw.githubusercontent.com/rapid7/metasploit-omnibus/master/config/templates/metasploit-framework-wrappers/msfupdate.erb > msfinstall && \

>   chmod 755 msfinstall && \

>   ./msfinstall

  % Total    % Received % Xferd  Average Speed   Time    Time     Time  Current

                                 Dload  Upload   Total   Spent    Left  Speed

100  5394  100  5394    0     0   5609      0 --:--:-- --:--:-- --:--:--  5607

Switching to root user to update the package

[sudo] password for bcook:

Adding metasploit-framework to your repository list..OK

Updating package cache..OK

Checking for and installing update..

Reading package lists... Done

Building dependency tree

Reading state information... Done

The following NEW packages will be installed:

  metasploit-framework

0 upgraded, 1 newly installed, 0 to remove and 2 not upgraded.

Need to get 148 MB of archives.

After this operation, 358 MB of additional disk space will be used.

Get:1 http://downloads.metasploit.com/data/releases/metasploit-framework/apt lucid/main armhf metasploit-framework armhf 4.13.23+20170217143300.git.1.85dca6a~1rapid7-1 [148 MB]

Fetched 148 MB in 19s (7743 kB/s)

Selecting previously unselected package metasploit-framework.

(Reading database ... 28449 files and directories currently installed.)

Preparing to unpack .../metasploit-framework_4.13.23+20170217143300.git.1.85dca6a~1rapid7-1_armhf.deb ...

Unpacking metasploit-framework (4.13.23+20170217143300.git.1.85dca6a~1rapid7-1) ...

Setting up metasploit-framework (4.13.23+20170217143300.git.1.85dca6a~1rapid7-1) ...

update-alternatives: using /opt/metasploit-framework/bin/msfbinscan to provide /usr/bin/msfbinscan (msfbinscan) in auto mode

update-alternatives: using /opt/metasploit-framework/bin/msfconsole to provide /usr/bin/msfconsole (msfconsole) in auto mode

update-alternatives: using /opt/metasploit-framework/bin/msfd to provide /usr/bin/msfd (msfd) in auto mode

update-alternatives: using /opt/metasploit-framework/bin/msfdb to provide /usr/bin/msfdb (msfdb) in auto mode

update-alternatives: using /opt/metasploit-framework/bin/msfelfscan to provide /usr/bin/msfelfscan (msfelfscan) in auto mode

update-alternatives: using /opt/metasploit-framework/bin/msfmachscan to provide /usr/bin/msfmachscan (msfmachscan) in auto mode

update-alternatives: using /opt/metasploit-framework/bin/msfpescan to provide /usr/bin/msfpescan (msfpescan) in auto mode

update-alternatives: using /opt/metasploit-framework/bin/msfrop to provide /usr/bin/msfrop (msfrop) in auto mode

update-alternatives: using /opt/metasploit-framework/bin/msfrpc to provide /usr/bin/msfrpc (msfrpc) in auto mode

update-alternatives: using /opt/metasploit-framework/bin/msfrpcd to provide /usr/bin/msfrpcd (msfrpcd) in auto mode

update-alternatives: using /opt/metasploit-framework/bin/msfupdate to provide /usr/bin/msfupdate (msfupdate) in auto mode

update-alternatives: using /opt/metasploit-framework/bin/msfvenom to provide /usr/bin/msfvenom (msfvenom) in auto mode

Run msfconsole to get started

W: --force-yes is deprecated, use one of the options starting with --allow instead.

bcook@localhost:~$ msfconsole  //启动msfconsole

 ** Welcome to Metasploit Framework Initial Setup **

    Please answer a few questions to get started.

Would you like to use and setup a new database (recommended)? y //是否设置数据库

Creating database at /home/bcook/.msf4/db

Starting database at /home/bcook/.msf4/db...success

Creating database users

Creating initial database schema

 ** Metasploit Framework Initial Setup Complete **

       =[ metasploit v4.13.23-dev-584850f1f8a1a74b69b5cea16c700c9fd1b8e4c6]

+ -- --=[ 1622 exploits - 924 auxiliary - 282 post        ]

+ -- --=[ 472 payloads - 39 encoders - 9 nops             ]

+ -- --=[ Free Metasploit Pro trial: http://r-7.co/trymsp ]

msf >
在MacOS中手动安装Metasploit
最新的OS X安装程序包也可以直接在这里下载:https://osx.metasploit.com/metasploitframework-latest.pkg
下载完后安装即可,安装完后,使用/opt/metasploit-framework/bin/msfconsole启动msfconsole。
三、
在Kali Linux上使用Metasploit
Kali Linux是最受安全从业人员欢迎的操作系统,第一、它预装了几乎所有流行的渗透测试工具,降低了使用成本,其次它是基于Linux的操作系统,具有可靠的稳定性和安全性。
准备工作
你可以在物理机上安装Kali Linux,也可以在虚拟机中安装它,安装过程非常简单。
在Kali Linux设置Metasploit开发环境可以用以下命令:
sudo apt update

sudo apt -y install autoconf bison build-essential curl git-core libapr1

libaprutil1 libcurl4-openssl-dev libgmp3-dev libpcap-dev libpq-dev

libreadline6-dev libsqlite3-dev libssl-dev libsvn1 libtool libxml2 libxml2-

dev libxslt-dev libyaml-dev locate ncurses-dev openssl postgresql

postgresql-contrib wget xsel zlib1g zlib1g-dev

curl -sSL https://rvm.io/mpapis.asc | gpg --import -

curl -L https://get.rvm.io | bash -s stable

source ~/.rvm/scripts/rvm

cd /opt

sudo git clone https://github.com/rapid7/metasploit-framework.git

sudo chown -R `whoami` /opt/metasploit-framework

cd metasploit-framework

rvm --install $(cat .ruby-version)

gem install bundler

bundle install
如何安装
你可以从Kali官网下载(https://www.kali.org)Kali Linux ISO镜像文件,用来制作USB启动盘或者制作DVD-ROM光盘。你可以将Kali Linux安装到硬盘上或者直接使用 Live CD模式。也可以在虚拟机中安装Kali Linux。
本书中,我们将使用 Kali Linux 虚拟机。
1、从官网下载 Kali Vmware 虚拟机文件,导入到Vmware Workstation中,启动系统,输入用户名和密码即可登录到Kali中,root默认密码是toor。
2、成功登录后,直接从 应用程序 菜单中启动 Metasploit

Tip:从应用程序菜单启动 Metasploit后,将自动设置PostgreSQL数据库,它将创建数据库用户,创建msf和msf_test数据库,配置Metasploit使用数据库,并通过以下命令启动msfconsole:(这是自动的,不需要手动执行下面的命令)
service postgresql start && msfdb init && msfconsole
过程如下:

其他
或者你可以直接在终端中运行msfconsole启动Metasploit
四、升级Kali Linux
升级Kali Linux非常简单,建议定期升级以获得最新的安全更新。若要升级,可以使用 apt update,然后使用 apt upgrade进行升级,这种方法是在不删除任何包的情况下升级已安装的包。如果要升级大的版本和重要更新。可以使用apt full-upgrade进行完全升级,这种方式将会删除过时的软件包和安装新的依赖。
五、构建渗透测试实验环境
构建一个渗透测试实验环境是非常有必要的。它允许你在一个安全的环境中练习和测试,因为直接针对真实系统攻击测试是违法的。使用虚拟机构建渗透测试实验环境具有可移植性,灵活性和低维护成本。并且可以构建多种操作系统,设置复杂的网络场景,并在多个目标上执行渗透测试。
准备工作
选择你喜欢的虚拟化软件,比如 Vmware Workstation、VirtualBox、Hyper-V等
我们需要构建的渗透测试实验环境拓扑如下:

包含 Kali Linux,Linux服务器和Windows服务器以及一台Windows 10客户机。
当然你可以根据自己的喜好来构建。
如何构建
Kali Linux
:直接从Kali官网下载安装就行
Linux服务器
:可以从 SourceForge下载 Metasploitable2 : https://sourceforge.net/projects/ metasploitable/files/Metasploitable2/
Windows 10 客户机
:可以从微软开发者网站下载 90天评估版: https://developer.microsoft.com/en-us/microsoft-edge/tools/vms/
Windows Server
:我们通过Metasploitable 3来构建。在Windows上运行build_win2008.sh进行构建。
Metasploitable 3 安装过程在此不做描述
构建过程不做详细描述
六、配置SSH连接
准备工作
要配置远程登录Kali Linux,首先我们需要更改默认的root密码并生成新的SSH密钥。
怎么做
使用passwd命令修改root密码
root@osboxes:~# passwd

Enter new UNIX password:

Retype new UNIX password:

passwd: password updated successfully

root@osboxes:~#
重新配置SSH主机密钥非常简单,首先删除当前的SSH主机密钥,然后使用dpkg-reconfigure openssh-server命令重新生成密钥即可。
root@osboxes:~# rm /etc/ssh/ssh_host_*

root@osboxes:~# dpkg-reconfigure openssh-server

Creating SSH2 RSA key; this may take some time ...

2048 SHA256:1FN10l0k50Ng/dpeLIXTPmFGyupZB22hk4JNQC1aKcI root@osboxes (RSA)

Creating SSH2 ECDSA key; this may take some time ...

256 SHA256:37c9q4AwOW4wEwUoEpQ1Jz/KXIYJfV53ORWeGBzONdI root@osboxes (ECDSA)

Creating SSH2 ED25519 key; this may take some time ...

256 SHA256:ky1bOQlbMFIMB0si0w7Msv32fpSeza6lZeHn8OevGdU root@osboxes (ED25519)

rescue-ssh.target is a disabled or a static unit, not starting it.
我们还需要编辑OpenSSH服务配置文件:/etc/ssh/sshd_config,将#PermitRootLogin without-password 更改为PermitRootLogin yes,从而运行root远程登录。

若要设置SSH服务开机启动,则执行systemctl enable ssh即可
root@osboxes:~# systemctl enable ssh

Synchronizing state of ssh.service with SysV service script with /lib/systemd/systemd-sysv-install.

Executing: /lib/systemd/systemd-sysv-install enable ssh

Created symlink /etc/systemd/system/sshd.service → /lib/systemd/system/ssh.service.
Tip:最好是将远程登录配置为密钥登录,而不是使用密码。
七、使用SSH连接到Kali
要连接到Kali Linux,我们只需要使用SSH客户端即可,大多数Unix,Linux和MacOS都已经安装了SSH客户端。如果使用的是Windows,可以安装PuTTY等SSH客户端软件。
怎么做
查看Kali的IP地址
root@osboxes:~# ip a

1: lo: <LOOPBACK,UP,LOWER_UP> mtu 65536 qdisc noqueue state UNKNOWN group default qlen 1000

    link/loopback 00:00:00:00:00:00 brd 00:00:00:00:00:00

    inet 127.0.0.1/8 scope host lo

       valid_lft forever preferred_lft forever

    inet6 ::1/128 scope host

       valid_lft forever preferred_lft forever

2: eth0: <BROADCAST,MULTICAST,UP,LOWER_UP> mtu 1500 qdisc pfifo_fast state UP group default qlen 1000

    link/ether 00:0c:29:9f:99:bf brd ff:ff:ff:ff:ff:ff

    inet 192.168.177.138/24 brd 192.168.177.255 scope global dynamic noprefixroute eth0

       valid_lft 1784sec preferred_lft 1784sec

    inet6 fe80::28ff:605:ed51:4ab7/64 scope link noprefixroute

       valid_lft forever preferred_lft forever
使用SSH 客户端连接到Kali
λ ssh root@192.168.177.138

The authenticity of host '192.168.177.138 (192.168.177.138)' can't be established.

ECDSA key fingerprint is SHA256:37c9q4AwOW4wEwUoEpQ1Jz/KXIYJfV53ORWeGBzONdI.

Are you sure you want to continue connecting (yes/no)? yes

Warning: Permanently added '192.168.177.138' (ECDSA) to the list of known hosts.

root@192.168.177.138's password:

Linux osboxes 4.14.0-kali3-amd64 #1 SMP Debian 4.14.12-2kali1 (2018-01-08) x86_64

The programs included with the Kali GNU/Linux system are free software;

the exact distribution terms for each program are described in the

individual files in /usr/share/doc/*/copyright.

Kali GNU/Linux comes with ABSOLUTELY NO WARRANTY, to the extent

permitted by applicable law.

root@osboxes:~#
八、配置PostgreSQL数据库
Metasploit的一个重要特性是支持PostgreSQL数据库,使用它来存储渗透测试结果和漏洞信息。
准备工作
启动服务,然后使用 Metasploit msfdb 初始化数据库
怎么做
1、启动数据库
root@osboxes:~# systemctl start postgresql
2、初始化数据库
~# msfdb init

Creating database user 'msf'

Enter password for new role:

Enter it again:

Creating databases 'msf' and 'msf_test'

Creating configuration file in /usr/share/metasploit-framework/config/database.yml

Creating initial database schema
msfdb 还可以用来管理Metasploit Framework数据库
root@osboxes:~# msfdb

Manage the metasploit framework database

  msfdb init     # start and initialize the database

  msfdb reinit   # delete and reinitialize the database

  msfdb delete   # delete database and stop using it

  msfdb start    # start the database

  msfdb stop     # stop the database

  msfdb status   # check service status

  msfdb run      # start the database and run msfconsole
3、修改数据库配置文件
我们可以直接编辑 database.yml文件,文件位于/usr/share/metasploit-framework/config/database.yml
root@osboxes:~# cat /usr/share/metasploit-framework/config/database.yml

development:

  adapter: postgresql

  database: msf

  username: msf

  password: 9JHbuu/CdoGT0kvBiSXf+VLDRQ9dKKpMYyWKY6Ui2jc=

  host: localhost

  port: 5432

  pool: 5

  timeout: 5

production:

  adapter: postgresql

  database: msf

  username: msf

  password: 9JHbuu/CdoGT0kvBiSXf+VLDRQ9dKKpMYyWKY6Ui2jc=

  host: localhost

  port: 5432

  pool: 5

  timeout: 5

test:

  adapter: postgresql

  database: msf_test

  username: msf

  password: 9JHbuu/CdoGT0kvBiSXf+VLDRQ9dKKpMYyWKY6Ui2jc=

  host: localhost

  port: 5432

  pool: 5

  timeout: 5
里面的usrname和password是默认配置的,你可以根据自己的喜好进行更改
4、确定是否连接到数据库
启动msfconsole,然后执行db_status,检查数据库连接情况。
msf > db_status

[*] postgresql connected to msf

msf >
更多
如果要手动连接到数据库,可以使用如下命令:
db_connect <user:pass>@<host:port>/<database>
我们可以使用databse.yml文件测试db_connect命令
msf > db_disconnect //断开连接

msf > db_status //查看连接状态

[*] postgresql selected, no connection

msf > db_connect

[*]    Usage: db_connect <user:pass>@<host:port>/<database>

[*]       OR: db_connect -y [path/to/database.yml]

[*] Examples:

[*]        db_connect user@metasploit3

[*]        db_connect user:pass@192.168.0.2/metasploit3

[*]        db_connect user:pass@192.168.0.2:1500/metasploit3

msf > db_connect -y /usr/share/metasploit-framework/config/database.yml //连接数据库

[*] Rebuilding the module cache in the background...

msf > db_status //查看连接状态

[*] postgresql connected to msf

msf >
九、创建工作区
Metasploit中有工作区的概念,可以用来隔离不同的渗透测试任务,从而避免混淆不同的测试。
怎么做
1、默认工作区
默认工作区是default,输入workspace查看
msf > workspace

* default

msf >
输入workspace -h 查看命令帮助
msf > workspace -h

Usage:

    workspace                  List workspaces

    workspace -v               List workspaces verbosely

    workspace [name]           Switch workspace

    workspace -a [name] ...    Add workspace(s)

    workspace -d [name] ...    Delete workspace(s)

    workspace -D               Delete all workspaces

    workspace -r <old> <new>   Rename workspace

    workspace -h               Show this help information

msf >
2、新建工作区
使用workspace -a命令添加新的工作区
msf > workspace -a book

[*] Added workspace: book

msf > workspace

  default

* book

msf >
3、删除工作区
使用workspace -d命令删除工作区
msf > workspace -d book

[*] Deleted workspace: book

[*] Switched workspace: default
4、更改工作区
使用workspace命令更改工作区
msf > workspace book

[*] Workspace: book
5、重命名工作区
使用workspace -r命令更改工作区
msf > workspace -r book msf

[*] Switched workspace: msf

msf >
十、使用数据库
配置完数据库,我们就可以使用它了,首先我们了解如何使用db_import导入外部工具数据。
准备工作
在msfconsole中运行db_import命令,查看支持的文件类型
msf > db_import

Usage: db_import <filename> [file2...]

Filenames can be globs like *.xml, or **/*.xml which will search recursively

Currently supported file types include:

    Acunetix

    Amap Log

    Amap Log -m

    Appscan

    Burp Session XML

    Burp Issue XML

    CI

    Foundstone

    FusionVM XML

    ...

    Wapiti XML

msf >
怎么做
1、导入nmap扫描结果
先完成扫描,保存结果为 XML 文档
root@osboxes:~# nmap -Pn -A -oX report 192.168.177.139
2、然后执行 db_import PATH进行导入
msf > db_import /root/report

[*] Importing 'Nmap XML' data

[*] Import: Parsing with 'Nokogiri v1.8.5'

[*] Importing host 192.168.177.139

[*] Successfully imported /root/report

msf >
3、当然也可以直接在msfconsole中运行dbnmap进行扫描,这样结果就直接保存到当前数据库中了,dbnmap 命令的参数与nmap 命令相同。
十一、使用 hosts 命令
既然数据库中有了数据,就可以使用hosts命令来显示当前工作区中存储的所有主机了。
msf > hosts

Hosts

=====

address          mac                name  os_name  os_flavor  os_sp  purpose  info  comments

-------          ---                ----  -------  ---------  -----  -------  ----  --------

192.168.177.139  00:0c:29:c6:a9:e5        Unknown                    device

msf >
怎么做
1、查看命令帮助hosts -h
msf > hosts -h

Usage: hosts [ options ] [addr1 addr2 ...]

OPTIONS:

  -a,--add          Add the hosts instead of searching

  -d,--delete       Delete the hosts instead of searching

  -c <col1,col2>    Only show the given columns (see list below)

  -C <col1,col2>    Only show the given columns until the next restart (see list below)

  -h,--help         Show this help information

  -u,--up           Only show hosts which are up

  -o <file>         Send output to a file in csv format

  -O <column>       Order rows by specified column number

  -R,--rhosts       Set RHOSTS from the results of the search

  -S,--search       Search string to filter by

  -i,--info         Change the info of a host

  -n,--name         Change the name of a host

  -m,--comment      Change the comment of a host

  -t,--tag          Add or specify a tag to a range of hosts

Available columns: address, arch, comm, comments, created_at, cred_count, detected_arch, exploit_attempt_count, host_detail_count, info, mac, name, note_count, os_family, os_flavor, os_lang, os_name, os_sp, purpose, scope, service_count, state, updated_at, virtual_host, vuln_count, tags

msf >
十二、理解 services 命令
services命令作用是显示目标主机上可用的服务
查看命令帮助:
msf > services -h

Usage: services [-h] [-u] [-a] [-r <proto>] [-p <port1,port2>] [-s <name1,name2>] [-o <filename>] [addr1 addr2 ...]

  -a,--add          Add the services instead of searching

  -d,--delete       Delete the services instead of searching

  -c <col1,col2>    Only show the given columns

  -h,--help         Show this help information

  -s <name1,name2>  Search for a list of service names

  -p <port1,port2>  Search for a list of ports

  -r <protocol>     Only show [tcp|udp] services

  -u,--up           Only show services which are up

  -o <file>         Send output to a file in csv format

  -O <column>       Order rows by specified column number

  -R,--rhosts       Set RHOSTS from the results of the search

  -S,--search       Search string to filter by

Available columns: created_at, info, name, port, proto, state, updated_at
怎么做
1、显示所有可用服务
msf > services

Services

========

host             port  proto  name         state  info

----             ----  -----  ----         -----  ----

192.168.177.142  22    tcp    ssh          open   OpenSSH 5.3p1 Debian 3ubuntu4 Ubuntu Linux; protocol 2.0

192.168.177.142  80    tcp    http         open   Apache httpd 2.2.14 (Ubuntu) mod_mono/2.4.3 PHP/5.3.2-1ubuntu4.30 with Suhosin-Patch proxy_html/3.0.1 mod_python/3.3.1 Python/2.6.5 mod_ssl/2.2.14 OpenSSL/0.9.8k Phusion_Passenger/4.0.38 mod_perl/2.0.4 Perl/v5.10.1

192.168.177.142  139   tcp    netbios-ssn  open   Samba smbd 3.X - 4.X workgroup: WORKGROUP

192.168.177.142  143   tcp    imap         open   Courier Imapd released 2008

192.168.177.142  443   tcp    ssl/https    open

192.168.177.142  445   tcp    netbios-ssn  open   Samba smbd 3.X - 4.X workgroup: WORKGROUP

192.168.177.142  5001  tcp    java-rmi     open   Java RMI

192.168.177.142  8080  tcp    http         open   Apache Tomcat/Coyote JSP engine 1.1

192.168.177.142  8081  tcp    http         open   Jetty 6.1.25

msf >
2、过滤服务
msf > services -s http

Services

========

host             port  proto  name  state  info

----             ----  -----  ----  -----  ----

192.168.177.142  80    tcp    http  open   Apache httpd 2.2.14 (Ubuntu) mod_mono/2.4.3 PHP/5.3.2-1ubuntu4.30 with Suhosin-Patch proxy_html/3.0.1 mod_python/3.3.1 Python/2.6.5 mod_ssl/2.2.14 OpenSSL/0.9.8k Phusion_Passenger/4.0.38 mod_perl/2.0.4 Perl/v5.10.1

192.168.177.142  8080  tcp    http  open   Apache Tomcat/Coyote JSP engine 1.1

192.168.177.142  8081  tcp    http  open   Jetty 6.1.25
3、过滤端口
msf > services -p 22

Services

========

host             port  proto  name  state  info

----             ----  -----  ----  -----  ----

192.168.177.142  22    tcp    ssh   open   OpenSSH 5.3p1 Debian 3ubuntu4 Ubuntu Linux; protocol 2.0

msf >
4、搜索特定字符
msf > services -S Apache

Services

========

host             port  proto  name  state  info

----             ----  -----  ----  -----  ----

192.168.177.142  80    tcp    http  open   Apache httpd 2.2.14 (Ubuntu) mod_mono/2.4.3 PHP/5.3.2-1ubuntu4.30 with Suhosin-Patch proxy_html/3.0.1 mod_python/3.3.1 Python/2.6.5 mod_ssl/2.2.14 OpenSSL/0.9.8k Phusion_Passenger/4.0.38 mod_perl/2.0.4 Perl/v5.10.1

192.168.177.142  8080  tcp    http  open   Apache Tomcat/Coyote JSP engine 1.1
5、多条件过滤
msf > services -c name,port,info -S Apache 192.168.177.142

Services

========

host             name  port  info

----             ----  ----  ----

192.168.177.142  http  80    Apache httpd 2.2.14 (Ubuntu) mod_mono/2.4.3 PHP/5.3.2-1ubuntu4.30 with Suhosin-Patch proxy_html/3.0.1 mod_python/3.3.1 Python/2.6.5 mod_ssl/2.2.14 OpenSSL/0.9.8k Phusion_Passenger/4.0.38 mod_perl/2.0.4 Perl/v5.10.1

192.168.177.142  http  8080  Apache Tomcat/Coyote JSP engine 1.1
Tip:在后续的章节我们将学习更多的数据库命令,比如 loot、cred、vulns、notes。
相关操作学习
Metasploit之PostgreSQL及Scanner实践:通过该实验学会metasploit与postgresql的配合使用,metasploit中主机扫描模块的使用以及集成的web应用扫描框架使用,数据库和扫描器的配合使用。
网络安全零基础路线图
我一共划分了六个阶段,但并不是说你得学完全部才能上手工作,对于一些初级岗位,学到第三四个阶段就足矣~
这里我整合并且整理成了一份【282G】的网络安全从零基础入门到进阶资料包,需要的小伙伴可以扫描下方CSDN官方合作二维码免费领取哦,无偿分享!!!
如果你对网络安全入门感兴趣,那么你需要的话可以
如果你对网络安全入门感兴趣,那么你需要的话可以点击这里
????
①网络安全学习路线
②上百份渗透测试电子书
③安全攻防357页笔记
④50份安全攻防面试指南
⑤安全红队渗透工具包
⑥HW护网行动经验总结
⑦100个漏洞实战案例
⑧安全大厂内部视频资源
⑨历年CTF夺旗赛题解析
