一、ArUco项目源码简析
声明:以下内容均是在虚拟机Ubuntu系统下进行操作,用开发板Nano Pi的同学亦可同样实现,但这里为了方便截图以及界面复制。
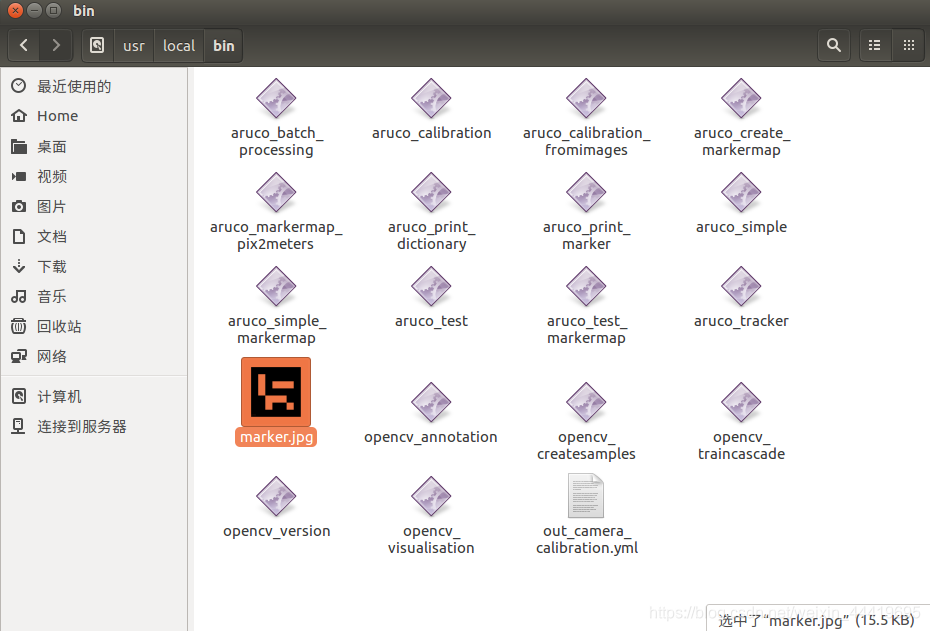
1、首先来看一下ArUco项目的源码结构
bin目录下有一些源码自动生成的可执行文件,像是一些demo,我们可以用它们实现ArUco的一些基本功能,比如相机标定、生成二维码、检测二维码等等。
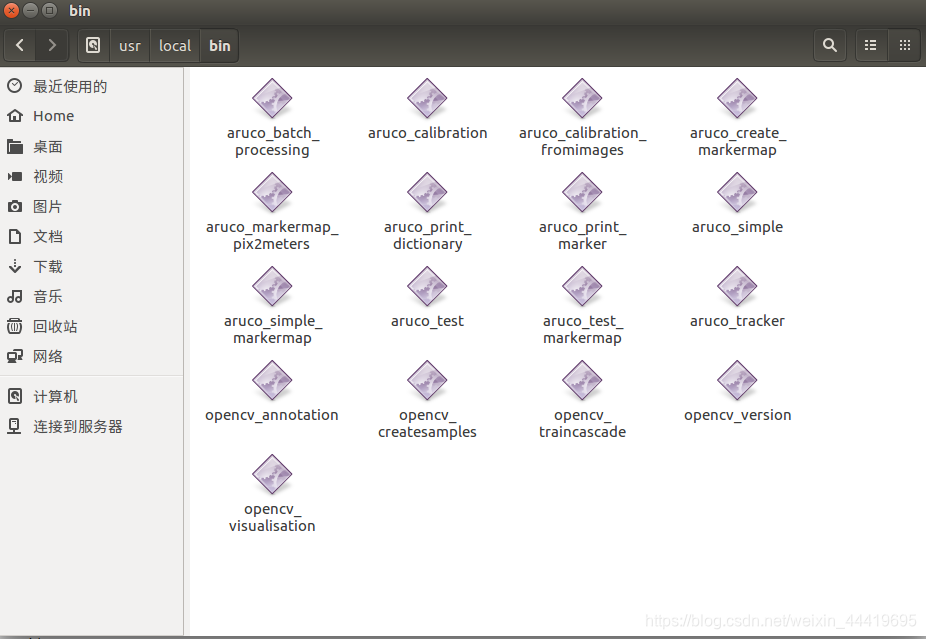
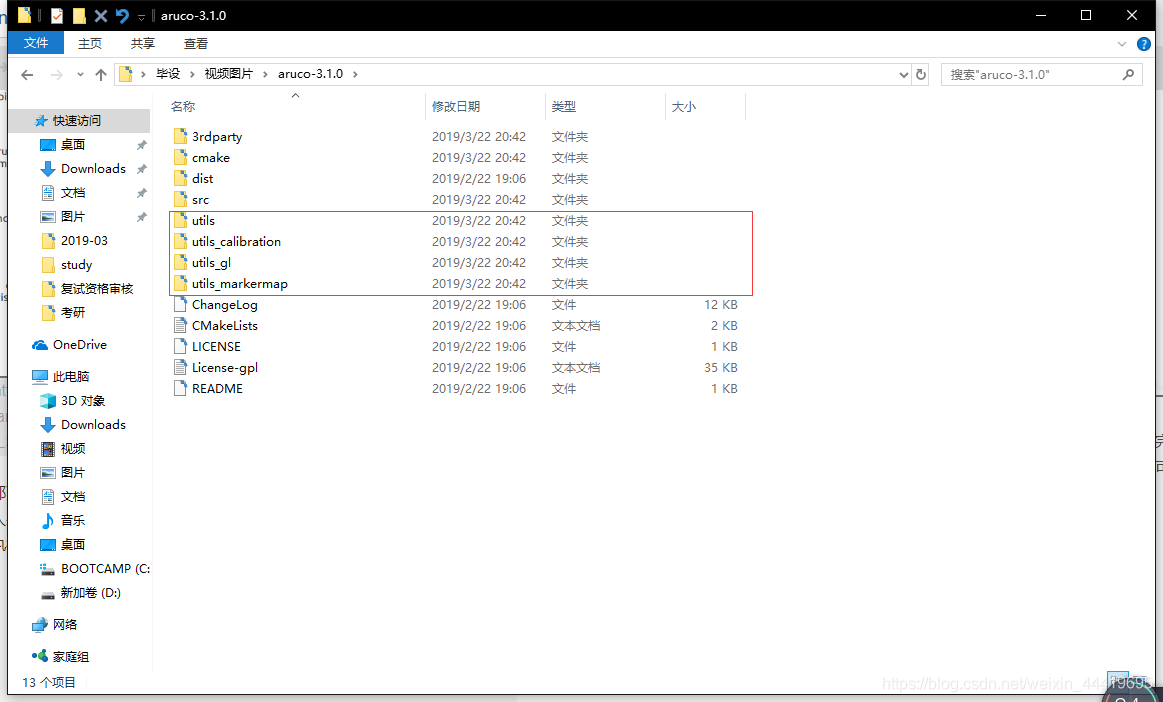
这些可执行文件的源码都可以在你的源码包中找到,当然日后我们自己写程序的时候完全可以参考这些源码。因为个人感觉这个项目的源码不是特别清晰,下面简单梳理一下我们可以在哪个文件夹下找到哪些可执行文件的源码:
细心的同学可能会发现,源码包中还有好多源码没有被生成可执行文件,这是因为在cmake配置文件中把它们屏蔽掉了。
2、接下来运行源码中几个比较常用的demo
2.1、声明
该库附带了几个demo,可以帮助您学习如何使用该库:
/utils
- #/utils / aruco_print_marker:创建标记并将其保存在可以打印的jpg文件中。
- #/utils / aruco_print_dictionary:将字典中指示的所有标记(ARUCO,APRILTAGS,ARTOOLKIT +等)保存到字典中。
- #/utils / aruco_print_dictionary:将字典中指示的所有标记(ARUCO,APRILTAGS,ARTOOLKIT +等)保存到字典中。
- #/utils / aruco_simple:检测图像中标记的简单测试应用程序
- #/utils / aruco_test:这是检测的主要应用程序。它从视频的摄像头读取图像并检测标记。此外,如果您提供相机的内在函数(通过OpenCv校准获得)和以米为单位的标记大小,库将计算标记内在函数,以便您可以轻松创建AR应用程序。
- #/utils / aruco_tracker:显示如何使用跟踪器的示例。
/utils_markermap
- #/utils_markermap / aruco_create_markermap:创建简单的标记贴图(旧板)。它创建了一个可以在一张纸上打印的标记网格。
该程序的结果是两个文件(.png和.yml).png文件是您可以打印的标记的图像。.yml文件是您需要传递给其他程序的配置文件,因此他们知道地图是如何的。.yml包含标记的位置(以像素为单位)。由于我们事先并不知道打印标记的大小,我们在这里使用像素。但是,为了获得相机,需要知道标记的实际尺寸。对于此pourpose,您可以使用程序utils_markermap / aruco_markermap_pix2meters创建一个新的.yml,其中的地图信息以米为单位。或者,所有测试程序都允许您在命令行中指示markersize。 - #/utils_markermap / aruco_markermap_pix2meters将markermap配置文件从像素转换为米
- #/utils_markermap / aruco_simple_markermap:显示如何使用标记贴图确定相机姿势的简单示例
- #/utils_markermap / aruco_test_markermap:一个更详细的示例,展示如何使用标记贴图确定相机姿势
/utils_calibration
- #/utils_calibration / aruco_calibration:使用由aruco标记组成的棋盘校准相机的程序。在此目录中,您可以找到可打印的校准板aruco_calibration_board_a4.pdf。它是一个标记图,其定义在aruco_calibration_board_a4.yml中。但是,它在程序中是硬编码的,因此您甚至不需要将其作为参数传递。
- #/utils_calibration / aruco_calibration_fromimages与上面相同,但是保存在文件中的图像
/utils_gl
- #/utils_gl / aruco_test_gl简单示例,展示如何将aruco与OpenGL结合使用
- 关于OPENGL的注意事项:该库支持与OpenGL的集成。为了编译支持OpenGL,您只需在系统中安装GL和过剩(或freeglut)的开发包。
2.2、aruco_calibration相机标定(前一篇文章有详细讲)
cd 到ArUco安装目录的bin目录下,运行:$ ./aruco_calibration
jie@jie-virtual-machine:/usr/local/bin$ sudo ./aruco_calibration
Usage: (in.avi|live[:camera_index(e.g 0 or 1)])) out_camera_calibration.yml
[-m markermapConfig.yml (configuration of the board. If use default one (in utils), no need to set this)]
[-size :(value in meters of a marker. If you provide a board that contains that information, this is ommited) ]
[-save: if enabled, saves the calibration images used]
这是一个用ArUco板标定相机的程序,因为你没有给它合适的入口参数,所以程序打印一段“Usage:”就直接退出了。根据上面的用法介绍,正确的命令应该是:
sudo ./aruco_calibration live:0 out_camera_calibration.yml -m aruco_calibration_grid_board_a4.yml -size 0.038
运行命令前看一下你的当前文件夹下有没有aruco_calibration_grid_board_a4.pdf,将pdf文件打印出来或者在另一台电脑上打开全屏显示(双显示器的就更方便啦),然后用直尺量出单个marker的边长(单位是米),如果跟我的不一样要修改“-size”后面的值。
或者直接默认
sudo ./aruco_calibration live:0 out_camera_calibration.yml s -size 0.038
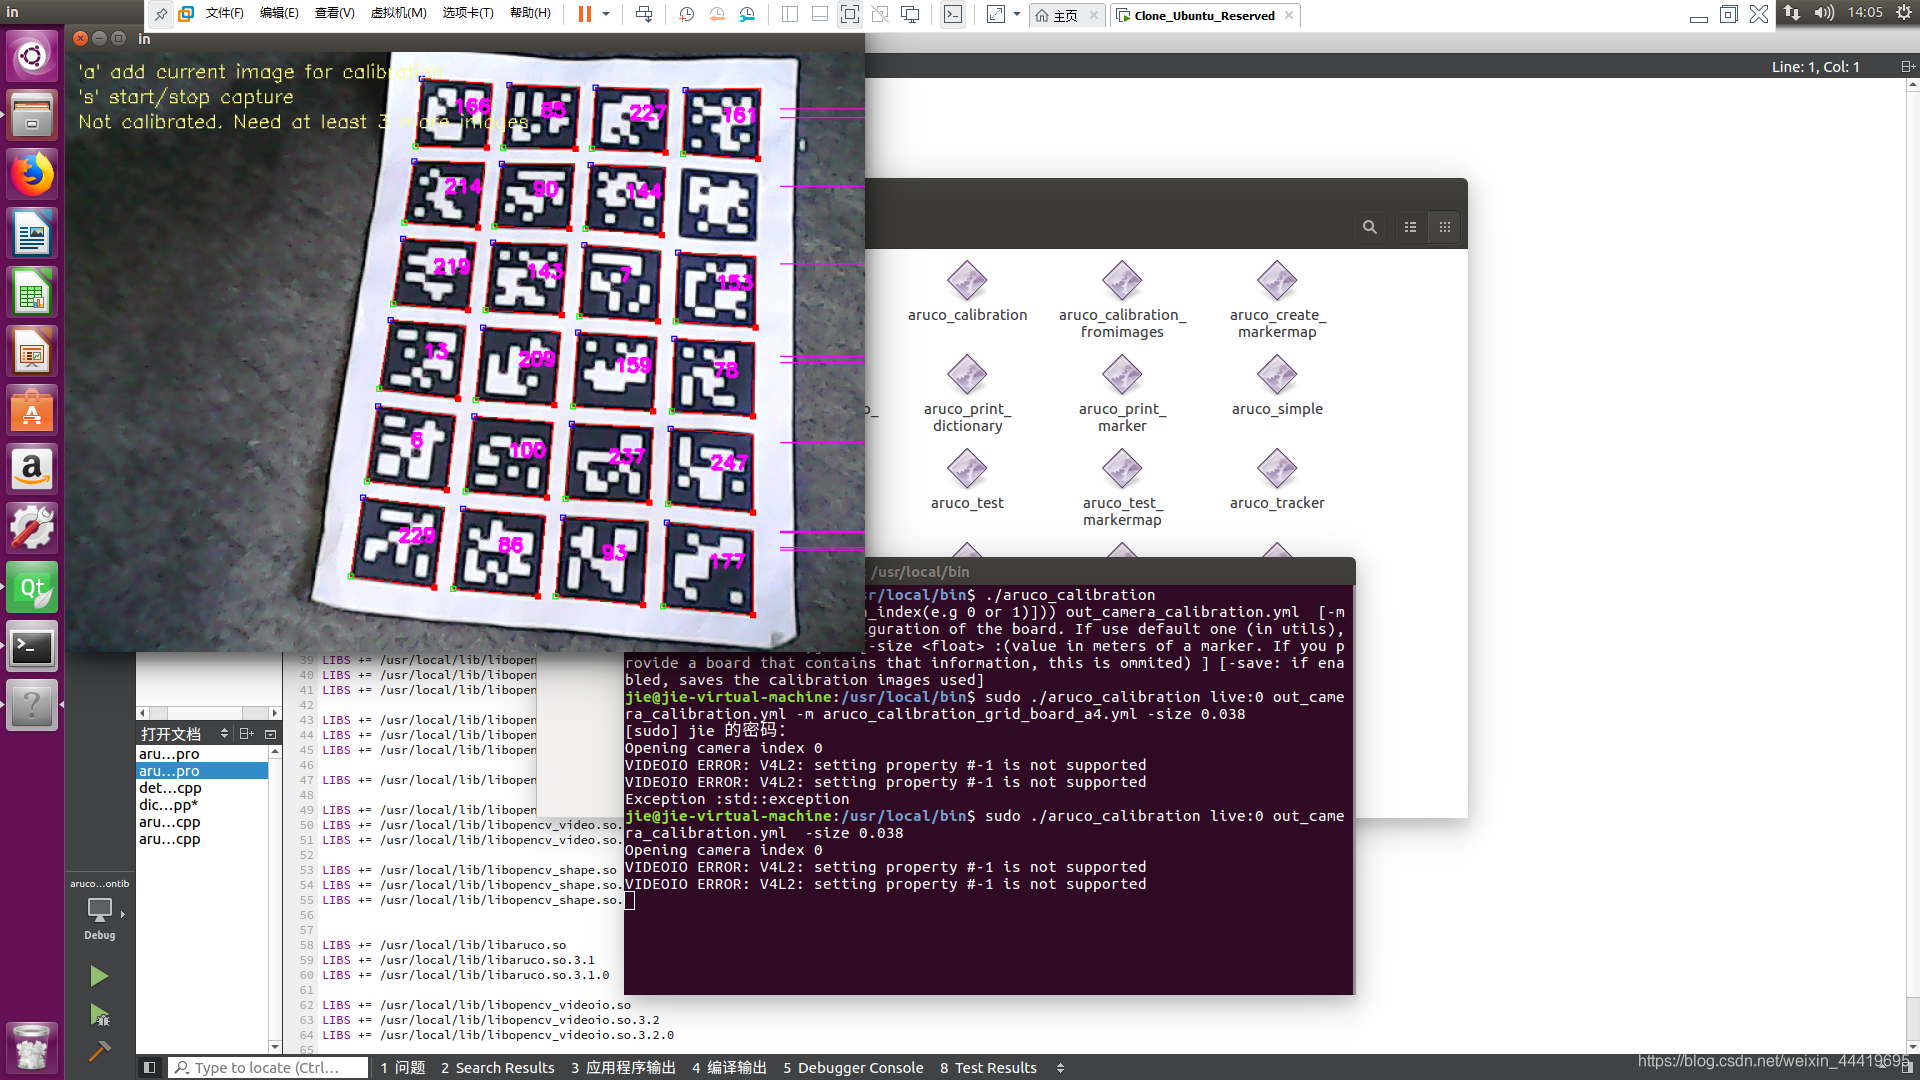
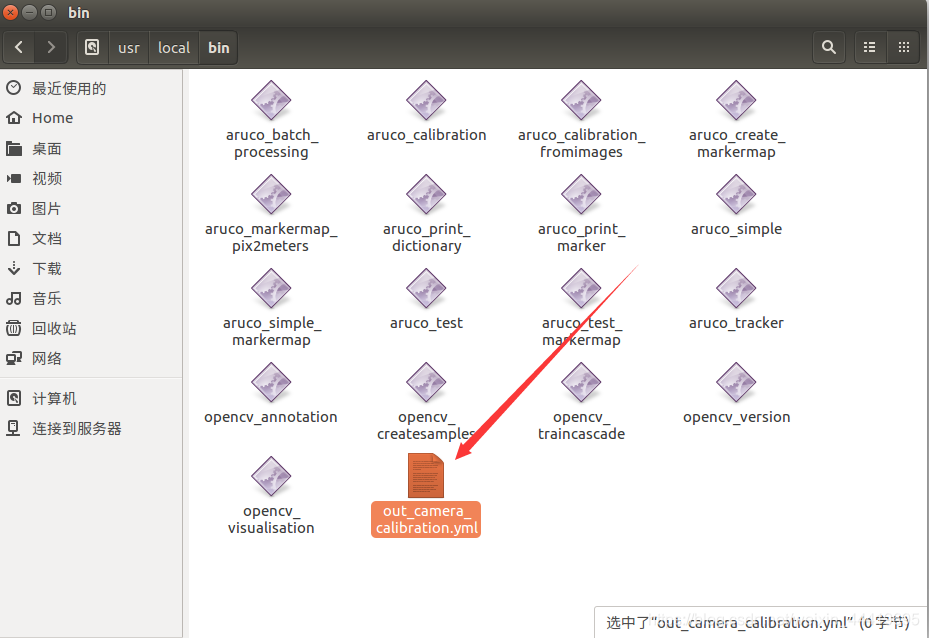
运行效果如上图所示,窗口左上角有操作提示,不赘述了。运行完了ESC键退出即可,相机标定文件保存在当前文件夹下。
补充aruco_calibration_fromimages
同理,这里只是用image来实现。先看看需要哪些参数吧
sudo ./aruco_calibration_fromimages
Usage: out_camera_calibration.yml directory_with_images [options]
options:
-size maker_size : Size of the markers in meters.
-m markersetconfig.yml : By default, the one in utils is assumed. Otherwise, set the file here
-auto_orient : forces width larger than height by flipping image 90degs.
所以只需要按这个格式,即可:
sudo ./aruco_calibration_fromimages out_camera_calibration.yml *directory_with_images*
2.3、aruco_test 检测识别 markers(前一篇文章有详细讲)
sudo ./aruco_test
Usage: (in.avi|live[:camera_index(e.g 0 or 1)]) [-c camera_params.yml]
[-s marker_size_in_meters] [-d dictionary:ALL_DICTS by default] [-h]
[-ws w:h] [-skip frames] Dictionaries: ARUCO ARUCO_MIP_16h3
ARUCO_MIP_25h7 ARUCO_MIP_36h12 ARTOOLKITPLUS ARTOOLKITPLUSBCH TAG16h5
TAG25h7 TAG25h9 TAG36h11 TAG36h10 CHILITAGS ALL_DICTS Instead of
these, you can directly indicate the path to a file with your own generated dictionary
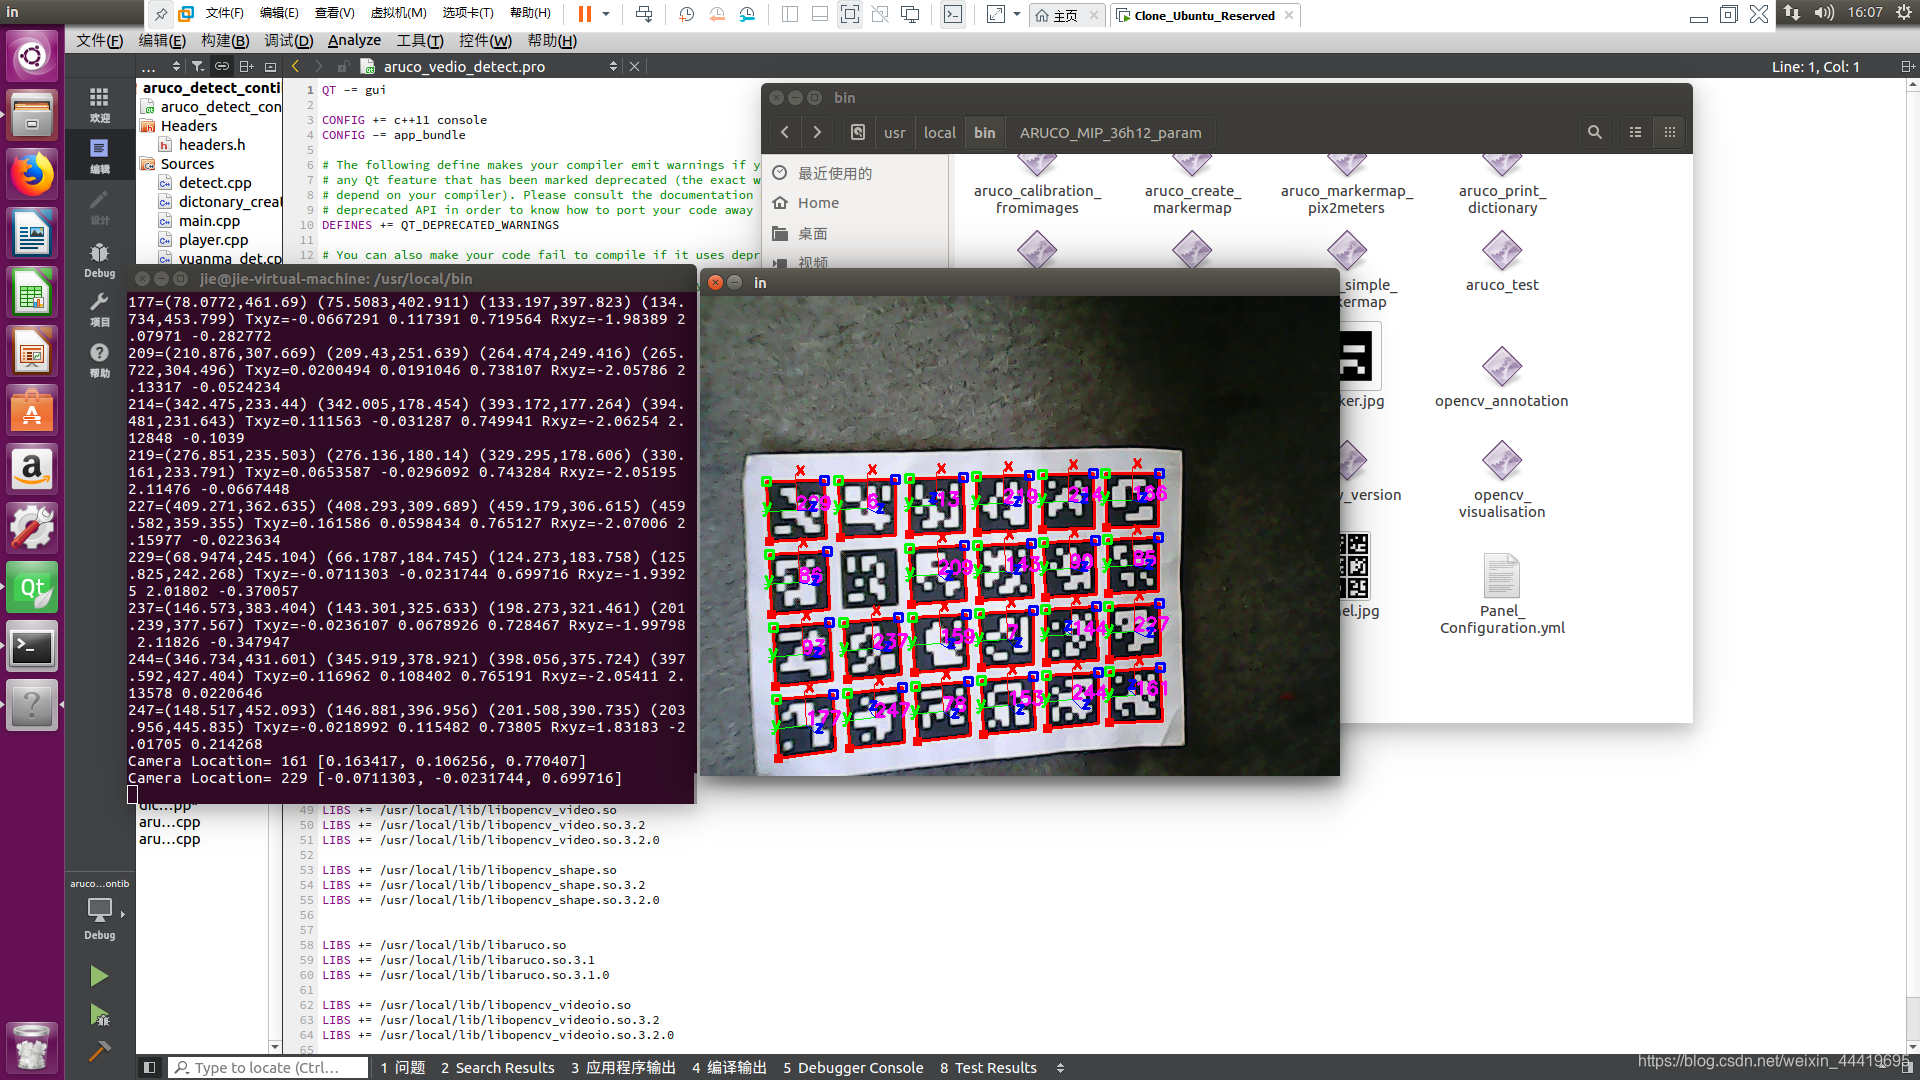
sudo ./aruco_test live:0 -c out_camera_calibration.yml -s 0.038
还用刚才的那个ArUco板,来看一下这次的运行效果:
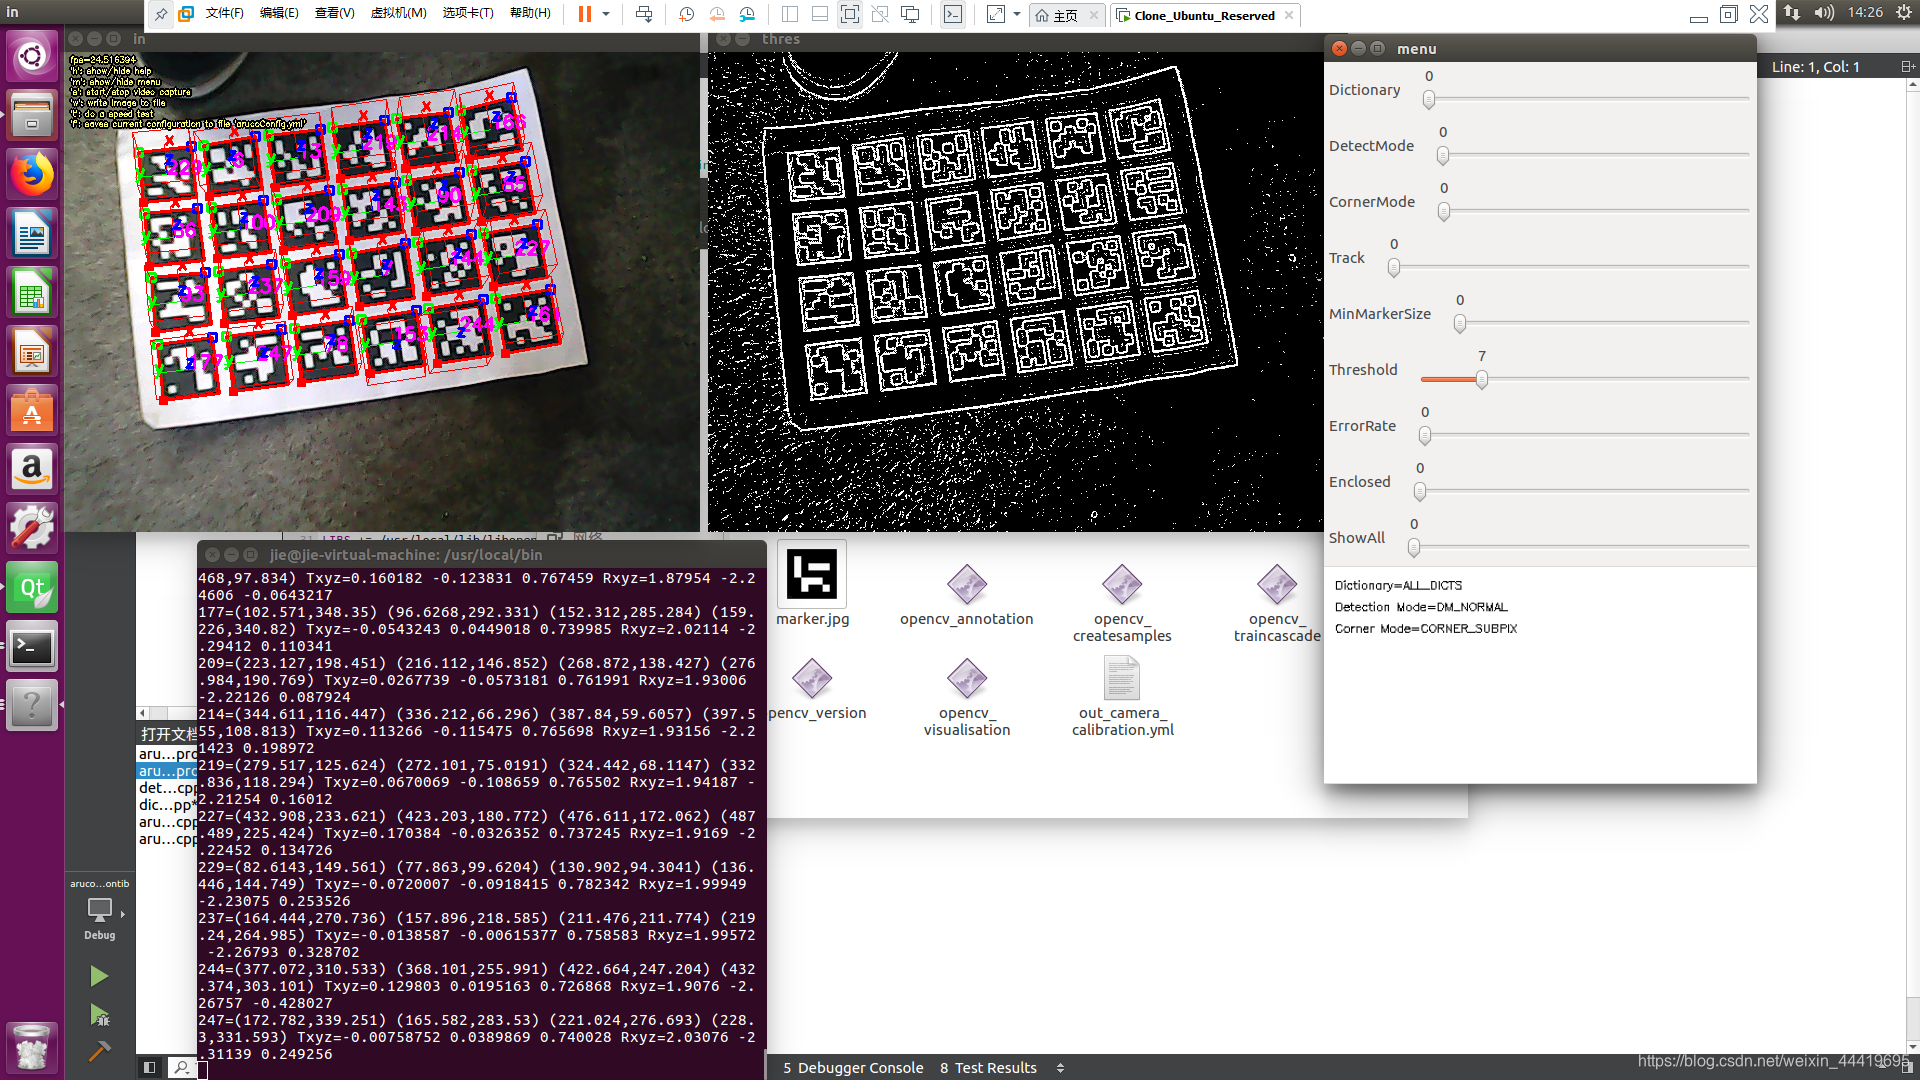
怎么样?图片是不是很炫酷!但这个东西其实对我们没什么用,真正有用的是在终端里显示的那一串串字符。每一行字符串代表的含义是:marker的id以及该marker的四个角点在图像中的像素座标,Txyz为相机座标系到该marker座标系的平移向量,Rxyz为相机座标系到该marker座标系的旋转向量。
2.4、aruco_print_marker 生成单个 marker
同上,就不再赘述了,每次先读读需要什么参数
sudo ./aruco_print_marker
Usage: outfile.(jpg|png|ppm|bmp) [options] [-e use
enclsing corners] [-bs :bit size in pixels. 50 by default ]
[-d : ARUCO_MIP_36h12 default] [-border: adds the white
border around] [-center: highlights the center] Dictionaries:
ARUCO ARUCO_MIP_16h3 ARUCO_MIP_25h7 ARUCO_MIP_36h12 ARTOOLKITPLUS
ARTOOLKITPLUSBCH TAG16h5 TAG25h7 TAG25h9 TAG36h11 TAG36h10 CHILITAGS
ALL_DICTS Instead of these, you can directly indicate the path to a
file with your own generated dictionary
运行,每次先读读需要什么参数,78表示码的ids,marker.jpg表示生成的文件,-d ARUCO表示生成的字典,-border表示生成白边,-cente表示生成中心圆点。
sudo ./aruco_print_marker 78 marker.jpg -d ARUCO -border
2.4、aruco_print_dictionary生成多个markers
sudo ./aruco_print_dictionary
Usage: outdir dictionary [ -s bit_image_size: 75 default]
Dictionaries: ARUCO ARUCO_MIP_16h3 ARUCO_MIP_25h7 ARUCO_MIP_36h12
ARTOOLKITPLUS ARTOOLKITPLUSBCH TAG16h5 TAG25h7 TAG25h9 TAG36h11
TAG36h10 CHILITAGS ALL_DICTS Instead of these, you can directly
indicate the path to a file with your own generated dictionary
sudo mkdir ARUCO_MIP_36h12_outdir
sudo  ./aruco_print_dictionary  ARUCO_MIP_36h12_outdir/  ARUCO_MIP_36h12
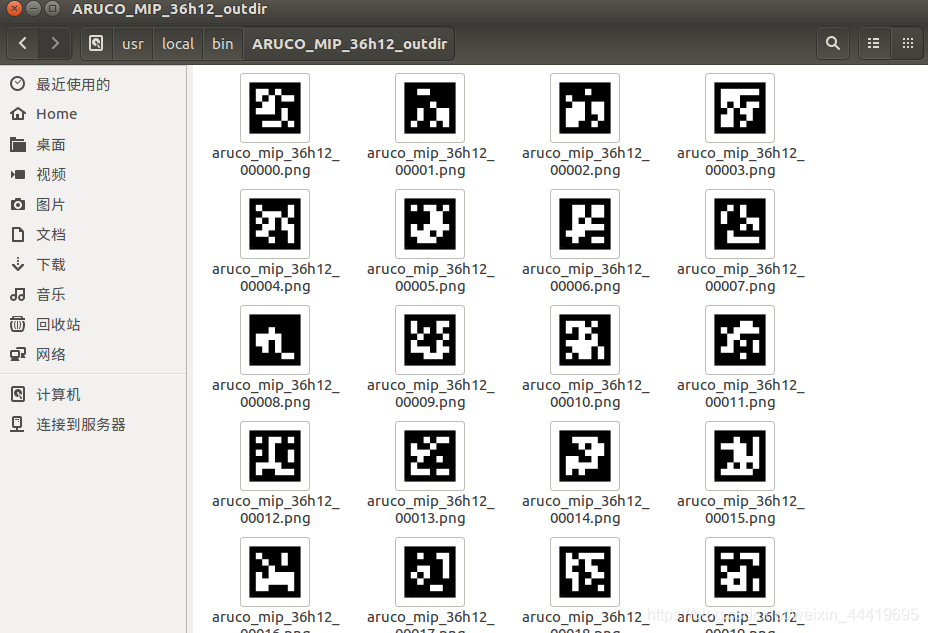
在ARUCO_MIP_36h12_dir文件夹下生成250个ARUCO_MIP_36h12字典中的marker。
**温馨提示:**用ArUco官方库生成的marker左下角自带水印,为该marker的ID;用OpenCV的aruco module生成的marker不带水印。重要的是,两者虽然是同样的编码原理,但生成的很多marker不能互相识别,说明它们二者之间的字典内容还是有所不同的。因此,有时即使是用的同一个字典名,ArUco可能也无法识别OpenCV生成的marker。
2.5、aruco_batch_processing
该程序对一组图像进行批处理。 它仅在2d中打印标记位置
sudo ./aruco_batch_processing
Usage: readDir outFile [params] [-d :ALL_DICTS default]
[-minSizeImage : minimum size of a marker in the image. Range
(0,1) 1 whole image] [-Fraser CX:CY:F:K1:K2:K3:P1:P2:b1:b2] fraser
calibration model[-MSize ] indicates the size of the
marker[-fast] uses the fast mode Dictionaries: ARUCO ARUCO_MIP_16h3
ARUCO_MIP_25h7 ARUCO_MIP_36h12 ARTOOLKITPLUS ARTOOLKITPLUSBCH TAG16h5
TAG25h7 TAG25h9 TAG36h11 TAG36h10 CHILITAGS ALL_DICTS Instead of
these, you can directly indicate the path to a file with your own
generated dictionary Example to work with apriltags dictionary :
video.avi -d TAG36h11
在当前目录下生成放参数的文件
sudo mkdir ARUCO_MIP_36h12_param
执行
sudo ./aruco_batch_processing ARUCO_MIP_36h12_outdir/ ARUCO_MIP_36h12_param/
为啥文件夹里没有,这里还不清楚,留待研究,但是程序执行没有报错,应该是参数的问题。
2.6、aruco_create_markermap创建标记并将其保存在可以打印的jpg文件中。
sudo ./aruco_create_markermap
Usage: X:Y Image.png Configuration.yml [-d dictionary_name
(ARUCO_MIP_36h12 default)] [-s ] [-t (0: panel,1:
chessboard )] [-r rand_seed] [-i interMarkerDistance(0,1)] [-ids
n1:n2:… List the ids to be employed] Dictionaries: ARUCO
ARUCO_MIP_16h3 ARUCO_MIP_25h7 ARUCO_MIP_36h12 ARTOOLKITPLUS
ARTOOLKITPLUSBCH TAG16h5 TAG25h7 TAG25h9 TAG36h11 TAG36h10 CHILITAGS
ALL_DICTS
注释:X:Y表示生成的靶标盘是行列是几乘几的,最后生成 Image.png 、Configuration.yml两个文件,-d 加字典,-s 加生成图片的像素大小,-t表示生成的jpg是那种格式有0、1两种选项,-i表示靶标间隔0.1表示一格,-ids表示打印多个靶标需要的id(切记:和X:Y需要的多个靶标数量的一致)
例:
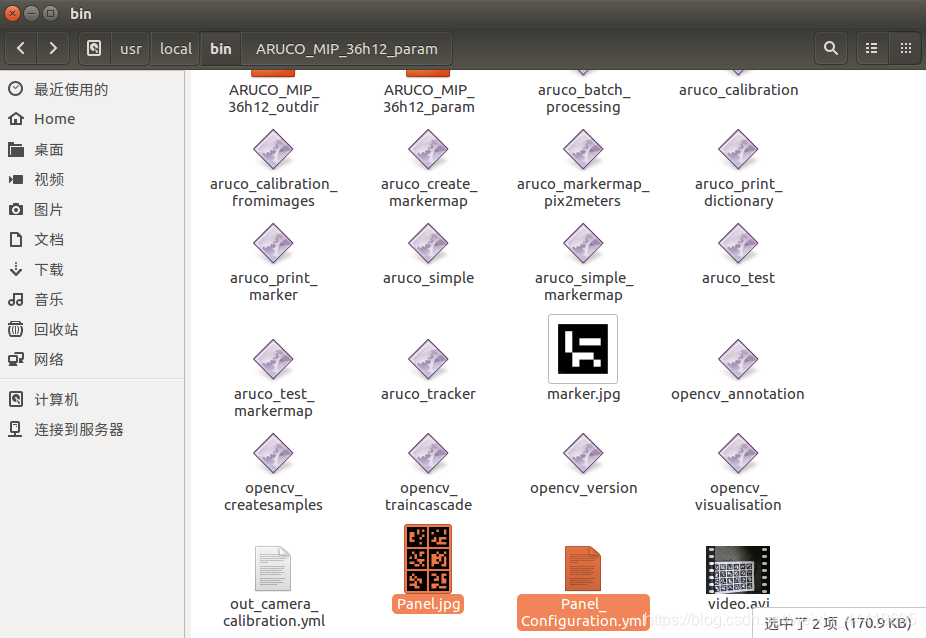
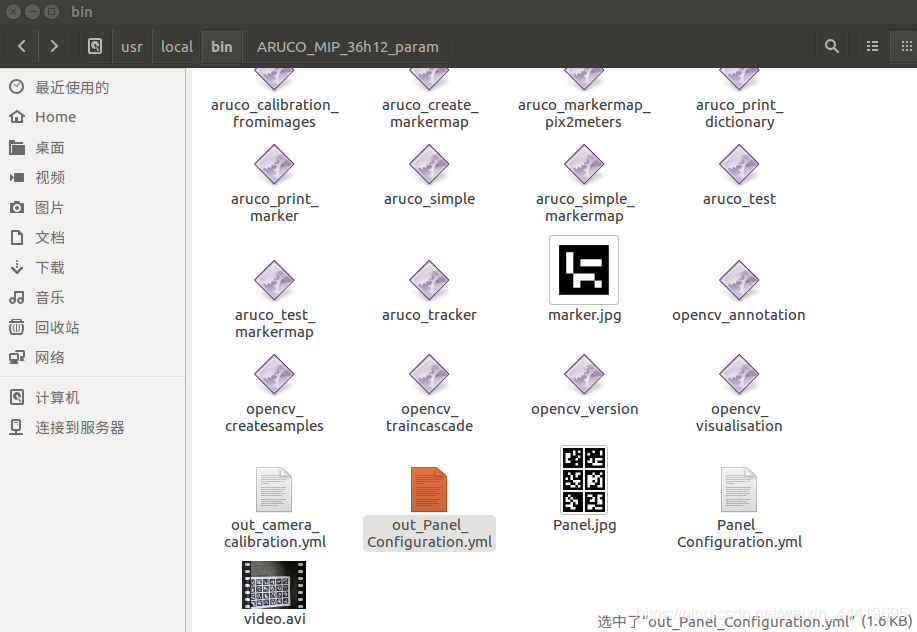
sudo ./aruco_create_markermap 2:3 Panel.jpg Panel_Configuration.yml -s 900 -t 0 -i 0.1 -ids 23:234:45:34:57:54
补:aruco_markermap_pix2meters将markermap配置文件从像素转换为米
sudo ./aruco_markermap_pix2meters
Usage: in_boardConfiguration.yml markerSize_meters
out_boardConfiguration.yml
sudo ./aruco_markermap_pix2meters Panel_Configuration.yml 0.4 out_Panel_Configuration.yml
如下,你可以打开out_Panel_Configuration.yml比较 Panel_Configuration.yml,可以发现角点的参数已经从像素点转化成了米。
2.7、aruco_simple
sudo ./aruco_simple
Usage: (in_image|video.avi) [-c cameraParams.yml] [-s markerSize] [-d
:ALL_DICTS default] [-f arucoConfig.yml] Dictionaries:
ARUCO ARUCO_MIP_16h3 ARUCO_MIP_25h7 ARUCO_MIP_36h12 ARTOOLKITPLUS
ARTOOLKITPLUSBCH TAG16h5 TAG25h7 TAG25h9 TAG36h11 TAG36h10 CHILITAGS
ALL_DICTS Instead of these, you can directly indicate the path to a
file with your own generated dictionary Example to work with apriltags
dictionary : video.avi -d TAG36h11
这里需要录制一个视频文件,复制到要进行操作的文件夹
sudo cp video.avi /usr/local/bin/
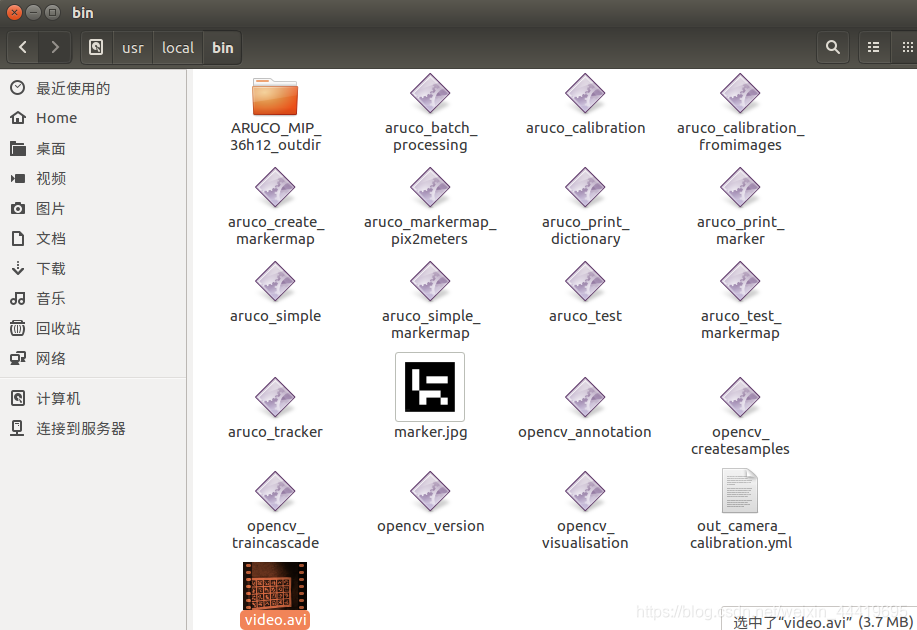
再执行命令:
sudo ./aruco_simple video.avi -c out_camera_calibration.yml -s 0.038
得到如下结果,能够识别出
本文内容由网友自发贡献,版权归原作者所有,本站不承担相应法律责任。如您发现有涉嫌抄袭侵权的内容,请联系:hwhale#tublm.com(使用前将#替换为@)