Keras解读:使用Model()类构建网络模型的底层原理

2023-05-16

目录

一、前言:

二、topology.py脚本简述

三、继承了Layer类的子类一般要实现(重写)以下methods:

四、Node、layer、tensor在网络构建过程中的关系(建议结合源码理解)

1、Node

2、layer

3、tensor


一、前言:

我们在使用keras来构建自己的卷积神经网络模型时,一般都会使用泛型函数Model()来构建,举一个简单的例子:

'''import步骤省略,具体参数配置省略'''
input = Input(shape=(3, 3))  # 模型输入层
x = Conv2D(...)(input)  # 中间层
x = BatchNormalization(...)(x)  # 中间层
output = LeakyReLU(...)(x)  # 模型输出层
Model(input, output)  # 根据input及output来构建模型

在上面例子中,我们构建了一个单输入单输出模型。首先,我们创建了一个shape(3, 3)的输入张量input,并简单搭建了一个卷积网络,得到输出张量output,最终通过调用Model(input, output)来完成模型的构建。在这过程中,相信大家或多或少都有一个疑问:keras是怎么通过调用Model()来实现网络图(graph)的构建的呐

二、topology.py脚本简述

要回答上面这个问题,还得从keras的底层源码之一——topology.py说起。topology.py定义了keras在构建模型流图(即模型的网络结构)时的拓扑规则。下面就以图形的形式来讲解topology.py文件。

首先需要了解下topology.py文件中的类(class)结构,及其继承、调用关系:

如上图所示,基类Layer()定义了网络结构中所有层的基本属性及方法,除了图中提到的class外,keras的其他所有层类(如全连接层Dense、二维卷积层Conv2D、泛型函数Model)都是直接或间接继承Layer()类,并通过overwrite有关Methods或增添相应的PropertiesMethods而来的。

InputSpec()类用以指定网络中每一个layerinput tensor的维度数(ndim)、数据类型(dtype)、维度(shape)等属性,并在构建有关layer时用以检测该layer输入tensor(s)的兼容性。

InputLayer()类定义了每个模型网络结构的原始输入tensor的有关信息。

Node()类用以在每个layer中创建node节点,使得该layer跟与其前后有关的layers关联起来。具体怎么关联,下面会有详细的介绍。

Container()类通过递归的方式,从模型的最终输出layer(s)层的output tensor(s)开始,根据每个layernode信息反向递归找出模型的所有网络层信息并构建模型的整体网络图(graph)(有点类似C语言中链表结构的递归查询)。上述提到的泛型函数Model()就是通过继承Container()类而来的。

三、继承了Layer类的子类一般要实现(重写)以下methods

1、__init__(): Defines custom layer attributes, and creates layer state variables that do not depend on input shapes, using add_weight().

定义自定义层属性,并创建不依赖于输入形状的层状态变量。

2、build(self, input_shape): This method can be used to create weights that depend on the shape(s) of the input(s), using add_weight(). __call__() will automatically build the layer (if it has not been built yet) by calling build().

用来创建依赖于输入shapeweights,即每层的权重。在layer的创建中,build() methods过调用add_weight()方法来创建layerweights在基类Layerbuild() methods为空:

class Layer(object):
  """   代码其余部分省略   """
    def build(self, input_shape):
        """Creates the layer weights.
        Must be implemented on all layers that have weights.
        # Arguments
            input_shape: Keras tensor (future input to layer)
                or list/tuple of Keras tensors to reference
                for weight shape computations.
        """
        self.built = True

因此build() methods需要在在继承了Layer class的子类中实现,以class _Conv(Layer):类为例,其实现build() method的方式为:

class _Conv(Layer):
"""   代码其余部分省略   """
def build(self, input_shape):
        if self.data_format == 'channels_first':
            channel_axis = 1
        else:
            channel_axis = -1
        if input_shape[channel_axis] is None:
            raise ValueError('The channel dimension of the inputs '
                             'should be defined. Found `None`.')
        input_dim = input_shape[channel_axis]
        kernel_shape = self.kernel_size + (input_dim, self.filters)
        self.kernel = self.add_weight(shape=kernel_shape,
                                      initializer=self.kernel_initializer,
                                      name='kernel',
                                      regularizer=self.kernel_regularizer,
                                      constraint=self.kernel_constraint)
        if self.use_bias:
            self.bias = self.add_weight(shape=(self.filters,),
                                        initializer=self.bias_initializer,
                                        name='bias',
                                        regularizer=self.bias_regularizer,
                                        constraint=self.bias_constraint)
        else:
            self.bias = None
        # Set input spec.
        self.input_spec = InputSpec(ndim=self.rank + 2,
                                    axes={channel_axis: input_dim})
        self.built = True

3、call(self, *args, **kwargs): Called in __call__ after making sure build() has been called. call() performs the logic of applying the layer to the input tensors (which should be passed in as argument). Two reserved keyword arguments you can optionally use in call() are: - training (boolean, whether the call is in inference mode or training mode) - mask (boolean tensor encoding masked timesteps in the input, used in RNN layers)

__call__ method中,build() method被调用之后调用call() method,用以处理该layerinput tensors,并输出相应的output tensors。类似于上述build method的实现原理,在Layer中,并没有对call method进行具体的实现:

class Layer(object):
"""   代码其余部分省略   """
    def call(self, inputs, **kwargs):
        """This is where the layer's logic lives.
        # Arguments
            inputs: Input tensor, or list/tuple of input tensors.
            **kwargs: Additional keyword arguments.
        # Returns
            A tensor or list/tuple of tensors.
        """
        return inputs

因此需要在Layer的子类中对其进行具体的实现,同样以class _Conv(Layer):类为例,其实现call() method的方式为:

class _Conv(Layer):
"""   省略其余部分代码   """
    def call(self, inputs):
        if self.rank == 1:
        """   省略该部分代码   """
        if self.rank == 2:
            outputs = K.conv2d(
                inputs,
                self.kernel,
                strides=self.strides,
                padding=self.padding,
                data_format=self.data_format,
                dilation_rate=self.dilation_rate)
        if self.rank == 3:
        """   省略该部分代码   """
        if self.use_bias:
            outputs = K.bias_add(
                outputs,
                self.bias,
                data_format=self.data_format)
        if self.activation is not None:
            return self.activation(outputs)
        return outputs

4、get_config(self): Returns a dictionary containing the configuration used to initialize this layer. If the keys differ from the arguments in __init__, then override from_config(self) as well. This method is used when saving the layer or a model that contains this layer.

在开始例子中我们使用到的泛型函数Model()其实就是继承了Container()类而来的,其类原型是Model(Container)。而另外一种序列模型Sequential()就是继承了Model()而来的,其原型是Sequential(Model)

四、Node、layer、tensor在网络构建过程中的关系(建议结合源码理解)

事实上,从源码中可以看出,node、layer和tensor的关系是相辅相成的。在模型的网络流图构建过程中,tensor(s)在每个layer中流动,在流动过程中,每一个layer都会创建并绑定一个或多个(一般共享层会有多个node)node,node把这些tensor与layer的前后关系联系起来,进而实现tensor、layer、node三者的相互联系。

就以泛型模型Model的网络流图的建立为例,举一个由Model构建的模型的简单例子,如下图所示:

图中所示模型的网络流图共有7个网络层Layer A~G,并假设LayerF为连结(concatenate)层而不是共享层,本次不讨论含有共享层的情况。每个layer都绑定有一个Node结点,网络的输入层为Layer A(该输入层就是使用上述的InputLayer()创建的),输出层为Layer GIN1为LayerA的输入tensor,OUT1为LayerA的输出tensor也即LayerB和LayerC的输入tensor IN2、IN3,其他同理。

1、Node

node并不参与计算,只是用来记录各layer、tensor之间关系的一个桥梁。以Layer F的node6为例说明其Node关联Layer E、Layer D及Layer G的过程。其他的与此相同。

首先,node的常用属性如下图所示:

乍一看貌似挺多,但是别怕!理解起来真不难!我们一个个来解释:

首先,大家可能注意到这些属性中只有“outbound_layer”是单数形式,其他的都是复数形式。这是由于outbound_layer代表将input tensors转化成output tensors的层,上图可以看出在Layer F中,完成IN6OUT6转换过程的layer正是Layer F本身,而这个层还只有且只能有一个,这一点不难理解。

inbound_layers表示node6的入站层,可以有多个,图中不难看出,node6inbound_layersLayer E和Layer D两个,即inbound_layers[] = [Layer ELayer D]。

node_indices表示Layer Fnode的索引,当一个Layer中有2个或2个以上的node时,一般对应着共享层,此处只讨论非共享层的情况,因此每个Layer只有一个node,因此这种情况下node_indices0,即一个。

tensor_indices表示Layer Foutput_tensors中每个tensor的索引,对应多输出的情况。假设图中的layer全部是单输出layer,所以node6tensor_indices0,即只输出一个tensor

input_tensorsoutput_tensors分表示该node的输入tensor与输出tensor。从图中可以看出,node6input_tensors有两个,output_tensors有一个。

input_shapesoutput_shapes分表示input_tensorsoutput_tensorstensorshape,这点容易理解。

2、layer

layer参与了各个层级tensor的各种计算过程。前面说了node与layer是相辅相成的,node是绑定的在相应的layer上使用的,下面来看看layer上是如何记录与其有关的node信息的吧。

首先,还是先看下layer的跟node有关的常用属性如下:

上述两个属性都是列表类型,在调用Node()时更新。更新时的代码段如下:

class Node(object):
    def __init__(self, outbound_layer,
                 inbound_layers, node_indices, tensor_indices,
                 input_tensors, output_tensors,
                 input_masks, output_masks,
                 input_shapes, output_shapes,
                 arguments=None):
        """   此处省略部分代码   """
        # Add nodes to all layers involved.
        for layer in inbound_layers:
            if layer is not None:
                layer._outbound_nodes.append(self)
        outbound_layer._inbound_nodes.append(self)
        """   此处省略部分代码   """

在源码中,对这两个属性的解释如下:

"""
    Each time a layer is connected to some new input,
    a node is added to `layer._inbound_nodes`.
    Each time the output of a layer is used by another layer,
    a node is added to `layer._outbound_nodes`.
"""

翻译成人话就是:当一个layer被连接到新的输入上时,一个node就被加入到当前层的_inbound_nodes[]中,该node将作为当前层中的入站node。相应的,当前层的输出作为下一层的输入被传递到下一个层时,下一层接收该输出的node就会被添加到当前层的_outbound_nodes[]中。

如果还是觉得上面解释比较拗口,就拿上图中的Layer F为例解释一下。我们看到有两个层的输出被连接到Layer F的输入中,因此Layer F的_inbound_nodes[]=[Node6],注意!这里并不是[Node4, Node5]。注意layer的入站结点(_inbound_nodes)与node的入站层(inbound_layers)的区别。Layer F的输出OUT6被Layer G用作输入,因此Layer F的_outbound_nodes[]=[Node7]

事实上,模型的网络流图构建完成后,node和layer都已经固定了,在图中流动的只有tensor,而不是node也不是layer。“入站节点”、“出站节点”只是一种习惯叫法,并不是说node也是动态流动的,知道了这一点再去理解上面的解释可能会更清楚点。

3、tensor

tensor在layer之间流动。在模型的网络流图构建过程中,每个tensor一般都是以占位符(placeholder)的形式存在的。每一个tensor也会有一些属性来表示该tensor的来历,这些属性如下:

 直接用例子说明三个参数的意思吧:在上图的Layer F中,OUT6的inbound_layer为Layer F,node_index为0,tensor_index为0。概括来说,tensor的_keras_history属性记录了该tensor来自哪里。

这些属性是在layer创建时对每层layer的输出tensor设置的,因为输入与输出是相对的,因此我们可以根据最终的输出tensor的_keras_history属性通过递归来得到整个模型的网络流图结构。可以用下面的表达式来表示这一关系:

                      input_tensors[ ] = inbound_layers[ ]._inbound_nodes[ ].output_tensors[ ]

即当前层的输入(input_tensors)等于其入站层(inbound_layers)中入站结点(_inbound_nodes)的输出(output_tensors)。

总的来说,node是一个桥梁,记录了各layer、tensor之间的关系;各layer又记录了与自身相关的node;而最终流动的tensor则记录了与其相关的出身信息_keras_history。因此通过最终的输出tensor可以找到其产生的层,通过这个层可以找到层中的结点,通过该节点又能更进一步地找到前一个tensor,如此往前递归搜索,就可以建立一幅完整的网络流图了。这个过程的代码段如下:

class Container(Layer):
"""   省略部分代码段   """        
    def __init__(...):
        ......
        def build_map_of_graph(tensor, finished_nodes, nodes_in_progress,
                               layer=None, node_index=None, tensor_index=None):
            """Builds a map of the graph of layers.

            This recursively updates the map `layer_indices`,
            the list `nodes_in_decreasing_depth` and the set `container_nodes`.

            # Arguments
                tensor: Some tensor in a graph.
                finished_nodes: Set of nodes whose subgraphs have been traversed
                    completely. Useful to prevent duplicated work.
                nodes_in_progress: Set of nodes that are currently active on the
                    recursion stack. Useful to detect cycles.
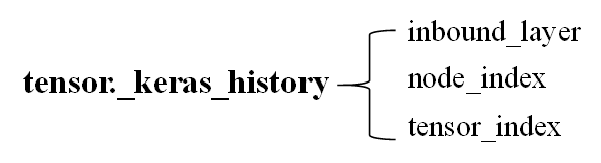
                layer: Layer from which `tensor` comes from. If not provided,
                    will be obtained from `tensor._keras_history`.
                node_index: Node index from which `tensor` comes from.
                tensor_index: Tensor_index from which `tensor` comes from.

            # Raises
                RuntimeError: if a cycle is detected.
            """
            if not layer or node_index is None or tensor_index is None:
                layer, node_index, tensor_index = tensor._keras_history
            node = layer._inbound_nodes[node_index]

            # Prevent cycles.
            if node in nodes_in_progress:
                raise RuntimeError(
                    'The tensor ' + str(tensor) + ' at layer "' +
                    layer.name + '" is part of a cycle.')

            # Don't repeat work for shared subgraphs
            if node in finished_nodes:
                return

            # Update container_nodes.
            container_nodes.add(self._node_key(layer, node_index))

            # Store the traversal order for layer sorting.
            if layer not in layer_indices:
                layer_indices[layer] = len(layer_indices)

            nodes_in_progress.add(node)

            # Propagate to all previous tensors connected to this node.
            for i in range(len(node.inbound_layers)):
                x = node.input_tensors[i]
                layer = node.inbound_layers[i]
                node_index = node.node_indices[i]
                tensor_index = node.tensor_indices[i]
                build_map_of_graph(x, finished_nodes, nodes_in_progress,
                                   layer, node_index, tensor_index)

            finished_nodes.add(node)
            nodes_in_progress.remove(node)

            nodes_in_decreasing_depth.append(node)

        finished_nodes = set()
        nodes_in_progress = set()
        for x in self.outputs:
            build_map_of_graph(x, finished_nodes, nodes_in_progress)
    ......


解释了泛型模型的创建过程,下面看一下序列模型( Sequential(Model) )的一个流图,是不是感觉结构很简单了?

Sequential模型


本文内容由网友自发贡献,版权归原作者所有,本站不承担相应法律责任。如您发现有涉嫌抄袭侵权的内容,请联系:hwhale#tublm.com(使用前将#替换为@)

Keras解读:使用Model()类构建网络模型的底层原理 的相关文章

随机推荐

  • 力扣刷题常用的c++库函数

    文章目录 1 xff0c max和min1 max函数2 xff0c min函数 2 xff0c sort函数sort 函数和lambda表达式 3 xff0c reverse 函数1 reverse函数可以反转一个字符串2 反转字符数组3
  • STM32学习(4)串口实验

    串口设置的一般步骤可以总结为如下几个步骤 xff1a 串口时钟使能 xff0c GPIO 时钟使能串口复位GPIO 端口模式设置串口参数初始化开启中断并且初始化 NVIC xff08 如果需要开启中断才需要这个步骤 xff09 使能串口编写
  • 【Docker】 入门与实战学习(Docker图形化工具和Docker Compose)

    文章目录 前言Docker图形化工具1 查看portainer镜像2 portainer镜像下载3 启动dockerui容器4 浏览器访问5 单机版Docker xff0c 直接选择Local xff0c 点击连接6 使用即可 Docker
  • 第三天_DOM

    第三天 Web APIs 学习目标 xff1a 能够使用removeChild 方法删除节点 能够完成动态生成表格案例 能够使用传统方式和监听方式给元素注册事件 能够说出事件流执行的三个阶段 能够在事件处理函数中获取事件对象 能够使用事件对
  • MySQL知识点整理汇总

    文章目录 前言一 数据库与SQL1 数据库与数据库管理系统2 关系数据库3 MySQL语句的种类4 MySQL语句的基本书写规则 二 MySQL语句的两大顺序1 MySQL 语句的书写顺序2 MySQL 语句的执行顺序 三 表的创建 删除与
  • 麦克科马克

    这里写自定义目录标题 欢迎使用Markdown编辑器新的改变功能快捷键合理的创建标题 xff0c 有助于目录的生成如何改变文本的样式插入链接与图片如何插入一段漂亮的代码片生成一个适合你的列表创建一个表格设定内容居中 居左 居右SmartyP
  • ROS-创建工作空间与功能包

    这里写目录标题 一 工作空间的组成与结构二 创建工作空间三 创建功能包四 设置环境变量五 功能包的package xml文件和CMakeLists txt文件 一 工作空间的组成与结构 工作空间的组成 xff1a src用于存放功能包源码
  • 「NeurIPS 2020」基于局部子图的图元学习

    点击蓝字 xff0c 设为星标 NeurIPS 2020 的接收论文 Graph Meta Learning via Local Subgraphs xff0c G META 是第一个使用局部子图来进行元学习的模型 Graph Meta L
  • Keras:Input()函数

    目录 1 Keras Input 函数 2 函数定义 xff1a 3 参数解释 4 例子 1 Keras Input 函数 作用 xff1a 初始化深度学习网络输入层的tensor 返回值 xff1a 一个tensor 2 函数定义 xff
  • JDBC入门笔记

    目录 1 xff0c JDBC概述 1 1 JDBC概念 2 xff0c JDBC快速入门 Java操作数据库的流程 2 1 编写代码步骤 3 JDBC API详解 3 1 DriverManager 3 2 Connection 3 2
  • 对抗样本入门详解

    文章目录 对抗样本基本原理对抗样本的发生对抗样本防御难在哪里对抗训练隐藏梯度defensive distillation 对抗样本的生成对抗样本生成方法介绍利用GAN生成对抗样本利用FGSM生成对抗样本代码复现 xff08 基于mnist
  • white/black-box attack(黑盒白盒攻击基础)

    基本概念 攻击方法分类标准 xff1a 假正性攻击 false positive 与伪负性攻击 false negative 假正性攻击 xff1a 原本是错误的但被被攻击模型识别为正例的攻击 eg 一张人类不可识别的图像 xff0c 被D
  • KL散度公式详解

    目录 文章目录 Jensen 39 s inequality讲解KL散度 xff08 又名relative entropy xff09 mutual information Jensen s inequality f x
  • 元学习算法MAML论文详解

    论文信息 题目 xff1a Model Agnostic Meta Learning for Fast Adaptation of Deep Networks 作者 xff1a Chelsea Finn 伯克利大学 xff0c Pieter
  • PINN内嵌物理知识神经网络入门及文献总结

    喜欢可点赞关注 xff0c 并收藏 xff0c 您的支持就是我的写作的动力 文章目录 一 PINN介绍二 物理信息驱动深度学习动手编程教程三 物理信息驱动深度学习方法几点讨论四 相关论文1 定义问题 建立工程架构2 网络结构选择3 不确定性
  • 极限学习机(Extreme Learning Machine,ELM)详解

    ELM ELM的提出目的是为了解决人工神经网络训练时耗费的时间和高成本 对此 xff0c 2004年由南洋理工大学的黄广斌提出了ELM学习理论 机器或者生物学习可以不需要调整隐层节点 xff1a 给定任何连续目标函数或者可分类目标 xff0
  • PINN深度学习求解微分方程系列一:求解框架

    下面我将介绍内嵌物理知识神经网络 xff08 PINN xff09 求解微分方程 首先介绍PINN基本方法 xff0c 并基于Pytorch框架实现求解一维Poisson方程 内嵌物理知识神经网络 xff08 PINN xff09 入门及相
  • PINN深度学习求解微分方程系列三:求解burger方程逆问题

    下面我将介绍内嵌物理知识神经网络 xff08 PINN xff09 求解微分方程 首先介绍PINN基本方法 xff0c 并基于Pytorch的PINN求解框架实现求解含时间项的一维burger方程逆问题 内嵌物理知识神经网络 xff08 P
  • 深度学习求解微分方程系列五:PINN求解Navier-Stokes方程正逆问题

    下面我将介绍内嵌物理知识神经网络 xff08 PINN xff09 求解微分方程 首先介绍PINN基本方法 xff0c 并基于Pytorch的PINN求解框架实现求解含时间项的二维Navier Stokes方程 内嵌物理知识神经网络 xff
  • Keras解读:使用Model()类构建网络模型的底层原理

    目录 一 前言 xff1a 二 topology py脚本简述 三 继承了Layer类的子类一般要实现 xff08 重写 xff09 以下methods xff1a 四 Node layer tensor在网络构建过程中的关系 建议结合源码