
hello,大家国庆快乐~今天是国庆节第三天啦,你有好好学习吗?😏😏本来今天决定更新websocket系统的,但是在我国庆节第一天发布的这篇文章:
国庆七天乐,写博也快乐之微信小程序天气预报+根据天气自动变换背景图实战(使用和风天气API)
有朋友私信我说这个个人中心的样式设计特别好看,想知道怎么做的,那么今天就让我水一篇博客吧🤭🤭🤭,分享一下做法,其实看起来很简单实则也是有一些小技巧在里面的,欢迎收藏、点赞和评论噢😎😎
这篇博文要结合上一篇的一起来噢,因为这里有天气预报、背景颜色变换的功能,要结合一起😏😏😏不然会有点懵,好啦,喜欢这个样式效果的朋友就拿去吧~
文章目录
- 样式效果🤘
- 天气🌅
- 开整🤠
- icon-font阿里图标⭐
- 页面🐠
- wxml 🤸♀️
- wcss(小tips)🚴
- js(重点❗❗❗💯💯💯)🏌️♂️
- 结语💡
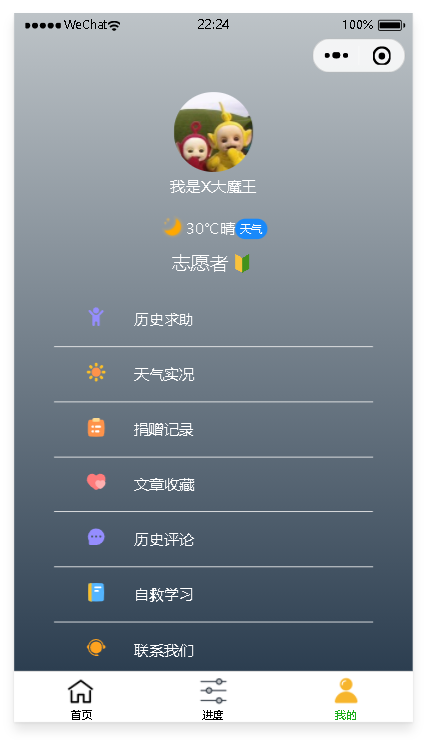
样式效果🤘
偷了上篇博文的图😏😏😏😏
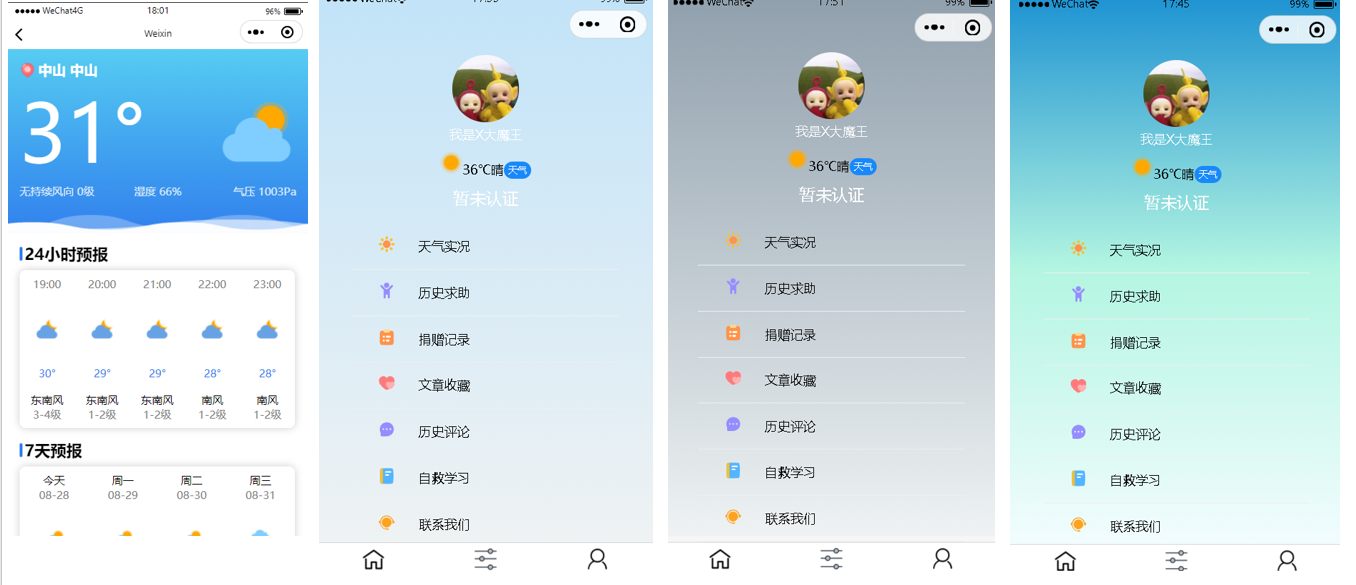
来个今夜吧~💙💙💙
天气🌅
天气的页面和样式效果都在这里:💡💡💡
国庆七天乐,写博也快乐之微信小程序天气预报+根据天气自动变换背景图实战(使用和风天气API)
开整🤠
icon-font阿里图标⭐
这里使用的那些可爱的小图标是来自阿里巴巴icon-font库里的,如果在小程序中还不会使用这个库的朋友,可以去搜一下,很简单的,这里不附上教程了,我隐约的记得我之前的文章里好像有写,但是我现在也忘记了😶🌫️😶🌫️😶🌫️

页面🐠
wxml 🤸♀️
<view class="userInfo {{bgColor == 'sunny' ? 'sunny' : bgColor == 'cloudy' ? 'cloudy' : bgColor == 'overcast' ? 'overcast' : bgColor == 'rainny' ? 'rainny' : 'night'}} {{textColor =='white' ? 'white' : 'black'}}">
<view class="user_info_bg" >
<view class="user_info_wrap">
<image src="{{userInfo.avatarUrl}}"></image>
<view class="user_name">{{userInfo.nickName}} </view>
<block wx:if="{{conditionWeather==true}}">
<image class="icon-weather" src="https://codermoyv.gitee.io/coder-moyv/assets/images/wechat/weather_custom/{{nowWeather.icon}}.png"></image>
<text>{{nowWeather.temp}}℃</text>
<text>{{nowWeather.text}}</text>
</block>
<van-tag round type="primary">天气</van-tag>
<view class="user_status">{{status_content}}</view>
</view>
</view>
<view class="my-navigator-list">
<navigator class="my-navigator-item" open-type="switchTab" url="/pages/schedule/schedule">
<view class="my-icon">
<iconfont name="nanhai" size="20" />
</view>
<text>历史求助</text>
</navigator>
<navigator class="my-navigator-item" wx:for="{{myNavigationList}}" wx:key="id" url="{{item.url}}">
<view class="my-icon">
<iconfont name="{{item.icon}}" size="20" />
</view>
<text>{{item.txt}}</text>
</navigator>
</view>
</view>
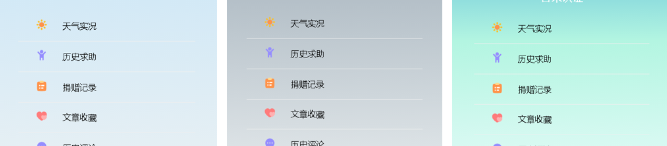
wcss(小tips)🚴
这里的难点就是:每个item下的线条问题,它们都是居中、左右两边留有空白💡其他的难度不大
page {
background-color: #f6f6f6;
}
.userInfo{
height: 100vh;
background: -webkit-linear-gradient(top,#bdc3c7,#2c3e50);
color: white;
}
.sunny{
background: var(--sunny);
}
.cloudy{
background: var(--cloudy);
}
.overcast{
background: var(--overcast);
}
.rainny{
background: var(--rainny);
}
.night{
background: var(--night);
}
.userInfo .user_info_bg {
width: 100%;
height: 40vh;
position: relative;
}
.userInfo .user_info_bg .user_info_wrap {
position: relative;
top: 30%;
text-align: center;
}
.userInfo .user_info_bg .user_info_wrap image {
width: 150rpx;
height: 150rpx;
border-radius: 50%;
}
.black{
color: #000;
}
.white{
color: #fff;
}
.userInfo .user_info_bg .user_info_wrap .icon-weather{
margin-top: 20rpx;
width: 50rpx;
height: 50rpx;
position: relative;
top: 12rpx;
}
.userInfo .user_info_bg .user_info_wrap .user_status{
margin-top: 20rpx;
font-size: large;
}
.userInfo .my-navigator-list{
margin-top: 30rpx;
}
.userInfo .my-navigator-item{
width: 80%;
display: flex;
flex-direction: row;
height: 102rpx;
content: '';
margin: 0 auto;
border-bottom: 0.01rem solid rgba(239,239,239,1);
align-items: center;
}
.userInfo .my-navigator-item .my-icon{
margin-left: 60rpx;
width: 48rpx;
height: 48rpx;
}
.userInfo .my-navigator-item image{
width: 100%;
height: 100%;
}
.userInfo .my-navigator-item text{
margin-left: 42rpx;
}
js(重点❗❗❗💯💯💯)🏌️♂️
这个是我之前的项目的,里面有很多工具类啊之类的东西,直接搬过去的话会报错的,所以大家就看看方法和流程就好,js上的登录功能、天气请求、页面跳转都是写好的,但是很多方法类我就不贴出来了,肉眼可见,因为太多了🥲🥲太多工具类和方法的封装🥲🥲🥲望各位看个大致流程,如果真的后续出博客的话,会详细说到的🤠完成了wcss部分后的话,大致的样式应该也出来了,js部分可以主要学习开发思路
import {
getBaseUrl,
requestUtil,
getWxLogin,
getUserProfile
} from '../../utils/requestUtil.js';
import regeneratorRuntime from '../../lib/runtime/runtime';
import {APIKEY} from '../../utils/config';
const util = require('../../utils/util')
Page({
data: {
bgColor: undefined,
textColor: undefined,
conditionWeather:false,
conditionBtn: true,
nowWeather:{},
baseUrl: '',
userInfo: {},
status_content: '',
wxuserid: '',
status: false,
myNavigationList: [
{
icon: 'taiyang',
id: 1,
txt: '天气实况',
url:'/pages/weather/index'
},
{
icon: 'dingdan',
id: 2,
txt: '捐赠记录',
url: '/pages/myDonation/myDonation'
},
{
icon: 'shoucang',
id: 3,
txt: '文章收藏',
url: '/pages/myCollect/myCollect'
},
{
icon: 'shequ',
id: 4,
txt: '历史评论',
url: '/pages/myComment/myComment'
},
{
icon: 'biji',
id: 5,
txt: '自救学习',
url: '/pages/guide/guide'
},
{
icon: 'xiaochengxu_tubiao',
id: 6,
txt: '联系我们',
url: '/pages/aboutUs/aboutUs'
}
],
userInfoBg:""
},
onLoad: function (options) {
const baseUrl = getBaseUrl();
this.setData({
baseUrl
});
const token=wx.getStorageSync('token');
if(!token){
wx.showModal({
title: 'BFD友情提示',
content: '微信授权登录之后,才可进入个人中心',
success:(res)=>{
Promise.all([
getWxLogin(),getUserProfile()
]).then((res)=>{
console.log(res[0].code);
let loginParam={
code:res[0].code,
nickName:res[1].userInfo.nickName,
avatarUrl:res[1].userInfo.avatarUrl
}
wx.setStorageSync('userInfo',res[1].userInfo);
this.wxlogin(loginParam);
this.setData({
userInfo:res[1].userInfo
})
})
}
})
}else{
const userInfo= wx.getStorageSync('userInfo');
const status_content = wx.getStorageSync('status_content');
const wxuserid = wx.getStorageSync('wxuserid');
const status = wx.getStorageSync('status')
this.setData({
userInfo,
status_content,
wxuserid,
status
})
}
this.getWeather();
},
async wxlogin(loginParam2){
const result=await requestUtil({url:"/bfd/wxuser/wxlogin", data:loginParam2, method:"post"});
console.log(result);
const token=result.data.token;
const status_content = result.data.status_content;
const wxuserid = result.data.wxuserid;
const status = result.data.status;
if(result.code===200){
wx.setStorageSync('token', token);
wx.setStorageSync('status_content', status_content);
wx.setStorageSync('wxuserid', wxuserid);
wx.setStorageSync('status',status);
this.setData({
status_content,
status
})
}else{
console.log("token创建失败!请联系xmonster");
}
},
async getWeather(){
var that = this;
var locationId = wx.getStorageSync('locationId');
if(locationId!=null){
var url = 'https://devapi.qweather.com/v7/weather/now?location='+locationId+'&key='+APIKEY;
console.log(url);
wx.request({
url: 'https://devapi.qweather.com/v7/weather/now?location='+locationId+'&key='+APIKEY,
success(result) {
var res = result.data.now
var bgColor ="";
var textColor = "";
var d = parseInt(new Date().getHours());
if(18<d){
bgColor="night";
textColor = "white";
}
else {
if (res.text == "晴") {
bgColor = "sunny";
textColor = "black";
} else if (res.text == "多云") {
bgColor = "cloudy";
textColor = "black";
} else if (res.text == "阴") {
bgColor = "overcast";
textColor = "black";
} else {
bgColor = "rainny";
textColor = "white";
}
}
that.setData({
nowWeather: res,
conditionBtn:false,
conditionWeather: true,
bgColor:bgColor,
textColor: textColor
})
}
})
}else{
return;
}
},
toWeather(){
wx.navigateTo({
url:'/pages/weather/index'
})
},
onReady() {
},
onShow() {
this.getWeather();
},
onHide() {
},
onUnload() {
},
onPullDownRefresh() {
},
onReachBottom() {
},
onShareAppMessage() {
}
})
结语💡
这次的这个样式分享就到这里结束啦,国庆第三天圆满结束,明天会出系统开发项目的博文😏😏😏😏赶紧去试试这个样式吧,后续有好看的各种样式我也会分享的🤠🤠

本文内容由网友自发贡献,版权归原作者所有,本站不承担相应法律责任。如您发现有涉嫌抄袭侵权的内容,请联系:hwhale#tublm.com(使用前将#替换为@)