目录
安装ubuntu系统文件
1.使用显示器连接树莓派
2.使用SSH xshell安装
安装ROS
安装ubuntu系统文件
1.下载ubuntu系统文件Ubuntu18版,目前最新都是21版本了,但是树莓派处理能力有限,而且新版安装ros时会有许多奇怪的错误,因此选择18.04版本,LST意思是长期支持版(我这里下载的是非桌面版,桌面版会有卡顿,不过对于初学者安装桌面版也是不错的选择,安装个显示器,此时树莓派相当于一个小电脑)
http://cdimage.ubuntu.com/releases/18.04/release/
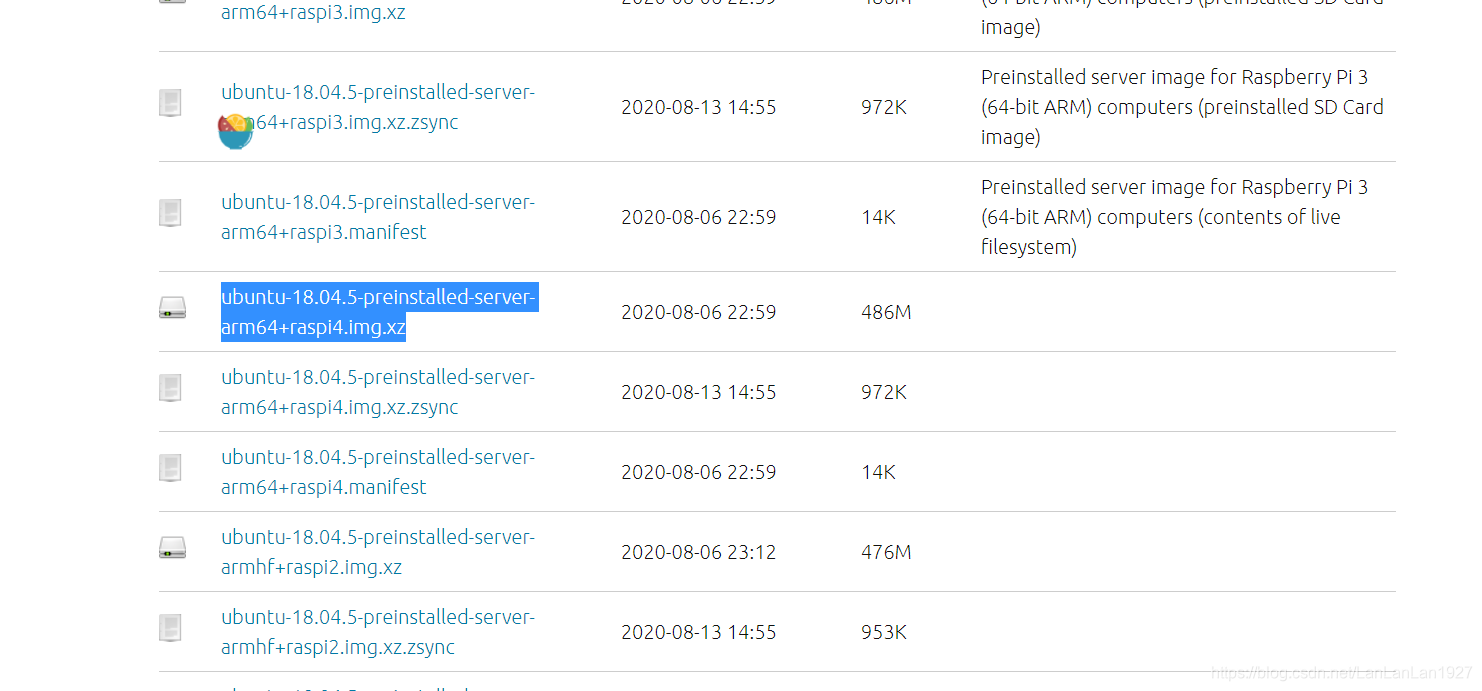
18.04.5是系统版本,可以看到该镜像适合树莓派4。这里我们选择64bit下载镜像
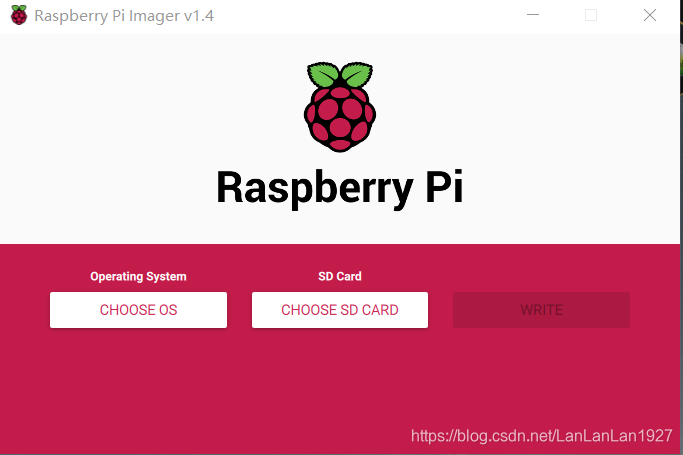
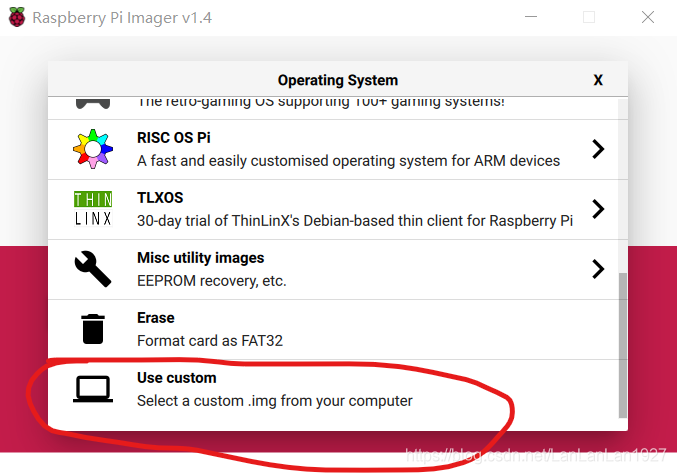
2.下载官方烧录软件,将img文件烧录进内存卡https://downloads.raspberrypi.org/imager/imager_1.4.exe
3.插读卡器到电脑
将镜像文件解压成img文件文件名
| ubuntu-18.04.5-preinstalled-server-arm64+raspi4.img.xz |
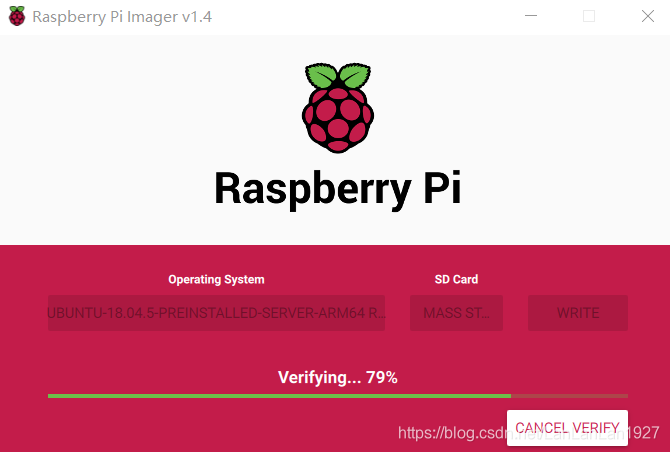
SD Card选择你的树莓派的储存卡,然后写入即可
1.使用显示器连接树莓派
开机进入后提示输入账户:
默认:ubuntu
password:ubuntu
接着再次提醒输入密码ubuntu,然后输入自己的新密码两遍,出现
ubuntu@ubuntu:
说明开机完毕。
1、进入netplan配置
cd /etc/netplan/

sudo vim 50-cloud-init.yaml
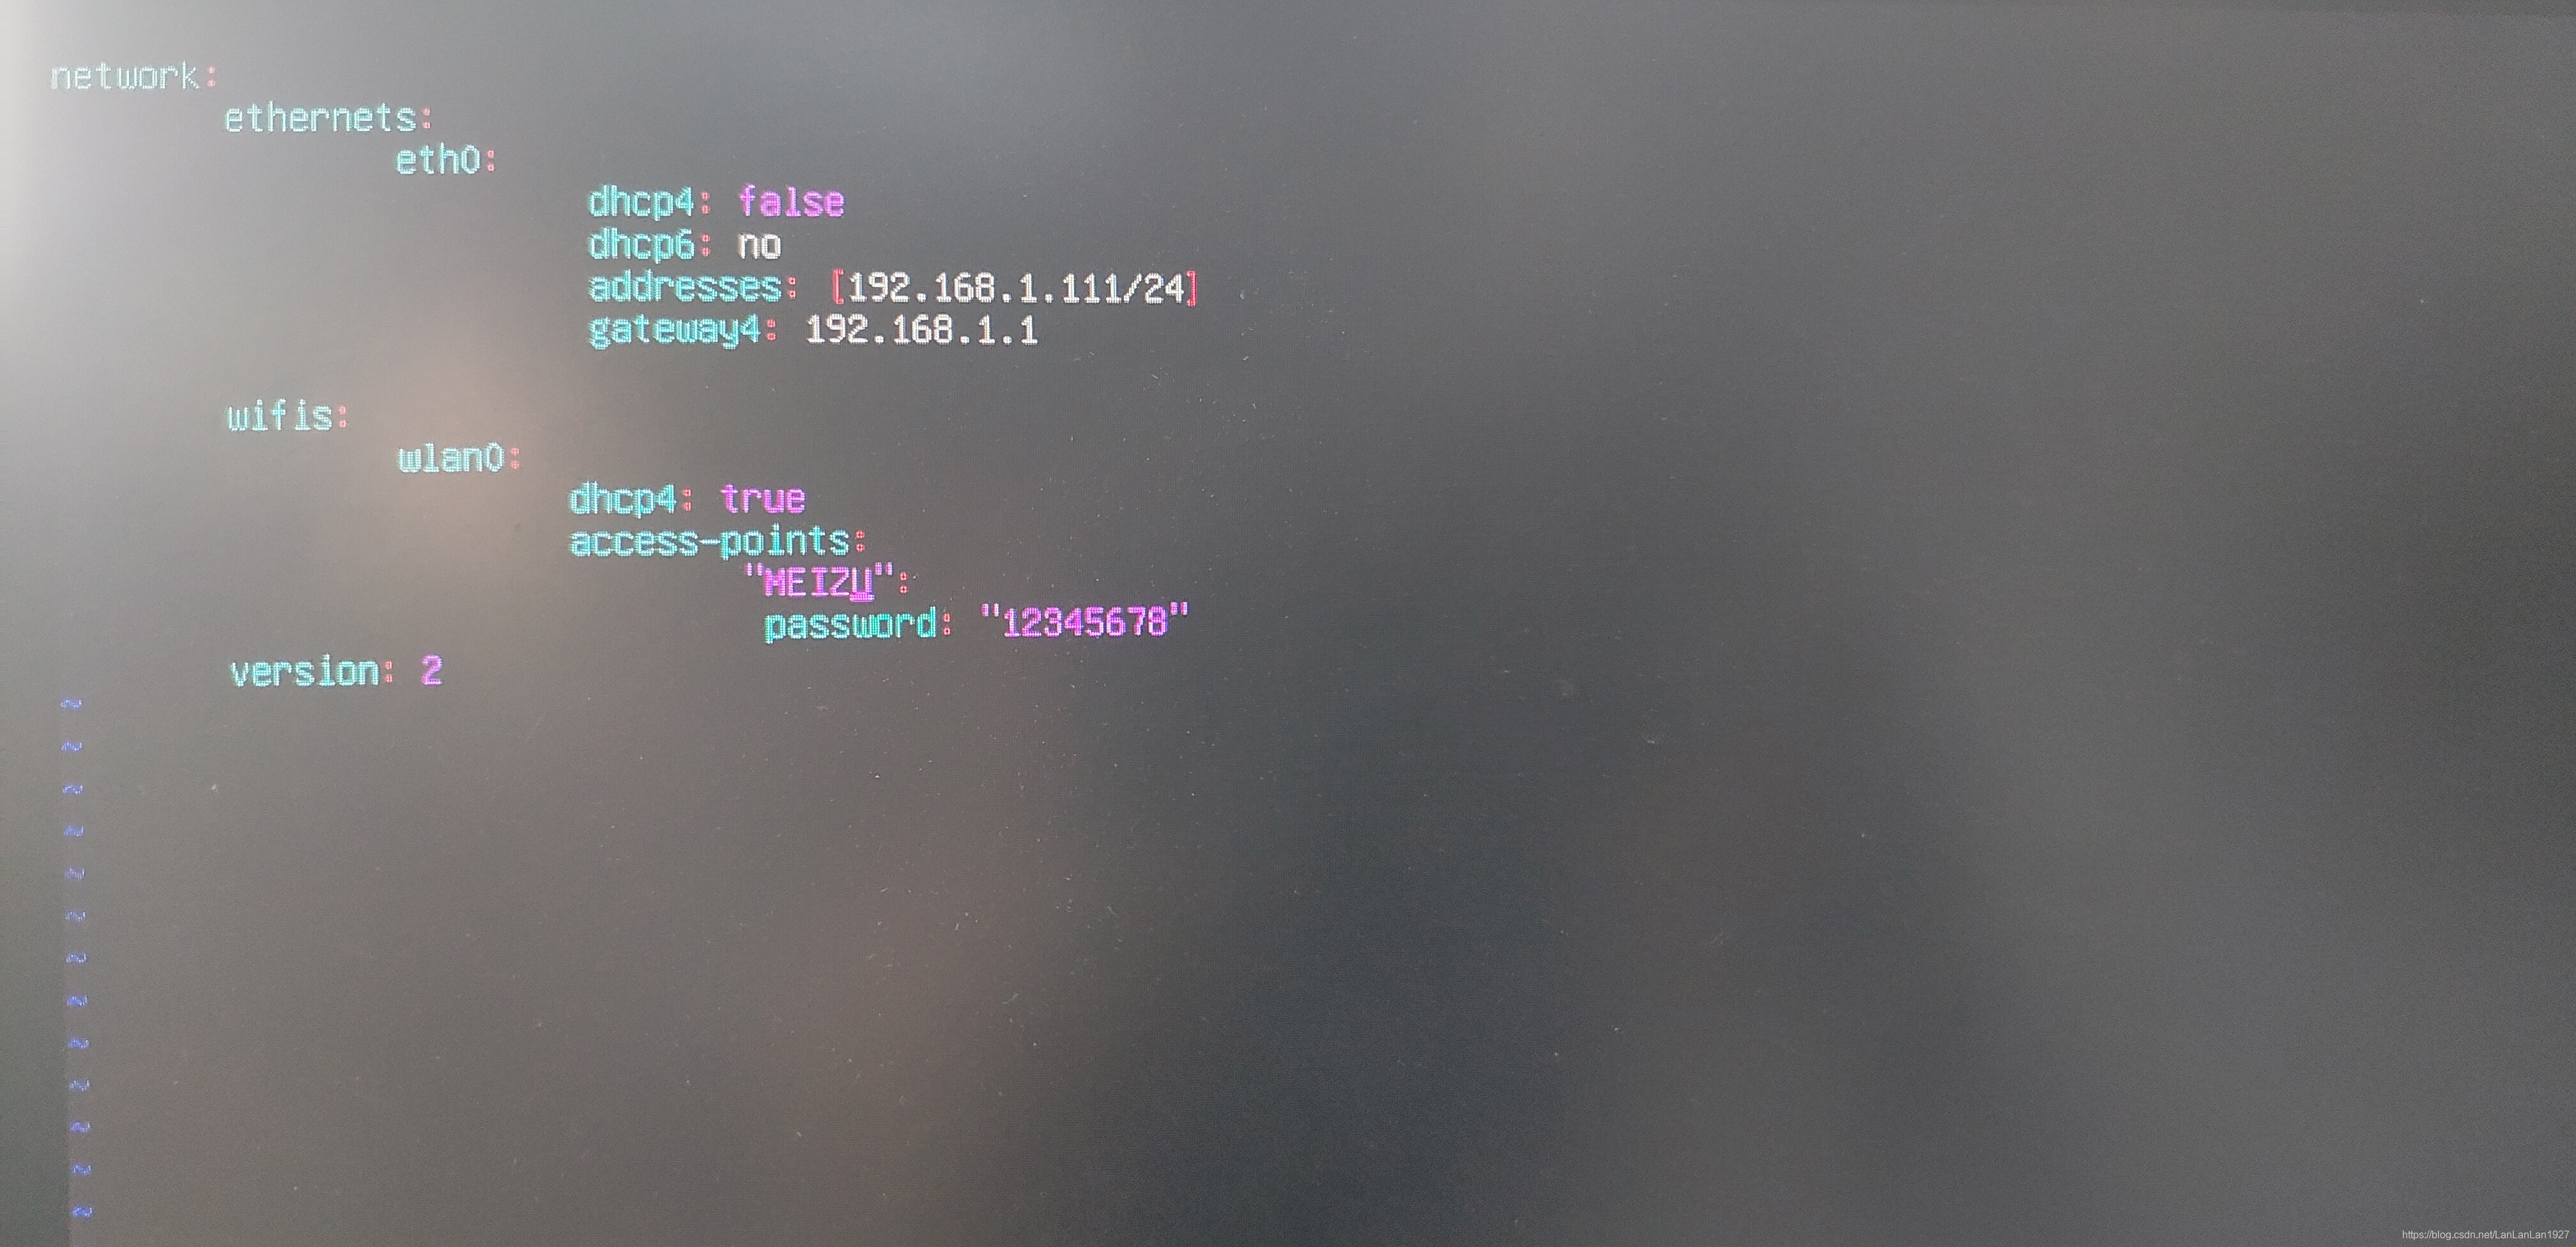
2.vim中修改为(注意冒号后面空格)
# This file is generated from information provided by the datasource.  Changes
# to it will not persist across an instance reboot.  To disable cloud-init's
# network configuration capabilities, write a file
# /etc/cloud/cloud.cfg.d/99-disable-network-config.cfg with the following:
# network: {config: disabled}
network:
    ethernets:
        eth0:
            dhcp4: false
            dhcp6: no
            addresses: [192.168.1.111/24]
            gateway4: 192.168.1.1
            #nameservers:
         		 #addresses: [114.114.114.114, 8.8.8.8]
     wifis:
        wlan0:
           dhcp4: true
           access-points:
                    "无线网的ssid":
                    password: "无线网密码password"
    version: 2
实际输入高亮效果如图:
3.配置生效
sudo netplan try
sudo netplan apply
systemctl daemon-reload
注意:下次开机若是网络不存在的话,开机系统会等待5min网络连接
4.更新源并重启
sudo apt-get update
sudo apt-get upgrade
reboot
5.安装
sudo apt-get install ubuntu-desktop

sudo apt-get update --fix-missing
7.此时重启ubuntu会自动进入桌面版就可以咯
2.使用SSH xshell安装
最开始先去百度"xshell"下载最新版,我目前用的7,长这样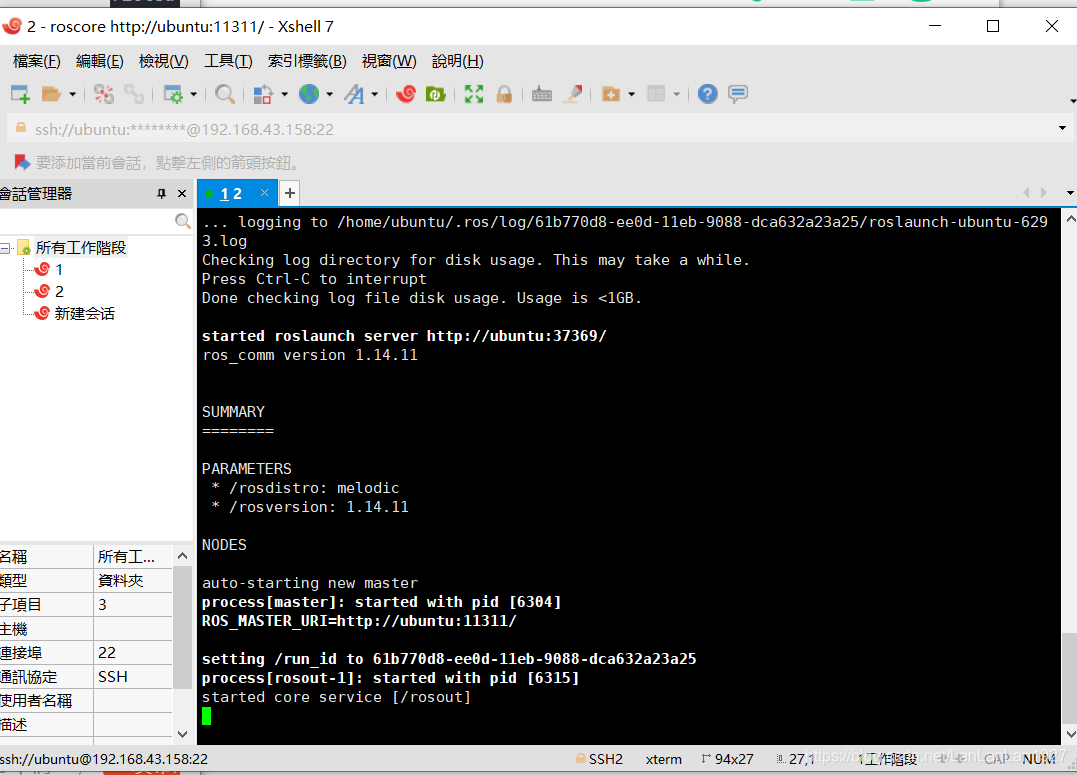
1.首先接着我们刚刚烧录完树莓派的ubuntu18.04系统,此时需要重新插一下读卡器,出来一个带着“boot”名字的盘,我看有的人是systemBoot,有的是其他,反正你会看到一个内存区,进去后找到network-config这个文件
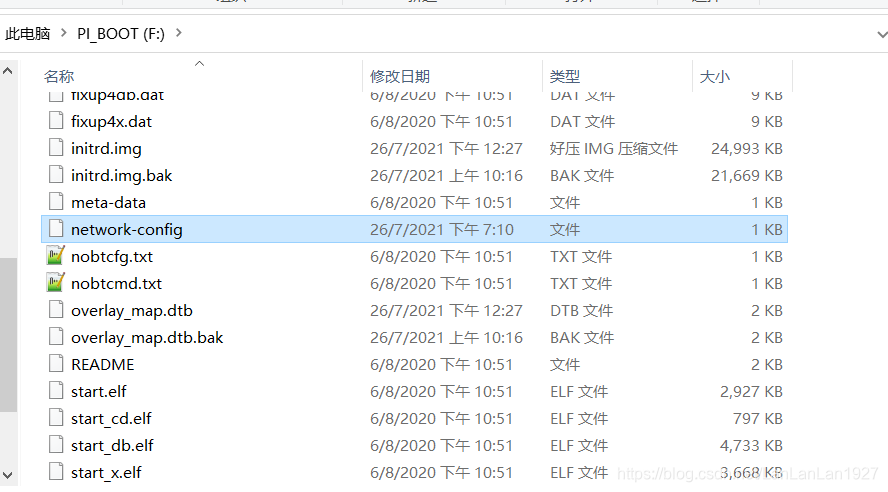
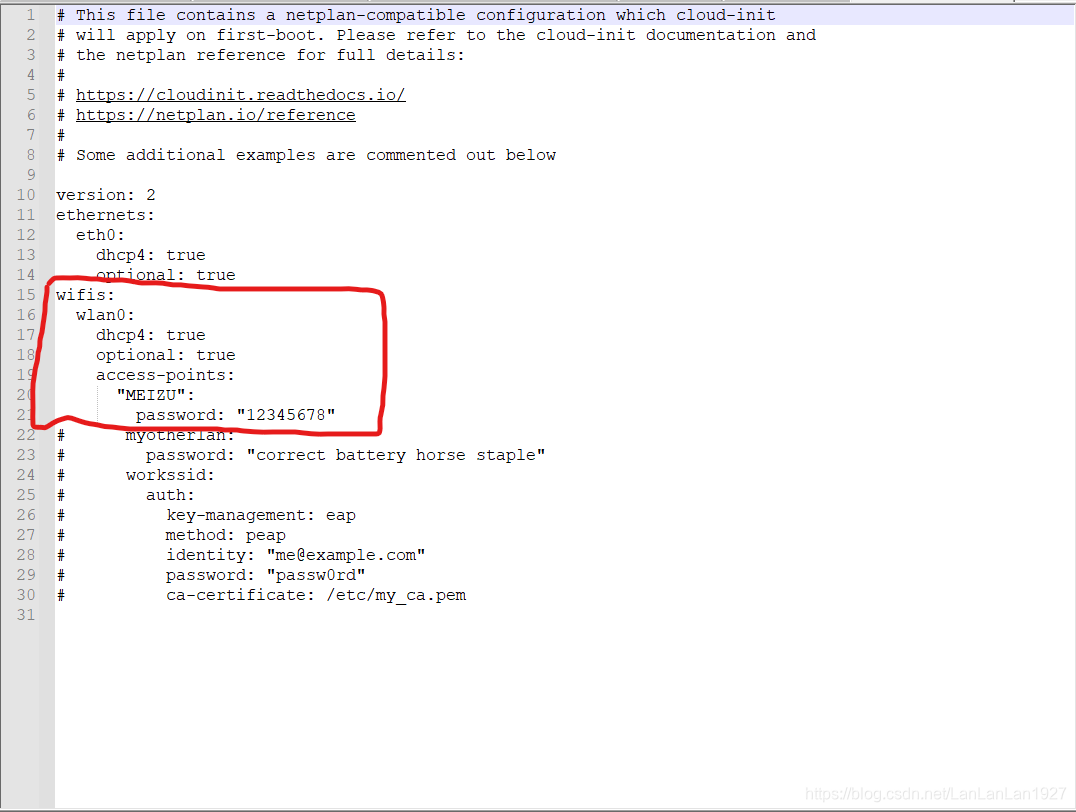
将我框出来的这部分注释去掉(删去#)
此时MEIZU,就是我待会树莓派和电脑同时连的wifi,12345678就是密码,你们对应位置改自己的就行,记得英文双引号!!!!
保存插卡,给树莓派上电,静等10min,看它从爆闪小绿灯到安静,然后断电再次上电
稍等一会就能存开热点的设备上看到ubuntu连接了你的wifi,即可跳过下面一小段内容
如果没有,请断电静等一会再看看,要是还没有,重新用读卡器看你的boot里
network- config里修改是否准确,我这里提供一下我的内容,你们依此改
# This file contains a netplan-compatible configuration which cloud-init
# will apply on first-boot. Please refer to the cloud-init documentation and
# the netplan reference for full details:
#
# https://cloudinit.readthedocs.io/
# https://netplan.io/reference
#
# Some additional examples are commented out below

version: 2
ethernets:
  eth0:
    dhcp4: true
    optional: true
wifis:
  wlan0:
    dhcp4: true
    optional: true
    access-points:
      "MEIZU":
        password: "12345678"
#      myotherlan:
#        password: "correct battery horse staple"
#      workssid:
#        auth:
#          key-management: eap
#          method: peap
#          identity: "me@example.com"
#          password: "passw0rd"
#          ca-certificate: /etc/my_ca.pem
如果连接好了wifi,恭喜你,SSH基本可以连接了,不管用什么方法,查看你树莓派的ip地址,我这里用的WNetWatcher,能看到就行,毕竟你要是开的热点,直接就能看到,地址类似这样:192.168.xx.xxx
打开xshell7,新建会话
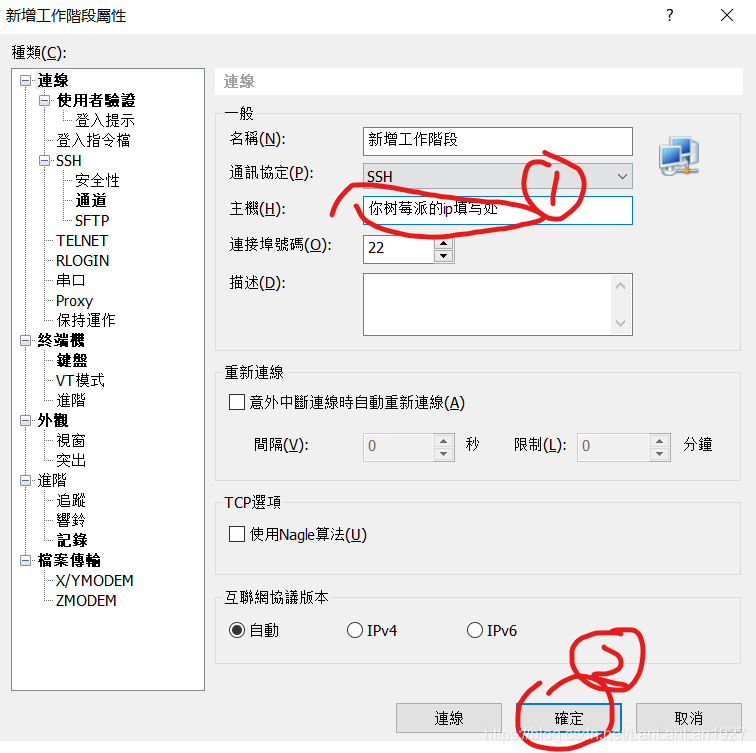
连接中
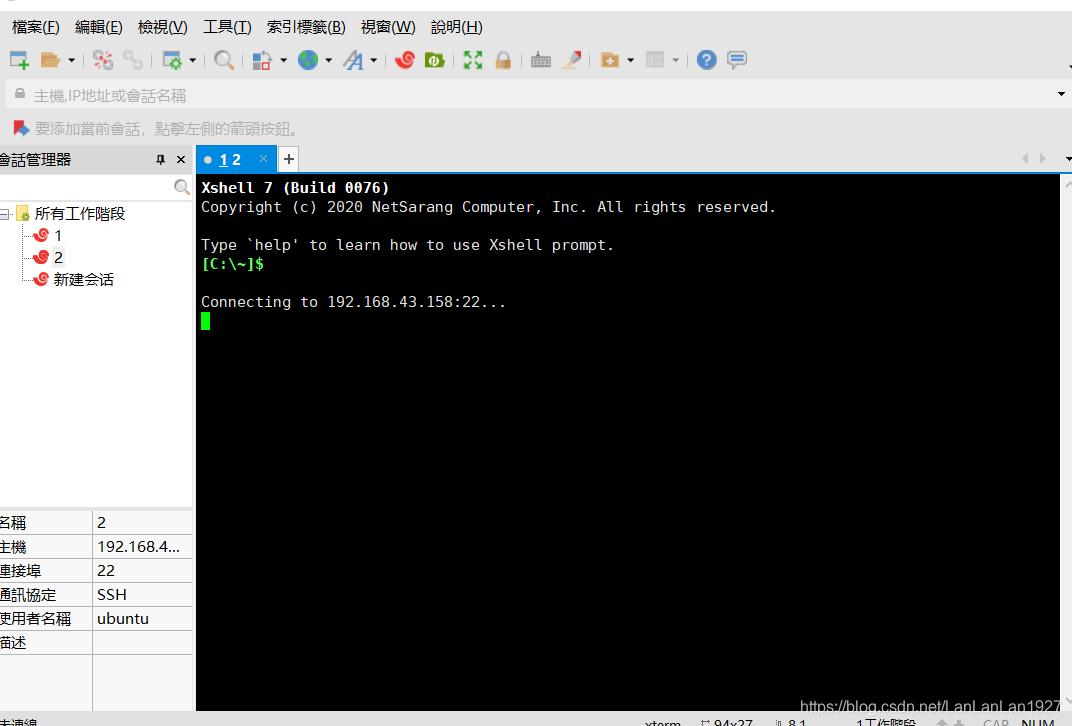
如果第一次连接成功,就会提醒你输入用户名,这里初始默认:ubuntu
然后输入密码:ubuntu
连接成功后,命令行里面让你再次重复密码:ubuntu
之后提醒你输入新密码两遍,此时连接完成。
安装ROS
因为如果直接用命令行版本ubuntu安装ros打字会非常麻烦,这时桌面版好处就体现了
1.修改源(使用nano比较好操作)
sudo nano /etc/apt/sources.list
修改为
# 默认注释了源码仓库,如有需要可自行取消注释
deb https://mirrors.ustc.edu.cn/ubuntu-ports/ bionic main restricted universe multiverse
# deb-src https://mirrors.ustc.edu.cn/ubuntu-ports/ bionic main main restricted universe multiverse
deb https://mirrors.ustc.edu.cn/ubuntu-ports/ bionic-updates main restricted universe multiverse
# deb-src https://mirrors.ustc.edu.cn/ubuntu-ports/ bionic-updates main restricted universe multiverse
deb https://mirrors.ustc.edu.cn/ubuntu-ports/ bionic-backports main restricted universe multiverse
# deb-src https://mirrors.ustc.edu.cn/ubuntu-ports/ bionic-backports main restricted universe multiverse
deb https://mirrors.ustc.edu.cn/ubuntu-ports/ bionic-security main restricted universe multiverse
# deb-src https://mirrors.ustc.edu.cn/ubuntu-ports/ bionic-security main restricted universe multiverse
保存即可
进入cn/melodic/Installation/Ubuntu - ROS Wiki
跳过镜像设置那一步跟着命令行一行一行输入即可
以下为各种错误处理
1.执行完该语句报错
sudo apt install ros-melodic-desktop-full

或者其它等奇怪的错误,基本就是源的选择问题,提供阿里云,中科大和清华的源可以解决
1.首先打开/etc/apt/sources.list
sudo nano /etc/apt/sources.list
2.获取源
- 18.04阿里云源 (要获取20版本的去ubuntu镜像-ubuntu下载地址-ubuntu安装教程-阿里巴巴开源镜像站 (aliyun.com))
deb http://mirrors.aliyun.com/ubuntu/ bionic main restricted universe multiverse
deb-src http://mirrors.aliyun.com/ubuntu/ bionic main restricted universe multiverse

deb http://mirrors.aliyun.com/ubuntu/ bionic-security main restricted universe multiverse
deb-src http://mirrors.aliyun.com/ubuntu/ bionic-security main restricted universe multiverse

deb http://mirrors.aliyun.com/ubuntu/ bionic-updates main restricted universe multiverse
deb-src http://mirrors.aliyun.com/ubuntu/ bionic-updates main restricted universe multiverse

deb http://mirrors.aliyun.com/ubuntu/ bionic-proposed main restricted universe multiverse
deb-src http://mirrors.aliyun.com/ubuntu/ bionic-proposed main restricted universe multiverse

deb http://mirrors.aliyun.com/ubuntu/ bionic-backports main restricted universe multiverse
deb-src http://mirrors.aliyun.com/ubuntu/ bionic-backports main restricted universe multiverse
- Ubuntu 20.04中科大源 (18.04的源怎么获取进去Ubuntu 源使用帮助 — USTC Mirror Help 文档可以看)
# 默认注释了源码仓库,如有需要可自行取消注释
deb https://mirrors.ustc.edu.cn/ubuntu/ focal main restricted universe multiverse
# deb-src https://mirrors.ustc.edu.cn/ubuntu/ focal main restricted universe multiverse

deb https://mirrors.ustc.edu.cn/ubuntu/ focal-security main restricted universe multiverse
# deb-src https://mirrors.ustc.edu.cn/ubuntu/ focal-security main restricted universe multiverse

deb https://mirrors.ustc.edu.cn/ubuntu/ focal-updates main restricted universe multiverse
# deb-src https://mirrors.ustc.edu.cn/ubuntu/ focal-updates main restricted universe multiverse

deb https://mirrors.ustc.edu.cn/ubuntu/ focal-backports main restricted universe multiverse
# deb-src https://mirrors.ustc.edu.cn/ubuntu/ focal-backports main restricted universe multiverse

# 预发布软件源,不建议启用
# deb https://mirrors.ustc.edu.cn/ubuntu/ focal-proposed main restricted universe multiverse
# deb-src https://mirrors.ustc.edu.cn/ubuntu/ focal-proposed main restricted universe multiverse
3.将原本内容备份好,然后将需要的源替换进去
源生效
sudo apt-get update
2.报错
sudo rosdep init
显示ERROR内容类似如下
sudo rosdep init
ERROR: cannot download default sources list from:
https://raw.githubusercontent.com/ros/rosdistro/master/rosdep/sources.list.d/20-default.list
Website may be down.
原因仍然是源的问题,因为该init是为了获取git一个文件,没翻墙会申请超时
解决方法:
1.改换源,或者手机热点网络
2. 进入git文件内容,然后复制内容
新建并进入如下目录
cd /etc/ros/rosdep/sources.list.d
(假如上面目录不存在,则使用sudo mkdir -p /etc/ros/rosdep/sources.list.d)
sudo nano 20-default.list
在20-default.list中粘贴刚刚复制的内容并保持再次sudo rosdep init
注意,如上解决方法是我成功解决的,如果还未解决,则可以参考ROS:sudo rosdep init出错常规方法都无效后解决办法记录 - 知乎 (zhihu.com)该文章还介绍了其它方法
3.报错ERROR或者time out
rosdep update
Hit https://raw.githubusercontent.com/ros/rosdistro/master/rosdep/osx-homebrew.yaml
ERROR: unable to process source [https://raw.githubusercontent.com/ros/rosdistro/master/rosdep/base.yaml]:
    <urlopen error [Errno 104] Connection reset by peer> (https://raw.githubusercontent.com/ros/rosdistro/master/rosdep/base.yaml)
ERROR: unable to process source [https://raw.githubusercontent.com/ros/rosdistro/master/rosdep/python.yaml]:
    <urlopen error [Errno 104] Connection reset by peer> (https://raw.githubusercontent.com/ros/rosdistro/master/rosdep/python.yaml)
ERROR: unable to process source [https://raw.githubusercontent.com/ros/rosdistro/master/rosdep/ruby.yaml]:
    <urlopen error [Errno 104] Connection reset by peer> (https://raw.githubusercontent.com/ros/rosdistro/master/rosdep/ruby.yaml)
ERROR: unable to process source [https://raw.githubusercontent.com/ros/rosdistro/master/releases/fuerte.yaml]:
    Failed to download target platform data for gbpdistro:
    <urlopen error [Errno 104] Connection reset by peer>
Query rosdistro index https://raw.githubusercontent.com/ros/rosdistro/master/index-v4.yaml
Skip end-of-life distro "ardent"
Skip end-of-life distro "bouncy"
Add distro "crystal"
ERROR: error loading sources list:
    <urlopen error <urlopen error [Errno 104
更换源 ,翻墙vpn
当时安装的时候错误并非完全解决了
然后有意思的是,但还是存在部分ERROR时,此时接着wiki继续往下,结束后在命令行中敲ros,然后双击TAB按键出现如图,说明ros安装已经成功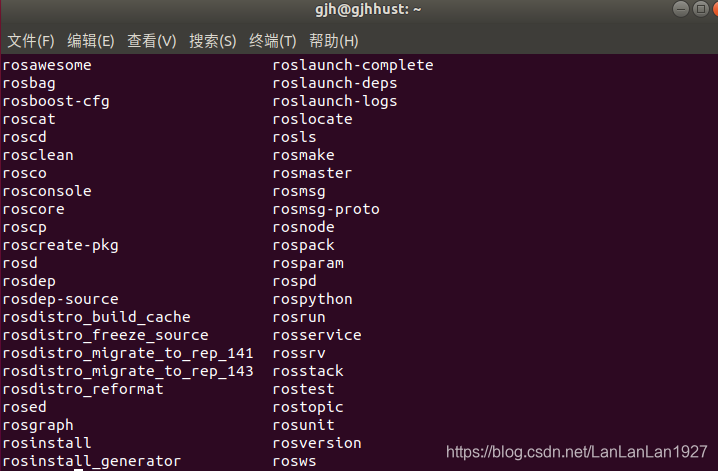
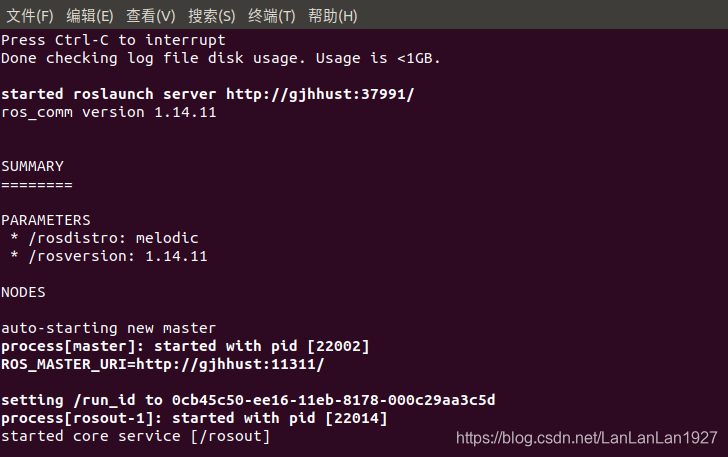
输入命令
roscore
出现如下说明已经成功
更多问题可以留言,我安装了树莓派和虚拟机两环境的ROS,真的是搜了各种错误,万幸都解决了
本文内容由网友自发贡献,版权归原作者所有,本站不承担相应法律责任。如您发现有涉嫌抄袭侵权的内容,请联系:hwhale#tublm.com(使用前将#替换为@)