目录:/etc/netplan
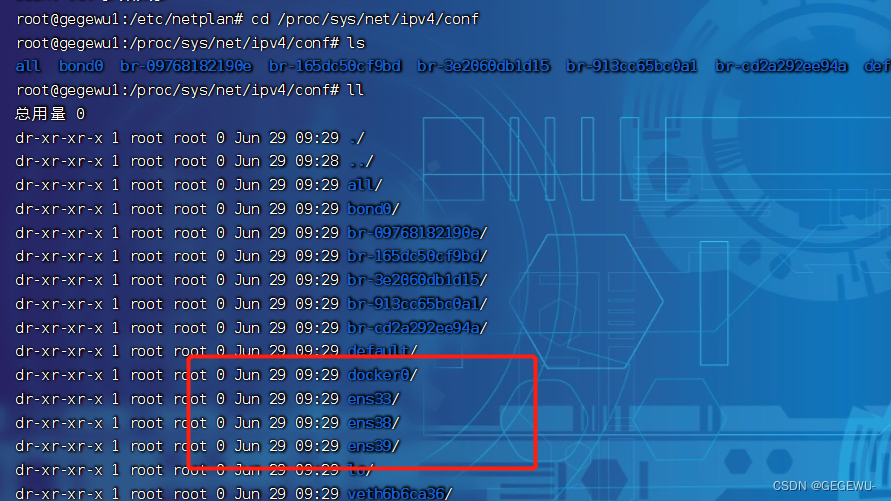
目录: /proc/sys/net/ipv4/conf
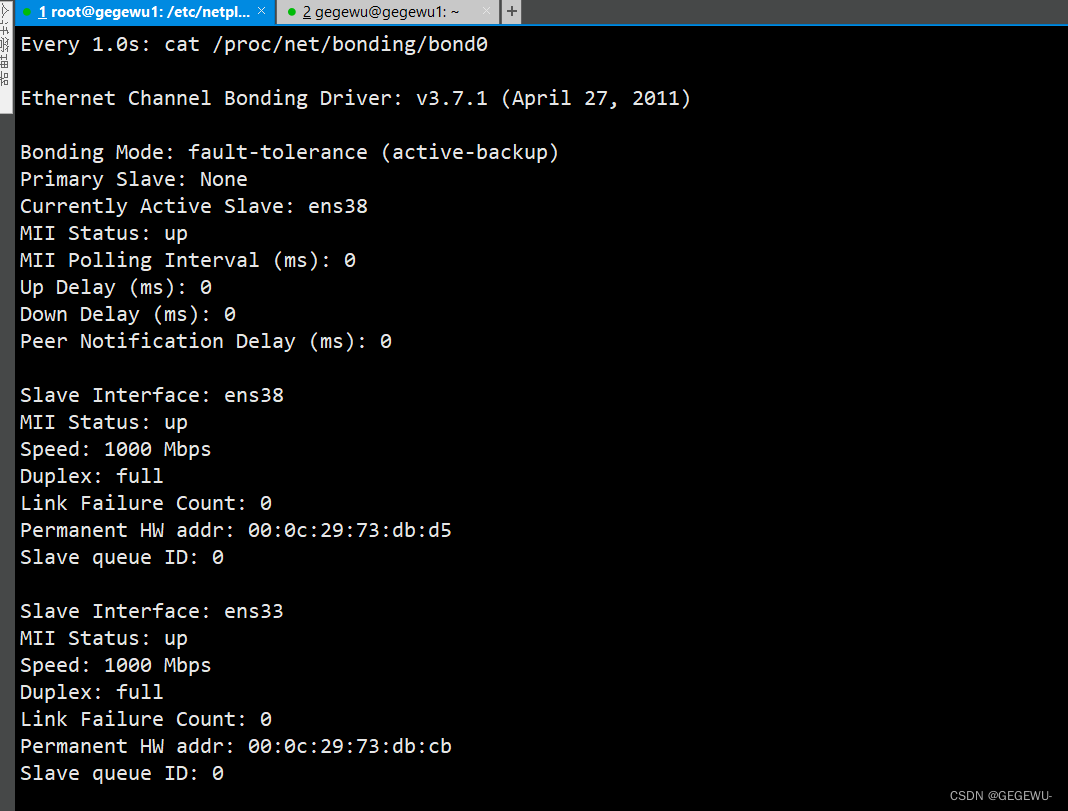
验证bond命令:watch -n 1 cat /proc/net/bonding/bond0
一. 单网卡+静态IP
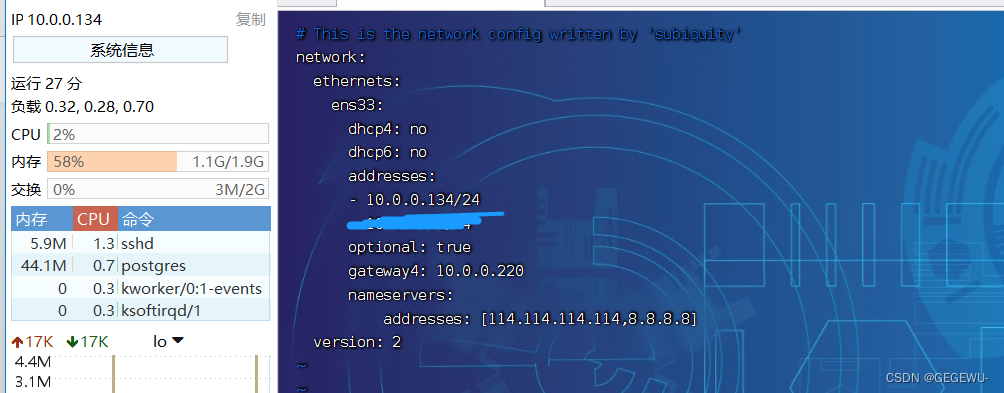
1. vim 00-installer-config.yaml
# This is the network config written by 'subiquity'
network:
  ethernets:
    ens33:
      dhcp4: no
      dhcp6: no   #关闭dhcp
      addresses:
      - 10.0.0.134/24
      optional: true
      gateway4: 10.0.0.220
      nameservers:  #dns
          addresses: [114.114.114.114,8.8.8.8]
  version: 2
2. 重启 sudo netplan apply
成功!
二 .单网卡多IP(子IP)
1. vim 00-installer-config.yaml
# This is the network config written by 'subiquity'
network:
  ethernets:
    ens33:
      dhcp4: no
      dhcp6: no
      addresses:
      - 10.0.0.134/24
      - 10.0.0.16/24
      optional: true
      gateway4: 10.0.0.220
      nameservers:
          addresses: [114.114.114.114,8.8.8.8]
  version: 2

2. netplan apply 成功!
三. 多网卡多IP并且绑定bond
1. 适配器添加一块网卡

2. 查看新添加网卡名称
cd /proc/sys/net/ipv4/conf
vim 00-installer-config.yaml
network:
  ethernets:
    ens33:
      addresses: []         #绑定单网卡不需要写IP地址
      dhcp4: no
    ens38:
      addresses: []
      dhcp4: no

  bonds:
    bond0:
      addresses:
        - 10.0.0.134/24
      gateway4: 10.0.0.220
      #nameservers: 根据需求可以不要
        #addresses:
          #- 114.114.114.114
      interfaces:
        - ens33
        - ens38
      parameters:           #参数
        mode: active-backup #bond模式
        primary: ens33


    ens39:
      dhcp4: no
      dhcp6: no
      addresses:
        - 10.0.0.35/24
      gateway4: 10.0.0.220
      optional: true
      nameservers:
          addresses: [114.114.114.114,8.8.8.8]
  version: 2
此为bond6的配置 如果要配置其他自行更改:
如8023ad
network:
    version: 2
    renderer: networkd
    ethernets:
        enp2s0:
            dhcp4: no
        enp3s0:
            dhcp4: no
            optional: true
   bonds:
       #bond-lan:
        bond0:
            interfaces: [enp2s0, enp3s0]
            addresses: [192.168.93.2/24]
            parameters:
                mode: 802.3ad
                mii-monitor-interval:
                lacp-rate: fast
                transmit-hash-policy: layer2
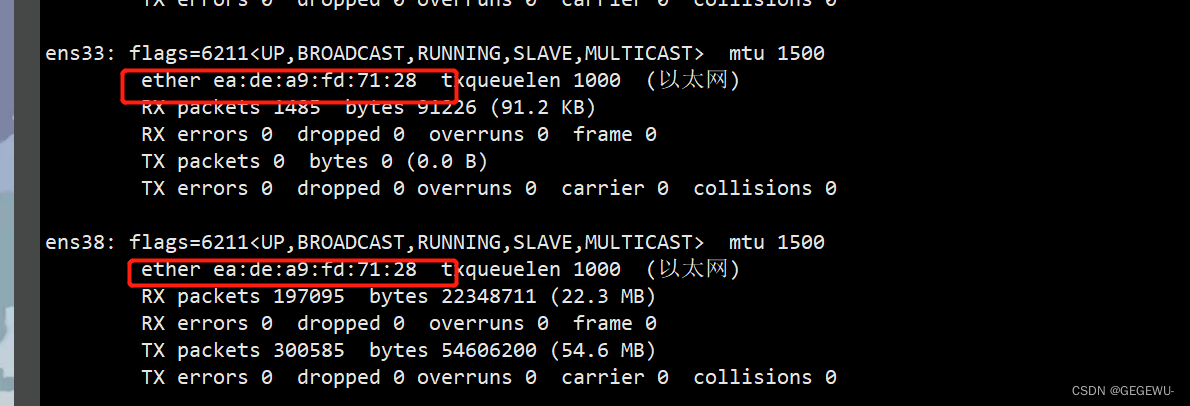
验证bond: watch -n 1 cat /proc/net/bonding/bond0
mac 与bond0相同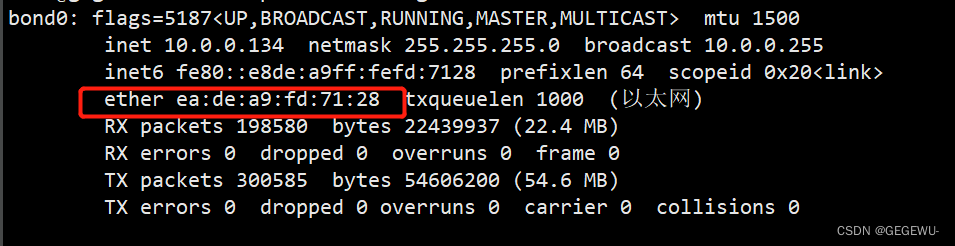
本文内容由网友自发贡献,版权归原作者所有,本站不承担相应法律责任。如您发现有涉嫌抄袭侵权的内容,请联系:hwhale#tublm.com(使用前将#替换为@)