(3)用imageView和imagebutton及activity在界面上实现图片浏览
新建android项目如AI03,在项目的/AI03/src/com/example/ai03/MainActivity.java文件写下如下代码,注意包名和图片存放的位置!
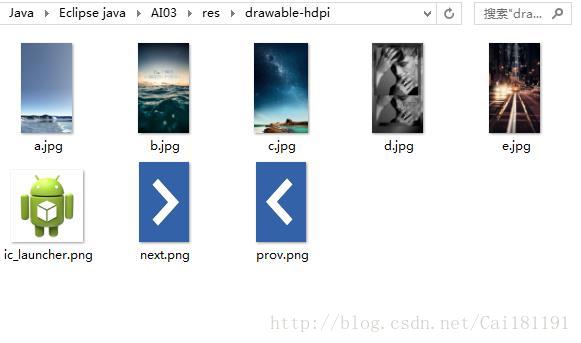
图片存放目录位置为/AI03/res/drawable-hdpi
package com.example.ai03;

import android.app.Activity;
import android.graphics.Bitmap;
import android.os.Bundle;
import android.view.Menu;
import android.view.MenuItem;
import android.view.View;
import android.view.View.OnClickListener;
import android.view.View.OnLongClickListener;
import android.widget.ImageButton;
import android.widget.ImageView;
import android.widget.Toast;

public class MainActivity extends Activity {

	//声明Image对象与ImageBoutton对象
    private ImageView ivwPicture=null;
    private ImageButton ibtnProv=null;
    private ImageButton ibtnNext=null;
    //声明5个图像
    private Integer[] iImages = {R.drawable.a,R.drawable.b,R.drawable.c,R.drawable.d,R.drawable.e};

    @Override
    protected void onCreate(Bundle savedInstanceState) {
        super.onCreate(savedInstanceState);
        setContentView(R.layout.activity_main);
        //获取ImageView对象ivwPicture
        ivwPicture=(ImageView)super.findViewById(R.id.picture);
        //获取两个按钮对象ImageButton
        ibtnProv=(ImageButton)super.findViewById(R.id.prov);
        ibtnNext=(ImageButton)super.findViewById(R.id.next);
        //注册OnClick监听器
        ibtnProv.setOnClickListener(new ProvOnClickListener());
        ibtnNext.setOnClickListener(new NextOnClickListener());
        //注册OnlongClick监听器
        ivwPicture.setOnLongClickListener(new PicOnLongClick());
    }
    //单击“上一幅”按钮显示前一张图片
    private class ProvOnClickListener  implements OnClickListener{
        private int i=5;
        public void onClick(View view){
            if(i > 0){
                ivwPicture.setImageResource(iImages[--i]);
            }
            else if(i == 0){
                i =5;
                ivwPicture.setImageResource(iImages[4]);
            }
        }
    }
    //单击“下一幅”按钮显示后一张图片
    private class NextOnClickListener implements OnClickListener{
        private int i=0;
        public void onClick(View view){
            if(i < 5)
                ivwPicture.setImageResource(iImages[i++]);
            else if(i == 5){
                i = 0;
                ivwPicture.setImageResource(iImages[0]);
            }
        }
    }
    //长按图片设置为桌面墙纸
    private class PicOnLongClick implements OnLongClickListener{
        @Override
        public boolean onLongClick(View view){
            try{
                //清空当前墙纸
                MainActivity.this.clearWallpaper();
                //当前view转换为ImageView对象
                ImageView iv=(ImageView)view;
                //启用图形缓冲
                iv.setDrawingCacheEnabled(true);
                //使用当前缓冲图形创建Bitmap
                Bitmap bmp=Bitmap.createBitmap(iv.getDrawingCache());
                //当前图形设置为墙纸
                MainActivity.this.setWallpaper(bmp);
                //清理图形缓冲
                iv.setDrawingCacheEnabled(false);
                Toast.makeText(getApplicationContext(), "背景设置成功!",Toast.LENGTH_LONG).show();
            }
            catch(Exception e){
                Toast.makeText(getApplicationContext(), "背景设置失败!",Toast.LENGTH_LONG).show();
            }
            return true;
        }
    }

	@Override
	public boolean onCreateOptionsMenu(Menu menu) {
		// Inflate the menu; this adds items to the action bar if it is present.
		getMenuInflater().inflate(R.menu.main, menu);
		return true;
	}

	@Override
	public boolean onOptionsItemSelected(MenuItem item) {
		// Handle action bar item clicks here. The action bar will
		// automatically handle clicks on the Home/Up button, so long
		// as you specify a parent activity in AndroidManifest.xml.
		int id = item.getItemId();
		if (id == R.id.action_settings) {
			return true;
		}
		return super.onOptionsItemSelected(item);
	}
}
在项目的/AI03/res/layout/activity_main.xml文件写下如下代码。
<RelativeLayout xmlns:android="http://schemas.android.com/apk/res/android"
    xmlns:tools="http://schemas.android.com/tools"
    android:layout_width="match_parent"
    android:layout_height="match_parent"
    android:paddingBottom="@dimen/activity_vertical_margin"
    android:paddingLeft="@dimen/activity_horizontal_margin"
    android:paddingRight="@dimen/activity_horizontal_margin"
    android:paddingTop="@dimen/activity_vertical_margin"
    tools:context="com.example.ai03.MainActivity" >

    <ImageView
        android:id="@+id/picture"
        android:layout_width="wrap_content"
        android:layout_height="wrap_content"
        android:layout_alignParentTop="true"
        android:layout_centerHorizontal="true"
        android:layout_marginTop="0dp"
        android:src="@drawable/a"
        tools:ignore="ContentDescription" />

    <ImageButton
        android:id="@+id/prov"
        android:layout_width="wrap_content"
        android:layout_height="wrap_content"
        android:layout_alignParentBottom="true"
        android:layout_alignParentLeft="true"
        android:src="@drawable/prov" />

    <ImageButton
        android:id="@+id/next"
        android:layout_width="wrap_content"
        android:layout_height="wrap_content"
        android:layout_alignParentBottom="true"
        android:layout_alignRight="@+id/picture"
        android:src="@drawable/next" />

</RelativeLayout>
在项目的
/AI03/AndroidManifest.xml
文件添加如下代码。
<uses-permission android:name="android.permission.SET_WALLPAPER"/>
<?xml version="1.0" encoding="utf-8"?>
<manifest xmlns:android="http://schemas.android.com/apk/res/android"
    package="com.example.ai03"
    android:versionCode="1"
    android:versionName="1.0" >

    <uses-sdk
        android:minSdkVersion="17"
        android:targetSdkVersion="17" />

    <uses-permission android:name="android.permission.SET_WALLPAPER"/>

    <application
        android:allowBackup="true"
        android:icon="@drawable/ic_launcher"
        android:label="@string/app_name"
        android:theme="@style/AppTheme" >
        <activity
            android:name=".MainActivity"
            android:label="@string/app_name" >
            <intent-filter>
                <action android:name="android.intent.action.MAIN" />

                <category android:name="android.intent.category.LAUNCHER" />
            </intent-filter>
        </activity>
    </application>

</manifest>
运行效果如下。
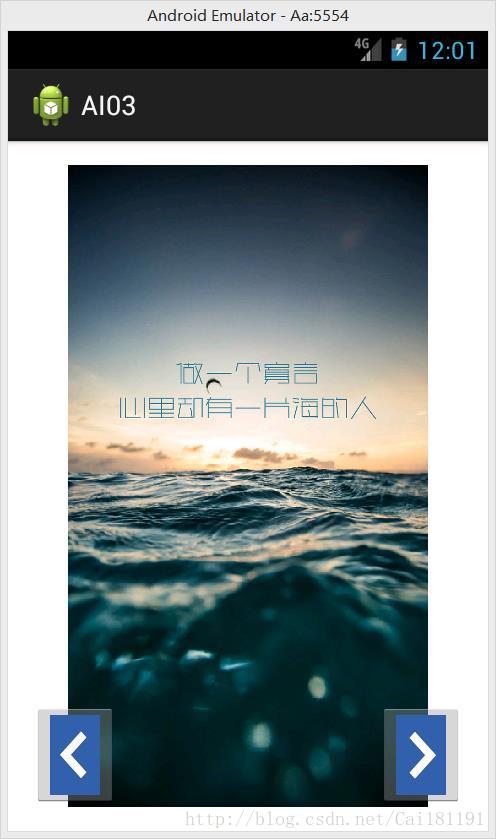
转自:http://blog.csdn.net/jianghuiquan/article/details/8348680
(4)利用RadioButton、CheckBox、Activity等实现如图的功能及效果
新建android项目如AI04,在项目的/AI01/src/com/example/ai04/MainActivity.java文件写下如下代码,注意包名!
package com.example.ai04;

import android.app.Activity;
import android.os.Bundle;
import android.view.Menu;
import android.view.MenuItem;
import android.widget.RadioGroup;
import android.widget.RadioGroup.OnCheckedChangeListener;
import android.widget.TextView;

public class MainActivity extends Activity {

	RadioGroup rg;
    TextView show;

	@Override
	protected void onCreate(Bundle savedInstanceState) {
		super.onCreate(savedInstanceState);
		setContentView(R.layout.activity_main);
		//获取界面上rg、show两个组件
        rg=(RadioGroup)findViewById(R.id.rg);
        show=(TextView)findViewById(R.id.show);
        //为RadioGroup组件的OnCheck事件绑定事件监听器
        rg.setOnCheckedChangeListener(new OnCheckedChangeListener(){

            @Override
            public void onCheckedChanged(RadioGroup group, int checkedId) {
                // TODO Auto-generated method stub
                //根据用户勾选的单选按钮来动态改变tip字符串的值
                String tip=checkedId==R.id.male?"您的性别是男人":"您的性别是女人";
                  //修改show组件中的文本
                show.setText(tip);
            }

        });
	}

	@Override
	public boolean onCreateOptionsMenu(Menu menu) {
		// Inflate the menu; this adds items to the action bar if it is present.
		getMenuInflater().inflate(R.menu.main, menu);

		return true;
	}

	@Override
	public boolean onOptionsItemSelected(MenuItem item) {
		// Handle action bar item clicks here. The action bar will
		// automatically handle clicks on the Home/Up button, so long
		// as you specify a parent activity in AndroidManifest.xml.
		int id = item.getItemId();
		if (id == R.id.action_settings) {
			return true;
		}
		return super.onOptionsItemSelected(item);
	}
}
在项目的
/AI04/res/layout/activity_main.xml
文件写下如下代码。
<TableLayout xmlns:android="http://schemas.android.com/apk/res/android"
    xmlns:tools="http://schemas.android.com/tools"
    android:layout_width="match_parent"
    android:layout_height="match_parent"
    android:paddingBottom="@dimen/activity_vertical_margin"
    android:paddingLeft="@dimen/activity_horizontal_margin"
    android:paddingRight="@dimen/activity_horizontal_margin"
    android:paddingTop="@dimen/activity_vertical_margin"
    tools:context="com.example.ai04.MainActivity" >

    <TableRow >
    <TextView android:layout_width="wrap_content"
        android:layout_height="wrap_content"
        android:text="性别:"
        android:textSize="16dp"/>
    <!-- 定义一组单选按钮 -->
    <RadioGroup android:id="@+id/rg"
        android:orientation="horizontal"
        android:layout_gravity="center_horizontal">
        <!-- 定义两个单选按钮 -->
        <RadioButton android:layout_width="wrap_content"
            android:layout_height="wrap_content"
            android:id="@+id/male"
            android:text="男"
            android:checked="true" />
        <RadioButton android:layout_width="wrap_content"
            android:layout_height="wrap_content"
            android:id="@+id/female"
            android:text="女"/>
    </RadioGroup>
</TableRow>
   <TableRow >
       <TextView android:layout_width="wrap_content"
           android:layout_height="wrap_content"
           android:text="喜欢的颜色:"
           android:textSize="16dp"/>
       <!-- 定义一个垂直的线性布局 -->
       <LinearLayout
           android:layout_gravity="center_horizontal"
           android:orientation="vertical"
           android:layout_width="wrap_content"
           android:layout_height="wrap_content" >
           <!-- 定义三个复选框 -->
           <CheckBox android:layout_width="wrap_content"
               android:layout_height="wrap_content"
               android:text="红色"
               android:checked="true" />
           <CheckBox android:layout_width="wrap_content"
               android:layout_height="wrap_content"
               android:text="蓝色"/>
           <CheckBox android:layout_width="wrap_content"
               android:layout_height="wrap_content"
               android:text="绿色"/>
       </LinearLayout>
   </TableRow>
   <TextView android:id="@+id/show"
       android:layout_width="wrap_content"
       android:layout_height="wrap_content" />

</TableLayout>
运行效果如下。
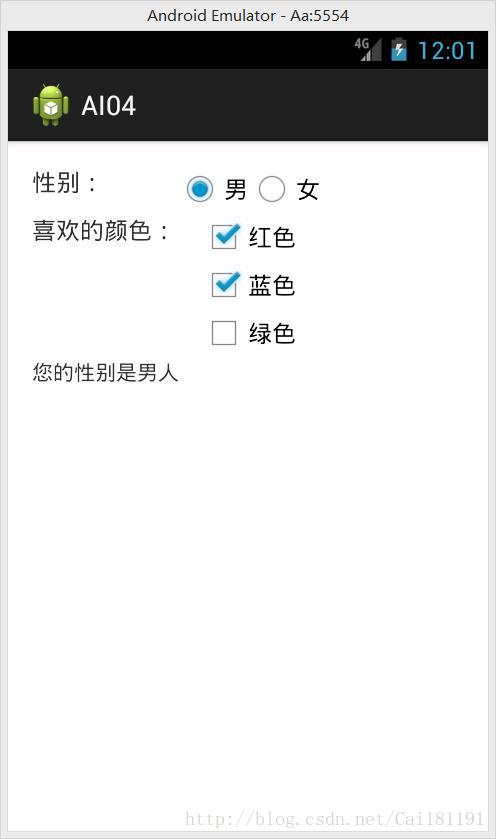
转自:https://www.cnblogs.com/wolipengbo/p/3343443.html
本文内容由网友自发贡献,版权归原作者所有,本站不承担相应法律责任。如您发现有涉嫌抄袭侵权的内容,请联系:hwhale#tublm.com(使用前将#替换为@)