一、先看Centos7的安装情况
1、多年前写了一篇文章:
centos7安装和卸载mysql5.7.18完整实用教程
https://blog.csdn.net/libaineu2004/article/details/76212125
https://downloads.mysql.com/archives/community/
2、今天安装新版本mysql 8.0.28。整个过程与5.x有不同。
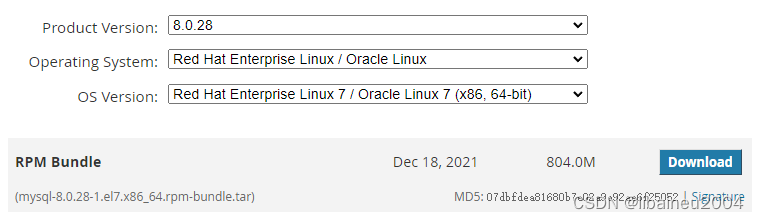
(1)8.x需要7个软件安装包,如下顺序依次安装
[root@localhost mysql]# rpm -ivh mysql-community-common-8.0.28-1.el7.x86_64.rpm
[root@localhost mysql]# rpm -ivh mysql-community-client-plugins-8.0.28-1.el7.x86_64.rpm
[root@localhost mysql]# rpm -ivh mysql-community-libs-8.0.28-1.el7.x86_64.rpm
[root@localhost mysql]# rpm -ivh mysql-community-client-8.0.28-1.el7.x86_64.rpm
[root@localhost mysql]# rpm -ivh mysql-community-icu-data-files-8.0.28-1.el7.x86_64.rpm
[root@localhost mysql]# rpm -ivh mysql-community-server-8.0.28-1.el7.x86_64.rpm
[root@localhost mysql]# rpm -ivh mysql-community-devel-8.0.28-1.el7.x86_64.rpm
(2)修改root密码
放弃旧方法
mysql> set password for root@localhost = password('Mypwd123456$');
使用新方法
mysql> ALTER USER 'root'@'localhost' IDENTIFIED BY 'Mypwd123456$';
(3)为 root 用户授权 mysql 远程连接服务
放弃旧方法
mysql> grant all privileges on *.* to 'root'@'%' identified by 'Mypwd123456$' with grant option;
mysql> flush privileges;
ERROR 1064 (42000): You have an error in your SQL syntax; check the manual that corresponds to your MySQL server version for the right syntax to use near 'identified by 'Mypwd123456$' with grant option' at line 1
使用新方法
mysql> create user 'root'@'%' identified by 'Mypwd123456$';
mysql> grant all privileges on *.* to 'root'@'%';
mysql> use mysql
Database changed
mysql> select user,host from user;
+------------------+-----------+
| user             | host      |
+------------------+-----------+
| mysql.infoschema | localhost |
| mysql.session    | localhost |
| mysql.sys        | localhost |
| root             | localhost |
+------------------+-----------+
4 rows in set (0.00 sec)

mysql> create user 'root'@'%' identified by 'Mypwd123456$';
Query OK, 0 rows affected (0.01 sec)

mysql> grant all privileges on *.* to 'root'@'%';
Query OK, 0 rows affected (0.00 sec)

mysql> exit
二、再看Windows10的情况
如果是Windows10环境安装了MySQL 8.0.x,那么请注意:
1、去官网下载*.msi文件,按照自定义选项安装,mysql-installer-community-8.0.31.0.msi
https://dev.mysql.com/downloads/installer/


2、默认的配置文件my.ini,在隐藏文件夹
C:\ProgramData\MySQL\MySQL Server 8.0\my.ini
字段datadir记录了当前保存的数据路径
# Path to the database root
datadir=C:/ProgramData/MySQL/MySQL Server 8.0\Data
如果想修改,得先关闭服务,等拷贝Data到目标路径,然后再启用。
win+r输入services.msc,可以快捷进入服务

3、为 root 用户授权 mysql 远程连接服务
windows开始菜单-MySQL 8.0 Command Line Client
输入root密码,然后与centos一样
mysql> create user 'root'@'%' identified by 'Mypwd123456$';
mysql> grant all privileges on *.* to 'root'@'%';
4、Qt连接mysql数据库出现问题:connect to mysql error “SSL connection error: unknown error number QMYSQL。
解决方法:
在my.ini文件中增加下面一行
[mysqld]
skip_ssl
5、用Qt客户端软件或者Navicat登陆Mysql8数据库时,报错:Authentication plugin 'caching_sha2_password' cannot be loaded。出现这个原因是mysql8 之前的版本中加密规则是mysql_native_password,而在mysql8之后,加密规则是caching_sha2_password。
解决方法:
升级客户端的库,把libmysql.dll升级到高版本。例如:

另外,Navicat Premium 15以上版本就可以支持caching_sha2_password。
6、用Qt软件登陆的Mysql8数据库时,报错:
Authentication plugin 'caching_sha2_password' reported error:Authentication require secure connection
"Authentication plugin 'caching_sha2_password' reported error: Authentication requires secure connection. QMYSQL: Unable to connect"
解决方法:
详情参见系列(3)
https://blog.csdn.net/libaineu2004/article/details/127568510
7、qt编译mysql的数据库插件
qt5默认是没有mysql插件的,需要自己编译

(1)进入源码工程
\Qt\\Src\qtbase\src\plugins\sqldrivers\mysql
(2)在mysql.pro中注释掉一行
#QMAKE_USE += mysql
qsqldriverbase.pri文件中注释掉
#include($$shadowed($$PWD)/qtsqldrivers-config.pri)
mysql.pro文件内容下面加上如下代码
path = "D:\My Resources\ImageProcessingLibrary\mysql"
INCLUDEPATH += $$path/include
win32:LIBS += -L$$path/lib -llibmysql
其中,include和lib是从mysql的安装路径C:\Program Files\MySQL\MySQL Server 8.0拷贝来的。
(3)编译,然后会在D:\plugins\sqldrivers得到文件
qsqlmysqld.dll
qsqlmysql.dll
(4)用户自己写的qt操作mysql的应用程序,发布时,除了需要以上的数据库插件,还需要带上mysql有关的动态库文件
C:\Program Files\MySQL\MySQL Server 8.0\lib\libmysql.dll
C:\Program Files\MySQL\MySQL Server 8.0\bin\libcrypto-1_1-x64.dll
C:\Program Files\MySQL\MySQL Server 8.0\bin\libssl-1_1-x64.dll
---
参考文献
Qt编译数据库插件通用步骤说明
https://qtchina.blog.csdn.net/article/details/125439119
数据库访问工具 DBUtl
http://qtdebug.com/qtbook-db-util/
姊妹篇
https://blog.csdn.net/libaineu2004/article/details/127216861
本文内容由网友自发贡献,版权归原作者所有,本站不承担相应法律责任。如您发现有涉嫌抄袭侵权的内容,请联系:hwhale#tublm.com(使用前将#替换为@)