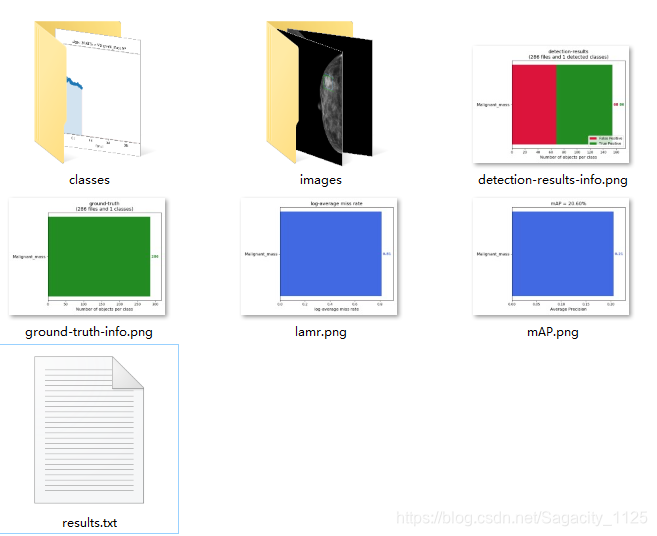
1. 解压之后如下图所示:
-
input文件夹里面放的是测试集的ground-truth、模型的测试结果、和测试集
-
scripts文件夹里面放的是一下制作input文件夹中一些 .txt文件需要用到的脚本文件,可以自行选择使用。
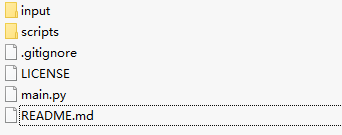
2. 运行main.py文件,上图中会自动创建一个名为results的文件夹,里面就是我们要的结果。如下图所示:
二、那么该如何计算自己的mAP呢?
主要有以下几个步骤:
- 制作input文件夹中的‘detection-results’文件中的.txt文件
- 制作input文件夹中的‘ground-truth’文件中的.txt文件
- 将测试集放到’images-optional’文件夹中
接下来详细讲解怎么制作1、2中的文件
1. 制作input文件夹中的‘detection-results’文件中的.txt文件
(1)为每张图片制作一个与图片名相同的文件,如(e.g. image: “000001.jpg”, detection-results: “000001.txt”).
在这些.txt文件中,每行的格式如下:
<class_name> <confidence> <left> <top> <right> <bottom>
如:“000001.txt”中的内容如下:
Malignant_mass 0.14168233 74 1426 352 1637
Malignant_mass 0.269833 433 260 506 336
运行以下代码即可:yolo_test.py
# -*- coding: utf-8 -*-
"""
功能:keras-yolov3 进行批量测试 并 保存结果
项目来源:https://github.com/qqwweee/keras-yolo3
"""

import colorsys
import os
from timeit import default_timer as timer
import time

import numpy as np
from keras import backend as K
from keras.models import load_model
from keras.layers import Input
from PIL import Image, ImageFont, ImageDraw

from yolo3.model import yolo_eval, yolo_body, tiny_yolo_body
from yolo3.utils import letterbox_image
from keras.utils import multi_gpu_model

import tensorflow as tf
from keras import backend as K
config = tf.ConfigProto()
config.gpu_options.allow_growth=True
sess = tf.Session(config=config)
K.set_session(sess)


path = 'D:\\tensorflow\keras-yolo3-test-master\\test'  #待检测图片的位置

# 创建创建一个存储检测结果的dir
result_path = 'D:\\tensorflow\keras-yolo3-test-master\\result'
if not os.path.exists(result_path):
    os.makedirs(result_path)

# result如果之前存放的有文件,全部清除
for i in os.listdir(result_path):
    path_file = os.path.join(result_path,i)
    if os.path.isfile(path_file):
        os.remove(path_file)

#创建一个记录检测结果的文件
txt_path =result_path + '/result.txt'
file = open(txt_path,'w')

class YOLO(object):
    _defaults = {
        "model_path": 'D:\\tensorflow\\keras-yolo3-master\\model_data\\trained_weights15.h5',#训练好之后保存的模型
        "anchors_path": 'D:\\tensorflow\\keras-yolo3-master\\model_data\\yolo_anchors.txt',
        "classes_path": 'D:\\tensorflow\\keras-yolo3-master\\model_data\\coco_classes.txt',
        "score" : 0.1,
        "iou" : 0.3,
        "model_image_size" : (416, 416),
        "gpu_num" : 1,
    }

    @classmethod
    def get_defaults(cls, n):
        if n in cls._defaults:
            return cls._defaults[n]
        else:
            return "Unrecognized attribute name '" + n + "'"

    def __init__(self, **kwargs):
        self.__dict__.update(self._defaults) # set up default values
        self.__dict__.update(kwargs) # and update with user overrides
        self.class_names = self._get_class()
        self.anchors = self._get_anchors()
        self.sess = K.get_session()
        self.boxes, self.scores, self.classes = self.generate()

    def _get_class(self):
        classes_path = os.path.expanduser(self.classes_path)
        with open(classes_path) as f:
            class_names = f.readlines()
        class_names = [c.strip() for c in class_names]
        return class_names

    def _get_anchors(self):
        anchors_path = os.path.expanduser(self.anchors_path)
        with open(anchors_path) as f:
            anchors = f.readline()
        anchors = [float(x) for x in anchors.split(',')]
        return np.array(anchors).reshape(-1, 2)

    def generate(self):
        model_path = os.path.expanduser(self.model_path)
        assert model_path.endswith('.h5'), 'Keras model or weights must be a .h5 file.'

        # Load model, or construct model and load weights.
        num_anchors = len(self.anchors)
        num_classes = len(self.class_names)
        is_tiny_version = num_anchors==6 # default setting
        try:
            self.yolo_model = load_model(model_path, compile=False)
        except:
            self.yolo_model = tiny_yolo_body(Input(shape=(None,None,3)), num_anchors//2, num_classes) \
                if is_tiny_version else yolo_body(Input(shape=(None,None,3)), num_anchors//3, num_classes)
            self.yolo_model.load_weights(self.model_path) # make sure model, anchors and classes match
        else:
            assert self.yolo_model.layers[-1].output_shape[-1] == \
                num_anchors/len(self.yolo_model.output) * (num_classes + 5), \
                'Mismatch between model and given anchor and class sizes'

        print('{} model, anchors, and classes loaded.'.format(model_path))

        # Generate colors for drawing bounding boxes.
        hsv_tuples = [(x / len(self.class_names), 1., 1.)
                      for x in range(len(self.class_names))]
        self.colors = list(map(lambda x: colorsys.hsv_to_rgb(*x), hsv_tuples))
        self.colors = list(
            map(lambda x: (int(x[0] * 255), int(x[1] * 255), int(x[2] * 255)),
                self.colors))
        np.random.seed(10101)  # Fixed seed for consistent colors across runs.
        np.random.shuffle(self.colors)  # Shuffle colors to decorrelate adjacent classes.
        np.random.seed(None)  # Reset seed to default.

        # Generate output tensor targets for filtered bounding boxes.
        self.input_image_shape = K.placeholder(shape=(2, ))
        if self.gpu_num>=2:
            self.yolo_model = multi_gpu_model(self.yolo_model, gpus=self.gpu_num)
        boxes, scores, classes = yolo_eval(self.yolo_model.output, self.anchors,
                len(self.class_names), self.input_image_shape,
                score_threshold=self.score, iou_threshold=self.iou)
        return boxes, scores, classes

    def detect_image(self, image):
        start = timer() # 开始计时

        if self.model_image_size != (None, None):
            assert self.model_image_size[0]%32 == 0, 'Multiples of 32 required'
            assert self.model_image_size[1]%32 == 0, 'Multiples of 32 required'
            boxed_image = letterbox_image(image, tuple(reversed(self.model_image_size)))
        else:
            new_image_size = (image.width - (image.width % 32),
                              image.height - (image.height % 32))
            boxed_image = letterbox_image(image, new_image_size)
        image_data = np.array(boxed_image, dtype='float32')

        print(image_data.shape) #打印图片的尺寸
        image_data /= 255.
        image_data = np.expand_dims(image_data, 0)  # Add batch dimension.

        out_boxes, out_scores, out_classes = self.sess.run(
            [self.boxes, self.scores, self.classes],
            feed_dict={
                self.yolo_model.input: image_data,
                self.input_image_shape: [image.size[1], image.size[0]],
                K.learning_phase(): 0
            })

        print('Found {} boxes for {}'.format(len(out_boxes), 'img')) # 提示用于找到几个bbox

        font = ImageFont.truetype(font='font/FiraMono-Medium.otf',
                    size=np.floor(2e-2 * image.size[1] + 0.2).astype('int32'))
        thickness = (image.size[0] + image.size[1]) // 500

        # 保存框检测出的框的个数
        # file.write('find  '+str(len(out_boxes))+' target(s) \n')

        for i, c in reversed(list(enumerate(out_classes))):
            predicted_class = self.class_names[c]
            box = out_boxes[i]
            score = out_scores[i]

            label = '{} {:.2f}'.format(predicted_class, score)
            draw = ImageDraw.Draw(image)
            label_size = draw.textsize(label, font)

            top, left, bottom, right = box
            top = max(0, np.floor(top + 0.5).astype('int32'))
            left = max(0, np.floor(left + 0.5).astype('int32'))
            bottom = min(image.size[1], np.floor(bottom + 0.5).astype('int32'))
            right = min(image.size[0], np.floor(right + 0.5).astype('int32'))

            # 写入检测位置
            # file.write(predicted_class+'  score: '+str(score)+' \nlocation: top: '+str(top)+'、 bottom: '+str(bottom)+'、 left: '+str(left)+'、 right: '+str(right)+'\n')
            file.write(' ' + predicted_class  +  ' ' +str(score) + ' ' + str(left)+ ' ' + str(top) + ' ' + str(right)+ ' '  + str(bottom) + ';')
            print(label, (left, top), (right, bottom))

            if top - label_size[1] >= 0:
                text_origin = np.array([left, top - label_size[1]])
            else:
                text_origin = np.array([left, top + 1])

            # My kingdom for a good redistributable image drawing library.
            for i in range(thickness):
                draw.rectangle(
                    [left + i, top + i, right - i, bottom - i],
                    outline=self.colors[c])
            draw.rectangle(
                [tuple(text_origin), tuple(text_origin + label_size)],
                fill=self.colors[c])
            draw.text(text_origin, label, fill=(0, 0, 0), font=font)
            del draw

        end = timer()
        print('time consume:%.3f s '%(end - start))
        return image

    def close_session(self):
        self.sess.close()


# 图片检测

if __name__ == '__main__':

    t1 = time.time()
    yolo = YOLO()
    for filename in os.listdir(path):
        image_path = path+'//'+filename
        portion = os.path.split(image_path)
        # file.write(portion[1]+' detect_result:\n')
        file.write(portion[1])
        image = Image.open(image_path)
        r_image = yolo.detect_image(image)
        file.write('\n')
        #r_image.show() 显示检测结果
        image_save_path = './result/result_'+portion[1]
        print('detect result save to....:'+image_save_path)
        r_image.save(image_save_path)

    time_sum = time.time() - t1
    file.write('time sum: '+str(time_sum)+'s')
    print('time sum:',time_sum)
    file.close()
    yolo.close_session()
结果会产生一个result文件夹,里面存放bounding box的result.txt文件和测试结果图
result.txt中的内容
000002.JPG Malignant_mass 0.14168233 74 1426 352 1637;
000003.JPG
000004.JPG Malignant_mass 0.11473637 52 369 341 585;
000005.JPG
000006.JPG
000007.JPG Malignant_mass 0.100756824 72 1255 358 1461;
000008.JPG Malignant_mass 0.18358967 142 1247 457 1453;
对result.txt进行分割,每张图片对应保存成一个.txt文件,代码如下:
detection_results.py
f = open('D:\\tensorflow\keras-yolo3-test-master\\result\\result.txt')
s=f.readlines()
result_path='D:\\tensorflow\keras-yolo3-test-master\\result\\'

for i in range(len(s)):  # 中按行存放的检测内容,为列表的形式
    r = s[i].split('JPG')
    file = open(result_path + r[0] + 'txt', 'w')
    if len(r[1]) > 5:
        t = r[1].split(';')
        # print('len(t):',len(t))
        if len(t) == 3:
            file.write(t[0] + '\n' + t[1] + '\n')  # 有两个对象被检测出
        elif len(t) == 4:
            file.write(t[0] + '\n' + t[1] + '\n' + t[2] + '\n')  # 有三个对象被检测出
        # elif len(t) == 5:
        #     file.write(t[0] + '\n' + t[1] + '\n' + t[2] + '\n' + t[3] + '\n')  # 有四个对象被检测出
        # elif len(t) == 6:
        #     file.write(t[0] + '\n' + t[1] + '\n' + t[2] + '\n' + t[3] + '\n' + t[4] + '\n')  # 有五个对象被检测出
        # elif len(t) == 7:
        #     file.write(t[0] + '\n' + t[1] + '\n' + t[2] + '\n' + t[3] + '\n' + t[4] + '\n' + t[5] + '\n')  # 有六个对象被检测出

        else:
            file.write(t[0] + '\n')  # 有一个对象
    else:
        file.write('')  # 没有检测出来对象,创建一个空白的对象
处理结果如下:直接复制到detection-results文件夹中即可
2. 制作input文件夹中的‘ground-truth’文件中的.txt文件
制作方法和’detection-results’是一样的,只不过其中.txt文件中的内容格式如下:
<class_name> <left> <top> <right> <bottom> [<difficult>]
其中difficult参数是可选的
eg.‘000001.txt’:
Malignant_mass 127 1420 306 1610
注意:需要将以下脚本文件和需要转换的xml文件放在一起
convert_gt_xml.py
import sys
import os
import glob
import xml.etree.ElementTree as ET

# make sure that the cwd() in the beginning is the location of the python script (so that every path makes sense)
os.chdir(os.path.dirname(os.path.abspath(__file__)))

# change directory to the one with the files to be changed
parent_path = os.path.abspath(os.path.join(os.getcwd(), os.pardir))
parent_path = os.path.abspath(os.path.join(parent_path, os.pardir))
GT_PATH = os.path.join(parent_path, 'input','ground-truth')
#print(GT_PATH)
os.chdir(GT_PATH)

# old files (xml format) will be moved to a "backup" folder
## create the backup dir if it doesn't exist already
if not os.path.exists("backup"):
  os.makedirs("backup")

# create VOC format files
xml_list = glob.glob('*.xml')
if len(xml_list) == 0:
  print("Error: no .xml files found in ground-truth")
  sys.exit()
for tmp_file in xml_list:
  #print(tmp_file)
  # 1. create new file (VOC format)
  with open(tmp_file.replace(".xml", ".txt"), "a") as new_f:
    root = ET.parse(tmp_file).getroot()
    for obj in root.findall('object'):
      obj_name = obj.find('name').text
      bndbox = obj.find('bndbox')
      left = bndbox.find('xmin').text
      top = bndbox.find('ymin').text
      right = bndbox.find('xmax').text
      bottom = bndbox.find('ymax').text
      new_f.write("%s %s %s %s %s\n" % (obj_name, left, top, right, bottom))
  # 2. move old file (xml format) to backup
  os.rename(tmp_file, os.path.join("backup", tmp_file))
print("Conversion completed!")
3. 运行main.py就可以了
运行结果如下: