目录
yolo-tensorrt
下载weights模型
onnx_tensorrt_project
编译问题解决
依赖项
自己生成weights模型,以及加载报错解决
生成引擎报错解决
批量预测
自动创建引擎
解决检测框乱的问题
提速
batch_size 大于1的调试:
tensorrt yolov5学习笔记_jacke121的专栏-CSDN博客
yolo-tensorrt
调试ok的地址:
https://github.com/enazoe/yolo-tensorrt
新增了yolov5-6。
也需要tensorrt7.1版本
下载weights模型
../configs/yolov5-5.0/yolov5s6.weights
下载地址:
https://github.com/enazoe/yolo-tensorrt/blob/master/yolov5_tutorial.md
结果是对的:
yolo-tensorrt_dll 报错不能提示。exe生成引擎文件后,也ok了。
yolo-tensorrt_exe结果:

python训练yolov5代码:没验证
F:\project\detect\yolov5\yolov5-5.0_voc
onnx_tensorrt_project
这个:
https://github.com/ttanzhiqiang/onnx_tensorrt_project
编译问题解决
1.cuda版本:
dll_detector.vcxproj
test_dll.vcxproj
可能另外一个项目的:
tiny_tensorrt_onnx.vcxproj
搜索11.1改为安装的版本,但是10.2版本以上,10.2 11.0 11.1
支持列表:
1. cuda10.2 TensorRT-7.2.1.6
2.cuda11 TensorRT-7.2.3.4
依赖项
F:\project\detect\yolov5\tensorrt\onnx_tensorrt_project\3rdparty\TensorRT-7.2.3.4\include
F:\project\detect\yolov5\tensorrt\onnx_tensorrt_project\3rdparty\opencv3.4.0\include\opencv
F:\project\detect\yolov5\tensorrt\onnx_tensorrt_project\3rdparty\opencv3.4.0\include
库文件:
F:\project\detect\yolov5\tensorrt\onnx_tensorrt_project\3rdparty\opencv3.4.0\lib\vc15
F:\project\detect\yolov5\tensorrt\onnx_tensorrt_project\3rdparty\TensorRT-7.2.3.4\lib
compute_30,sm_30
int main_yolov5()
改为:
int main()
yolo_detector.cpp中的int main()
改为:
int main_yolov5()
3.更改tensorrt的版本。
2.报错:
严重性 代码 说明 项目 文件 行 禁止显示状态
错误 LNK2001 无法解析的外部符号 createNvOnnxParser_INTERNAL tiny_tensorrt_onnx F:\project\detect\yolov5\tensorrt\onnx_tensorrt_project-main\tiny_tensorrt_onnx\Trt.obj 1
解决:
tensorrt版本:7.2.3.4
添加lib:
nvonnxparser.lib
nvparsers.lib
https://github.com/ttanzhiqiang/onnx_tensorrt_project
cuda11.1 tensorrt 7.2.3版本,我换成6.0版本,int8放弃,编译成功,转onnx成功,转engine失败了
报错代码:
    if(!parser->parseFromFile(onnxModel.c_str(), static_cast<int>(nvinfer1::ILogger::Severity::kWARNING))) {
        spdlog::error("error: could not parse onnx engine");
        return false;
    }
yolov5-4.0,预测出来的值与python的结果稍微不一样:

自己生成weights模型,以及加载报错解决
yolo5各个版本cfg下载:
yolo-tensorrt/yolov5_tutorial.md at master · enazoe/yolo-tensorrt · GitHub
yolov5 tensorrt_jacke121的专栏-CSDN博客_yolov5tensorrt
改之前的:get_weights.py
import torch
import struct
from utils.torch_utils import select_device

# Initialize
device = select_device('cpu')
# Load model
# model = torch.load('yolov5s.pt', map_location=device)['model'].float()  # load to FP32
model = torch.load('_0.9437_5997.pt', map_location=device)['model'].float()  # load to FP32
model.to(device).eval()

f = open('yolov5s.weights', 'w')
f.write('{}\n'.format(len(model.state_dict().keys())))
for k, v in model.state_dict().items():
    vr = v.reshape(-1).cpu().numpy()
    f.write('{} {} '.format(k, len(vr)))
    for vv in vr:
        f.write(' ')
        f.write(struct.pack('>f',float(vv)).hex())
    f.write('\n')
报错解决之后的:get_weights.py
修改代码:f.write('{} '.format(k))
import torch
import struct
from utils.torch_utils import select_device

# Initialize
device = select_device('cpu')
# Load model
# model = torch.load('yolov5s.pt', map_location=device)['model'].float()  # load to FP32
model = torch.load('_0.9437_5997.pt', map_location=device)['model'].float()  # load to FP32
model.to(device).eval()

f = open('yolov5s.weights', 'w')
f.write('{}\n'.format(len(model.state_dict().keys())))
for k, v in model.state_dict().items():
    vr = v.reshape(-1).cpu().numpy()
    #f.write('{} {} '.format(k, len(vr)))
    f.write('{} '.format(k))
    for vv in vr:
        f.write(' ')
        f.write(struct.pack('>f',float(vv)).hex())
    f.write('\n')
c++解析weights,修改之前的:
void Yolo::load_weights_v5(const std::string s_weights_path_,
	std::map<std::string,std::vector<float>> &vec_wts_)
{
	vec_wts_.clear();
	assert(fileExists(s_weights_path_));
	std::cout << "Loading pre-trained weights..." << std::endl;
	std::ifstream file(s_weights_path_, std::ios_base::binary);
	assert(file.good());
	std::string line;
	while (std::getline(file,line))
	{
		if(line.empty())continue;
		std::stringstream iss(line);
		std::string wts_name;
		iss >> wts_name ;
		std::vector<float> weights;
		uint32_t n_str;
		while(iss >> std::hex >> n_str)
		{
			weights.push_back(reinterpret_cast<float&>(n_str));
		}
		vec_wts_[wts_name] = weights;
	}
	std::cout << "Loading complete!" << std::endl;
}
自己导出的weights,导入报错,报错的地方:
std::cout << size << " size " << map_wts_[s_layer_name_ + ".weight"].size() << std::endl;
assert(size == (map_wts_[s_layer_name_ + ".weight"].size()));
结果; 3456 3457
发现python保存时,保存名字+空格+长度+空格+数据。
c++读取,读取名字后,直接读取数据,导出实际长度比size大1。
修改后代码:
void Yolo::load_weights_v5(const std::string s_weights_path_,
	std::map<std::string,std::vector<float>> &vec_wts_)
{
	vec_wts_.clear();
	assert(fileExists(s_weights_path_));
	std::cout << "Loading pre-trained weights..." << std::endl;
	std::ifstream file(s_weights_path_, std::ios_base::binary);
	assert(file.good());
	std::string line;
	while (std::getline(file,line))
	{
		if(line.empty())continue;
		std::stringstream iss(line);
		std::string wts_name;
		iss >> wts_name ;

		int size_a;
		iss >> size_a;

		std::vector<float> weights;
		uint32_t n_str;
		while(iss >> std::hex >> n_str)
		{
			weights.push_back(reinterpret_cast<float&>(n_str));
		}
		vec_wts_[wts_name] = weights;
	}
	std::cout << "Loading complete!" << std::endl;
}
参考:Pytorch通过保存为ONNX模型转TensorRT5_连正的博客-CSDN博客_onnx转tensorrt
生成引擎报错解决
ERROR: (Unnamed Layer* 193) [Concatenation]: all concat input tensors must have the same dimensions except on the concatenation axis (0), but dimensions mismatched at index 1. Input 0 shape: [384,18,18], Input 1 shape: [384,17,17]
Assertion failed: d.nbDims == 3, file f:\project\detect\yolov5\tensorrt\yolo-tensorrt_exe\modules\trt_utils.cpp, line 444
后来发现是分辨率给错了,分辨率需要是64的倍数
yolov5s6.cfg 修改内容:
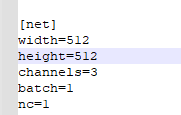
width和height,需要是64的倍数
nc,实际训练的类别个数。
批量预测
yolo.cpp文件:
m_BatchSize = 2;// std::stoi(trim(block.at("batch")));
自动创建引擎
先检测engine文件不存在,然后自动创建,创建大概要上分钟,需要耐心等待。

void Yolo::create_engine_yolov5(const nvinfer1::DataType dataType,
Int8EntropyCalibrator* calibrator )
{
yolov5s6-kFLOAT-batch1
| 设备 |
模型 |
model |
batch |
gpu计算耗时/ms |
平均耗时 |
| 1060 |
yolov5s6 |
fp32 |
1 |
23 |
23 |
| 1060 |
yolov5s7 |
fp32 |
2 |
40 |
20 |
| 1060 |
yolov5s8 |
fp32 |
4 |
72 |
18 |
| 1060 |
yolov5s9 |
fp32 |
8 |
130 |
16.25 |
输出特征维数:
| w |
h |
anchors |
特征数量 |
类别加box |
|
|
|
| 80 |
64 |
3 |
15360 |
85 |
|
1305600 |
|
|
| 40 |
32 |
3 |
3840 |
85 |
|
326400 |
|
|
| 20 |
16 |
3 |
960 |
85 |
|
81600 |
|
|
| 10 |
8 |
3 |
240 |
85 |
|
20400 |
|
173400 |
打印特征:
std::vector<BBoxInfo> Yolo::decodeDetections(const int& imageIdx,
										     const int& imageH,
                                             const int& imageW)
{
//	Timer timer;
    std::vector<BBoxInfo> binfo;
    for (auto& tensor : m_OutputTensors)
    {

		for (int a = 0; a < 20; a++) {
			std::cout << tensor.hostBuffer[a] << " ";
		}
		std::cout << std::endl;

        std::vector<BBoxInfo> curBInfo = decodeTensor(imageIdx, imageH, imageW, tensor);
        binfo.insert(binfo.end(), curBInfo.begin(), curBInfo.end());
    }
//	timer.out("decodeDetections");
    return binfo;
解决检测框乱的问题
第一步:转化weights文件时,记录anchors,
就是下面代码中的:anchor_grid
代码文件:
gen_weight_new.py
anchor_grid = model.model[-1].anchors * model.model[-1].stride[...,None,None]
print(anchor_grid)
# model.model[-1].anchor_grid = anchor_grid
delattr(model.model[-1], 'anchor_grid') # model.model[-1] is detect layer
model.model[-1].register_buffer("anchor_grid",anchor_grid)
打印结果:
tensor([[[ 35.18750, 5.43750],
[ 69.50000, 6.88672],
[ 49.90625, 9.78906]],
[[ 75.00000, 10.44531],
[112.87500, 8.17969],
[141.87500, 10.35156]],
[[217.25000, 8.93750],
[243.00000, 12.73438],
[320.00000, 10.21875]]])
第二步:保存到cfg中:
D:\work\lbg\yolov5_track\yolo-tensorrt_dll\sln\x64\Release\configs\kuaizi.cfg
width_multiple=0.5
anchors=35.18750,5.4375,69.50,6.88672, 49.90625,9.78906,75.0,10.445,112.870,8.17969,141.875, 10.35156,217.25,8.9375,243.0,12.73438,320.0,10.21875
提速
cfg中修改:
[net]
width=640
height=128
然后删掉kuaizi-kFLOAT-batch5_640.engine文件,重新生成engine文件,
自己的项目速度由16ms提升到8ms。
cfg中修改:
[net]
width=640
height=128
然后删掉kuaizi-kFLOAT-batch5_640.engine文件,重新生成engine文件,
速度右16ms提升到8ms。