1、创建工作空间
mkdir cartographer_ws
cd cartographer_ws
wstool init src
2、下载cartographer源码包
wstool merge -t src https://raw.githubusercontent.com/googlecartographer/cartographer_ros/master/cartographer_ros.rosinstall
wstool update -t src
第一步是下载cartographer源码,总共有三个文件夹 ,国内的话第三个包 ceres-solver的网址会招到拦截所以会下载失败,此时的解决办法为:从github网址下载后,将其放入到工作空间,三个包可以直接打开网络下载放进src工作区间,自己下载完放进去的可以不用执行第二步
参考网址:
cartographer_ros
cartographer
ceres-solver
3、安装依赖的ROS包
src/cartographer/scripts/install_proto3.sh
sudo rosdep init
rosdep update
rosdep install --from-paths src --ignore-src --rosdistro=melodic -y -i -r
如果安装ROS的时候执行过'sudo rosdep init',那么这里会报错,报错可以忽略
4、安装abseil-cpp librar
src/cartographer/scripts/install_abseil.sh
5、编译并安装
catkin_make_isolated --install --use-ninja
由于编译的内容比较大,首次编译会比较慢,耐心等待即可,正常情况下可以编译,如果abseil安装没有成功会报错:
CMake Error at CMakeLists.txt:32 (find_package):
  By not providing "Findabsl.cmake" in CMAKE_MODULE_PATH this project has
  asked CMake to find a package configuration file provided by "absl", but
  CMake did not find one.


  Could not find a package configuration file provided by "absl" with any of
  the following names:


    abslConfig.cmake
    absl-config.cmake


  Add the installation prefix of "absl" to CMAKE_PREFIX_PATH or set
  "absl_DIR" to a directory containing one of the above files.  If "absl"
  provides a separate development package or SDK, be sure it has been
  installed.
此时解决步骤如下:
sudo apt-get install stow
sudo chmod +x ~/cartographer_ws/src/cartographer/scriptsinstall_abseil.sh
cd ~/cartographer_ws/src/cartographer/scripts
./install_abseil.sh
编译完成过后把环境变量写进.bashrc方便以后运行
sudo gedit ~/.bashrc
在.bashrc中添加环境变量
source /home/gongmeifang/cartographer_ws/install_isolated/setup.bash
刷新使环境变量生效后 关闭所有终端
source ~/.bashrc
6、修改revo_lds.lua文件
修改cartographer下的文件,文件路径:cartographer_ws/src/cartographer_ros/cartographer_ros/configuration_files/revo_lds.lua
只需要修改以下两句里面的horizontal_laser_link,改成自己激光雷达的frame_id,修改为laser即可,一般都是laser,其余的不要动。
tracking_frame = "horizontal_laser_link",
published_frame = "horizontal_laser_link",
修改后的文件代码如下:
-- Copyright 2016 The Cartographer Authors
--
-- Licensed under the Apache License, Version 2.0 (the "License");
-- you may not use this file except in compliance with the License.
-- You may obtain a copy of the License at
--
--      http://www.apache.org/licenses/LICENSE-2.0
--
-- Unless required by applicable law or agreed to in writing, software
-- distributed under the License is distributed on an "AS IS" BASIS,
-- WITHOUT WARRANTIES OR CONDITIONS OF ANY KIND, either express or implied.
-- See the License for the specific language governing permissions and
-- limitations under the License.

include "map_builder.lua"
include "trajectory_builder.lua"

options = {
  map_builder = MAP_BUILDER,
  trajectory_builder = TRAJECTORY_BUILDER,
  map_frame = "map",
  tracking_frame = "laser",
  published_frame = "laser",
  odom_frame = "odom",
  provide_odom_frame = true,
  publish_frame_projected_to_2d = false,
  use_pose_extrapolator = true,
  use_odometry = false,
  use_nav_sat = false,
  use_landmarks = false,
  num_laser_scans = 1,
  num_multi_echo_laser_scans = 0,
  num_subdivisions_per_laser_scan = 1,
  num_point_clouds = 0,
  lookup_transform_timeout_sec = 0.2,
  submap_publish_period_sec = 0.3,
  pose_publish_period_sec = 5e-3,
  trajectory_publish_period_sec = 30e-3,
  rangefinder_sampling_ratio = 1.,
  odometry_sampling_ratio = 1.,
  fixed_frame_pose_sampling_ratio = 1.,
  imu_sampling_ratio = 1.,
  landmarks_sampling_ratio = 1.,
}

MAP_BUILDER.use_trajectory_builder_2d = true

TRAJECTORY_BUILDER_2D.submaps.num_range_data = 35
TRAJECTORY_BUILDER_2D.min_range = 0.3
TRAJECTORY_BUILDER_2D.max_range = 8.
TRAJECTORY_BUILDER_2D.missing_data_ray_length = 1.
TRAJECTORY_BUILDER_2D.use_imu_data = false
TRAJECTORY_BUILDER_2D.use_online_correlative_scan_matching = true
TRAJECTORY_BUILDER_2D.real_time_correlative_scan_matcher.linear_search_window = 0.1
TRAJECTORY_BUILDER_2D.real_time_correlative_scan_matcher.translation_delta_cost_weight = 10.
TRAJECTORY_BUILDER_2D.real_time_correlative_scan_matcher.rotation_delta_cost_weight = 1e-1


POSE_GRAPH.optimization_problem.huber_scale = 1e2
POSE_GRAPH.optimize_every_n_nodes = 35
POSE_GRAPH.constraint_builder.min_score = 0.65

return options
7、修改demo_revo_lds.launch文件
修改cartographer下的文件,文件路径:cartographer_ws/src/cartographer_ros/cartographer_ros/launch/demo_revo_lds.launch文件。打开demo_revo_lds.launch并修改代码如下:
<!--
  Copyright 2016 The Cartographer Authors

  Licensed under the Apache License, Version 2.0 (the "License");
  you may not use this file except in compliance with the License.
  You may obtain a copy of the License at

       http://www.apache.org/licenses/LICENSE-2.0

  Unless required by applicable law or agreed to in writing, software
  distributed under the License is distributed on an "AS IS" BASIS,
  WITHOUT WARRANTIES OR CONDITIONS OF ANY KIND, either express or implied.
  See the License for the specific language governing permissions and
  limitations under the License.
-->

<launch>
  <param name="/use_sim_time" value="true" />

  <node name="cartographer_node" pkg="cartographer_ros"
      type="cartographer_node" args="
          -configuration_directory $(find cartographer_ros)/configuration_files
          -configuration_basename revo_lds.lua"
      output="screen">
    <remap from="scan" to="scan" />
  </node>

  <node name="rviz" pkg="rviz" type="rviz" required="true"
      args="-d $(find cartographer_ros)/configuration_files/demo_2d.rviz" />"
</launch>
修改完之后,回到cartographer_ws 目录下再次编译
catkin_make_isolated --install --use-ninja
8、启动测试
首先运行激光雷达节点launch文件
roslaunch rplidar_ros rplidar.launch
运行cartographer框架
roslaunch cartographer_ros demo_revo_lds.launch
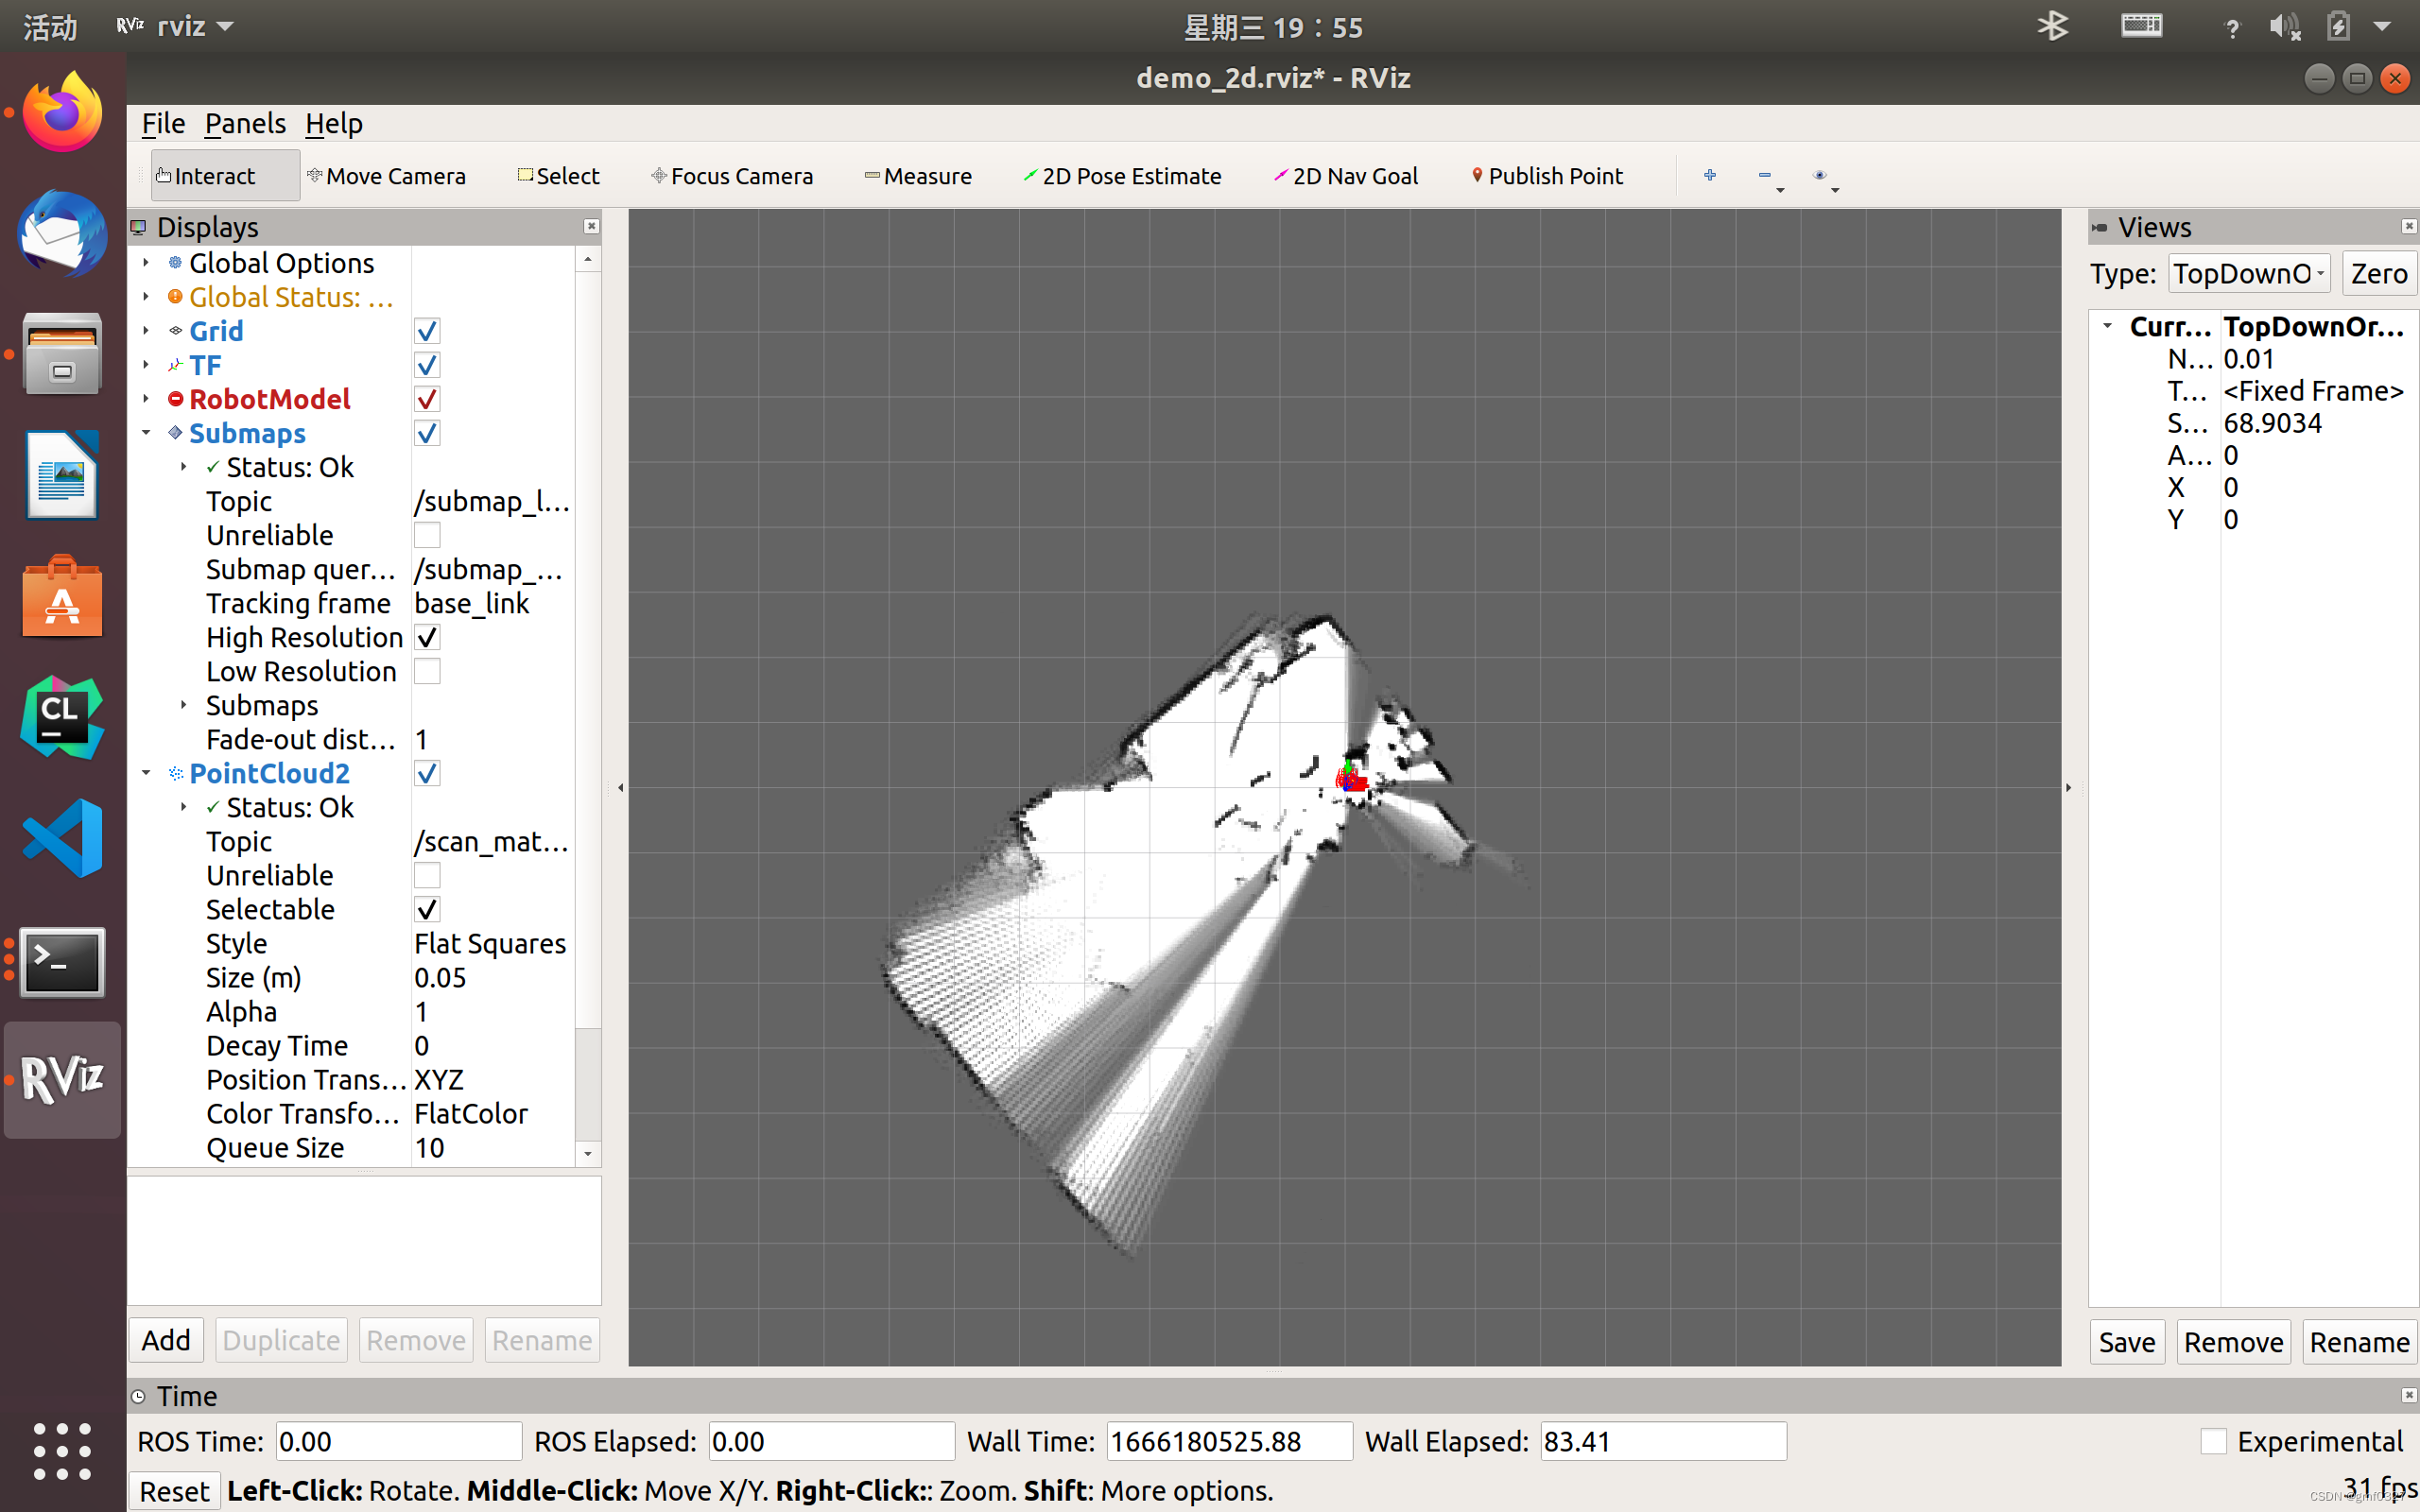
运行正常将打开rviz,并且显示正常,如下
参考:
Ubuntu 16.04 ROS Kinetic安装Cartographer 及使用RPLIDAR A2建图测试_苏沛东的博客-CSDN博客
Ubuntu1804上源码安装cartographer问题整理 - 创客智造社区
本文内容由网友自发贡献,版权归原作者所有,本站不承担相应法律责任。如您发现有涉嫌抄袭侵权的内容,请联系:hwhale#tublm.com(使用前将#替换为@)