【Unity】第三人称射击游戏开发过程之瞄准状态设计(TPS.S.P1)
这篇文章开始,我将逐渐的整理并开发第三人称射击游戏。在项目到达稳定之前,这个系列的任何一篇文章的任何一个部分都有可能改变。这也就意味着本系列文章仅作为自己的笔记。文章内容可以提供制作游戏的思路,但尚且存在可能的优化。
设计整体的结构与模式
以下是我的设计思路:
角色有两件武器,同时会存在无武器状态。武器可以在进入游戏前进行更换。手雷暂时不做设计。
枪械可以存在一个基类,然后不同的武器类型进行继承。不过是否这样我仍然在思考,优先使用一种类抽象出不同的枪械类型。
瞄准状态的设计
这个可以看看代码猴使用第三人称开发的视频,我将使用类似的思想进行设计。
我们做另一个渐进的VCamera。用代码控制这个的激活。每当按下瞄准,会将其激活,会自动进入瞄准的VM。在瞄准状态下,我们限制移动速度只能为行走,不允许跑步,并且移动将成为始终朝向瞄准方向下的前后左右。
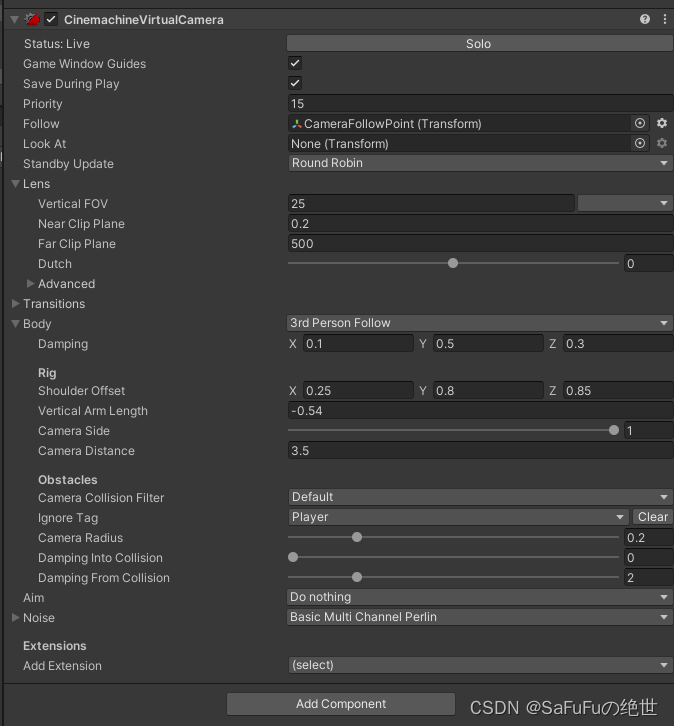
瞄准相机
我们将之前的相机复制出来,重新命名为瞄准相机。调整FOV以及distance和offset,确定一个合适的相机大小与角度。这是我设置的一个机位。
我们在代码中引入Cinemachine的命名空间,将这个相机加进来。然后做一个DoAim的方法,将这个组件的游戏对象与输入系统中的aim属性同步。
当然,在动画状态机中也会设置相应的部分,做一个bool值的更新。
public CinemachineVirtualCamera _aimCamera;

    private void DoAim()
    {
        _aimCamera.gameObject.SetActive(_isAim);
        _anim.SetBool("Aiming", _isAim);
    }
在测试前,请确保在本系列第一篇中的Input系统中有做好映射,我们的逻辑一直都是input监测输入,然后Controller检测输入值。做好对应关系,就可以测试了。
瞄准状态
瞄准时的鼠标移动速度限制
我们创建一个float值表示速度倍率,这个值将与普通速度相乘,平时为1f,瞄准状态下的值会决定当前鼠标速度是普通状态下的几倍。对应的,创建一些基础的值,这将会方便我们后续的修正。最后在项目做到相对完整时,写一个Setting的代码,将所有的基础值写进去,然后写一个设置面板就可以了。
    public float SpeedChangeRate = 10.0f;
    private float normalSensitivity=1f;
    [Tooltip("这是在基础鼠标移速下,瞄准速度的倍率")]
    public float aimSensitivity = 0.6f;
    [Tooltip("这是鼠标移动速度比例")]
    private float Sensitivity = 1f;
接下来,在CameraRotation的方法中,将赋值的部分乘上这个倍率。
_cinemachineTagertX += _inputsMassage.look.x * deltaTimeMultiplier * Sensitivity;
_cinemachineTagertY += _inputsMassage.look.y * deltaTimeMultiplier * Sensitivity;
在DoAim中加入对这个值修改
    private void DoAim()
    {
        _aimCamera.gameObject.SetActive(_isAim);
        _anim.SetBool("Aiming", _isAim);
        if(_isAim)
        {
            Sensitivity = aimSensitivity;
        }
        else
        {
            Sensitivity = normalSensitivity;
        }
    }
瞄准点的处理
我们在这里要处理瞄准点的问题,这也是之后武器类的处理方式。
我们写一个Ray,然后通过Hitinfo来获取命中点。
我们使用相机的ScreenPointToRay方法创建一个射线,这个方法需要提供一个二维坐标来确定这条射线会射向哪里(可以理解为两点确定一条线,由于是从相机发出的,所以一点已经确定,只需要另一点确定方向)。
很多时候我们会选择用鼠标位置来决定,因为很多时候我们的鼠标会指向目标点。而在射击类游戏中,我们会把鼠标锁定在屏幕正中心,然后用准星瞄准。我们可以认为屏幕的中心点就是我们所需的另一个点。
Vector2 screenCenterPoint = new Vector2(Screen.width / 2f, Screen.height / 2f);
Ray ray = Camera.main.ScreenPointToRay(screenCenterPoint);
接下来我们获取瞄准信息。使用Physics.Raycast方法
Physics.Raycast(ray,out RaycastHit raycastHit,9999f,aimColliderMask)
其中,ray是射线,out会返回一个值,这里是检测到的信息,第三个数值是检测距离,第四个是检测哪些层级。大家对于这些有什么设置就自己做一做。我这里就不做演示了。
这个方法会返回一个bool值,用这个值做判断即可。
我们将一个球摆到碰撞点,这样以后就可以直接制作射击功能,然后配合IK等组件实现细致的动画。
注意: 请删除目标点的碰撞器(如果是球之类的有碰撞器的)
    [Tooltip("这是目标点")]
    public Transform aimDestinationPoint;
	private void AimPointUpdate()
    {
        Vector2 screenCenterPoint = new Vector2(Screen.width / 2f, Screen.height / 2f);
        Ray ray = Camera.main.ScreenPointToRay(screenCenterPoint);
        if(Physics.Raycast(ray,out RaycastHit raycastHit,9999f,aimColliderMask))
        {
            aimDestinationPoint.position = raycastHit.point;
        }
    }
角色在瞄准状态下的旋转
这个我们仍在Move方法中的旋转部分去设置。之前是是直接转向,现在添加一个if来分开瞄准与否的旋转方式。
之前我们设置了瞄准点,它本身的X与Z坐标是我们应该朝向的方向。
我们新建一个变量,保存目前的瞄准点位置,然后将Y的影响剔除,然后就可以获得一个方向向量,我们此处仍然进行归一化获得方向向量。
最后,我们进行插值处理方向。此处也可以使用旋转。
Vector3 worldAimTarget = aimDestinationPoint.position;
worldAimTarget.y = transform.position.y;
Vector3 aimdirection = (worldAimTarget - transform.position).normalized;
transform.forward = Vector3.Lerp(transform.forward, aimdirection, Time.deltaTime * 20f);
当然,如果我们像下方这段代码写,是会有bug的,原因在于这个判断是基于位移不为零,当位移为零,我们的角色不会旋转。
			if (!_isAim)
            {
                #region 在位移过程中的转向
                float rotation = Mathf.SmoothDampAngle(transform.eulerAngles.y, _targetRotation, ref _rotationVelocity,
                    RotationSmoothTime);
                transform.rotation = Quaternion.Euler(0.0f, rotation, 0.0f);
                #endregion
            }
            else
            {
                #region 瞄准状态下的转向
                Vector3 worldAimTarget = aimDestinationPoint.position;
                worldAimTarget.y = transform.position.y;
                Vector3 aimdirection = (worldAimTarget - transform.position).normalized;
                transform.forward = Vector3.Lerp(transform.forward, aimdirection, Time.deltaTime * 20f);
                #endregion
            }
这里贴上修正过后的代码
		if (_inputsMassage.move!=Vector2.zero)
        {
            _targetRotation = Mathf.Atan2(currentInput.x, currentInput.z) * Mathf.Rad2Deg + _mainCamera.transform.eulerAngles.y;

            if (!_isAim)
            {
                #region 在位移过程中的转向
                float rotation = Mathf.SmoothDampAngle(transform.eulerAngles.y, _targetRotation, ref _rotationVelocity,
                    RotationSmoothTime);
                transform.rotation = Quaternion.Euler(0.0f, rotation, 0.0f);
                #endregion
            }
        }

        if(_isAim)
        {
            #region 瞄准状态下的转向
            Vector3 worldAimTarget = aimDestinationPoint.position;
            worldAimTarget.y = transform.position.y;
            Vector3 aimdirection = (worldAimTarget - transform.position).normalized;
            transform.forward = Vector3.Lerp(transform.forward, aimdirection, Time.deltaTime * 20f);
            #endregion
        }
瞄准时的移动速度限制
这里可以和上方的瞄准状态的旋转一起判断。
不过我们对整个Move函数重新审视时,会发现这里还是与上方的下蹲状态类似,所有一起进行判断。
if (_isAim) targetSpeed = _aimMoveSpeed;
总结
此处很多关于IK的内容我没有说明,因为IK插件本身是要付费的。代码中会夹杂着关于IK和动画状态机的代码,相信需要做动画状态机和IK的同学能够看懂,不需要的只需要看我提到的那些代码,然后选择性剔除便可。
代码
using System.Collections;
using System.Collections.Generic;
using UnityEngine;
using UnityEngine.InputSystem;
using Cinemachine;
using RootMotion.FinalIK;

public class ThirdPlayerMoveController : MonoBehaviour
{
    CharacterController _characterController;
    PlayerInput _playerInput;
    PlayerInputsMassage _inputsMassage;
    GameObject _mainCamera;
    Animator _anim;

    public PlayerActionState playerActionState = PlayerActionState.Idle;

    [Header("相机设置")]
    public GameObject _cinemachineFollowTarget;
    public CinemachineVirtualCamera _aimCamera;
    float _cinemachineTagertX;
    float _cinemachineTagertY;
    [Tooltip("相机仰角")]
    public float TopClamp = 70.0f;
    [Tooltip("相机俯角")]
    public float BottomClamp = -30.0f;
    [Tooltip("额外的度数覆盖摄像头。有用的微调相机位置时,锁定")]
    public float CameraAngleOverride = 0.0f;
    [Tooltip("瞄准IK")]
    public AimIK _playerAimIK;

    [Header("玩家设置")]
    [Tooltip("这将决定普通行走时的速度")]
    public float walkSpeed = 1.5f;
    [Tooltip("这将决定跑步时的速度")]
    public float _runSpeed = 5.0f;
    private bool _isCrouch = false;
    [Tooltip("这将决定蹲下行走的速度")]
    public float _crouchSpeed = 1.0f;
    [Tooltip("这将决定瞄准状态下的速度")]
    public float _aimMoveSpeed = 1.0f;

    [Header("瞄准设置")]
    [Tooltip("这是基础的鼠标移动速度")]
    public float SpeedChangeRate = 10.0f;
    private float normalSensitivity=1f;
    [Tooltip("这是在基础鼠标移速下,瞄准速度的倍率")]
    public float aimSensitivity = 0.6f;
    [Tooltip("这是鼠标移动速度比例")]
    private float Sensitivity = 1f;
    private bool _isAim = false;
    [Tooltip("这是目标点")]
    public Transform aimDestinationPoint;
    [Tooltip("射线检测时所能检测的目标层级")]
    public LayerMask aimColliderMask;


    [Header("重力及下落")]
    [Tooltip("重力加速度")]
    public float Gravity = -15.0f;
    [Tooltip("是否着地")]
    public bool Grounded = true;
    [Tooltip("检测半径")]
    public float GroundedRadius = 0.28f;
    [Tooltip("检测的层级")]
    public LayerMask GroundLayers;
    [Tooltip("地面宽容度")]
    public float GroundedOffset = -0.14f;
    [Tooltip("进入坠落所需时间")]
    public float FallTimeout = 0.15f;
    private float _fallTimeOutDelta;
    private float _verticalVelocity;
    private float _terminalVelocity = 53.0f;


    private float _currentSpeed;
    private float _targetRotation = 0.0f;
    [Tooltip("角色光滑旋转时间")]
    private float RotationSmoothTime = 0.12f;
    [Tooltip("在角色光滑旋转过程中的速度")]
    private float _rotationVelocity;

    private float _threshold = 0.01f;

    private bool IsCurrentDeviceMouse
    {
        get { return _playerInput.currentControlScheme == "KeyboardMouse"; }
    }

    private void Awake()
    {
        // get a reference to our main camera
        if (_mainCamera == null)
        {
            _mainCamera = GameObject.FindGameObjectWithTag("MainCamera");
        }
    }

    // Start is called before the first frame update
    void Start()
    {
        _characterController = GetComponent<CharacterController>();
        _inputsMassage = GetComponent<PlayerInputsMassage>();
        _playerInput = GetComponent<PlayerInput>();
        _anim = GetComponentInChildren<Animator>();
        _playerAimIK = GetComponentInChildren<AimIK>();
    }

    private void Update()
    {
        PlayerStateJudge();
        DoGravity();
        GroundedCheack();
        Move();
        AimPointUpdate();
        DoAim();
    }

    private void LateUpdate()
    {
        CameraRotation();
    }

    /// <summary>
    /// 相机追踪点的控制
    /// </summary>
    private void CameraRotation()
    {
        if(_inputsMassage.look.sqrMagnitude>_threshold)//look值大于误差代表有输入
        {
            float deltaTimeMultiplier = IsCurrentDeviceMouse ? 1f : Time.deltaTime;

            _cinemachineTagertX += _inputsMassage.look.x * deltaTimeMultiplier * Sensitivity;
            _cinemachineTagertY += _inputsMassage.look.y * deltaTimeMultiplier * Sensitivity;
        }
        _cinemachineTagertX = ClampAngle(_cinemachineTagertX, float.MinValue, float.MaxValue);
        _cinemachineTagertY = ClampAngle(_cinemachineTagertY, BottomClamp, TopClamp);

        _cinemachineFollowTarget.transform.rotation = Quaternion.Euler((-_cinemachineTagertY - CameraAngleOverride) * Settings.mouseYmoveTimes,
                _cinemachineTagertX * Settings.mouseXmoveTimes, 0.0f);
    }

    private void Move()
    {
        _isCrouch = _inputsMassage.crouch;
        //在这里进行状态的判断
        //PlayerStateJudge();

        //首先将移动速度赋予临时变量,考虑到有可能在其他地方使用,我们将其存储起来
        //_currentSpeed = walkSpeed;(转换为更加完善的速度控制)
        float targetSpeed = playerActionState switch
        {
            PlayerActionState.Idle => 0f,
            PlayerActionState.Walk => walkSpeed,
            PlayerActionState.Run => _runSpeed,
            _ => 0f
        };
        if (_isCrouch) targetSpeed = _crouchSpeed;
        if (_isAim) targetSpeed = _aimMoveSpeed;

        //玩家当前水平速度的参考
        float currentHorizontalSpeed = new Vector3(_characterController.velocity.x, 0.0f, _characterController.velocity.z).magnitude;
        //偏离度,保证目标速度与目前速度相差大才可以插值,避免小幅度的抽搐
        float speedOffset = 0.1f;
        //判断偏离度
        if (currentHorizontalSpeed < targetSpeed - speedOffset ||
                currentHorizontalSpeed > targetSpeed + speedOffset)
        {
            _currentSpeed = Mathf.Lerp(currentHorizontalSpeed, targetSpeed ,Time.deltaTime * SpeedChangeRate);
            //四舍五入到小数点后3位
            _currentSpeed = Mathf.Round(_currentSpeed * 1000f) / 1000f;
        }
        else
        {
            _currentSpeed = targetSpeed;
        }

        //判断是否进行移动输入
        if (_inputsMassage.move == Vector2.zero) _currentSpeed = 0;

        var currentInput = new Vector3(_inputsMassage.move.x, 0, _inputsMassage.move.y).normalized;

        //单位向量的方向,或者说位移方向
        if (_inputsMassage.move!=Vector2.zero)
        {
            _targetRotation = Mathf.Atan2(currentInput.x, currentInput.z) * Mathf.Rad2Deg + _mainCamera.transform.eulerAngles.y;

            if (!_isAim)
            {
                #region 在位移过程中的转向
                float rotation = Mathf.SmoothDampAngle(transform.eulerAngles.y, _targetRotation, ref _rotationVelocity,
                    RotationSmoothTime);
                transform.rotation = Quaternion.Euler(0.0f, rotation, 0.0f);
                #endregion
            }
        }

        if(_isAim)
        {
            #region 瞄准状态下的转向
            Vector3 worldAimTarget = aimDestinationPoint.position;
            worldAimTarget.y = transform.position.y;
            Vector3 aimdirection = (worldAimTarget - transform.position).normalized;
            transform.forward = Vector3.Lerp(transform.forward, aimdirection, Time.deltaTime * 20f);
            #endregion
        }

        Vector3 targetDir = Quaternion.Euler(0.0f, _targetRotation, 0.0f) * Vector3.forward;
        _characterController.Move(targetDir.normalized * (_currentSpeed * Time.deltaTime)
            + new Vector3(0.0f, _verticalVelocity, 0.0f) * Time.deltaTime);
        //TODO:这里的Move可以执行垂直方向的速度,直接加上垂直的Vector就可以

        _anim.SetFloat("Speed", _currentSpeed);
        _anim.SetBool("Crouch", _isCrouch);
    }

    /// <summary>
    /// 重力
    /// </summary>
    private void DoGravity()
    {
        if(Grounded)
        {
            //重置坠落计时器
            _fallTimeOutDelta = FallTimeout;
            //落地后我们停止垂直速度累加
            if(_verticalVelocity<0.0f)
            {
                _verticalVelocity = -2f;
            }
        }
        else
        {
            //此if用于决定是否是下落动画
            if(_fallTimeOutDelta>=0.0f)
            {
                _fallTimeOutDelta -= Time.deltaTime;
            }
            else
            {
                //下落动画
            }
        }

        if(_verticalVelocity<_terminalVelocity)
        {
            _verticalVelocity += Gravity * Time.deltaTime;
        }
    }

    private void DoAim()
    {
        _aimCamera.gameObject.SetActive(_isAim);
        _anim.SetBool("Aiming", _isAim);
        if(_isAim)
        {
            Sensitivity = aimSensitivity;
        }
        else
        {
            Sensitivity = normalSensitivity;
        }
    }

    /// <summary>
    /// 限制角度
    /// </summary>
    /// <param name="lfAngle"></param>
    /// <param name="lfMin"></param>
    /// <param name="lfMax"></param>
    /// <returns></returns>
    private static float ClampAngle(float lfAngle, float lfMin, float lfMax)
    {
        if (lfAngle < -360f) lfAngle += 360f;
        if (lfAngle > 360f) lfAngle -= 360f;
        return Mathf.Clamp(lfAngle, lfMin, lfMax);
    }

    /// <summary>
    /// 对玩家状态进行判断
    /// </summary>
    private void PlayerStateJudge()
    {
        playerActionState = PlayerActionState.Idle;
        if (_inputsMassage.move!=Vector2.zero)
        {
            playerActionState = PlayerActionState.Walk;
            if (_inputsMassage.run)
                playerActionState = PlayerActionState.Run;
        }
        _isAim = _inputsMassage.aim;
        _playerAimIK.enabled = _isAim;
    }
    /// <summary>
    /// 地面检测
    /// </summary>
    private void GroundedCheack()
    {
        Vector3 spherePosition = new Vector3(transform.position.x, transform.position.y - GroundedOffset, transform.position.z);
        Grounded = Physics.CheckSphere(spherePosition, GroundedRadius, GroundLayers, QueryTriggerInteraction.Ignore);
    }

    /// <summary>
    ///校准十字中心与目标点
    /// </summary>
    private void AimPointUpdate()
    {
        Vector2 screenCenterPoint = new Vector2(Screen.width / 2f, Screen.height / 2f);
        Ray ray = Camera.main.ScreenPointToRay(screenCenterPoint);
        if(Physics.Raycast(ray,out RaycastHit raycastHit,9999f,aimColliderMask))
        {
            aimDestinationPoint.position = raycastHit.point;
        }
    }

}