遇到的问题:
1.项目才打开时无法运行。
解决方法:切换成c++17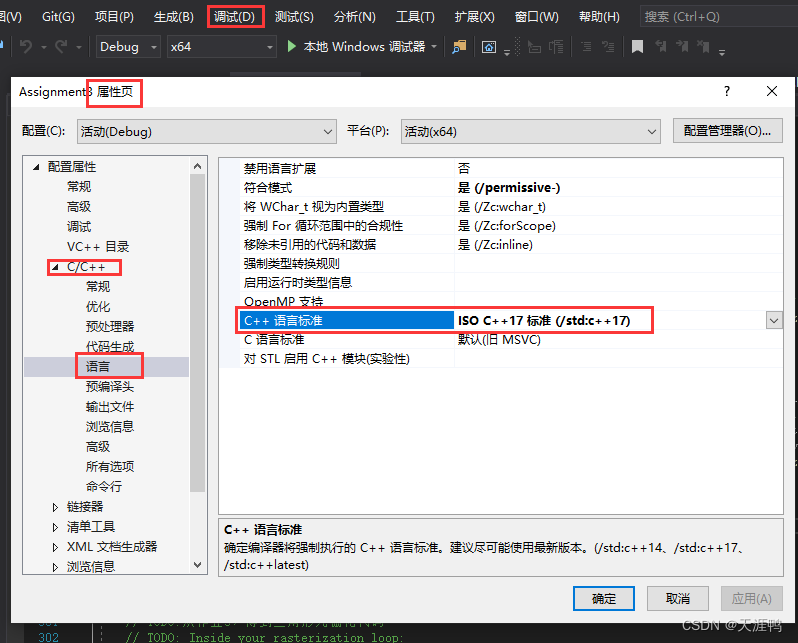
解决方法引用:Games101 作业3 环境问题 - 知乎
注:知乎里面的关于越界限制的控制不适用,虽然可以解决部分作业的问题,但是在bump里面依然会出现越界错误。应该用以下大佬的代码。
2.出现越界错误
解决方法:在头文件里面的texture.hpp里面增加限制
    Eigen::Vector3f getColor(float u, float v)
    {
        //以下两句为新增
        u = fmin(1, fmax(u, 0));
        v = fmin(1, fmax(v, 0));

        auto u_img = u * width;
        auto v_img = (1 - v) * height;
        auto color = image_data.at<cv::Vec3b>(v_img, u_img);
        return Eigen::Vector3f(color[0], color[1], color[2]);
    }
解决方法引用:【GAMES101】作业3(提高)与法线贴图原理和渲染管线框架分析
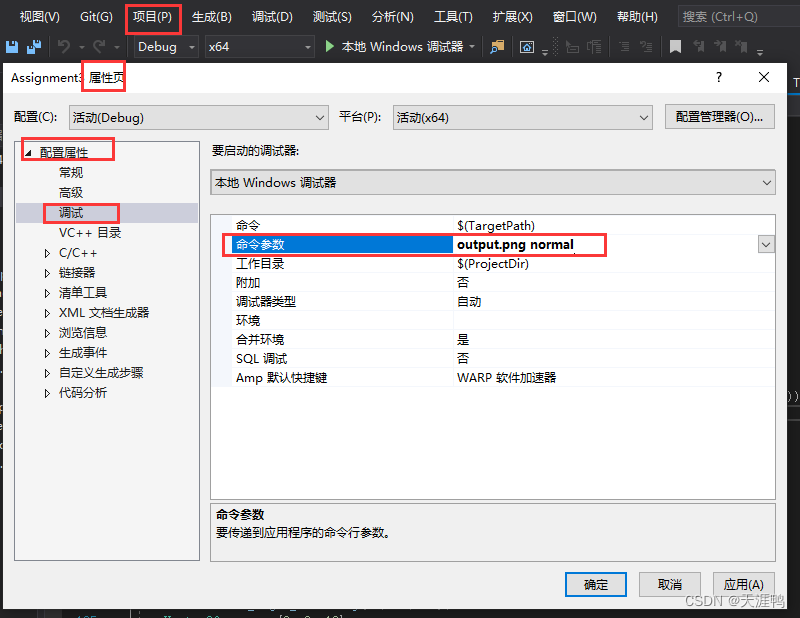
3.如何输入output.png normal这些。
作业分析:
1. 修改函数 rasterize_triangle(const Triangle& t) in rasterizer.cpp: 在此处实现与作业 2 类似的插值算法,实现法向量、颜色、纹理颜色的插值。
依然逐个像素判断是否在三角形内。前面代码都和作业2一样,只是在for循环内增加法向量、颜色、纹理颜色的插值。插值的方法框架也已经写好了,直接用就是。
(这点确实没想到。。想了很久 该怎么用,最后还是参考了别人的才知道。)
static Vector3f interpolate(float alpha, float beta, float gamma, const Vector3f& vert1, const Vector3f& vert2, const Vector3f& vert3, float weight)
{
    return (alpha * vert1 + beta * vert2 + gamma * vert3) / weight;
}

static Vector2f interpolate(float alpha, float beta, float gamma, const Vector2f& vert1, const Vector2f& vert2, const Vector2f& vert3, float weight)
{
    auto u = (alpha * vert1[0] + beta * vert2[0] + gamma * vert3[0]);
    auto v = (alpha * vert1[1] + beta * vert2[1] + gamma * vert3[1]);

    u /= weight;
    v /= weight;

    return Vector2f(u, v);
}
知道了直接调用interpolate实现插值,那其他也没啥难度了,老师代码都给全了。
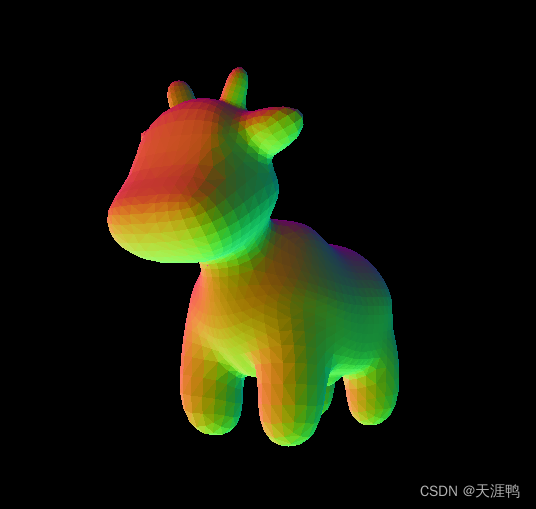
2. 修改函数 get_projection_matrix() in main.cpp: 将你自己在之前的实验中实现的投影矩阵填到此处,此时你可以运行 ./Rasterizer output.png normal来观察法向量实现结果。
没什么疑问,直接把作业2的内容放上去就行了。
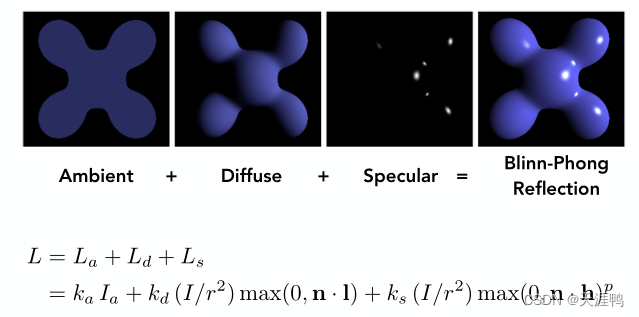
3. 修改函数 phong_fragment_shader() in main.cpp: 实现 Blinn-Phong 模型计算 Fragment Color.
需要用到的:
dot()点乘
Norm()求向量长度
Normalized()求标准向量
pow(x,n)求n次方
cwiseProduct()向量对应值相乘。举个例子就是:
一个很好的解释:Blinn-Phong光照模型从定义到实现,一文就够了(1.5w字) - 知乎
4. 修改函数 texture_fragment_shader() in main.cpp: 在实现 Blinn-Phong的基础上,将纹理颜色视为公式中的 kd,实现 Texture Shading Fragment Shader.

5.修改函数 bump_fragment_shader() in main.cpp: 在实现 Blinn-Phong 的 基础上,仔细阅读该函数中的注释,实现 Bump mapping.
按照老师给的注释挨着写上去,只是写上去没什么难度,难度在于理解代码。
6.修改函数 displacement_fragment_shader() in main.cpp: 在实现 Bump mapping 的基础上,实现 displacement mapping.
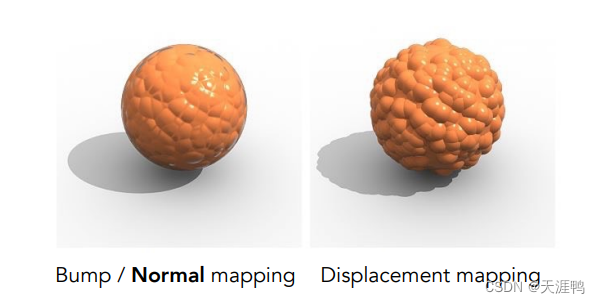
5是实现凹凸贴图,6是实现置换贴图。代码只有一句需要修改,就是把point的位置实现真正的改变。老师的备注也是很详细的给出了。
代码部分
1.
void rst::rasterizer::rasterize_triangle(const Triangle& t, const array<Vector3f, 3>& view_pos)
{
    auto v = t.toVector4();
//    std::tuple<float, float, float> angle(alpha, beta, gamma);
    float xmin = v[0][0] < (v[1][0] < v[2][0] ? v[1][0] : v[2][0]) ? v[0][0] : (v[1][0] < v[2][0] ? v[1][0] : v[2][0]);//最左边边界,最小值
    float xmax = v[0][0] > (v[1][0] > v[2][0] ? v[1][0] : v[2][0]) ? v[0][0] : (v[1][0] > v[2][0] ? v[1][0] : v[2][0]);//最右边边界,最大值
    float ymin = v[0][1] < (v[1][1] < v[2][1] ? v[1][1] : v[2][1]) ? v[0][1] : (v[1][1] < v[2][1] ? v[1][1] : v[2][1]);//最矮,最小值
    float ymax = v[0][1] > (v[1][1] > v[2][1] ? v[1][1] : v[2][1]) ? v[0][1] : (v[1][1] > v[2][1] ? v[1][1] : v[2][1]);//最高,最大值

    int x_min = floor(xmin);
    int x_max = ceil(xmax);
    int y_min = floor(ymin);
    int y_max = ceil(ymax);
    //遍历所有坐标
    for (int x = x_min; x <= x_max; x++) {
        for (int y = y_min; y <= y_max; y++) {
            if (insideTriangle(x, y, t.v)) {//如果在三角形内
                auto [alpha, beta, gamma] = computeBarycentric2D(x+0.5, y+0.5, t.v);
//               angle = computeBarycentric2D(x+0.5, y+0.5, t.v);
                float Z = 1.0 / (alpha / v[0].w() + beta / v[1].w() + gamma / v[2].w());    //根据质心坐标计算实际的z值
                float zp = alpha * v[0].z() / v[0].w() + beta * v[1].z() / v[1].w() + gamma * v[2].z() / v[2].w();
                zp *= Z;

                if (zp < depth_buf[get_index(x, y)]) {
                    depth_buf[get_index(x, y)] = zp;
                    auto interpolated_color=interpolate(alpha,beta,gamma,t.color[0],t.color[1],t.color[2],1);
                    auto interpolated_normal=interpolate(alpha, beta, gamma, t.normal[0], t.normal[1], t.normal[2], 1);
                    auto interpolated_texcoords=interpolate(alpha, beta, gamma, t.tex_coords[0], t.tex_coords[1], t.tex_coords[2], 1);
                    auto interpolated_shadingcoords = interpolate(alpha, beta, gamma, view_pos[0], view_pos[1], view_pos[2],1);
                    fragment_shader_payload payload(interpolated_color, interpolated_normal.normalized(), interpolated_texcoords, texture ? &*texture : nullptr);
                    payload.view_pos = interpolated_shadingcoords;
                    auto pixel_color = fragment_shader(payload);
                    Vector2i nowpixel(x, y);
                    set_pixel(nowpixel, pixel_color);
                }
            }
        }
    }
    // TODO: From your HW3, get the triangle rasterization code.
    // TODO:从作业3,得到三角形光栅化代码
    // TODO: Inside your rasterization loop:
    // TODO:写入你的光栅化loop循环

    //    * v[i].w() is the vertex view space depth value z.
    //    * v[i].w()是顶点视图空间的深度值z

    //    * Z is interpolated view space depth for the current pixel
    //    * Z是当前像素的插值视图空间深度

    //    * zp is depth between zNear and zFar, used for z-buffer
    //    * zp是zNear和zFar之间的深度,用于z缓冲区

    // float Z = 1.0 / (alpha / v[0].w() + beta / v[1].w() + gamma / v[2].w());
    // float zp = alpha * v[0].z() / v[0].w() + beta * v[1].z() / v[1].w() + gamma * v[2].z() / v[2].w();
    // zp *= Z;

    // TODO: Interpolate the attributes:
    // TODO:插入属性:
    // auto interpolated_color
    // auto interpolated_normal
    // auto interpolated_texcoords
    // auto interpolated_shadingcoords

    // Use: fragment_shader_payload payload( interpolated_color, interpolated_normal.normalized(), interpolated_texcoords, texture ? &*texture : nullptr);
    // Use: payload.view_pos = interpolated_shadingcoords;
    // Use: Instead of passing the triangle's color directly to the frame buffer, pass the color to the shaders first to get the final color;
    // 用法:不要将三角形的颜色直接传递到帧缓冲区,而是首先将颜色传递给着色器以获得最终颜色;
    // Use: auto pixel_color = fragment_shader(payload);


}
2.
Matrix4f get_projection_matrix(float eye_fov, float aspect_ratio, float zNear, float zFar)
{
    // TODO: Use the same projection matrix from the previous assignments
    Matrix4f projection = Matrix4f::Identity();
    Matrix4f persp;
    Matrix4f ortho1, ortho2;

    float r, l, t, b, n, f;
    float angle = eye_fov * MY_PI / 180.0 / 2;
    n = zNear;
    f = zFar;
    t = -tan(angle) * n;
    b = tan(angle) * n;
    r = t * aspect_ratio;
    l = -t * aspect_ratio;

    persp << n, 0, 0, 0,
        0, n, 0, 0,
        0, 0, n + f, -n * f,
        0, 0, 1, 0;

    ortho1 << 2 / (r - l), 0, 0, 0,
        0, 2 / (t - b), 0, 0,
        0, 0, 2 / (n - f), 0,
        0, 0, 0, 1;

    ortho2 << 1, 0, 0, -(r + l) / 2,
        0, 1, 0, -(t + b) / 2,
        0, 0, 1, -(n + f) / 2,
        0, 0, 0, 1;

    projection = ortho1 * ortho2 * persp * projection;
    return projection;

}
运行结果: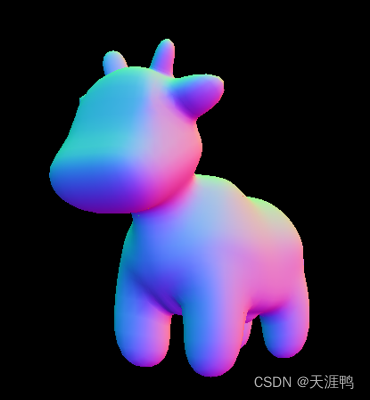
3.
Vector3f phong_fragment_shader(const fragment_shader_payload& payload)
{
    Vector3f ka = Vector3f(0.005, 0.005, 0.005);
    Vector3f kd = payload.color;
    Vector3f ks = Vector3f(0.7937, 0.7937, 0.7937);

    auto l1 = light{{20, 20, 20}, {500, 500, 500}};
    auto l2 = light{{-20, 20, 0}, {500, 500, 500}};

    vector<light> lights = {l1, l2};
    Vector3f amb_light_intensity{10, 10, 10};
    Vector3f eye_pos{0, 0, 10};

    float p = 150;

    Vector3f color = payload.color;
    Vector3f point = payload.view_pos;
    Vector3f normal = payload.normal;

    Vector3f result_color = {0, 0, 0};

    for (auto& light : lights)
    {
        // TODO: For each light source in the code, calculate what the *ambient*, *diffuse*, and *specular*
        // components are. Then, accumulate that result on the *result_color* object.
        //TODO:对于代码中的每个光源,计算* ambient* 、* diffuse* 和* specular* 的值
        //然后在*result_color*对象上累积该结果。
        Vector3f light_intensity = light.intensity / (light.position - point).dot(light.position - point);//I/r^2
        Vector3f l = (light.position - point).normalized();//阳光入射角度
        Vector3f v = (eye_pos - point).normalized();//人视觉角度
        Vector3f h = (l + v).normalized();
        float ld_energy = l.dot(normal) > 0 ? l.dot(normal) : 0;//max(0,n·l)
        float ls_energy = pow((h.dot(normal) > 0 ? h.dot(normal) : 0), p);//max(0,n·h)^p
        Vector3f la = ka.cwiseProduct(amb_light_intensity);
        Vector3f ld = kd.cwiseProduct(light_intensity) * ld_energy;
        Vector3f ls = ks.cwiseProduct(light_intensity) * ls_energy;
        result_color += la + ld + ls;
    }

    return result_color * 255.f;
}
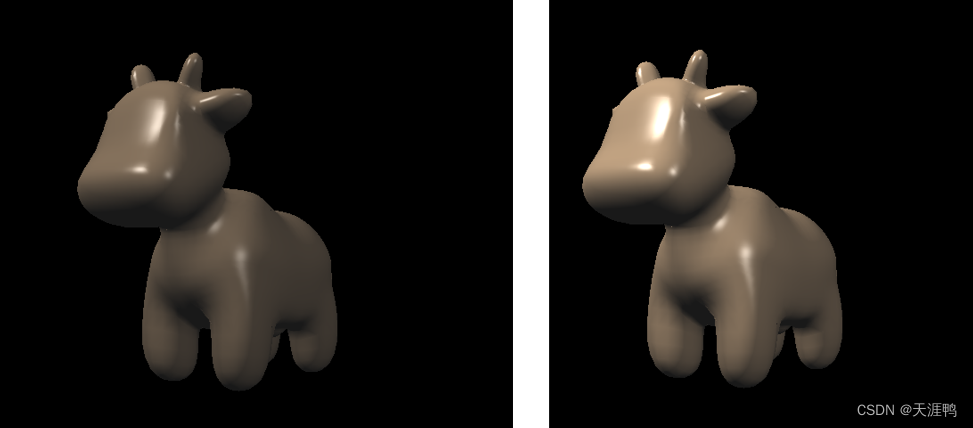
运行结果: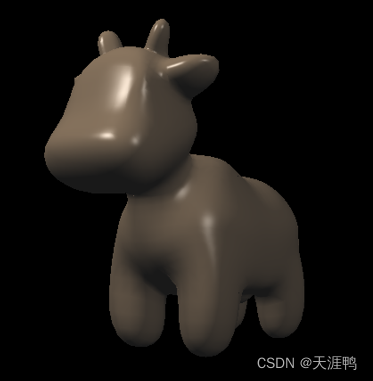
4.
Vector3f texture_fragment_shader(const fragment_shader_payload& payload)
{
    Vector3f return_color = {0, 0, 0};
    if (payload.texture)
    {
        // TODO: Get the texture value at the texture coordinates of the current fragment
        //获取当前片段纹理坐标处的纹理值
        return_color = payload.texture->getColor(payload.tex_coords.x(),payload.tex_coords.y());
    }
    Vector3f texture_color;
    texture_color << return_color.x(), return_color.y(), return_color.z();

    Vector3f ka = Vector3f(0.005, 0.005, 0.005);
    Vector3f kd = texture_color / 255.f;
    Vector3f ks = Vector3f(0.7937, 0.7937, 0.7937);

    auto l1 = light{{20, 20, 20}, {500, 500, 500}};
    auto l2 = light{{-20, 20, 0}, {500, 500, 500}};

    vector<light> lights = {l1, l2};
    Vector3f amb_light_intensity{10, 10, 10};
    Vector3f eye_pos{0, 0, 10};

    float p = 150;

    Vector3f color = texture_color;
    Vector3f point = payload.view_pos;
    Vector3f normal = payload.normal;

    Vector3f result_color = {0, 0, 0};

    for (auto& light : lights)
    {
        // TODO: For each light source in the code, calculate what the *ambient*, *diffuse*, and *specular*
        // components are. Then, accumulate that result on the *result_color* object.
//以下代码和phong没有区别
        Vector3f light_intensity = light.intensity / (light.position - point).dot(light.position - point);//I/r^2
        Vector3f l = (light.position - point).normalized();//阳光入射角度,标准向量
        Vector3f v = (eye_pos - point).normalized();//人视觉角度,标准向量
        Vector3f h = (l + v).normalized();
        float ld_energy = l.dot(normal) > 0.0 ? l.dot(normal) : 0.0;//max(0,n·l)
        float ls_energy = pow((h.dot(normal) > 0.0 ? h.dot(normal) : 0.0), p);//max(0,n·h)^p
        Vector3f la = ka.cwiseProduct(amb_light_intensity);
        Vector3f ld = kd.cwiseProduct(light_intensity) * ld_energy;
        Vector3f ls = ks.cwiseProduct(light_intensity) * ls_energy;
        result_color += la + ld + ls;
    }

    return result_color * 255.f;
}
运行结果: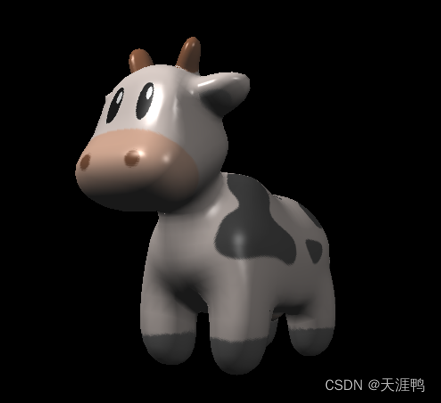
5.
Vector3f bump_fragment_shader(const fragment_shader_payload& payload)
{

    Vector3f ka = Vector3f(0.005, 0.005, 0.005);
    Vector3f kd = payload.color;
    Vector3f ks = Vector3f(0.7937, 0.7937, 0.7937);

    auto l1 = light{ {20, 20, 20}, {500, 500, 500} };
    auto l2 = light{ {-20, 20, 0}, {500, 500, 500} };

    vector<light> lights = { l1, l2 };
    Vector3f amb_light_intensity{ 10, 10, 10 };
    Vector3f eye_pos{ 0, 0, 10 };

    float p = 150;

    Vector3f color = payload.color;
    Vector3f point = payload.view_pos;
    Vector3f normal = payload.normal;


    float kh = 0.2, kn = 0.1;

    // TODO: Implement bump mapping here
    //在此处实现bump贴图

    // Let n = normal = (x, y, z)
    float x = normal.x();
    float y = normal.y();
    float z = normal.z();
    // Vector t = (x*y/sqrt(x*x+z*z),sqrt(x*x+z*z),z*y/sqrt(x*x+z*z))
    Vector3f t(x * y / sqrt(x * x + z * z), sqrt(x * x + z * z), z * y / sqrt(x * x + z * z));
    // Vector b = n cross product t
    //b=n差积t
    Vector3f b = normal.cross(t);
    // Matrix TBN = [t b n]
    Matrix3f TBN;
    TBN << t.x(), b.x(), x,
        t.y(), b.y(), y,
        t.z(), b.z(), z;
    // dU = kh * kn * (h(u+1/w,v)-h(u,v))
    //bump mapping 部分的 h(u,v)=texture_color(u,v).norm, 其中 u,v 是 tex_coords, w,h 是 texture 的宽度与高度
    //实现 h(u+1/w,v) 的时候要写成 h(u+1.0/w,v)
    float u = payload.tex_coords.x();
    float v = payload.tex_coords.y();
    float w = payload.texture->width;
    float h = payload.texture->height;
    float dU = kh * kn * (payload.texture->getColor(u + 1.0 / w, v).norm() - payload.texture->getColor(u, v).norm());
    // dV = kh * kn * (h(u,v+1/h)-h(u,v))
    float dV = kh * kn * (payload.texture->getColor(u, v + 1.0 / h).norm() - payload.texture->getColor(u, v).norm());
    // Vector ln = (-dU, -dV, 1)
    Vector3f ln(-dU, -dV, 1.0);
    // Normal n = normalize(TBN * ln)
    normal = (TBN * ln).normalized();


    Vector3f result_color = {0, 0, 0};
    result_color = normal;

    return result_color * 255.f;
}
运行结果: 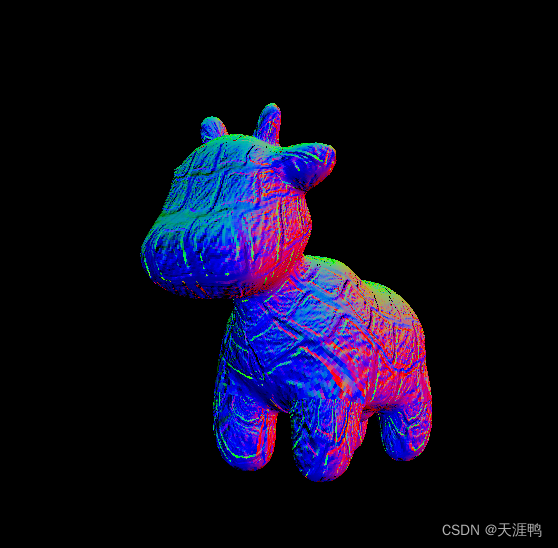
6.
Vector3f displacement_fragment_shader(const fragment_shader_payload& payload)
{

    Vector3f ka = Vector3f(0.005, 0.005, 0.005);
    Vector3f kd = payload.color;
    Vector3f ks = Vector3f(0.7937, 0.7937, 0.7937);

    auto l1 = light{{20, 20, 20}, {500, 500, 500}};
    auto l2 = light{{-20, 20, 0}, {500, 500, 500}};

    vector<light> lights = {l1, l2};
    Vector3f amb_light_intensity{10, 10, 10};
    Vector3f eye_pos{0, 0, 10};

    float p = 150;

    Vector3f color = payload.color;
    Vector3f point = payload.view_pos;
    Vector3f normal = payload.normal;

    float kh = 0.2, kn = 0.1;

    // TODO: Implement displacement mapping here
    // Let n = normal = (x, y, z)
    float x = normal.x();
    float y = normal.y();
    float z = normal.z();
    // Vector t = (x*y/sqrt(x*x+z*z),sqrt(x*x+z*z),z*y/sqrt(x*x+z*z))
    Vector3f t(x * y / sqrt(x * x + z * z), sqrt(x * x + z * z), z * y / sqrt(x * x + z * z));
    // Vector b = n cross product t
    Vector3f b = normal.cross(t);
    // Matrix TBN = [t b n]
    Matrix3f TBN;
    TBN << t.x(), b.x(), x,
        t.y(), b.y(), y,
        t.z(), b.z(), z;
    // dU = kh * kn * (h(u+1/w,v)-h(u,v))
    float u = payload.tex_coords.x();
    float v = payload.tex_coords.y();
    float w = payload.texture->width;
    float h = payload.texture->height;
    float dU = kh * kn * (payload.texture->getColor(u + 1.0 / w, v).norm() - payload.texture->getColor(u, v).norm());
    // dV = kh * kn * (h(u,v+1/h)-h(u,v))
    float dV = kh * kn * (payload.texture->getColor(u, v + 1 / h).norm() - payload.texture->getColor(u, v).norm());
    // Vector ln = (-dU, -dV, 1)
    Vector3f ln(-dU, -dV, 1);
    // Position p = p + kn * n * h(u,v)
    //---------------------唯一需要修改的代码-----------------------------
    point += kn * normal * payload.texture->getColor(u, v).norm();
    // Normal n = normalize(TBN * ln)
    normal = (TBN * ln).normalized();


    Vector3f result_color = {0, 0, 0};

    for (auto& light : lights)
    {
        // TODO: For each light source in the code, calculate what the *ambient*, *diffuse*, and *specular*
        // components are. Then, accumulate that result on the *result_color* object.
        Vector3f light_intensity = light.intensity / (light.position - point).dot(light.position - point);//I/r^2
        Vector3f l = (light.position - point).normalized();//阳光入射角度,标准向量
        Vector3f v = (eye_pos - point).normalized();//人视觉角度,标准向量
        Vector3f h = (l + v).normalized();
        float ld_energy = l.dot(normal) > 0.0 ? l.dot(normal) : 0.0;//max(0,n·l)
        float ls_energy = pow((h.dot(normal) > 0.0 ? h.dot(normal) : 0.0), p);//max(0,n·h)^p
        Vector3f la = ka.cwiseProduct(amb_light_intensity);
        Vector3f ld = kd.cwiseProduct(light_intensity) * ld_energy;
        Vector3f ls = ks.cwiseProduct(light_intensity) * ls_energy;
        result_color += la + ld + ls;

    }

    return result_color * 255.f;
}
运行结果 :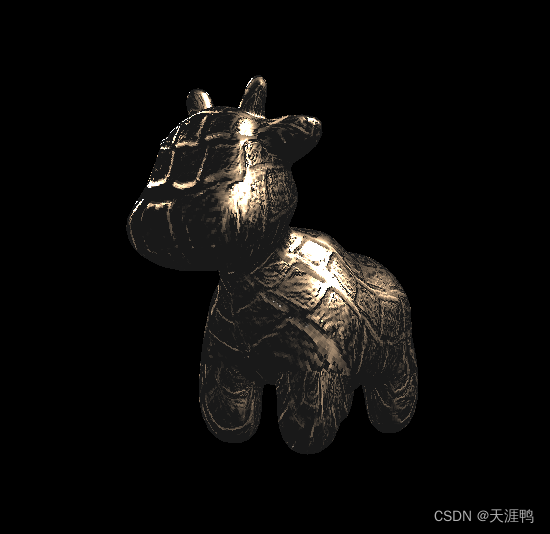
存在问题:
1.对于bump虽然按照老师的注释写下来了,但是还是不太能理解。希望后期可以再看看
2.这里的weight不知道为什么是1,但是根据我的运行,会存在溢出,必须修改老师给好的框架,我认为这里应该还有可以思考的地方。
static Vector2f interpolate(float alpha, float beta, float gamma, const Vector2f& vert1, const Vector2f& vert2, const Vector2f& vert3, float weight)
3.光线的平方必须要点乘,而不能先cwiseProduct求平方再求长度。写成这样的话,会比要求得到的图形亮上一点。
Vector3f light_intensity = light.intensity / (light.position - point).cwiseProduct(light.position - point).norm();
左边是老师要求的。右边是我得到的错误结果。
4.
auto [alpha, beta, gamma] = computeBarycentric2D(x+0.5, y+0.5, t.v);
最开始老师给的代码一直有问题,只能自己重写:
float alpha, beta, gamma;
std::tuple<float, float, float> angle(alpha, beta, gamma);
angle = computeBarycentric2D(x+0.5, y+0.5, t.v);
但是会导致法向量模型有问题,只能又改回老师的代码(这时候又没问题了。可能是c++17的原因,之前用的是老版本)。自己重写的会导致结果变为: