文章目录
- 基于改进SSIM算法的图像清晰度识别
- 1. SSIM算法流程
- 2. SSIM算法实现
- 3. 信息熵函数
- 4. 图像测试流程
- 5. 测试结果
- 总结
转载: https://www.heywhale.com/mw/project/5f2f9ac4af3980002cb4cb87
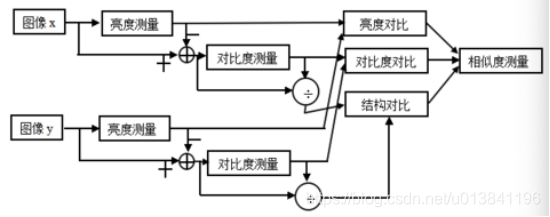
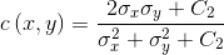
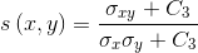
SSIM(structural similarity) 是一种用来衡量图片相似度的指标,也可用来判断图片压缩后的质量。
SSIM由亮度对比、对比度对比、结构对比三部分组成。
在改进SSIM中,作者使用信息熵的方法来对清晰度进行计算。该算法的流程为:
(1)在ssim Function函数中先对图片进行高斯处理,然后分别对原图和高斯模糊后图片进行sobel边缘提取。
(2)计算每一小块的SSIM和信息熵大小。
(3)通过对一个图像中裁剪的所有小块,按照信息熵进行片排名,然后取Top(这里取top=10)SSIM做均值。最后 1-均值 即为清晰度得分。
1. SSIM算法流程
算法流程的代码如下所示:
import numpy as np
import math
import cv2
import urllib
import matplotlib.pyplot as plt

def img_ssimRecog(img, len_s = 11):
    """
       图片处理
      :param img:  图片
      :param  len_s: 图片每个小块尺寸
      :return:
    """
    X_org, Y_org = img.shape
    res_list = []
    for i in range(0, int(X_org), int(X_org / len_s)+3):
        for j in range(0, int(Y_org), int(Y_org / len_s)+3):
            res_list.append(ssimFunction(img[i:i + len_s, j:j + len_s]))

    res_list = np.array(res_list)
    res_list_sort = res_list[np.lexsort(-res_list.T)]
    res_list = res_list_sort[:, :1]

    res = np.mean(res_list[:10])
    if res < 0.0:
        res = 0.0
    return 1 - res
2. SSIM算法实现
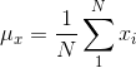
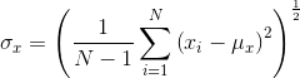
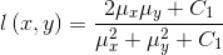
通过图像的均值、方差等计算SSIM函数。算法函数如下:

均值、方差计算函数如下:
亮度函数如下:
对比度函数如下:
结构函数如下:
SSIM算法函数:
def ssimFunction(img):
"""
ssim 算法
:param img: 图片
:return:
"""
x, y = img.shape
resEntropy = entropyFunc(img)
TR = cv2.GaussianBlur(img, (5,5),3)
G = cv2.Sobel(img,cv2.CV_16S,2,2)/5
Gr = cv2.Sobel(TR,cv2.CV_16S,2,2)/5
Ux = np.mean(G)
Uy = np.mean(Gr)
Vx = np.var(G)
Vy = np.var(Gr)
Vxy = (1 / (x * y - 1)) * np.sum((G - Ux) * (Gr - Uy))
R = 255
K1 = 0.03
K2 = 0.01
c1 = (K1 * R) ** 2
c2 = (K2 * R) ** 2
A1 = 2 * Ux * Uy + c1
A2 = 2 * Vxy + c2
B1 = Ux ** 2 + Uy ** 2 + c1
B2 = Vx + Vy + c2
SSIM = (A1 * A2) / (B1 * B2)
return SSIM, resEntropy
3. 信息熵函数
代码如下:
def entropyFunc(img):
    """
        熵函数
       :param img:  图片
       :return:
    """
    res = 0
    tmp = [0] * 256
    img_list = []
    for i in range(len(img)):
        img_list.extend(map(int, img[i]))
    img_list_set = set(img_list)
    for i in img_list_set:
        tmp[i] = float(img_list.count(i))/ 256

    for i in range(len(tmp)):
        if (tmp[i] == 0):
            res = res
        else:
            res = float(res - tmp[i] * (math.log(tmp[i]) / math.log(2.0)))
    return res
4. 图像测试流程
对图像进行改进SSIM算法的测试,分为三步骤:
step1:先将图片预处理裁剪
裁剪图片视情况而定,主要结合业务需求将图片的大小裁剪成相同的尺寸,便于比较,因为我处理的大部分是新闻图片,因此将图片裁剪成512400,并将彩色图片处理灰度化;
step2: 对图像进行分块处理
首先对图片进行分块处理,视情况而定,这里将整个图片均匀分为9块大小,每块为1111的大小,对每块图片采用ssimFunction函数处理,计算SSIM,与传统的ssim不同的是,我增加了一步利用函数entropyFunc计算信息熵的过程。
step3: 图像清晰度测试
step1、2 图像尺寸标准化处理:
def imgPreHandle(img,img_witdth,img_height,resize_width=512,resize_height=480):
"""
将图片缩放到同样的尺寸
:param img: 图片
:param img_witdth: 图片的宽度
:param img_height: 图片的宽度高度
:param resize_width: 图片裁剪的宽度
:param resize_height 图片裁剪的高度
:return:
"""
x,y,z = img.shape
new_pic = img
if ((x>=resize_height) & (y>=resize_width))|((x<resize_height) & (y<resize_width)):
new_pic = img
elif (x<resize_height) & (y>=resize_width) :
new_pic = img[:, int((y/2)-(resize_width/2)):int((y/2) + (resize_width/2))]
elif (x>=resize_height) & (y<resize_width):
new_pic = img[int((x/2)-(resize_height/2)):int((x/2) + (resize_height/2)), :]
elif (x >= resize_height) & (y < resize_width):
new_pic = img[int((x / 2) - (resize_height / 2)):int((x / 2) + (resize_height / 2)), :]
new_picture = cv2.resize(new_pic, (resize_height, resize_width))
if len(new_picture.shape) == 3:
gray = cv2.cvtColor(new_picture, cv2.COLOR_BGR2GRAY)
else:
gray = new_picture
return gray
step3 主函数,对输入图像进行清晰度测试:
if __name__ == "__main__":
img_path = r"./test/d.jpg"
img = cv2.imdecode(np.fromfile(img_path, dtype=np.uint8),-1)
w, h, _ = img.shape
gray = cv2.cvtColor(img, cv2.COLOR_BGR2GRAY)
plt.figure(figsize=(20, 10))
plt.subplot(1, 2, 1)
plt.imshow(gray,cmap='Greys')
start = time.time()
score = img_ssimRecog(gray, len_s = 11)
print('end:',time.time()-start)
text = str(round(score,3))
src = gray.copy()
plt.subplot(1, 2, 2)
cv2.putText(src, text, (10, 50), cv2.FONT_HERSHEY_COMPLEX, 1, (10, 10, 10), 1)
plt.imshow(src,cmap='Greys')
plt.show()
print('Score : {}'.format(score))
5. 测试结果
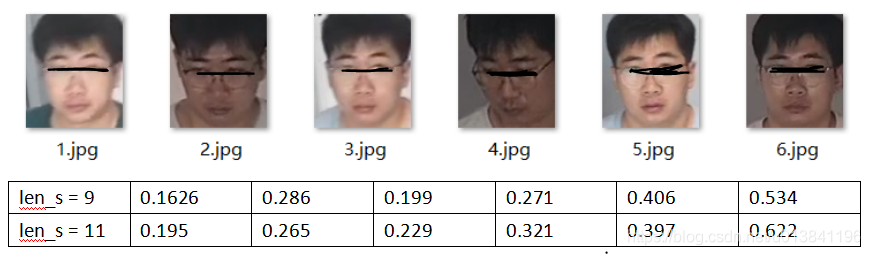
注: 130x110大小图像,win10下约50ms/次。
总结
从结果看来,对于模糊检测有一定效果,结合具体场景可自行调节图像大小和图像切片大小,具体阈值根据实际应用进行测试获取。
本文内容由网友自发贡献,版权归原作者所有,本站不承担相应法律责任。如您发现有涉嫌抄袭侵权的内容,请联系:hwhale#tublm.com(使用前将#替换为@)