Centos7部署elasticsearch-7.8.0集群
- 1 部署前准备
- 1.1 系统选择
- 1.2 主机列表
- 1.3 下载、解压缩安装包
- 1.4 创建用户
- 2 修改配置文件
- 2.1 elastic search配置文件
- 2.2 OS配置文件
- 3 启动
-
- 4 验证
- 4.1 elasticsearch-head
- 4.2 Postman
1 部署前准备
1.1 系统选择
均为centos7.9系统,内核版本为:3.10.0-1160.el7.x86_64
本来想选择centos8,无奈8的文件数限制修改方式跟7不一样,网上实在找不到相关文档,如果有知道的朋友可以在评论区指教下
1.2 主机列表
c1/c2/c3做master,c10/c11/c12做data,修改主机/etc/hostname并加入/etc/hosts中
cat /etc/hosts
10.0.8.1    c1  c1.pangfaheng.com
10.0.8.2    c2  c2.pangfaheng.com
10.0.8.3    c3  c3.pangfaheng.com
10.0.8.10   c10 c10.pangfaheng.com
10.0.8.11   c11 c11.pangfaheng.com
10.0.8.12   c12 c12.pangfaheng.com
1.3 下载、解压缩安装包
mkdir /opt/module
wget https://artifacts.elastic.co/downloads/elasticsearch/elasticsearch-7.8.0-linux-x86_64.tar.gz
tar -zxvf elasticsearch-7.8.0-linux-x86_64.tar.gz -C /opt/module
mv /opt/module/elasticsearch-7.8.0/ /opt/module/elasticsearch-cluster/
1.4 创建用户
elasticsearch不允许root账户启动,需要为每台实例创建es用户
useradd es
passwd es
chown -R es:es /opt/module/elasticsearch-cluster
2 修改配置文件
2.1 elastic search配置文件
cluster.name: elasticsearch-cluster
node.name: c1
network.host: c1
node.master: true
node.data: false
http.port: 9200
http.cors.allow-origin: "*"
http.cors.enabled: true
http.max_content_length: 200mb
cluster.initial_master_nodes: ["c1"]
discovery.seed_hosts: ["c1:9300","c2:9300","c3:9300","c10:9300","c11:9300","c12:9300"]
gateway.recover_after_nodes: 2
network.tcp.keep_alive: true
network.tcp.no_delay: true
transport.tcp.compress: true
cluster.routing.allocation.cluster_concurrent_rebalance: 16
cluster.routing.allocation.node_concurrent_recoveries: 16
cluster.routing.allocation.node_initial_primaries_recoveries: 16
2.2 OS配置文件
/etc/security/limits.conf
vim /etc/security/limits.conf
es soft nofile 65536
es hard nofile 65536
/etc/security/limits.d/20-nproc.conf
es soft nofile 65536
es hard nofile 65536
* hard nproc 4096
/etc/sysctl.conf
vim /etc/sysctl.conf
vm.max_map_count=655360
sysctl -p
3 启动
3.1 命令行启动
切换es账户再启动,如果提示报错可以重新执行chown授权下,这里启动时需要注意不要一次性全部启动,要逐个实例启动
su es
cd /opt/module/elasticsearch-cluster/
bin/elasticsearch
bin/elasticsearch -d -p pid
3.2 开机自启动
vim /lib/systemd/system/elasticsearch.service
[Unit]
Description=elasticsearch
After=network.target
[Service]
Type=simple
User=es
Group=es
LimitNOFILE=100000
LimitNPROC=100000
Restart=no
ExecStart=/opt/module/elasticsearch-cluster/bin/elasticsearch
PrivateTmp=true
[Install]
WantedBy=multi-user.target
systemctl daemon-reload
systemctl enable elasticsearch
systemctl start elasticsearch
4 验证
4.1 elasticsearch-head
1、下载elasticsearch-head
下载地址:https://github.com/mobz/elasticsearch-head
使用方式:添加到谷歌插件中,然后连接集群任意节点,比如:http://10.0.8.1:9200/
结果如下,其中星号代表master:

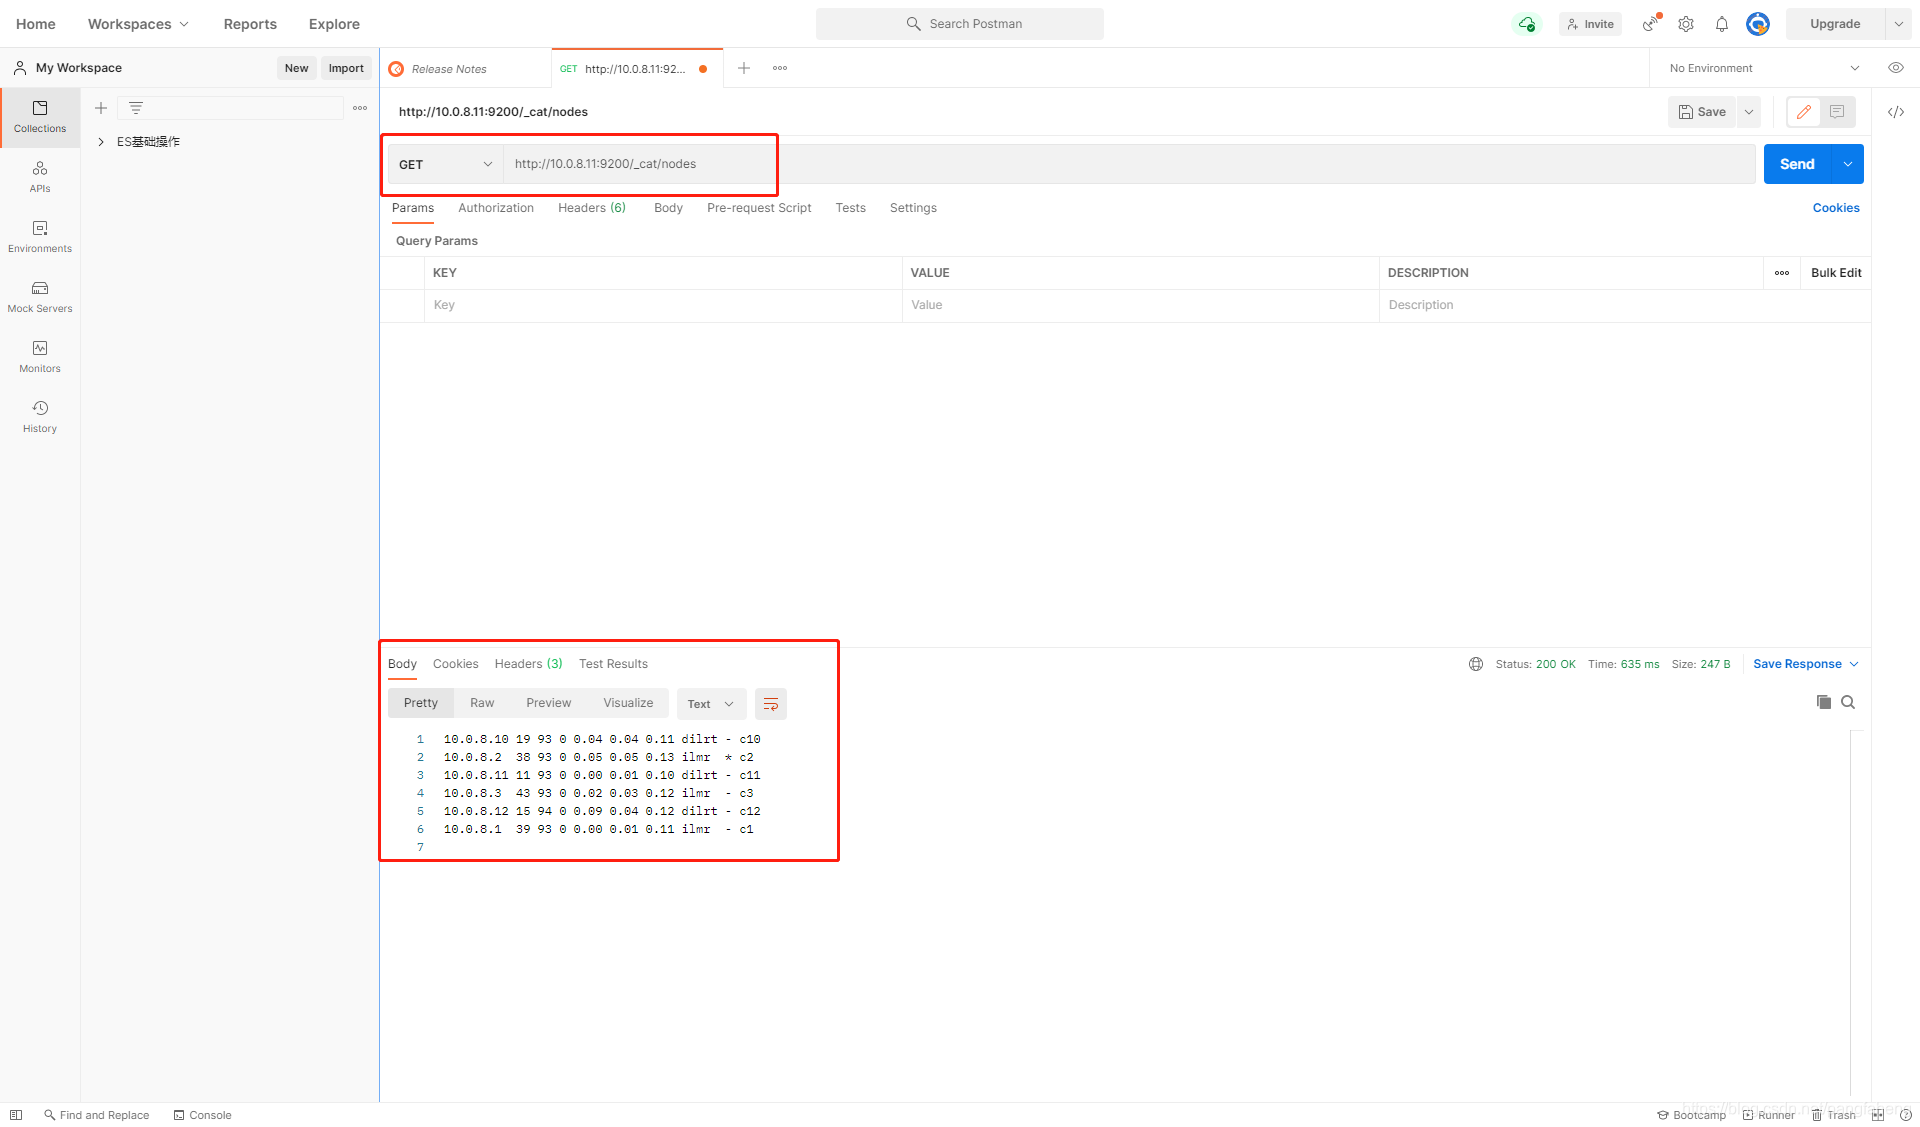
4.2 Postman
连接集群任意节点,比如:http://10.0.8.1:9200/,get http://10.0.8.11:9200/_cat/nodes
结果如下,其中*号代表master:
本文内容由网友自发贡献,版权归原作者所有,本站不承担相应法律责任。如您发现有涉嫌抄袭侵权的内容,请联系:hwhale#tublm.com(使用前将#替换为@)