第三章、让小车动起来
1►配置controller
在tianracer_description功能包新建config文件夹时,我们可以通过一个yaml文件smart_control_config.yaml来声明我们所需要的controller,以及对应的参数,PID增益和 控制器设置必须保存在yaml文件中,再通过 launch文件加载到param服务器上:
tianracer:
# controls the rear two tires based on individual motors
  # Publish all joint states -----------------------------------
  joint_state_controller:
    type: joint_state_controller/JointStateController
    publish_rate: 50
  rear_right_velocity_controller:
    type: velocity_controllers/JointVelocityController
    joint: right_rear_wheel_joint
    pid: {p: 100.0, i: 0.01, d: 10.0}
  rear_left_velocity_controller:
    type: velocity_controllers/JointVelocityController
    joint: left_rear_wheel_joint
    pid: {p: 100.0, i: 0.01, d: 10.0}
  front_right_steering_position_controller:
    type: effort_controllers/JointPositionController
    joint: right_steering_hinge_joint
    pid: {p: 4.0, i: 2.0, d: 1.0}
  front_left_steering_position_controller:
    type: effort_controllers/JointPositionController
    joint: left_steering_hinge_joint
    pid: {p: 4.0, i: 2.0, d: 1.0}
   gazebo_ros_control:
    pid_gains:
      right_rear_wheel_joint:
        p: 100.0
        i: 0.5
        d: 0.0
      left_rear_wheel_joint:
        p: 100.0
        i: 0.5
        d: 0.0
2►配置launch文件
创建control.launch文件启动 ros_control controllers
<?xml version="1.0" encoding="UTF-8"?>
<launch>
  <!-- Load joint controller configurations from YAML file to parameter server -->
  <rosparam file="$(find tianracer_description)/config/smart_control_config.yaml" command="load"/>

  <!-- load controllers -->
  <node name="controller_spawner" pkg="controller_manager" type="spawner" respawn="false"
        output="screen" ns="/tianracer" args="joint_state_controller rear_right_velocity_controller rear_left_velocity_controller front_right_steering_position_controller front_left_steering_position_controller"/>
  <node name="robot_state_publisher" pkg="robot_state_publisher" type="robot_state_publisher"
      respawn="true" output="screen">
      <remap from="/joint_states" to="/tianracer/joint_states" />
  </node>

  <node name="cmdvel2gazebo" pkg="tianracer_description" type="cmdvel2gazebo.py" respawn="true" output="screen"/>

</launch>
接着创建一个可以将小车模型在gazebo中打开的launch文件tianracer.launch,并且能够加载上述control.launch文件
<?xml version="1.0" encoding="UTF-8"?>
<launch>
      <!-- 设置launch文件的参数 -->
    <arg name="paused" default="false"/>
    <arg name="use_sim_time" default="true"/>
    <arg name="gui" default="true"/>
    <arg name="headless" default="false"/>
    <arg name="debug" default="false"/>
    <!--模型车的起点放置位置-->
    <arg name="x_pos" default="0"/>
    <arg name="y_pos" default="0"/>
    <arg name="z_pos" default="0"/>
    <arg name="R_pos" default="0"/>
    <arg name="P_pos" default="0"/>
    <arg name="Y_pos" default="0"/>

  <!--运行gazebo仿真环境-->
  <include file="$(find gazebo_ros)/launch/empty_world.launch">
          <arg name="debug" value="$(arg debug)" />
          <arg name="gui" value="$(arg gui)" />
          <arg name="paused" value="$(arg paused)"/>
          <arg name="use_sim_time" value="$(arg use_sim_time)"/>
          <arg name="headless" value="$(arg headless)"/>
   <!-- <arg name="world_name" value="$(find racebot_description)/world/tianracer_race.world"/> -->
               <!-- .world文件的地址-->
      </include>

  <!-- 加载机器人模型描述参数 -->
  <param name="robot_description" command="$(find xacro)/xacro --inorder '$(find tianracer_description)/urdf/tianracer_description.xacro'"/>

        <!-- 在gazebo中加载机器人模型-->
    <node name="urdf_spawner" pkg="gazebo_ros" type="spawn_model" respawn="false" output="screen"
          args="-urdf -model tianracer -param robot_description -x $(arg x_pos) -y $(arg y_pos) -z $(arg z_pos) -R $(arg R_pos) -P $(arg P_pos) -Y $(arg Y_pos)"/>


  <!-- ros_control racecar launch file -->
  <include file="$(find tianracer_description)/launch/control.launch">
  </include>

    <!--Launch the simulation joystick control-->
  <!-- <rosparam command="load" file="$(find tianracer_gazebo)/config/keyboard_teleop.yaml" />
  <node pkg="tianracer_gazebo" type="keyboard_teleop.py" name="keyboard_teleop" /> -->

</launch>
3►配置运动学模型
在功能包中新建scripts文件夹,并加入cmdvei2gazebo.py文件,该文件参考用的是:[从零开始自动驾驶07] 用 ROS topic 控制车轮 中的开源代码,其中代码的解析这里不做展开复述,各位请自行到原地址观看,up主讲的很好。该文件定义了小车的运动学模型,并且订阅了一个Twist消息类型的话题tianracer/cmd_vel,我们可以通过编写一个接收该消息类型话题的节点来控制小车运动。代码如下:
#!/usr/bin/env python
import rospy
from std_msgs.msg import Float64
from geometry_msgs.msg import Twist
import math
class CmdVel2Gazebo:
    def __init__(self):
        rospy.init_node('cmdvel2gazebo', anonymous=True)
        rospy.Subscriber('/tianracer/cmd_vel', Twist, self.callback, queue_size=1)
        self.pub_steerL = rospy.Publisher('/tianracer/front_left_steering_position_controller/command', Float64, queue_size=1)
        self.pub_steerR = rospy.Publisher('/tianracer/front_right_steering_position_controller/command', Float64, queue_size=1)
        self.pub_rearL = rospy.Publisher('/tianracer/rear_left_velocity_controller/command', Float64, queue_size=1)
        self.pub_rearR = rospy.Publisher('/tianracer/rear_right_velocity_controller/command', Float64, queue_size=1)
        # initial velocity and tire angle are 0
        self.x = 0
        self.z = 0
        # car Wheelbase (in m)
        self.L = 0.261

        # car Tread
        self.T_front = 0.1632
        self.T_rear = 0.1632

        # how many seconds delay for the dead man's switch
        self.timeout=rospy.Duration.from_sec(0.2);
        self.lastMsg=rospy.Time.now()

        # maximum steer angle of the "inside" tire
        self.maxsteerInside=0.6;

        # turning radius for maximum steer angle just with the inside tire
        # tan(maxsteerInside) = wheelbase/radius --> solve for max radius at this angle
        rMax = self.L/math.tan(self.maxsteerInside);

        # radius of inside tire is rMax, so radius of the ideal middle tire (rIdeal) is rMax+treadwidth/2
        rIdeal = rMax+(self.T_front/2.0)

        # maximum steering angle for ideal middle tire
        # tan(angle) = wheelbase/radius
        self.maxsteer=math.atan2(self.L,rIdeal)

        # loop
        rate = rospy.Rate(10) # run at 10Hz
        while not rospy.is_shutdown():
            self.publish()
            rate.sleep()


    def callback(self,data):
        # w = v / r
        self.x = data.linear.x / 0.3
        # constrain the ideal steering angle such that the ackermann steering is maxed out
        self.z = max(-self.maxsteer,min(self.maxsteer,data.angular.z))
        self.lastMsg = rospy.Time.now()

    def publish(self):
        # now that these values are published, we
        # reset the velocity, so that if we don't hear new
        # ones for the next timestep that we time out; note
        # that the tire angle will not change
        # NOTE: we only set self.x to be 0 after 200ms of timeout
        delta_last_msg_time = rospy.Time.now() - self.lastMsg
        msgs_too_old = delta_last_msg_time > self.timeout
        if msgs_too_old:
            self.x = 0
            msgRear = Float64()
            msgRear.data = self.x
            self.pub_rearL.publish(msgRear)
            self.pub_rearR.publish(msgRear)
            msgSteer = Float64()
            msgSteer.data = 0
            self.pub_steerL.publish(msgSteer)
            self.pub_steerR.publish(msgSteer)

            return

        # The self.z is the delta angle in radians of the imaginary front wheel of ackerman model.
        if self.z != 0:
            T_rear = self.T_rear
            T_front = self.T_front
            L=self.L
            # self.v is the linear *velocity*
            r = L/math.fabs(math.tan(self.z))

            rL_rear = r-(math.copysign(1,self.z)*(T_rear/2.0))
            rR_rear = r+(math.copysign(1,self.z)*(T_rear/2.0))
            rL_front = r-(math.copysign(1,self.z)*(T_front/2.0))
            rR_front = r+(math.copysign(1,self.z)*(T_front/2.0))
            msgRearR = Float64()
            # the right tire will go a little faster when we turn left (positive angle)
            # amount is proportional to the radius of the outside/ideal
            msgRearR.data = self.x*rR_rear/r;
            msgRearL = Float64()
            # the left tire will go a little slower when we turn left (positive angle)
            # amount is proportional to the radius of the inside/ideal
            msgRearL.data = self.x*rL_rear/r;

            self.pub_rearL.publish(msgRearL)
            self.pub_rearR.publish(msgRearR)

            msgSteerL = Float64()
            msgSteerR = Float64()
            # the left tire's angle is solved directly from geometry
            msgSteerL.data = math.atan2(L,rL_front)*math.copysign(1,self.z)
            self.pub_steerL.publish(msgSteerL)

            # the right tire's angle is solved directly from geometry
            msgSteerR.data = math.atan2(L,rR_front)*math.copysign(1,self.z)
            self.pub_steerR.publish(msgSteerR)
        else:
            # if we aren't turning
            msgRear = Float64()
            msgRear.data = self.x;
            self.pub_rearL.publish(msgRear)
            # msgRear.data = 0;
            self.pub_rearR.publish(msgRear)

            msgSteer = Float64()
            msgSteer.data = self.z

            self.pub_steerL.publish(msgSteer)
            self.pub_steerR.publish(msgSteer)


if __name__ == '__main__':
    try:
        CmdVel2Gazebo()
    except rospy.ROSInterruptException:
        pass
将代码中的话题名以及参数进行修改,改为自己小车模型的尺寸参数。并将该python代码作为一个节点添加到control.launch文件中。
4►让小车动起来
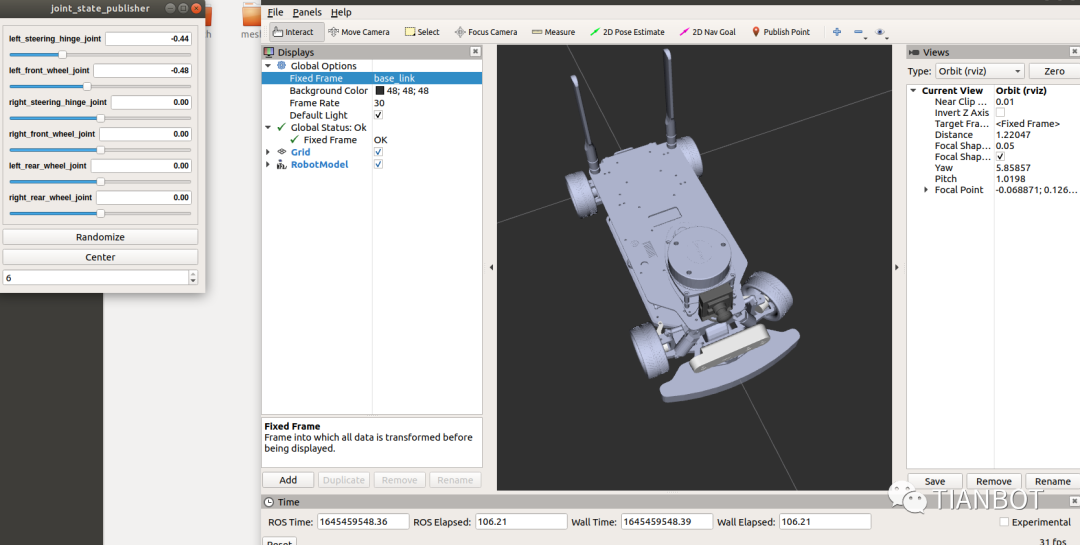
通过rostopic pub话题让小车动起来。到此为止已经可以通过pub话题让小车动起来了。
roslaunch tianracer_description tianracer.launch
再开一个终端,使用rostopic list来看一下话题列表
rostopic list

可以看到发布了单目摄像头,深度摄像头,激光雷达,以及让小车运动的tianracer/cmd_vel话题,将这个话题pub一下:
rostopic pub /tianracer/cmd_vel -r 10 geometry_msgs/Twist "linear:
  x: 1.0
  y: 0.0
  z: 0.0
angular:
  x: 0.0
  y: 0.0
  z: 1.0"
此时小车便会绕着Z轴转动起来。使用键盘控制节点控制小车运动:
在tianracer_description/scripts目录下新建teleop.py
#!/usr/bin/env python
# -*- coding: utf-8 -*-

import rospy
from geometry_msgs.msg import Twist
import sys, select, termios, tty

msg = """
Control mbot!
---------------------------
Moving around:
   u    i    o
   j    k    l
   m    ,    .

q/z : increase/decrease max speeds by 10%
w/x : increase/decrease only linear speed by 10%
e/c : increase/decrease only angular speed by 10%
space key, k : force stop
anything else : stop smoothly

CTRL-C to quit
"""

moveBindings = {
        'i':(1,0),
        'o':(1,-1),
        'j':(0,1),
        'l':(0,-1),
        'u':(1,1),
        ',':(-1,0),
        '.':(-1,1),
        'm':(-1,-1),
           }

speedBindings={
        'q':(1.1,1.1),
        'z':(.9,.9),
        'w':(1.1,1),
        'x':(.9,1),
        'e':(1,1.1),
        'c':(1,.9),
          }

def getKey():
    tty.setraw(sys.stdin.fileno())
    rlist, _, _ = select.select([sys.stdin], [], [], 0.1)
    if rlist:
        key = sys.stdin.read(1)
    else:
        key = ''

    termios.tcsetattr(sys.stdin, termios.TCSADRAIN, settings)
    return key

speed = 10
turn = 1

def vels(speed,turn):
    return "currently:\tspeed %s\tturn %s " % (speed,turn)

if __name__=="__main__":
    settings = termios.tcgetattr(sys.stdin)

    rospy.init_node('carsmart_teleop')
    pub = rospy.Publisher('/tianracer/cmd_vel', Twist, queue_size=5)

    x = 0
    th = 0
    status = 0
    count = 0
    acc = 0.1
    target_speed = 0
    target_turn = 0
    control_speed = 0
    control_turn = 0
    try:
        print msg
        print vels(speed,turn)
        while(1):
            key = getKey()
            # 运动控制方向键(1:正方向,-1负方向)
            if key in moveBindings.keys():
                x = moveBindings[key][0]
                th = moveBindings[key][1]
                count = 0
            # 速度修改键
            elif key in speedBindings.keys():
                speed = speed * speedBindings[key][0]  # 线速度增加0.1倍
                turn = turn * speedBindings[key][1]    # 角速度增加0.1倍
                count = 0

                print vels(speed,turn)
                if (status == 14):
                    print msg
                status = (status + 1) % 15
            # 停止键
            elif key == ' ' or key == 'k' :
                x = 0
                th = 0
                control_speed = 0
                control_turn = 0
            else:
                count = count + 1
                if count > 4:
                    x = 0
                    th = 0
                if (key == '\x03'):
                    break

            # 目标速度=速度值*方向值
            target_speed = speed * x
            target_turn = turn * th

            # 速度限位,防止速度增减过快
            if target_speed > control_speed:
                control_speed = min( target_speed, control_speed + 0.02 )
            elif target_speed < control_speed:
                control_speed = max( target_speed, control_speed - 0.02 )
            else:
                control_speed = target_speed

            if target_turn > control_turn:
                control_turn = min( target_turn, control_turn + 0.1 )
            elif target_turn < control_turn:
                control_turn = max( target_turn, control_turn - 0.1 )
            else:
                control_turn = target_turn

            # 创建并发布twist消息
            twist = Twist()
            twist.linear.x = control_speed;
            twist.linear.y = 0;
            twist.linear.z = 0
            twist.angular.x = 0;
            twist.angular.y = 0;
            twist.angular.z = control_turn
            pub.publish(twist)

    except:
        print e

    finally:
        twist = Twist()
        twist.linear.x = 0; twist.linear.y = 0; twist.linear.z = 0
        twist.angular.x = 0; twist.angular.y = 0; twist.angular.z = 0
        pub.publish(twist)

    termios.tcsetattr(sys.stdin, termios.TCSADRAIN, settings)
该节点发布了一个Twist消息类型的话题tianracer/cmd_vel,可以通过键盘来控制小车运动。
roslaunch tianracer_description tianracer.launch
rosrun tianracer_description teleop.py
此时按u,i,o等按键即可控制小车运动了,通过rqt_graph看一下各个节点之间的关系:
rqt_graph

5►小结
至此,已经成功让小车动起来了,而且也添加了激光雷达传感器,这也就意味着接下去就能做建图导航了,然而由于从solidworks导出的模型惯性参数等方面的一些问题,导致小车运动起来多多少少有一些问题,所以我手撸了小车的1:1简易模型的代码,并且准备用ackermann消息控制小车运动,并使用该模型完成接下去的建图导航等内容。

参考资料
1.古月老师的<<ROS机器人开发实践>>
2.[从零驾驶自动驾驶] https://www.bilibili.com/video/BV1ZJ41187tS?spm_id_from=333.999.0.0

天之博特科技有限公司是一家专注于智能移动机器人操作系统与应用开发的创新创业企业,致力于将最前沿的人工智能与机器人技术应用到科研、教育与产业中,秉承“致知穷理,行健不息”的理念研发并生产智能机器人教育科研和竞赛产品,同时提供移动机器人在工业生产和商业服务中的应用集成,为高校新工科和双一流建设提供人工智能和机器人专业的全套解决方案,是国内智能移动机器人高等教育行业的先行者。
本文内容由网友自发贡献,版权归原作者所有,本站不承担相应法律责任。如您发现有涉嫌抄袭侵权的内容,请联系:hwhale#tublm.com(使用前将#替换为@)