深度摄像头测距
环境:windows+opencv3+python3.64
我采用的是:Realsense D435i 深度摄像头,使用深度摄像头测距的步骤:建一个深度流管、配置流和管道、开启流、创建流对象、对齐流、开启通道后将深度框与颜色框对齐、最后在通过.get_depth_frame()方法获取深度图。获取到深度图后,想要获得深度图上任意一点的距离,即将深度图图像转化为数组、提取点即为对应改点的深度。官方资料仓库
import pyrealsense2 as rs
import numpy as np
import cv2
def nothing(x):
pass
def creatTrackbar():
cv2.createTrackbar("hmin", "color_adjust", 0, 255, nothing)
cv2.createTrackbar("hmax", "color_adjust", 30, 255, nothing)
cv2.createTrackbar("smin", "color_adjust", 5, 255, nothing)
cv2.createTrackbar("smax", "color_adjust", 100, 255, nothing)
cv2.createTrackbar("vmin", "color_adjust", 255, 255, nothing)
cv2.createTrackbar("vmax", "color_adjust", 255, 255, nothing)
cv2.createTrackbar("open", "mor_adjust", 1, 30, nothing)
cv2.createTrackbar("close", "mor_adjust", 15, 30, nothing)
cv2.createTrackbar("erode", "mor_adjust", 1, 30, nothing)
cv2.createTrackbar("dilate", "mor_adjust", 3, 30, nothing)
cv2.createTrackbar("z", "z_adjust", 100, 360, nothing)
def hsv_change(frame):
hmin = cv2.getTrackbarPos('hmin', 'color_adjust')
hmax = cv2.getTrackbarPos('hmax', 'color_adjust')
smin = cv2.getTrackbarPos('smin', 'color_adjust')
smax = cv2.getTrackbarPos('smax', 'color_adjust')
vmin = cv2.getTrackbarPos('vmin', 'color_adjust')
vmax = cv2.getTrackbarPos('vmax', 'color_adjust')
hsv = cv2.cvtColor(frame, cv2.COLOR_BGR2HSV)
lower_hsv = np.array([hmin, smin, vmin])
upper_hsv = np.array([hmax, smax, vmax])
mask = cv2.inRange(hsv, lowerb=lower_hsv, upperb=upper_hsv)
return mask
pc = rs.pointcloud()
points = rs.points()
pipeline = rs.pipeline()
config = rs.config()
config.enable_stream(rs.stream.depth, 640, 480, rs.format.z16, 15)
config.enable_stream(rs.stream.color, 640, 480, rs.format.bgr8, 15)
pipe_profile = pipeline.start(config)
align_to = rs.stream.color
align = rs.align(align_to)
print(type(align))
cap = cv2.VideoCapture(0)
def led_practice():
while True:
frames = pipeline.wait_for_frames()
aligned_frames = align.process(frames)
depth_frame = aligned_frames.get_depth_frame()
color_frame = aligned_frames.get_color_frame()
img_color = np.asanyarray(color_frame.get_data())
img_depth = np.asanyarray(depth_frame.get_data())
depth_intrin = depth_frame.profile.as_video_stream_profile().intrinsics
color_intrin = color_frame.profile.as_video_stream_profile().intrinsics
depth_to_color_extrin = depth_frame.profile.get_extrinsics_to(color_frame.profile)
depth_sensor = pipe_profile.get_device().first_depth_sensor()
depth_scale = depth_sensor.get_depth_scale()
depth_pixel = [240, 320]
depth_point = rs.rs2_deproject_pixel_to_point(depth_intrin, depth_pixel, depth_scale)
color_point = rs.rs2_transform_point_to_point(depth_to_color_extrin, depth_point)
color_pixel = rs.rs2_project_point_to_pixel(color_intrin, color_point)
print('depth: ', color_point)
print('depth: ', color_pixel)
pc.map_to(color_frame)
points = pc.calculate(depth_frame)
vtx = np.asanyarray(points.get_vertices())
tex = np.asanyarray(points.get_texture_coordinates())
i = 640*200+200
print('depth: ', [np.float(vtx[i][0]), np.float(vtx[i][1]), np.float(vtx[i][2])])
cv2.circle(img_color, (300, 250), 8, [255, 0, 255], thickness=-1)
cv2.putText(img_color, "Distance/cm:"+str(img_depth[300, 250]), (40, 40), cv2.FONT_HERSHEY_SIMPLEX, 1.2, [255, 0, 255])
cv2.putText(img_color, "X:"+str(np.float(vtx[i][0])), (80, 80), cv2.FONT_HERSHEY_SIMPLEX, 1, [255, 0, 255])
cv2.putText(img_color, "Y:"+str(np.float(vtx[i][1])), (80, 120), cv2.FONT_HERSHEY_SIMPLEX, 1, [255, 0, 255])
cv2.putText(img_color, "Z:"+str(np.float(vtx[i][2])), (80, 160), cv2.FONT_HERSHEY_SIMPLEX, 1, [255, 0, 255])
cv2.imshow('depth_frame', img_color)
cv2.imshow("dasdsadsa", img_depth)
key = cv2.waitKey(1)
if key == 27:
cv2.destroyAllWindows()
break
led_practice()
cv2.waitKey(0)
cv2.destroyAllWindows()
pipeline.stop()
这里附上我实现的代码,测量中心点的距离。代码注释的都比较详细
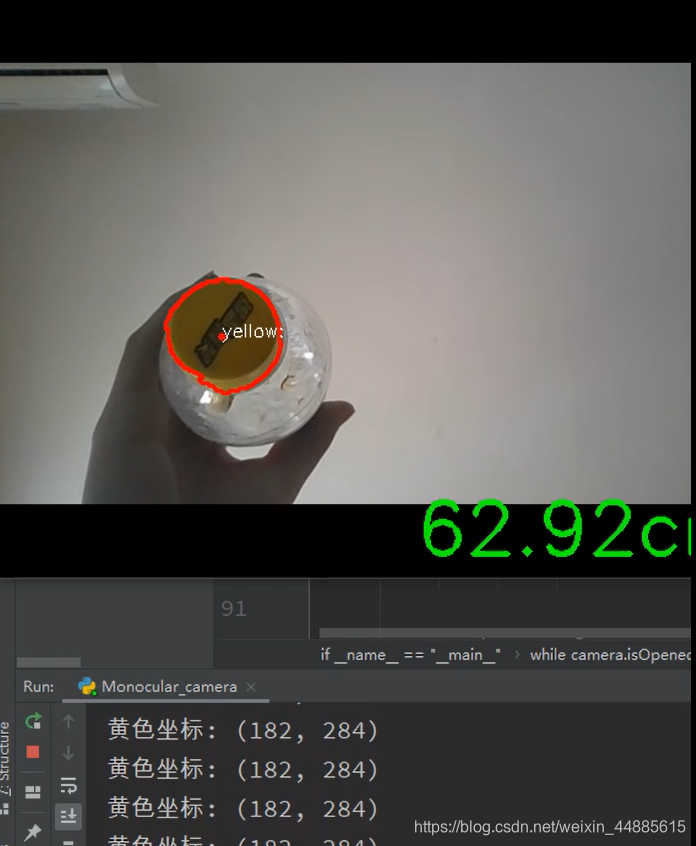
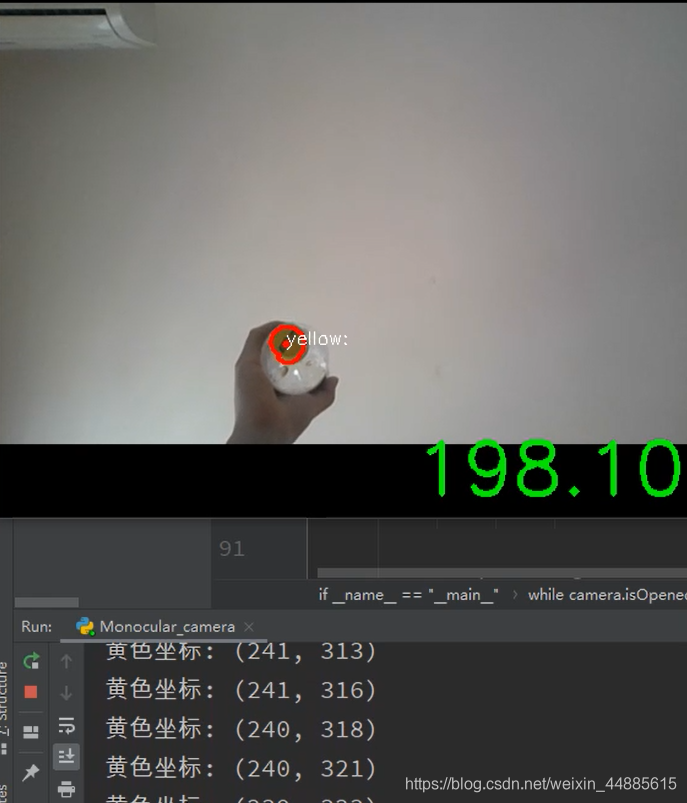
单目测距
效果图:
代码:
import numpy as np
import cv2
def nothing(x):
pass
def open_binary(binary, x, y):
kernel = cv2.getStructuringElement(cv2.MORPH_RECT, (x, y))
dst = cv2.morphologyEx(binary, cv2.MORPH_OPEN, kernel)
return dst
def close_binary(binary, x, y):
kernel = cv2.getStructuringElement(cv2.MORPH_RECT, (x, y))
dst = cv2.morphologyEx(binary, cv2.MORPH_CLOSE, kernel)
return dst
def erode_binary(binary, x, y):
kernel = cv2.getStructuringElement(cv2.MORPH_RECT, (x, y))
dst = cv2.erode(binary, kernel)
return dst
def dilate_binary(binary, x, y):
kernel = cv2.getStructuringElement(cv2.MORPH_RECT, (x, y))
dst = cv2.dilate(binary, kernel)
return dst
def find_marker(image):
img1, contours, heriachy1 = cv2.findContours(image, cv2.RETR_EXTERNAL, cv2.CHAIN_APPROX_SIMPLE)
cv2.drawContours(frame, contours, -1, (0, 0, 255), 2)
return contours
def distance_to_camera(knownWidth, focalLength, perWidth):
if knownWidth * focalLength == 0 or perWidth == 0:
return 0
else:
return (knownWidth * focalLength) / perWidth
def color_detetc(frame):
hmin1 = cv2.getTrackbarPos('hmin1', 'color_adjust1')
hmax1 = cv2.getTrackbarPos('hmax1', 'color_adjust1')
smin1 = cv2.getTrackbarPos('smin1', 'color_adjust1')
smax1 = cv2.getTrackbarPos('smax1', 'color_adjust1')
vmin1 = cv2.getTrackbarPos('vmin1', 'color_adjust1')
vmax1 = cv2.getTrackbarPos('vmax1', 'color_adjust1')
close = cv2.getTrackbarPos('close', 'mor_adjust')
erode = cv2.getTrackbarPos('erode', 'mor_adjust')
dilate = cv2.getTrackbarPos('dilate', 'mor_adjust')
hsv = cv2.cvtColor(frame, cv2.COLOR_BGR2HSV)
lower_hsv1 = np.array([hmin1, smin1, vmin1])
upper_hsv1 = np.array([hmax1, smax1, vmax1])
mask1 = cv2.inRange(hsv, lowerb=lower_hsv1, upperb=upper_hsv1)
ret, thresh1 = cv2.threshold(mask1, 40, 255, cv2.THRESH_BINARY)
dst_close = close_binary(thresh1, close, close)
dst_erode = erode_binary(dst_close, erode, erode)
dst_dilate = dilate_binary(dst_erode, dilate, dilate)
cv2.imshow('dst_close:', dst_close)
cv2.imshow('dst_erode:', dst_erode)
cv2.imshow('dst_dilate:', dst_dilate)
return dst_dilate
if __name__ == "__main__":
KNOWN_DISTANCE = 24.0
KNOWN_WIDTH = 2.69
KNOWN_HEIGHT = 2.27
focalLength = 811.82
print('focalLength = ', focalLength)
camera = cv2.VideoCapture(0)
cv2.namedWindow("color_adjust1")
cv2.namedWindow("mor_adjust")
cv2.createTrackbar("hmin1", "color_adjust1", 16, 255, nothing)
cv2.createTrackbar("hmax1", "color_adjust1", 31, 255, nothing)
cv2.createTrackbar("smin1", "color_adjust1", 119, 255, nothing)
cv2.createTrackbar("smax1", "color_adjust1", 255, 255, nothing)
cv2.createTrackbar("vmin1", "color_adjust1", 0, 255, nothing)
cv2.createTrackbar("vmax1", "color_adjust1", 255, 255, nothing)
cv2.createTrackbar("close", "mor_adjust", 5, 30, nothing)
cv2.createTrackbar("erode", "mor_adjust", 10, 30, nothing)
cv2.createTrackbar("dilate", "mor_adjust", 10, 30, nothing)
while camera.isOpened():
ret, frame = camera.read()
dst_dilate = color_detetc(frame)
contours = find_marker(dst_dilate)
if contours == 0:
continue
for i, contour in enumerate(contours):
area1 = cv2.contourArea(contour)
if area1 > 100:
(x1, y1), radius1 = cv2.minEnclosingCircle(contours[i])
x1 = int(x1)
y1 = int(y1)
center1 = (int(x1), int(y1))
radius1 = int(radius1)
cv2.circle(frame, center1, 3, (0, 0, 255), -1)
print("黄色坐标:", (x1, y1))
cv2.putText(frame, "yellow:", (x1, y1), cv2.FONT_HERSHEY_SIMPLEX,
0.5, [255, 255, 255])
marker = cv2.minAreaRect(contours[0])
inches = distance_to_camera(KNOWN_WIDTH, focalLength, marker[1][0])
cv2.putText(frame, "%.2fcm" % (inches * 30.48 / 12),
(frame.shape[1] - 300, frame.shape[0] - 20), cv2.FONT_HERSHEY_SIMPLEX,
2.0, (0, 255, 0), 3)
cv2.imshow("capture", frame)
if cv2.waitKey(1) & 0xFF == 27:
break
camera.release()
cv2.destroyAllWindows()
**说明:**代码为通过hsv识别一个黄色的小球,然后对小球单目测距。摄像头的焦距,是我简单测试的,起个演示作用,最好是通过相机标定测试摄像头的内部参数,然后来实现测距。也可以用几个A4纸测试一下,算出相机焦距。
深度与单目的区别
- 深度测距比较准确,并且不需要所谓目标的实际尺寸,可以随意检测目标距离,而不是特定目标的距离。相机不需要标定知道相机内部的参数。相机标定在出厂时已经标定完了。
- 单目测距精度方面不如深度准确,并且还需要知道相机内部参数,需要相机标定,还得知道测距目标的实际尺寸,只能针对特定目标进行测距。但是优点也是显著的,简单,对相机没有要求。对测距精度不高的环境合适。
- 对比分析:像素和测距的对比。当然用深度的目的远不止用于测距的作用,realsenseD435i的像素不算很高,即想看的清,又想测得准的话,realsenseD435i是不太实用的。单目虽然测得不算很准,但是相比之下可以选择像素高的单目相机,同样还是可以测距。但是realsenseD435i测距准确,但是像素固定无法提高了。看适用场合选取合适的摄像头。
本文内容由网友自发贡献,版权归原作者所有,本站不承担相应法律责任。如您发现有涉嫌抄袭侵权的内容,请联系:hwhale#tublm.com(使用前将#替换为@)